Layered Dimensional Die Cutting Series. Episode #1 – Birthday Card featuring Venise Lace collection
Hello everyone. This is Yana Smakula and thank you for joining me! This blog post and video marks the start on a new monthly feature I’m hosting on Spellbinders blog and Youtube channel called “Layered Dimensional Die Cutting Series”.
What is “Layered Dimensional Die Cutting Series”? Once a month I’ll be sharing a card project along with a detailed video tutorial in the showcasing traditional Spellbinders style with lots of die-cut layers and dimension!
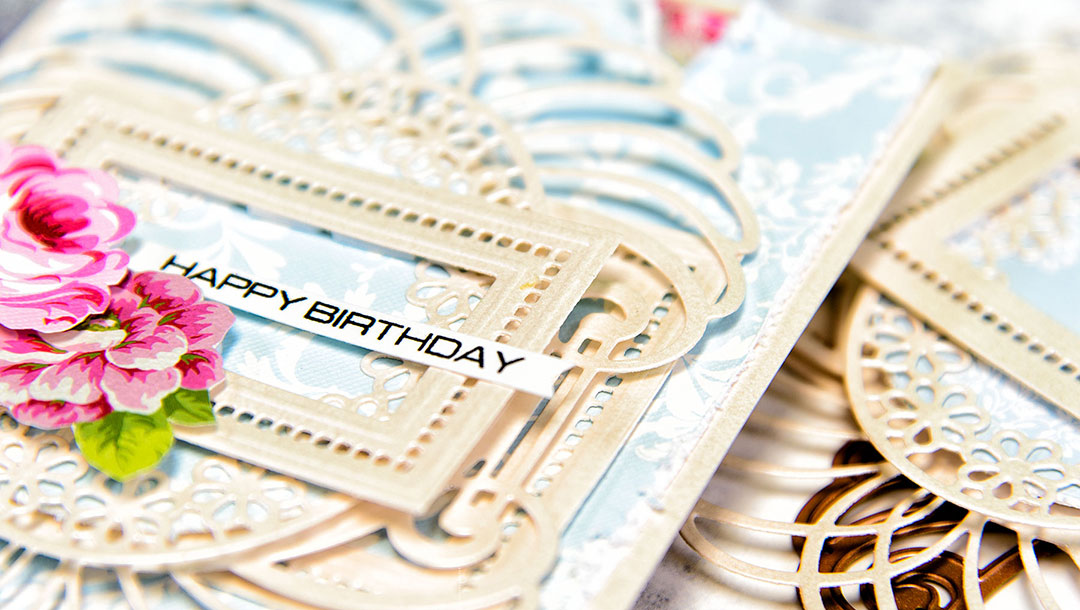
For my today’s blog post I made a birthday card using several dies from Becca Feeken’s Venise Lace collection.

I started working on this card by doing all of my die cutting first. I decided to go with pearlescent white cardstock for my die cut pieces. I love to use thicker papers with my intricate dies so that they hold their form better and I also love to use specialty papers like this pearlescent one as they add a lot of gorgeous shimmer to the finished project.

I die-cut and embossed the Plume element from the Marcheline Plume set. I cut just a label shape, if you want, you can combine this die with a circle die that comes in this set and create a gorgeous frame. I also die-cut a circle out of patterned paper, I used papers from the Pretty Posy 12×12″ paper pad from First Edition – these are my all time favorite papers for die cutting as they have beautiful finishes to them. I used this same circle die and cut 2 circles out of white fun foam. I needed those to add dimension to my card. You can skip this step and use foam adhesive, but I prefer to have solid dimension with the help of fun foam.

I die-cut two frames using dies from the Hemstitch Rectangles set. You can also cut these to be label like or a frame like by combining multiple dies. I cut and embossed 2 frames for my card. I really love these rectangles for the unique hemstitch detail, it’s gorgeous because it effortlessly makes your paper die cuts look like lace. One final piece I cut for my card is the Floral Oval from the Victoriana Crest set.

The card I am sharing today is rather large, so I made a 5 ¼ x 7 ¼” top folding card base.
I used a 12×12 sheet of paper to make it. I cut two pieces of cardstock, scored one of them at the top, added adhesive, adhered the second piece of cardstock to create a top folding card and later trimmed it to size.
I used a piece of patterned paper cut to 5×7” for my background; I distressed the edges using scissors and layered beautiful floral paper underneath it. I took this even one step further by adding Glass Beads into the distressed crevices to really make my background pop. After foam mounting all of the die cut pieces in place I added a hand stamped Happy Birthday sentiment and embellished my card using several flowers (I fussy cut them out of patterned paper) and a silk ribbon bow.
Spellbinders Supplies:
- S5-308 Hemstitch Rectangles Etched Dies
- S5-309 Marcheline Plume Etched Dies
- S6-125 Victoriana Crest Etched Dies
- PE-100 Platinum 6 Die Cutting and Embossing Machine
- T-001 Tool ‘N One™
Additional dies I mention in my video (not used to create the project):
- S4-790 Bella Clair Border Etched Dies
- S4-793 Gossamer Knot Ensemble Etched Dies
- S5-310 Isabella Frame Etched Dies
- S5-311 Emmeline Treillage Etched Dies
Other supplies: white cardstock (WorldWin); Patterned Paper (Pretty Posy 12×12 First Edition); Clear Stamp (Altenew – Beautiful Day); Black Ink (Versafine Onyx Black); Glass Beads (Prima in Crystal); Glue; Fun Foam; Tape Runner; Foam Adhesive.
Watch video tutorial below to learn how to make this project:
Thank you so much for stopping by today and have fun die cutting!


4 Comments
Debbie Fricke
What an absolutely beautiful card, Yana! Will (or does) Spellbinders have a die (or ???) for making a box to put the enlarged multi-dimensional cards in? I love making these types of cards, but mailing them …. I wouldn’t mind making a box myself, but don’t know how and wouldn’t know the first place to begin figuring it out. Thank you so much for the demonstration. Very excited about your new series on Spellbinders. I really like the rectangle die.
Yana Smakula
thank you, Debbie! I’m so happy you loved it! I’m already working on my 3rd episode today.
At the moment Spellbinders doesn’t have a die to make a box like that and with our thin dies it probably wont be possible to cut one that is sturdy enough.
When sending cards like that I think you can package them in a bubble mailer and ask at the post office to hand cancel it so it doesn’t have to go through the automated machine.
Also, there is a solution from My Sweet Petunia – they have dimensional mailers for A2 cards, I’ve used them and they are quite good, but they only fit A2 cards http://www.mysweetpetunia.com/product-p/card-guard-6pack.htm
Hope this helps!
Di Brown
Stunning card Yana, as are all your cards. I saw the /venice collection on Becca Feekins site and loved it. I love your card and the way you have used them. I also really like those rectangle dies, I will be looking out for them. Thank you for your inspiration, I read your posts first thing every morning.
Yana Smakula
aww, thank you so much, Di Brown! This really is such a beautiful collection!