Creative DIY Party Décor Series | Falloween
“Falloween” as I like to call it. It’s my favorite time of the year. How about you? I’m Debi Adams and I love the colors and scents of the season. When my kids were young, we would go apple and pumpkin picking this time every year. They are all grown now so when I start to reminisce, I pull out my favorite fall colors of paper and craft supplies and begin making some new fall décor as a way of creating my own new tradition.
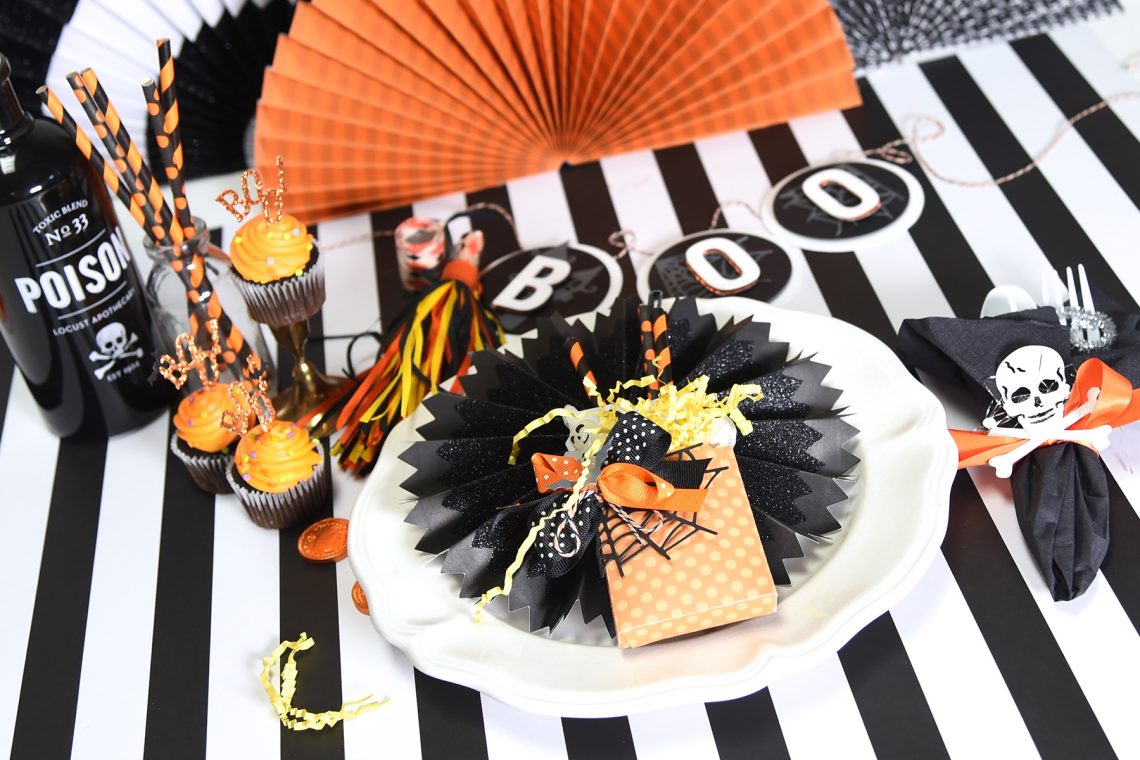
Today is Round 3 of my DIY Party Décor series and since Halloween is just a few short weeks away, I decided to make it around that theme. I’m not into the dark, evil side but rather the fun, celebratory part. I’ve created a treat bag, banner, napkin ring and cupcake topper. Even if you don’t have parties, like where I am these days, it’s always nice to add a splash of the season onto your tablescape. So, get your “making” on and let’s get started.
Treat Bag
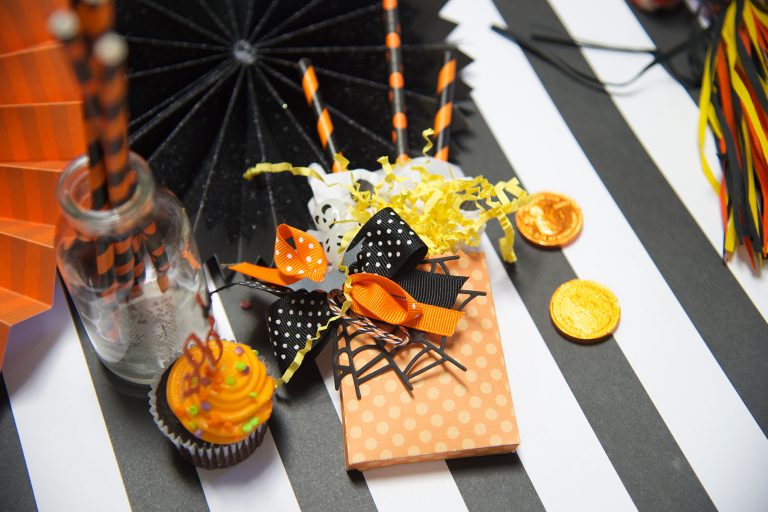
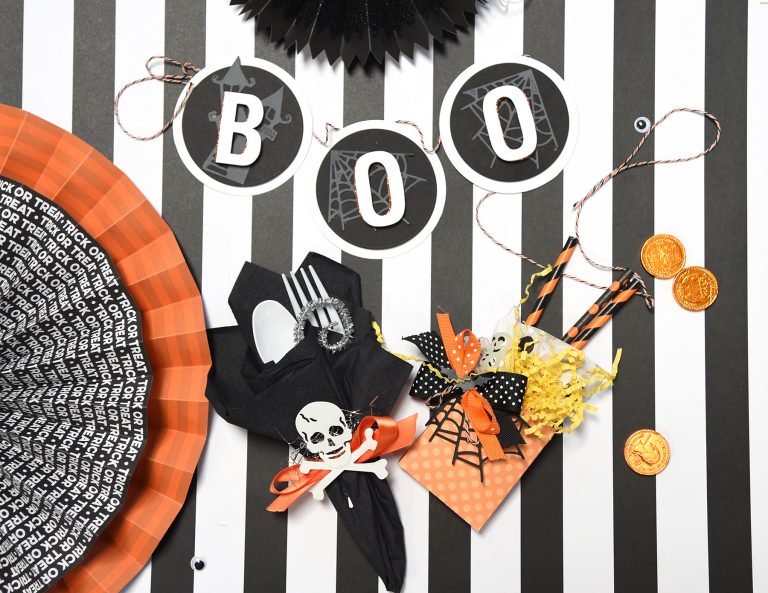
This party bag is really my Bag n Tag. I cut it from some festive cardstock and then added the die d-lite spider web, stuffed it with some goodies and embellished it with a skeleton from the local cake decorating store. It was all tied off with a bow and a die-cut bat.
Boo Banner
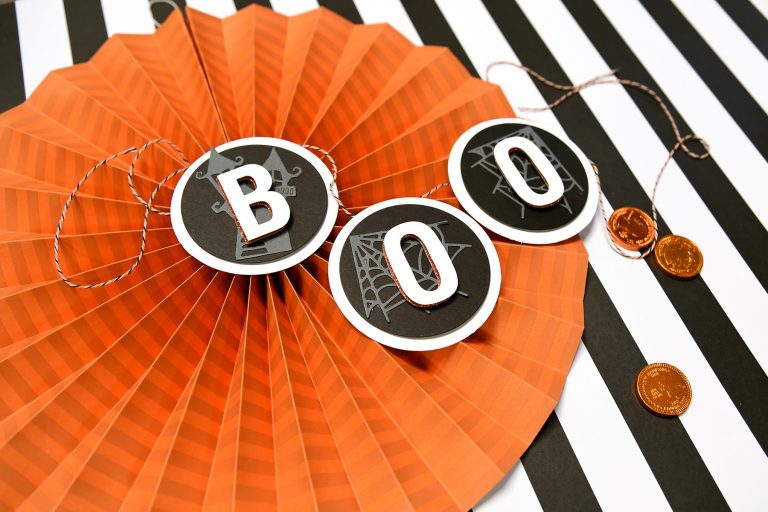
No party is complete without a banner, at least I don’t think so. Creating one like this is really simple. I die-cut three sets of two Nestabilities Circles each from black and white cardstock and layered them together. It seemed a bit plain to me so I die-cut two spider webs and a haunted house from a deep gray cardstock and adhered them to the black circles. Now I have a background. Using our contour alphabet die set comes in really handy if you aren’t too accomplished at hand-lettering. I die-cut my sentiment from white cardstock and again in orange glittered paper. Offsetting the pieces created a pop of color. When completed, I attached them to the banner using pop dots. Finally I added twine to the back of the circles and it was ready to hang.
Napkin Ring
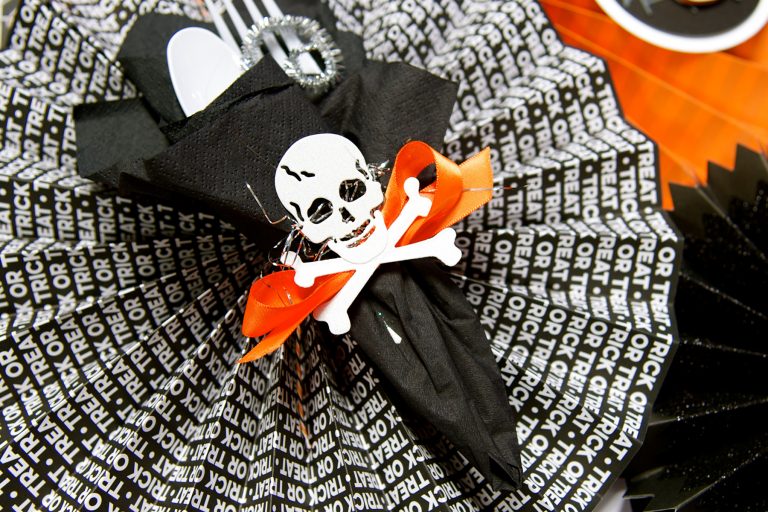
I thought it would be fun to add a little “fright” to the party by attaching the skeleton onto a ribbon-tied napkin ring. The skeleton was die-cut from glittered cardstock. I stuffed a little bit of silver fru-fru behind his head for a bit of glimmer.
Cupcake Topper
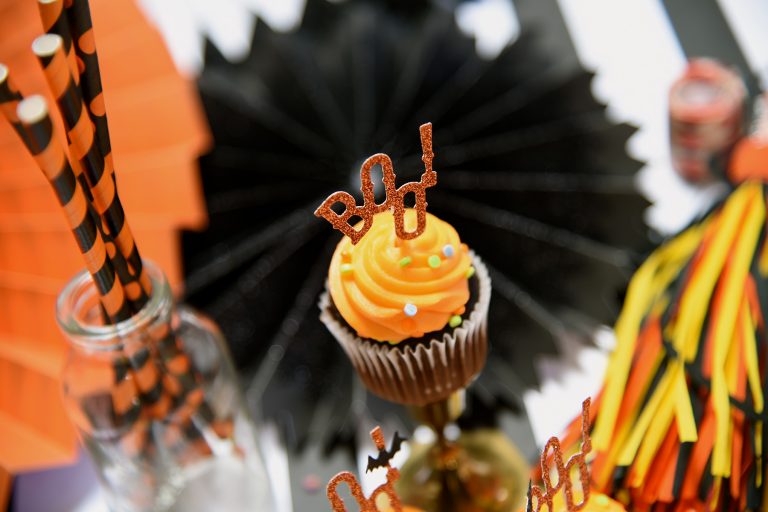
The easiest and least expensive way to add pizzazz to your table décor is by adding a decorated toothpick. The sentiment “boo” seemed the perfect size for these mini cupcakes. Because they are so easy to make, your kids or grandkids could step in and help! The “boo” also makes great confetti and can be die-cut from just scraps of paper.
Spellbinders Supplies:
- S2-263 Boo Web Holiday 2017 Dies
- S2-265 Haunted Manor Holiday 2017 Dies
- S2-281 Skull n’ Crossbones Holiday 2017 Dies
- S4-728 Bag n Tag It Dies
- SR-011 Contour Type-Oh! Steel Rule Die
- PE-100 Platinum 6 Die Cutting and Embossing Machine – 6″ Platform or PL-001 Platinum Die Cutting and Embossing Machine – 8.5″ Platform
So that is just my two cents on what makes great party décor. It’s always nice to be able to pick your own colors or coordinate the décor with your purchased plates, napkins and cups.
Would love to hear what you like to do for décor for Fall or Halloween. Do you like to decorate your home or do you like to have parties? Either which way, I’m sure your place looks amazing! Send a pic. I would love to see what you create.
XO,
Debi

One Comment
Dawn
Gorgeous Debi, glad the bag n tag was featured and love the embellishments. I love the cake topper. I wonder if BOO translates in French the children at my daughters school would love them