Cardmaking Inspiration | Love You To The Moon & Back
Hello Spellbinders’ fans! Welcome back to our Cardmaking Inspiration series! We hope you’ve been enjoying these mini posts sharing simple cardmaking ideas and step by step instructions on how to make them!
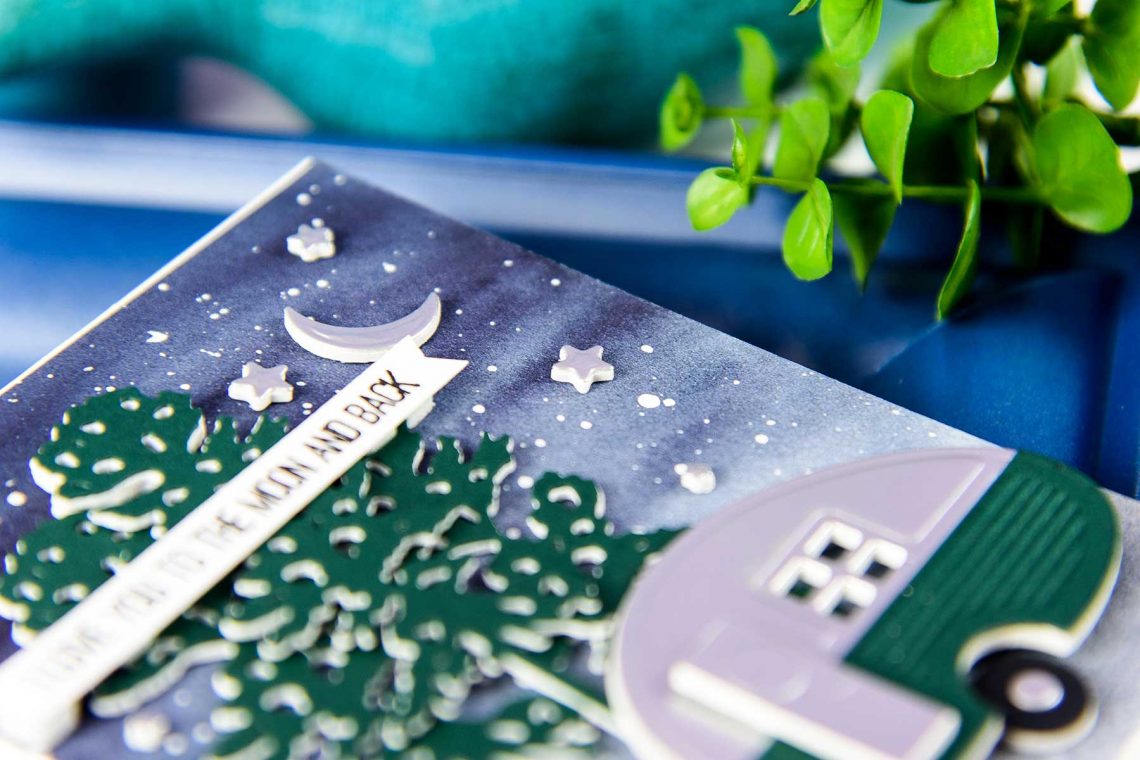
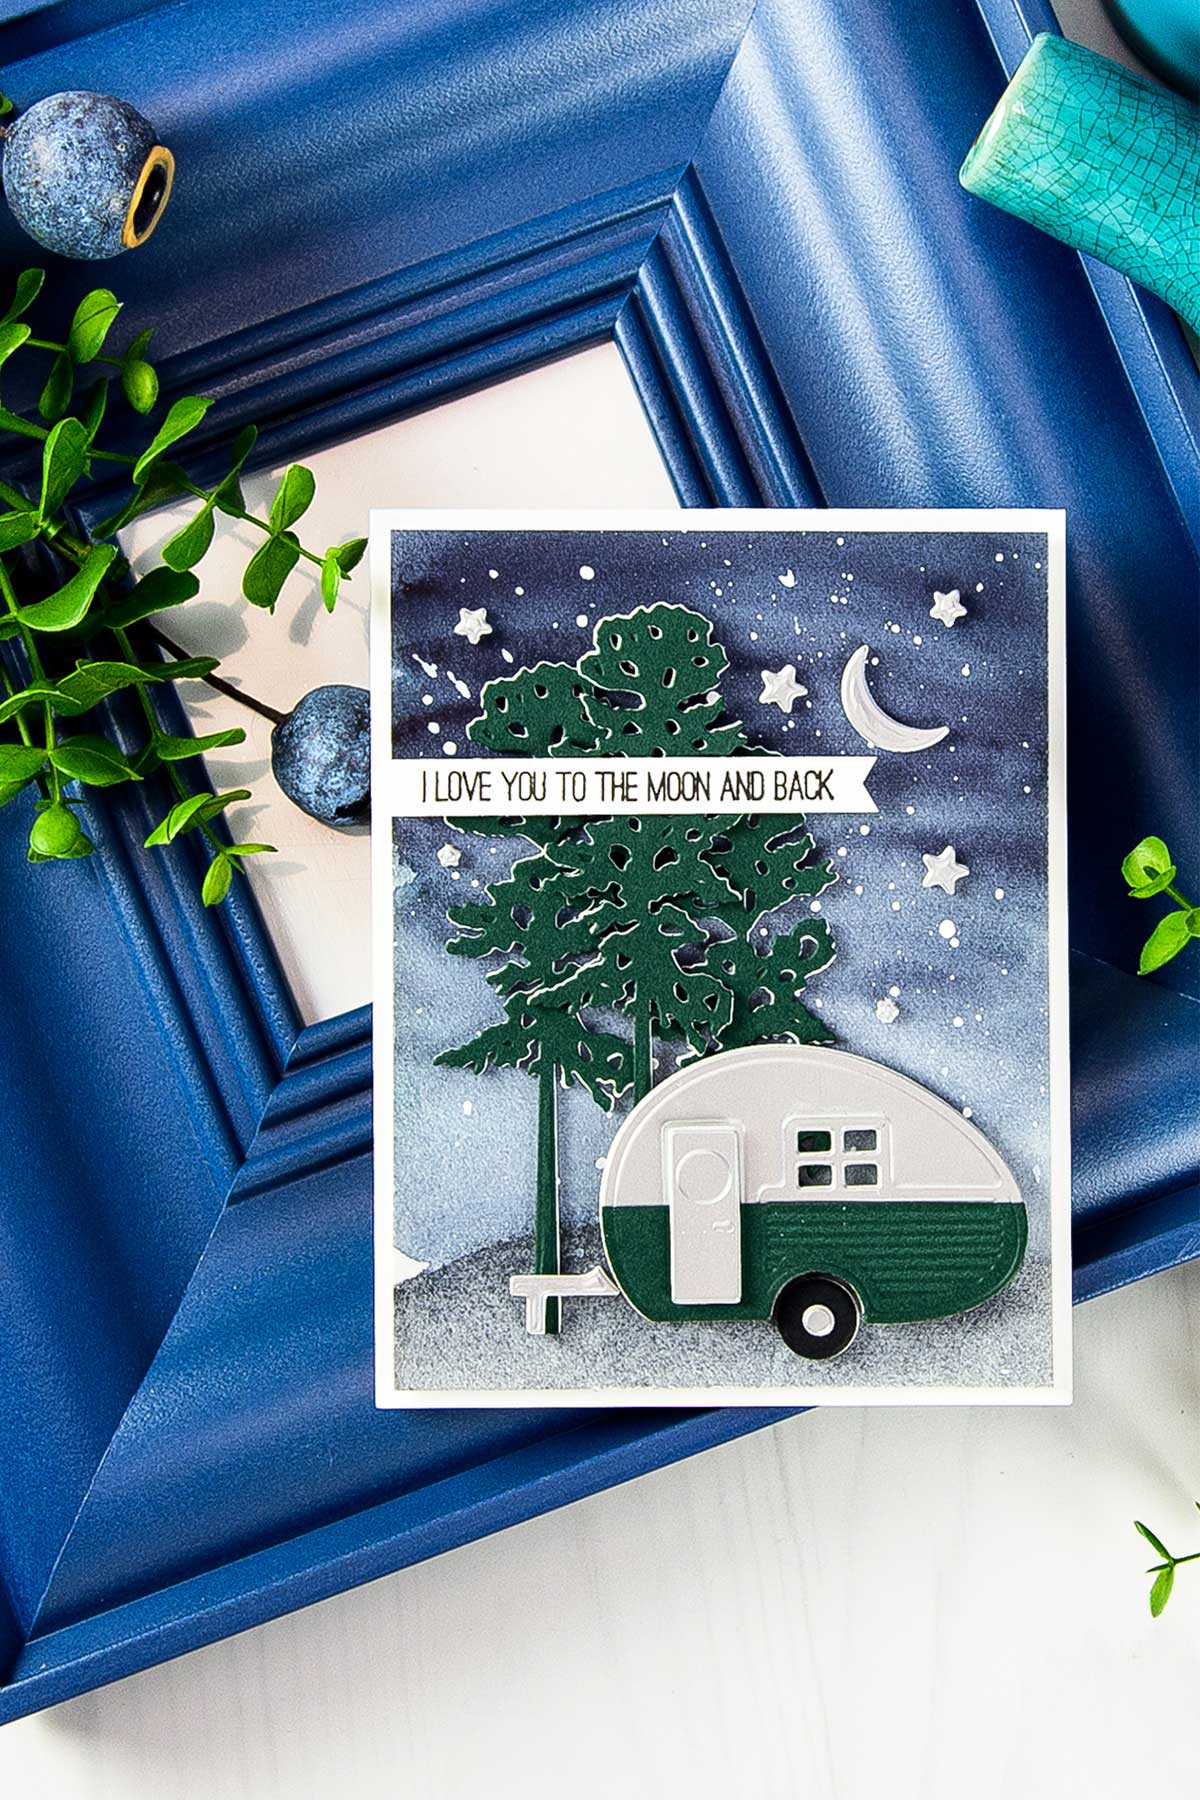
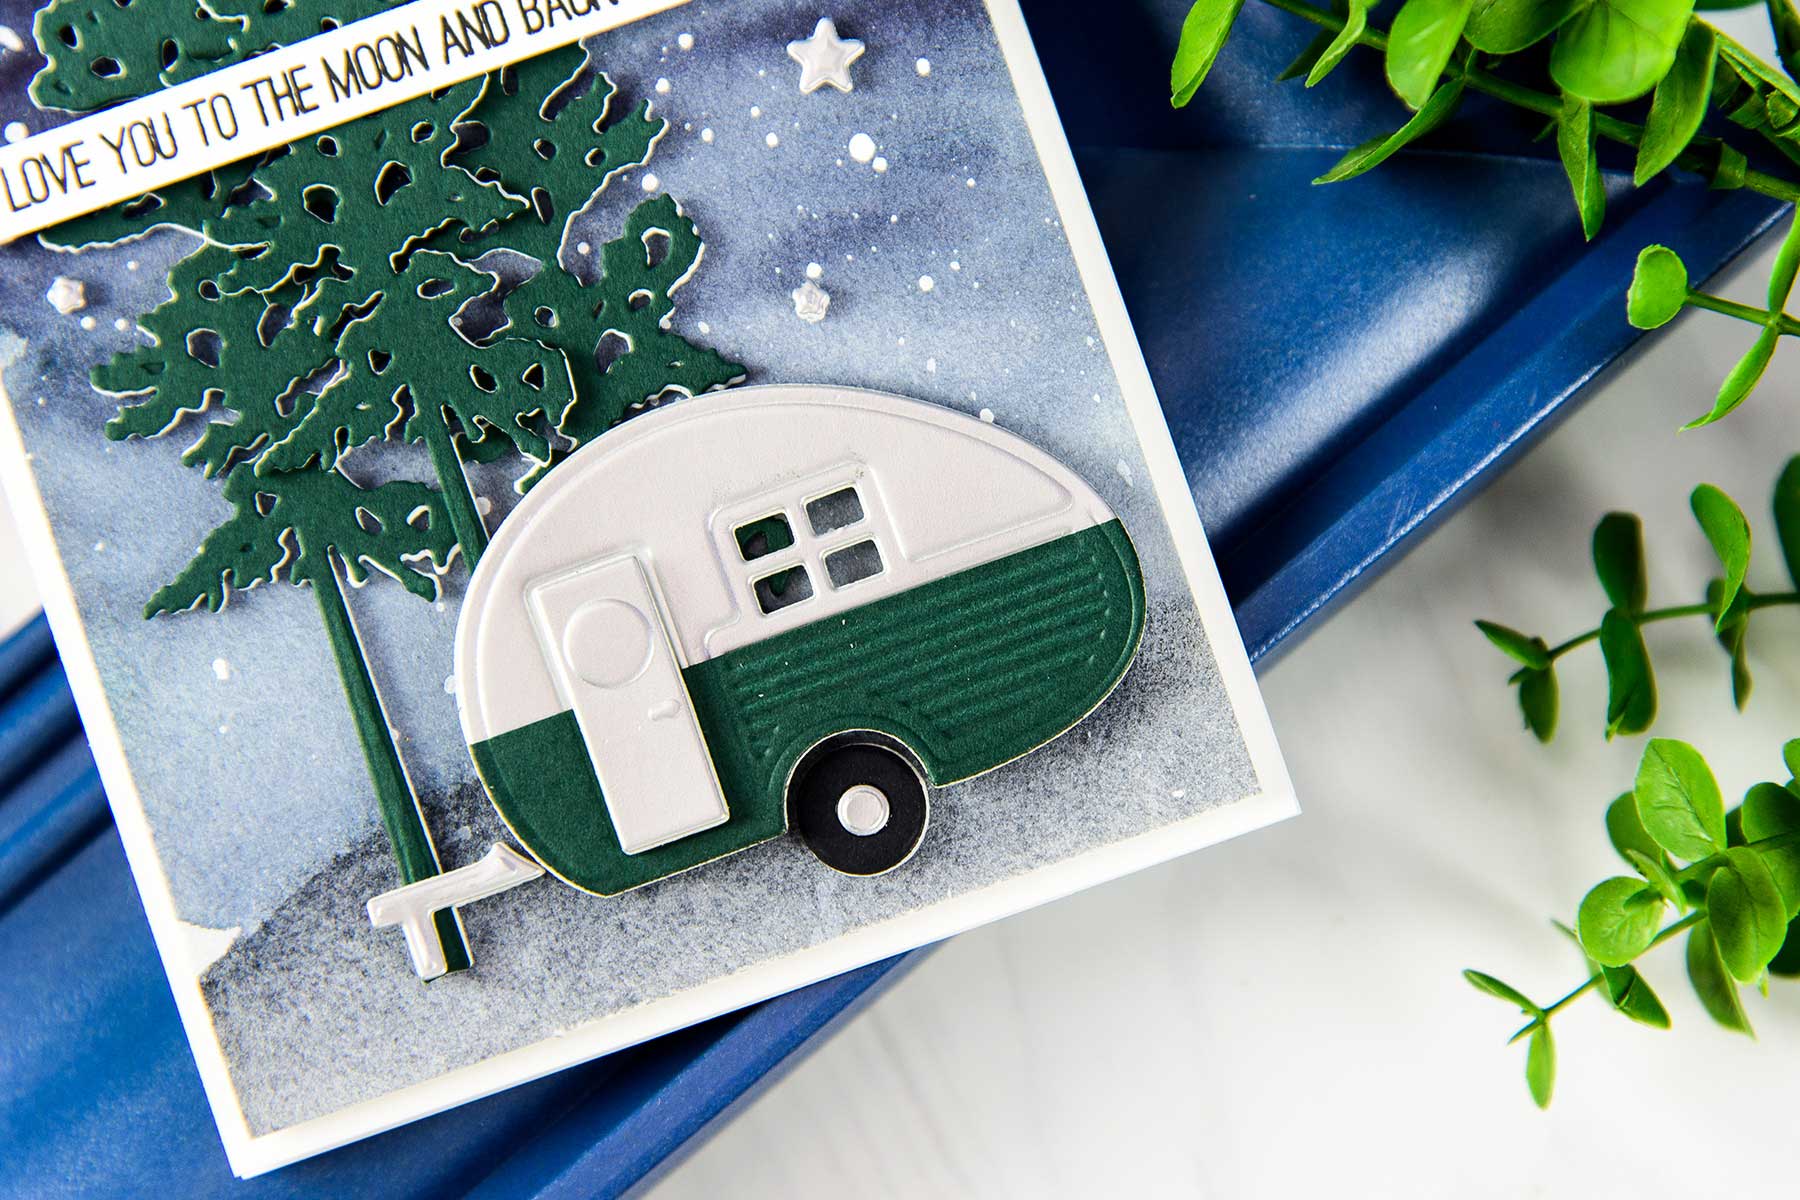
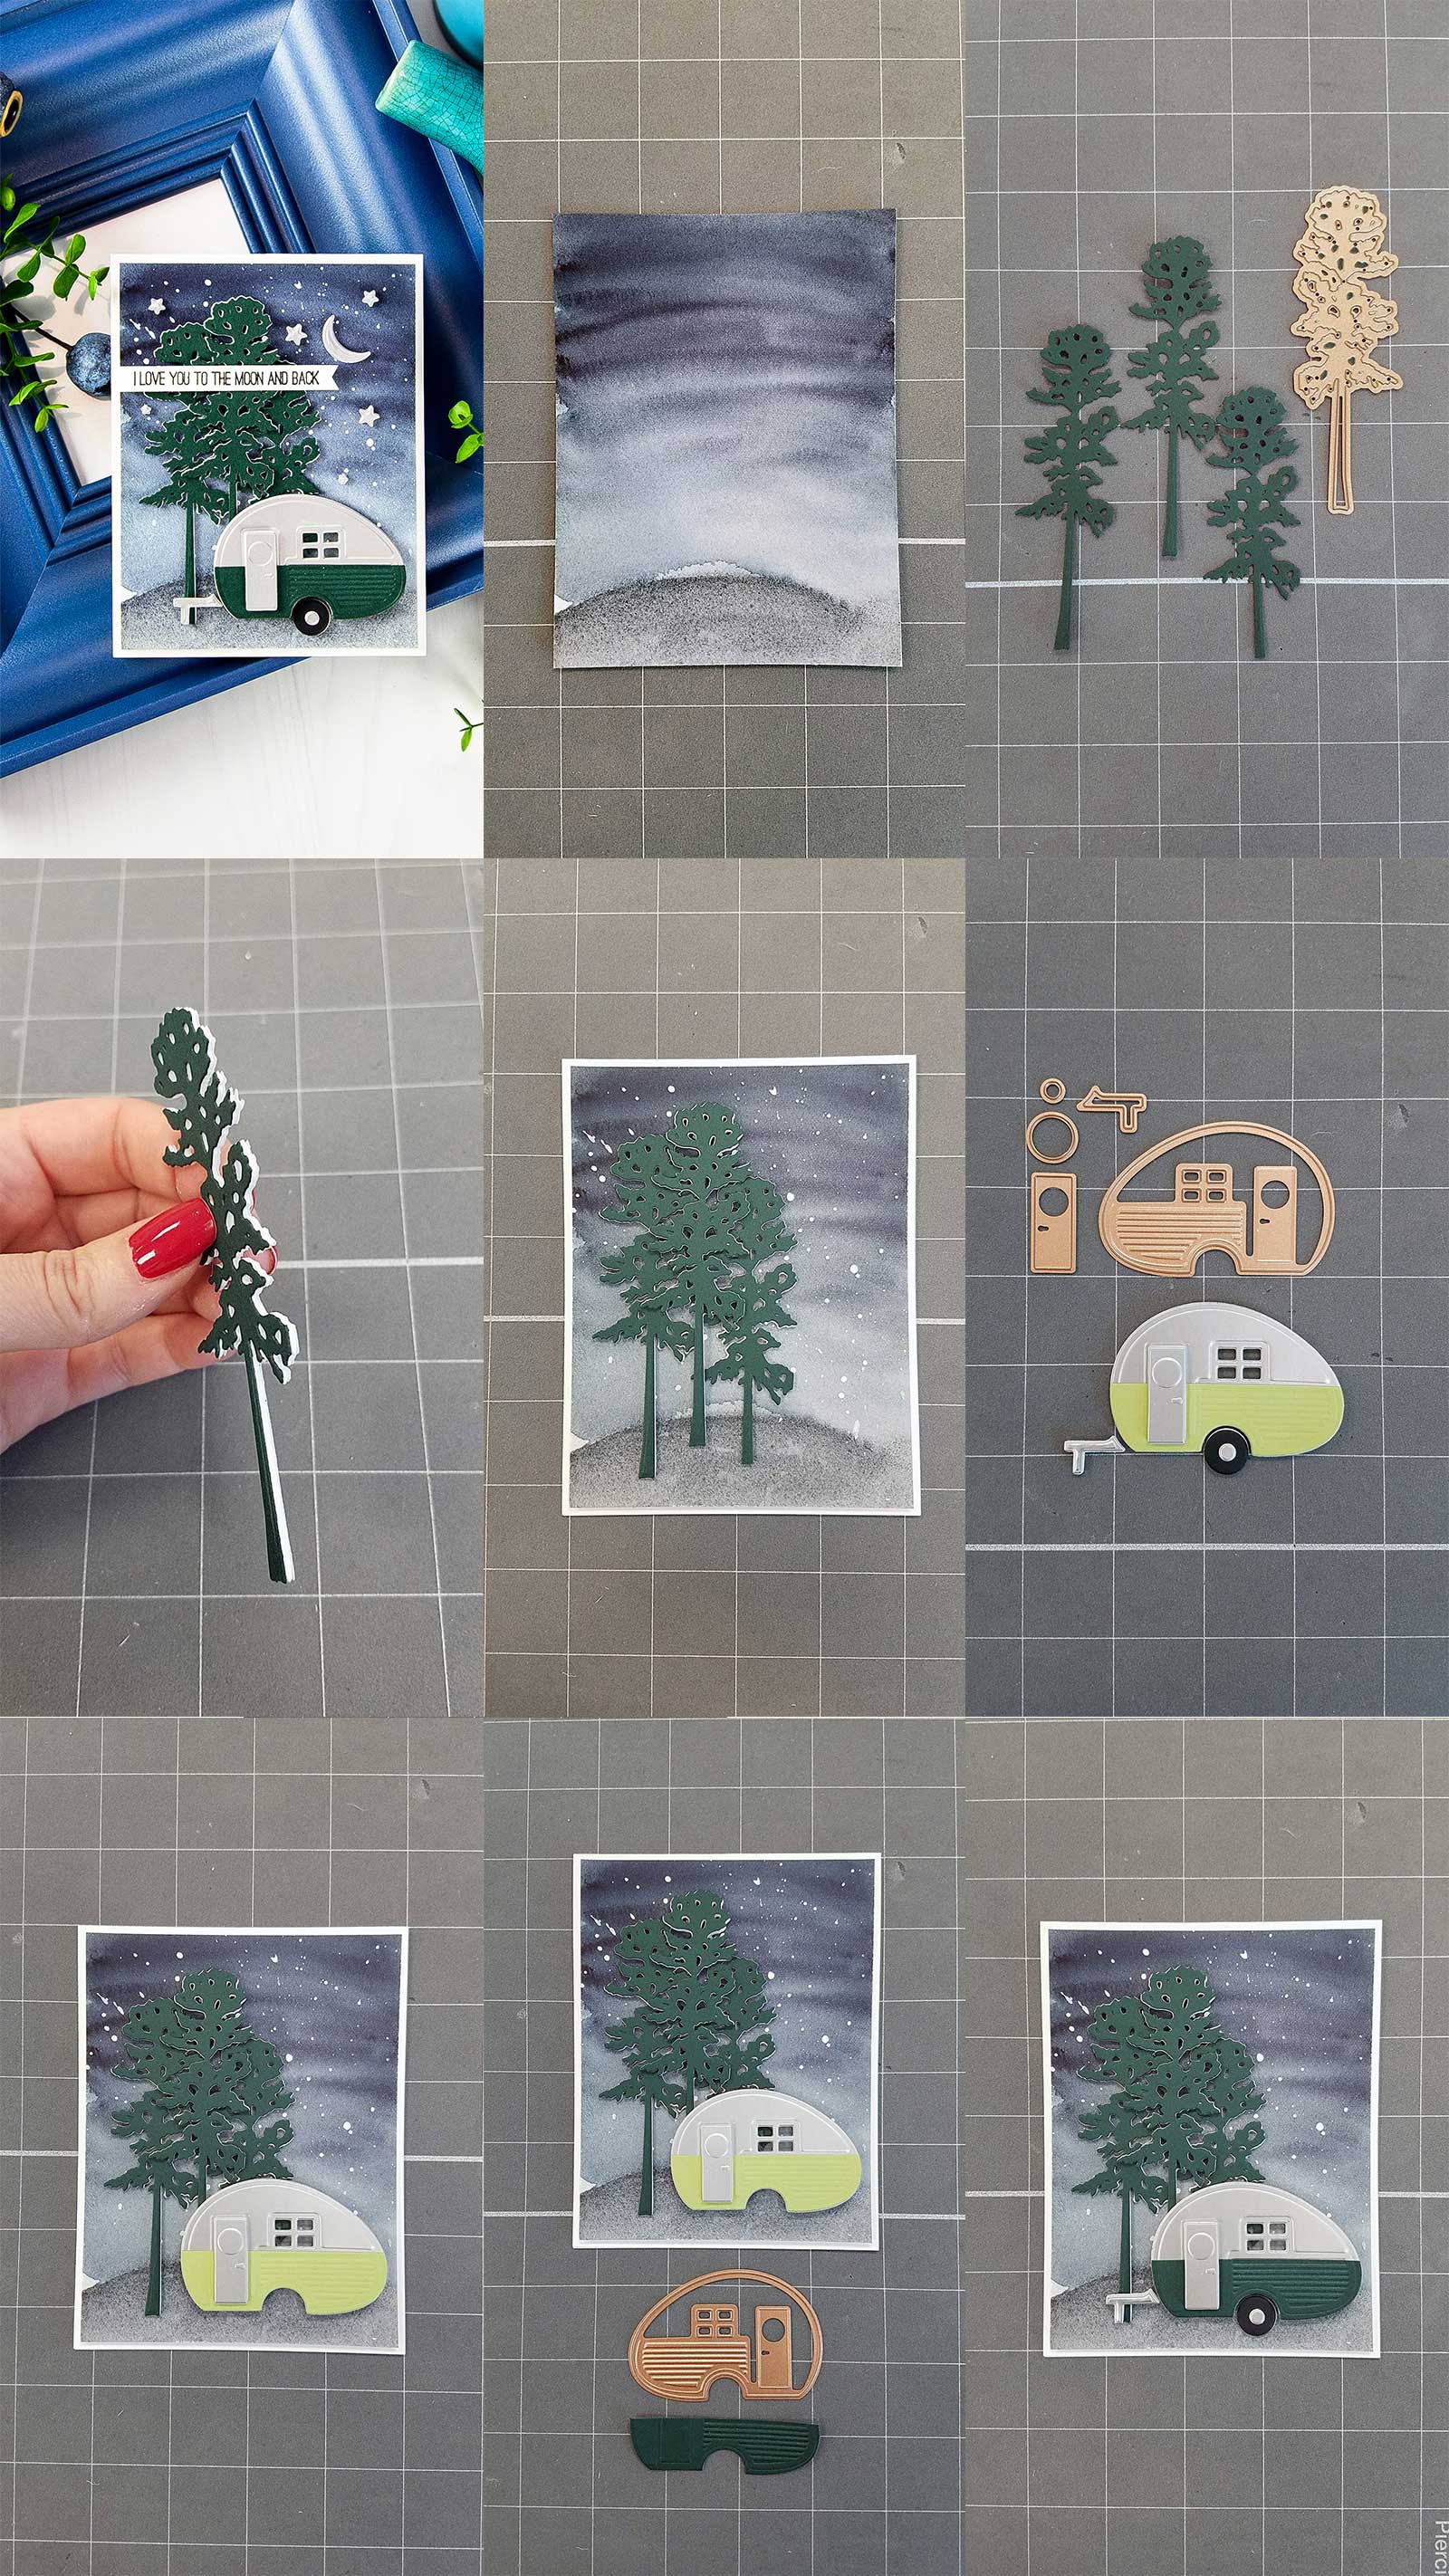
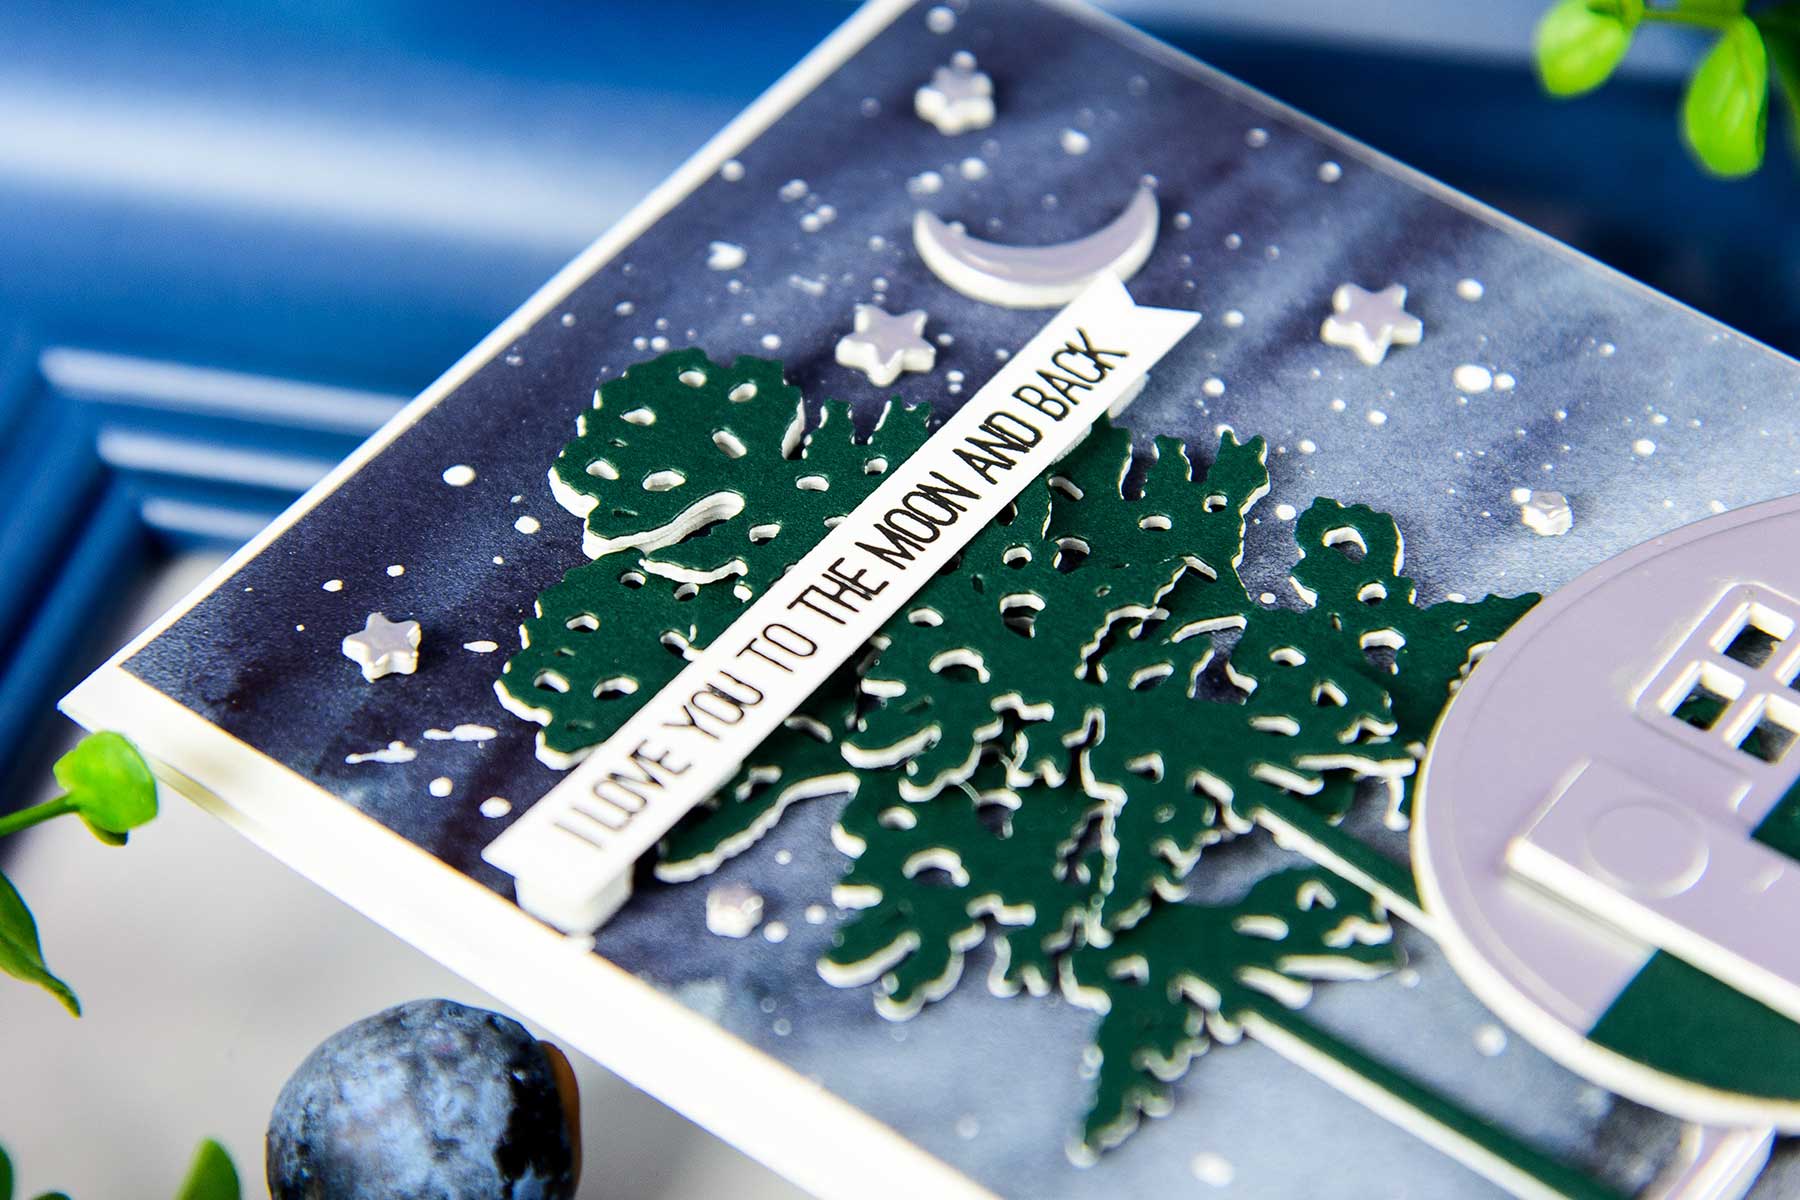
Today we’re sharing a dreamy Love You To The Moon & Back card created with the help of our Die D-Lite dies.
Project created by in-house designer Yana Smakula
Step By Step Instructions:
We have a full set of step by step instructions describing how to create this card.
- Create A2 top folding card base out of white cardstock.
- Paint watercolor background. Add white splatter to the sky portion of the background to mimic stars.
- Foam mount watercolor panel onto the card base.
- Die-cut Camper and camper parts out of silver foil, green, black cardstock (make sure to cut camper out of both silver foil and green, cut green in half and adhere onto silver to make the bottom part of the camper green and top part silver).
- Die-cut 3 trees out of green cardstock.
- Add double sided sticky sheets onto both sides of white fun foam. Die cut 3 trees, camper and camper parts. Adhere cardstock die cuts onto fun foam die cuts.
- Adhere die cuts onto the card creating a scene.
- Die-cut stars and moon out of silver foil cardstock and fun foam. Adhere cardstock die cuts onto fun foam. Adhere onto the card.
- Stamp sentiment in black ink. Foam mount onto the card.
Click photo to view larger:
Spellbinders Supplies:
- S3-255 Canoeing Dies
- S3-275 Camping
- S3-296 Build a Camper
- PL-001 Platinum Die Cutting And Embossing Machine – 8.5″ Platform
- T-001 Tool ‘N One
OTHER SUPPLIES:
Arches Cold Pressed Watercolor Paper; Silver Foil Cardstock; My Colors Cardstock: Forest Green, Black; Neenah Solar White 110 LB cardstock; White Fun Foam; Ken Oliver Stick It Double Sided Sticky Sheets; Daniel Smith Watercolors; White Acrylic Paint; Brush; Simon Says Stamp - Shine On Stamp Set; Versafine Onyx Black Ink.
Thank you for joining us today, friends! We hope you like this project and will give this idea a try! If you do, please share your project photos on social media and tag us so we can see!
Have fun die-cutting!
Open House Collection – Card Inspiration with Annie Williams
April 2020 Glimmer Hot Foil Kit of the Month is Here – Celebrate the Day