Die D-Lites Holiday Inspiration | Christmas Character Cards with Kimberly Crawford
Hello everyone! This is Kimberly Crawford and I am thrilled to be on the Spellbinders blog! Today I get to share the absolutely adorable new Holiday Die D-Lites! These cute images have details galore with basic die cutting, but add a few other special touches, and you can make these images come to life!

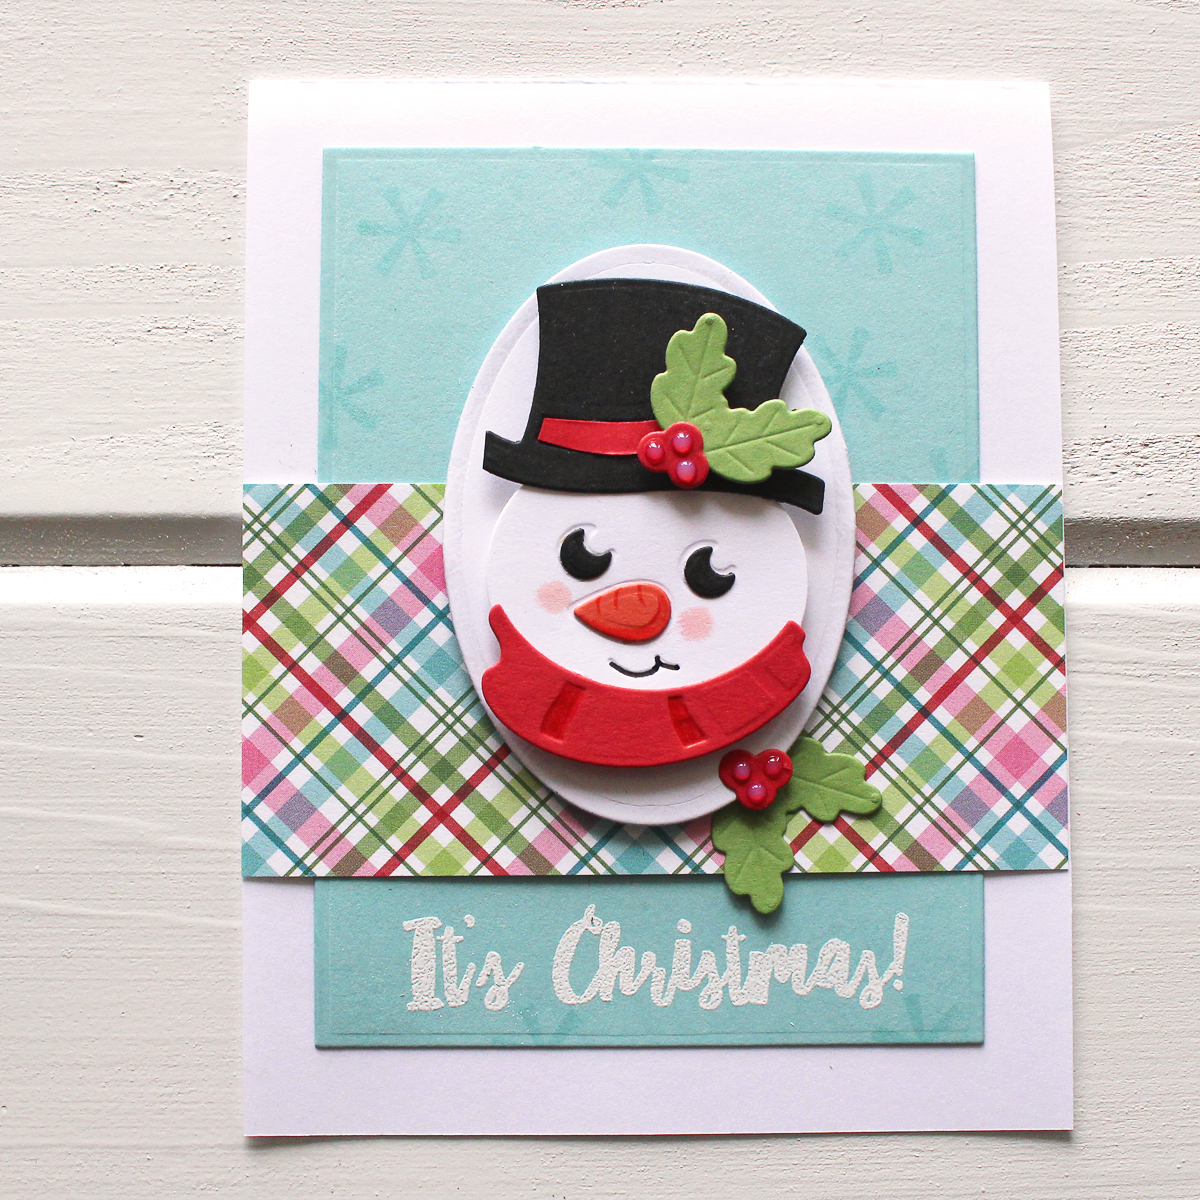
Each of these sets of Die D-Lites contains so many details! This snowman makes me smile instantly.

One of the features of Spellbinders dies that I have long-loved is the embossed details on the images. Take a look at the hat on the snowman. When I die cut it, the ribbon on his hat has a deep embossed portion that is so classy. But, to step it up a little bit, I die cut and embossed the hat image again from red cardstock. Using a pair of scissors, I cut that embossed portion out and laid it inside the image. The hat went from cool to wow!
I also added some shiny dots to the berries on his hat for extra dimension.
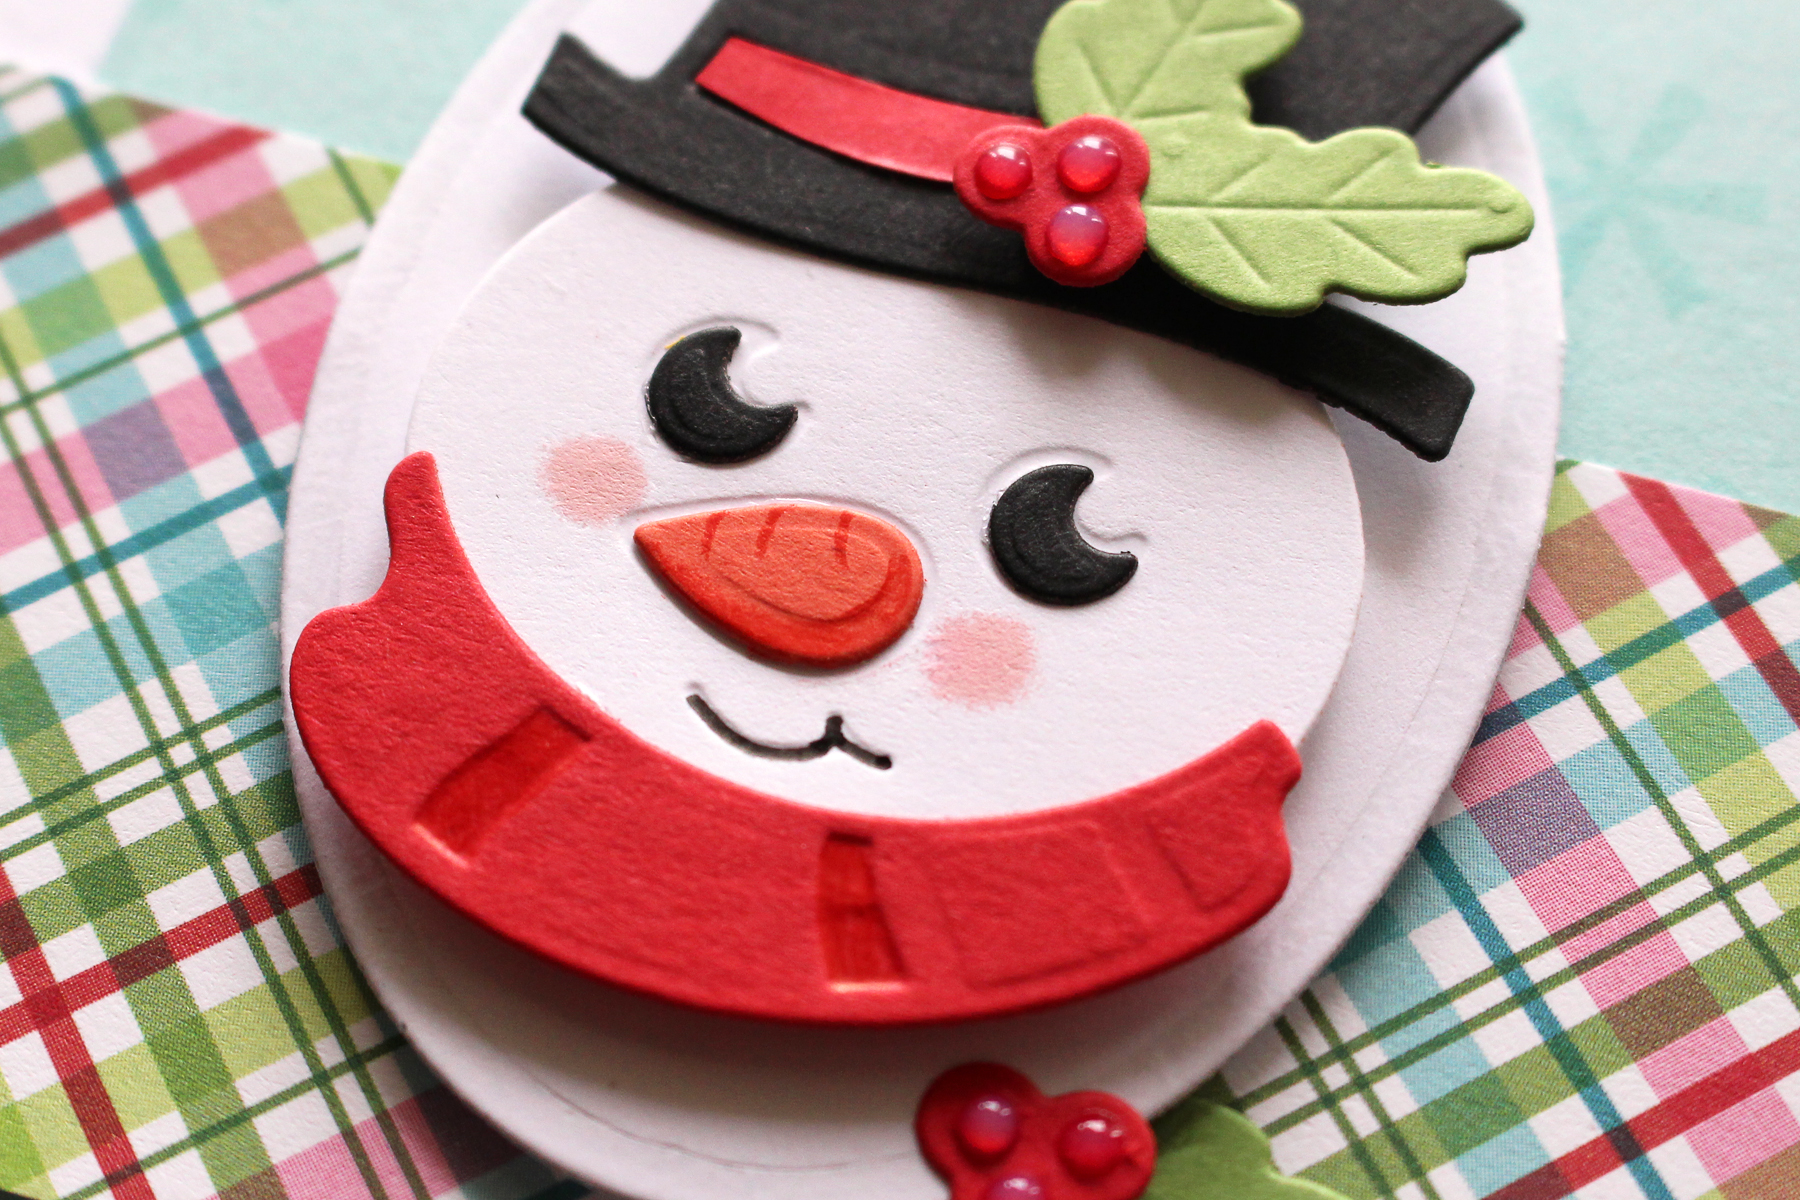
On his face, I added pink to his cheeks with a small foam ink stick. I colored in his embossed smile with a thin black pen. And finally, I added accents to the images with a color pencil. Color pencils add so much depth! I colored the base of his carrot nose and added some carrot bumps with a dark orange pencil. With a dark red pencil, I added depth to his scarf.
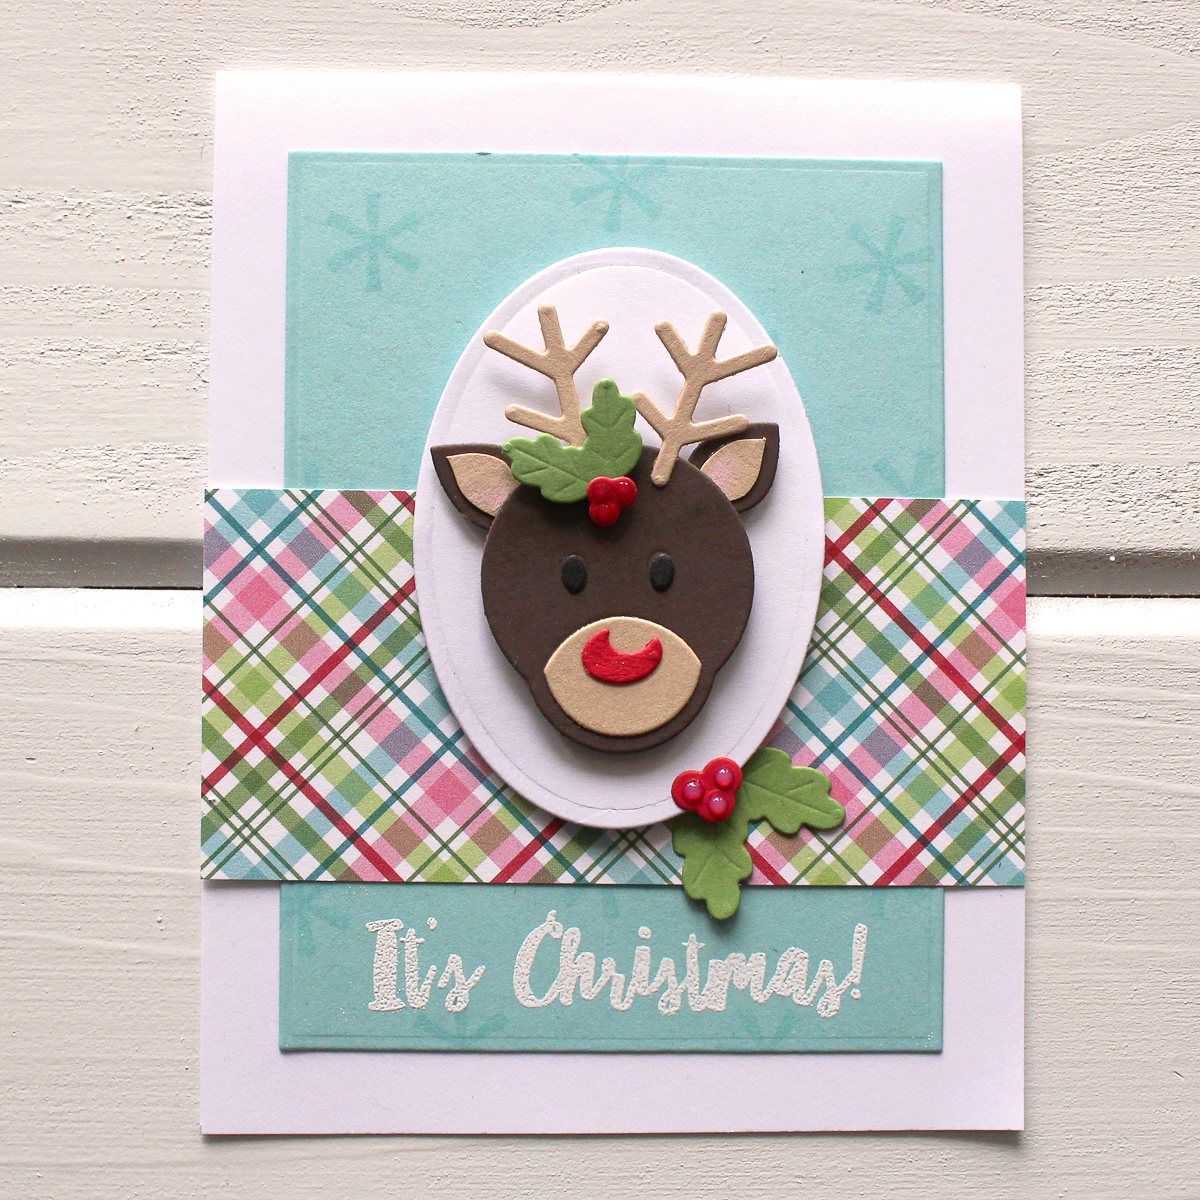
I continued the fun on this sweet reindeer!
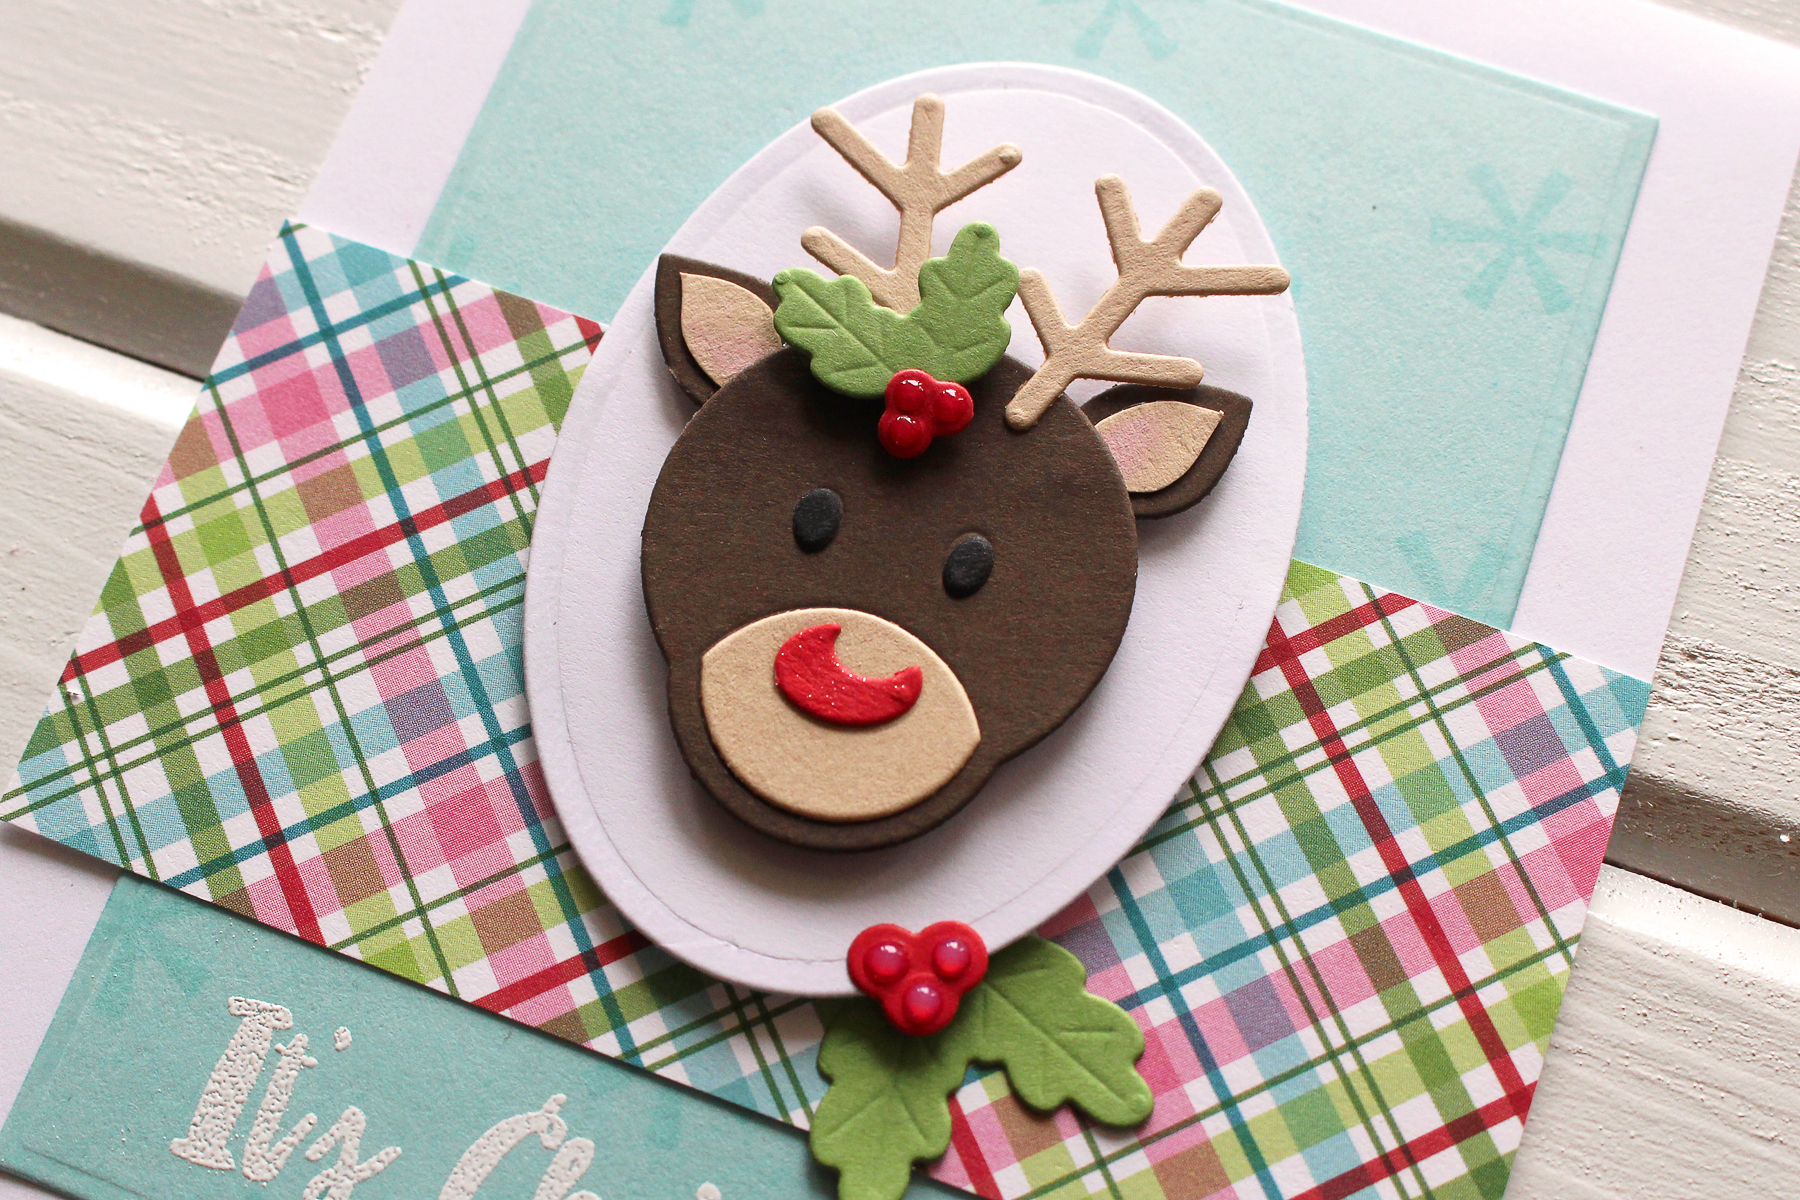
I used a few of the same tricks, like cutting out the embossed portion for his ears and using accents to add shine to the berries.
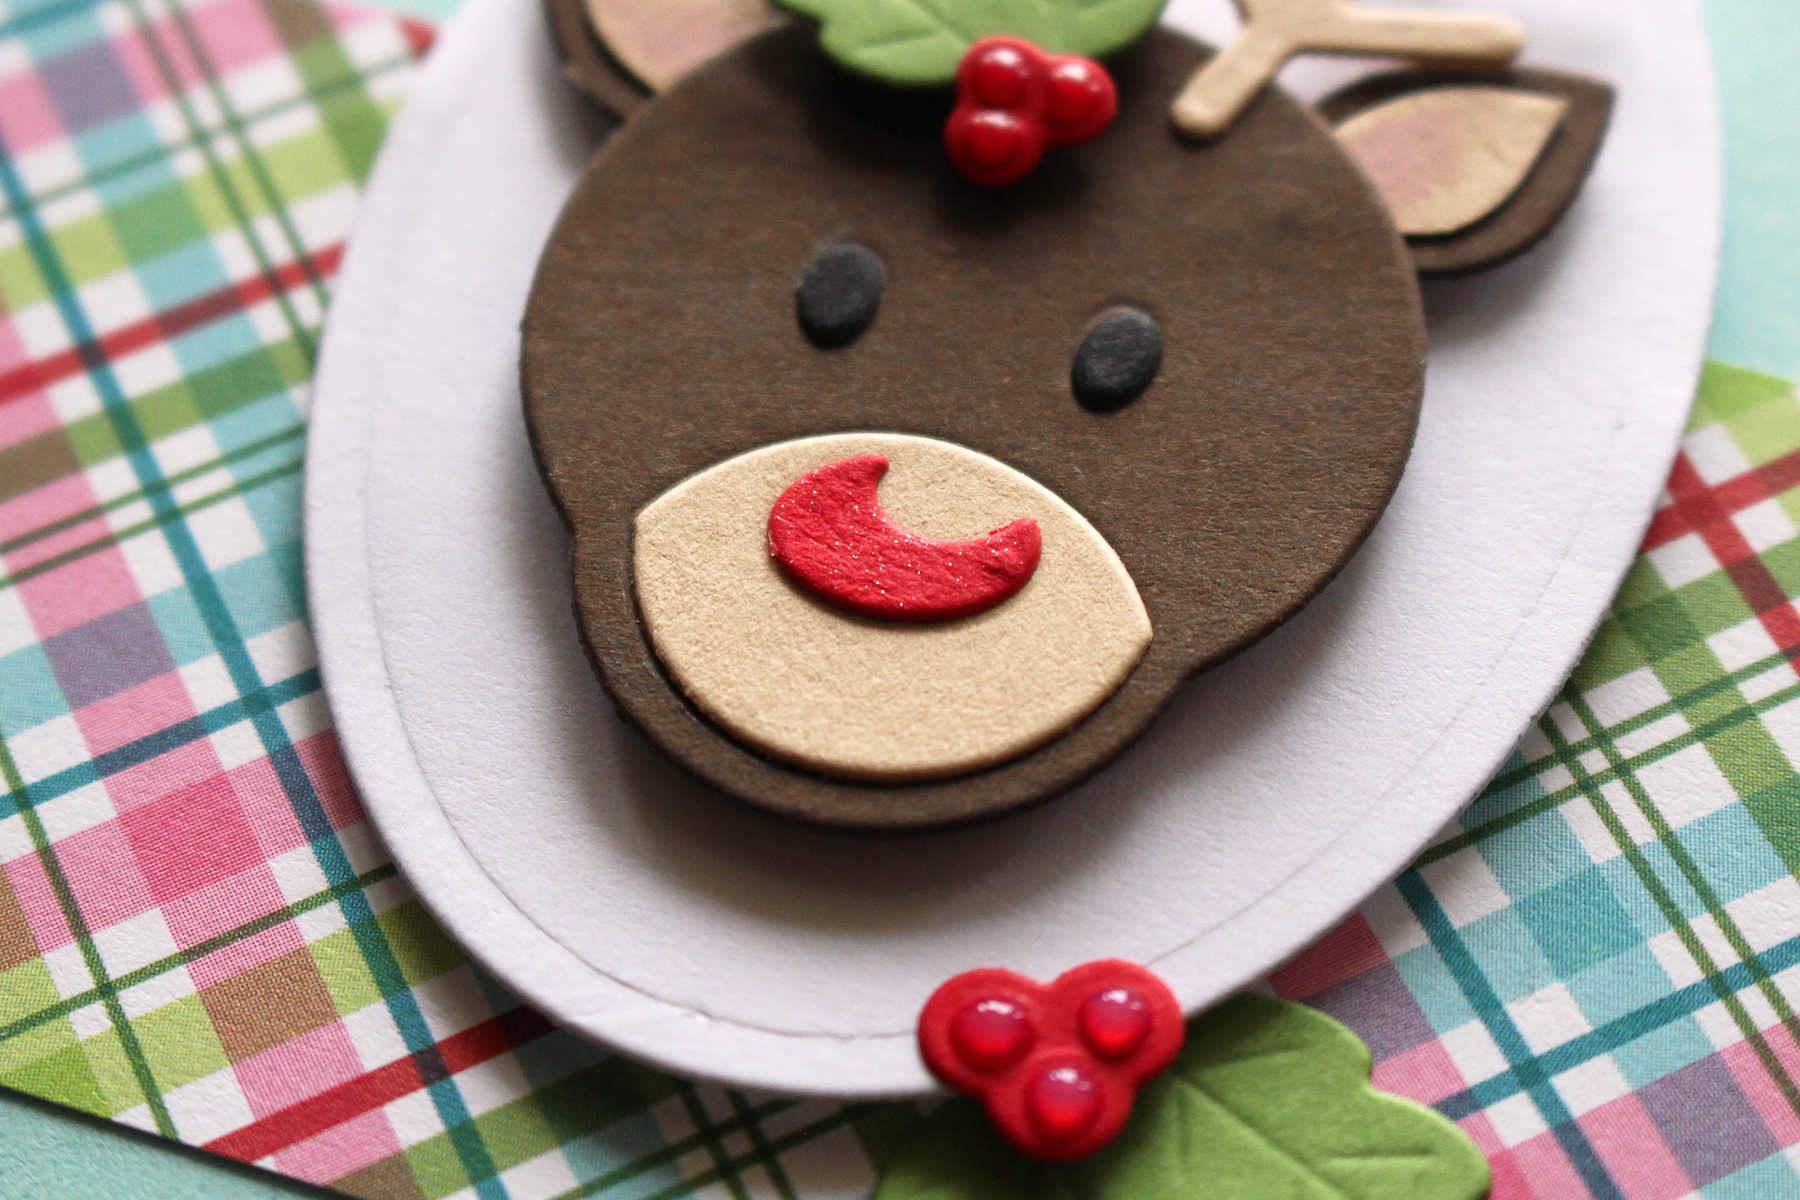
But on this reindeer, whom I HAD to make Rudolph, I added some sparkle to his nose. Using a brush pen with glitter I was able to bring some bling!

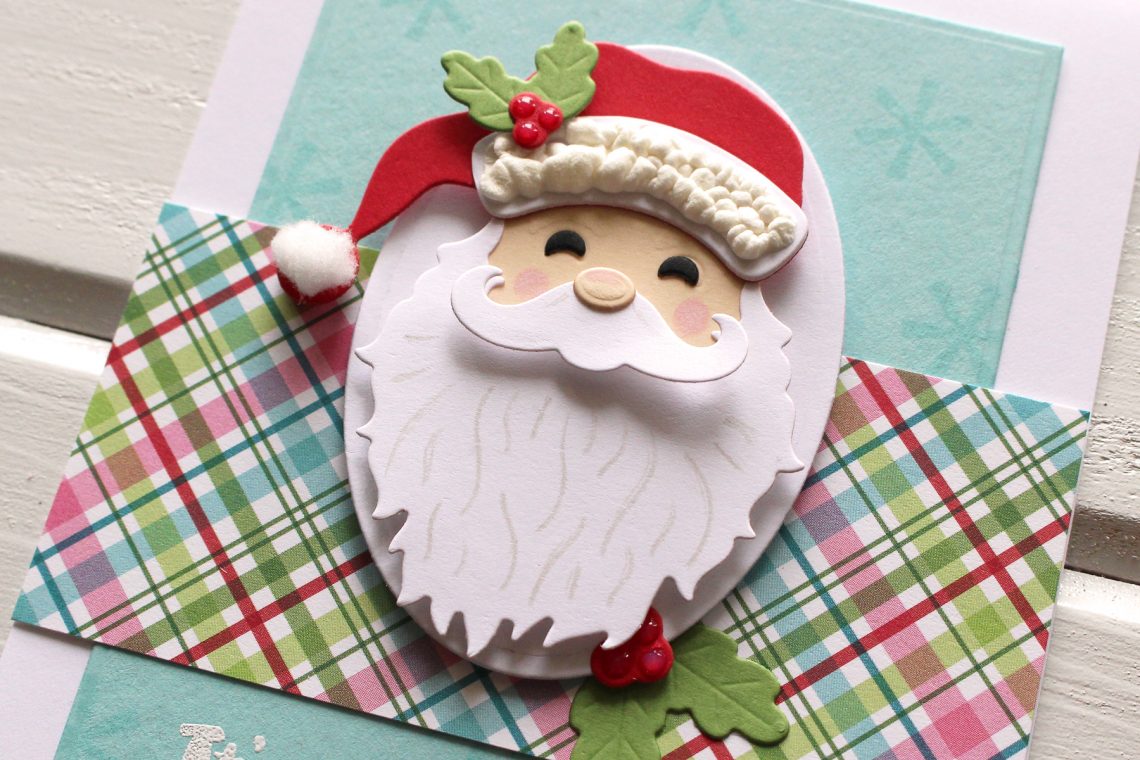
No Christmas card set would be complete without a Santa!

Santa was too much fun to add accents to! On his beard I used color pencil. By placing the white cardstock I had cut for his beard back into the die, I could use the die like a stencil and add texture to his beard. I also used pink ink for his cheeks and shiny accents on the berries.
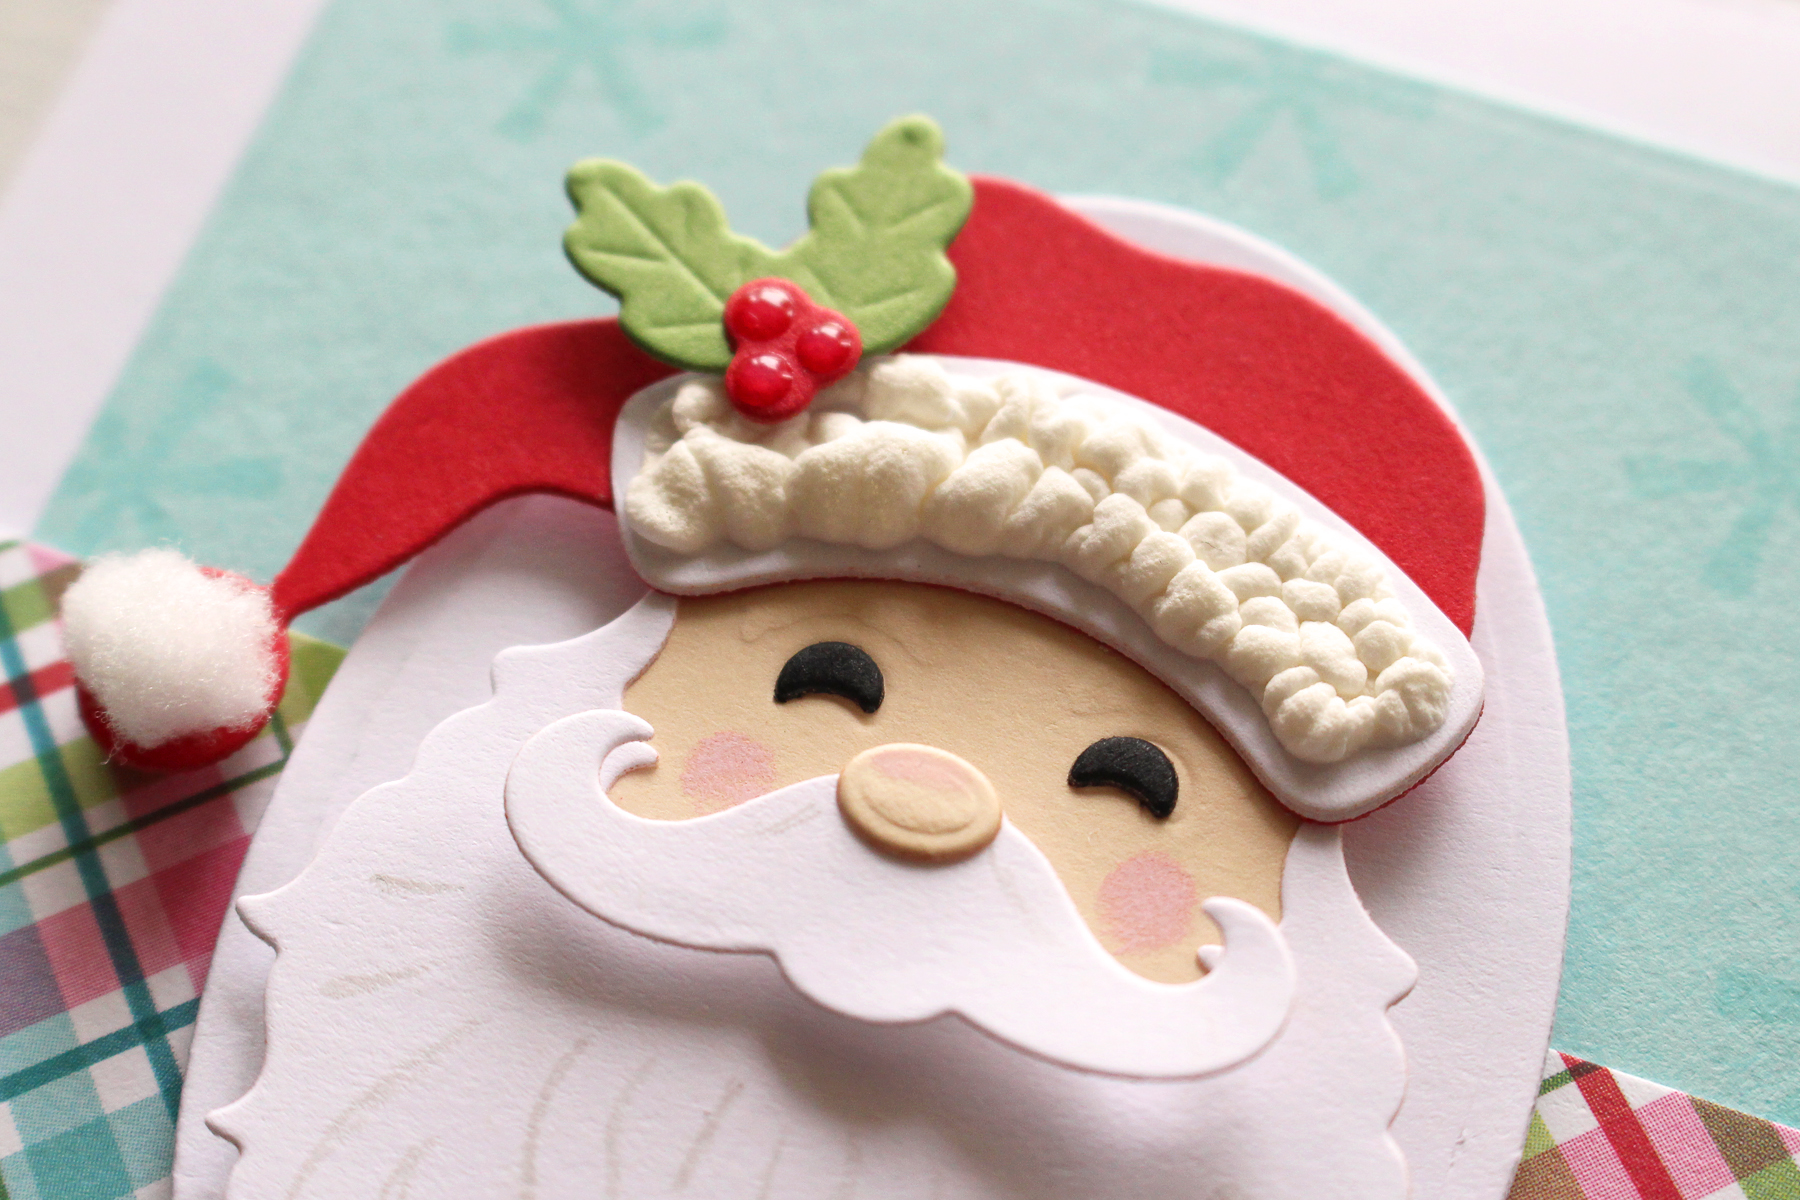
But my favorite accent on Santa is his hat! On the brim I used Liquid Applique on the white portion. Once heated, it puffs up and looks like fur! And for even more dimension, I used a small, white pom, cut from a piece of trim, to add to the end of his hat.
One last tip, don’t forget to add dimension to your die cut images by adhering some of the pieces with foam adhesive. It really brings your images to life!
Spellbinders Supplies:
- S3-358 Reindeer
- S3-359 Santa
- S3-360 Snowman
- S4-132 Classic Rectangle LG
- S4-110 Classic Ovals LG
- PL-001 Platinum Machine 8.5”
Other supplies:
Various colors card stock; Color pencils; Liquid Applique; Clear gloss accents; Pink, Blue Ink; Foam ink stick; Glitter brush pen; Thin line black pen; Stamps; Watermark Ink; White Embossing Powder; Liquid Adhesive; Foam Adhesive.
Thank you for joining me today! I hope you have added a few fun ideas for stepping up your die cut images on your next project! I look forward to sharing another Holiday Die D-Lites project with you very soon!
One Comment
Pat McCleary
These images are adorable, & your added touches put them over the top. Well done, Kimberly