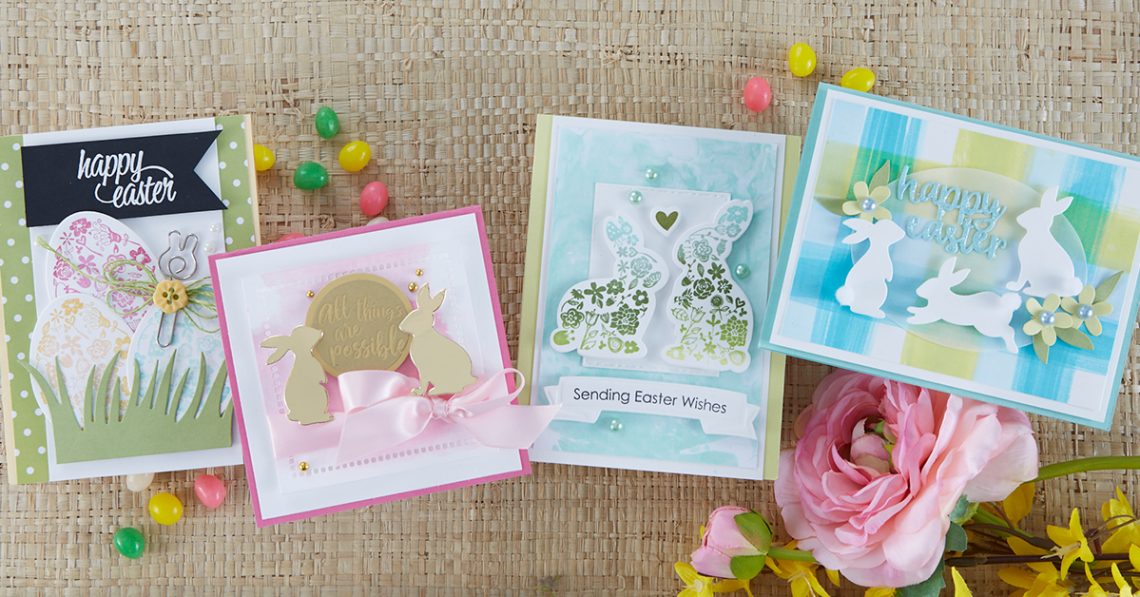
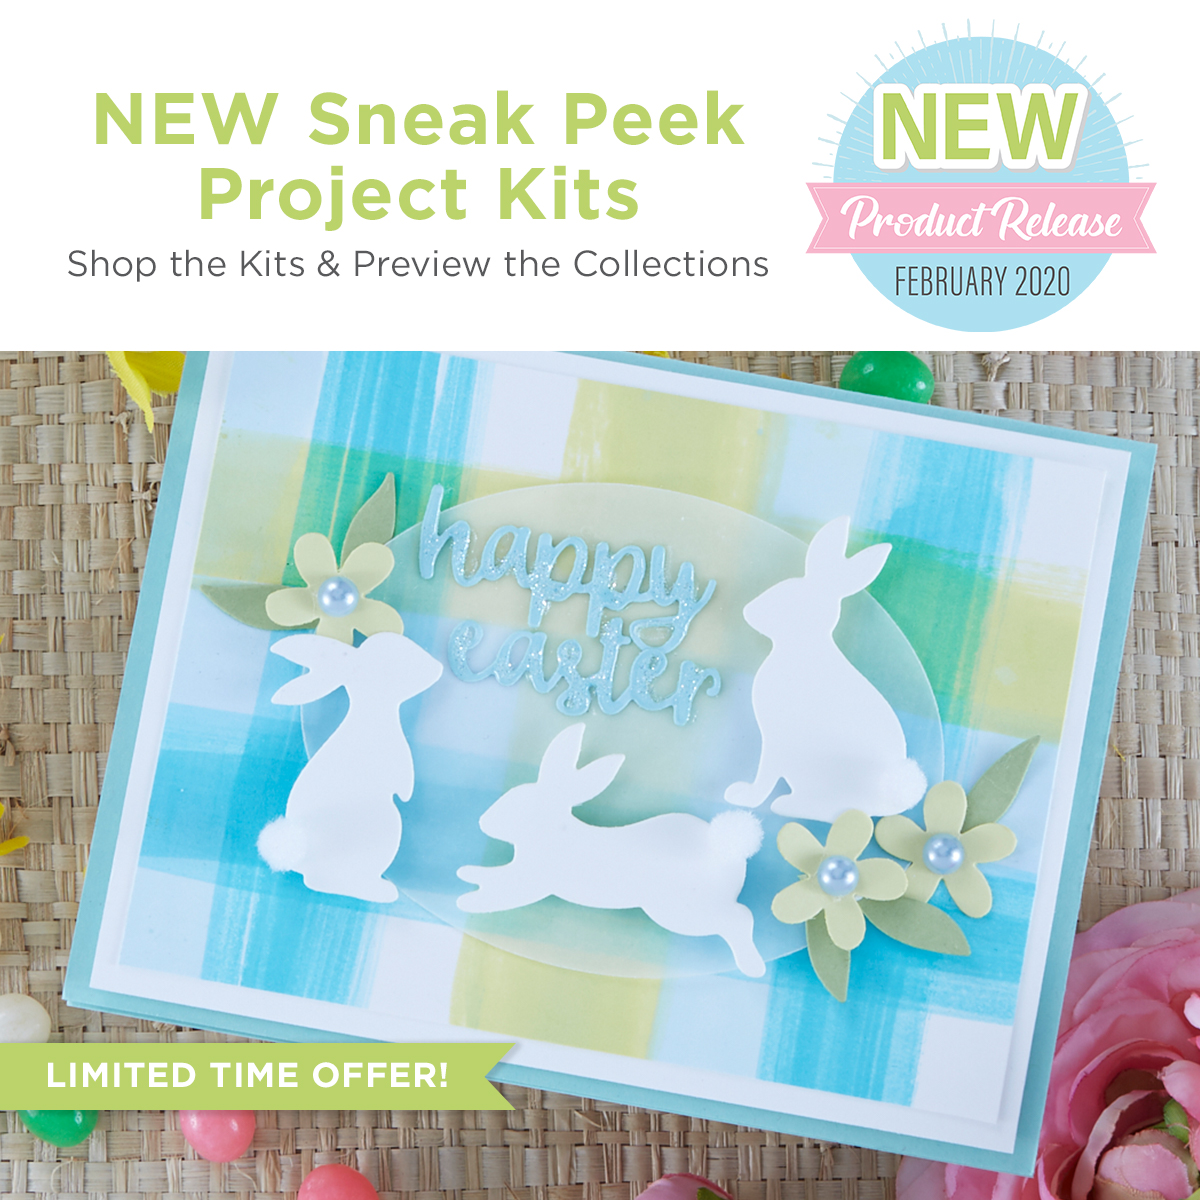
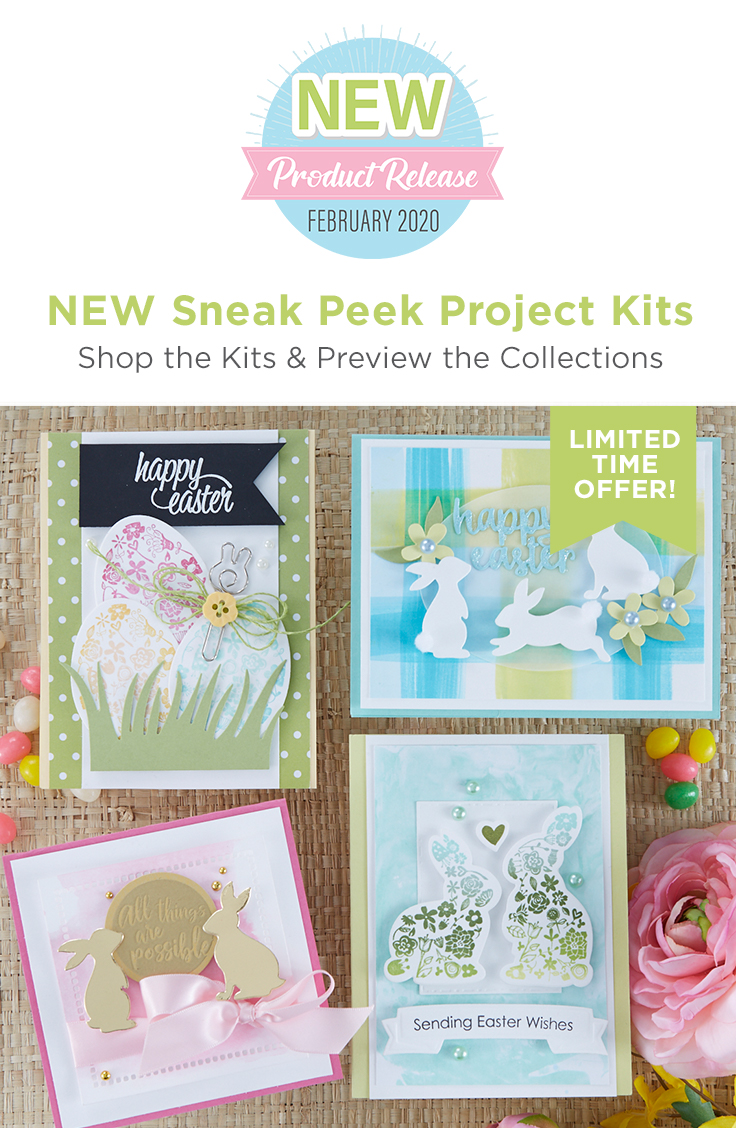
FSJ Ready, Set, Spring Project Kit is Here!
Hello Spellbinders’ and FSJ fans! Our Fun Stampers Journey Ready, Set, Spring Project Kit is here!
Ready, Set, Spring Project Kit is an awesome way to get your hands on the NEW Ready, Set, Spring! Project Kit Collection from Fun Stampers Journey before it releases on February 10th. It includes a selection of fun spring themed Coming Soon products, along with a project kit to create four unique cards. We’ve done the hard work, all you have to do is stamp, color and assemble! Each card is 4.25” X 5.5”. Your friends will love receiving your beautiful handmade cards! An online Video Tutorial filled with tips and techniques will ensure your cards turn out perfectly.
Kit includes two stamp sets and two dies sets. Also included are four pre-kitted cards that include special die cuts and other embellishments. Full color, postcard sized instructions are also in your kit!
Included in Bundle:
- AT-0359 Happy Spring Minis Stamp Set
- SS-0689 Joyful Greetings Stamp Set
- DI-0547 Joyful Greetings Die Set
- DI-0545 Bunny Trio Die Set
- Kit Materials to Assemble FOUR Cards
Bunny Trio Card
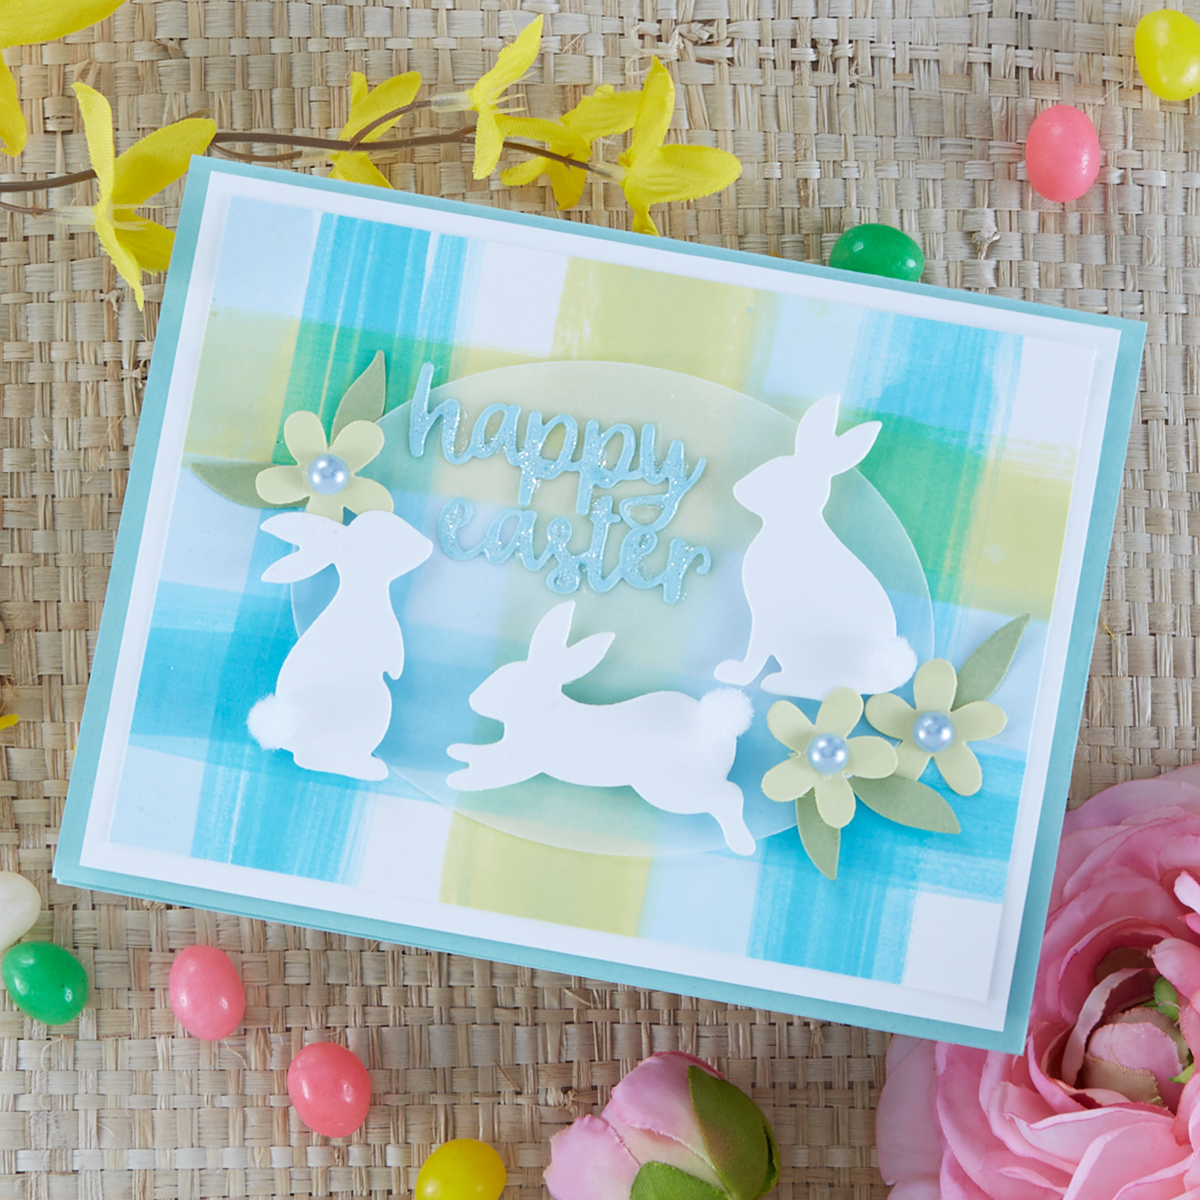
Finished size: 4.25” X 5.5”
Instructions:
- Fold Cool Pool cardstock in half to create card base, die cut bunnies from Whip Cream cardstock, sentiment from Pool Play cardstock.
- Use Liquid Color and Square paintbrush to create plaid background on Whip Cream panel: start with Sweet Pear and paint one vertical and one horizontal stripe (allow brushstrokes to show), then add Turbo Teal and lastly Lovely Blue (see photo for placement), let dry.
- Adhere dry panel to Whip Cream mat and adhere to card base with foam adhesive.
- Adhere sentiment to vellum oval and tack down oval in center of card by adding adhesive under the sentiment; position bunny die cuts and blooms surrounding sentiments and pop up with foam adhesive (add additional adhesive under vellum), tuck in and adhere leaves.
- Adhere bunny tail pom minis and affix pearls to flower centers.
- Trace sentiment with Journey Glaze and while wet, lightly sprinkle with Sparkle Dust, let dry.
Supplies:
Bunny Trio DI-0545, Journey Ovals DI-0042, Spring Bloom Minis DI-0008, Greenhouse DI-0420; Pool Play CS-0092, Cool Pool CS-0118, Whip Cream CS-0040, Lemon Grass CS-0019, Sweet Pear CS-0095, Journey Vellum PP-0044; Turbo Teal Liquid Color IP-0163, Sweet Pear Liquid Color IP-0162, Lovely Blue Liquid Color IP-0134; Cottage Pearls AC-0403, Sparkle Dust AC-0013, Pom Minis AC-0199 TOOLS: Square Paintbrush TO-0102 BASIC SUPPLIES: Easy Glide Permanent Adhesive Runner AD-0081, Journey Glaze AD-0003, Journey Foam Squares Small AD-0084, Journey Craft Glue AD-0111, Crease Tool TO-0040.
Happy Easter Card
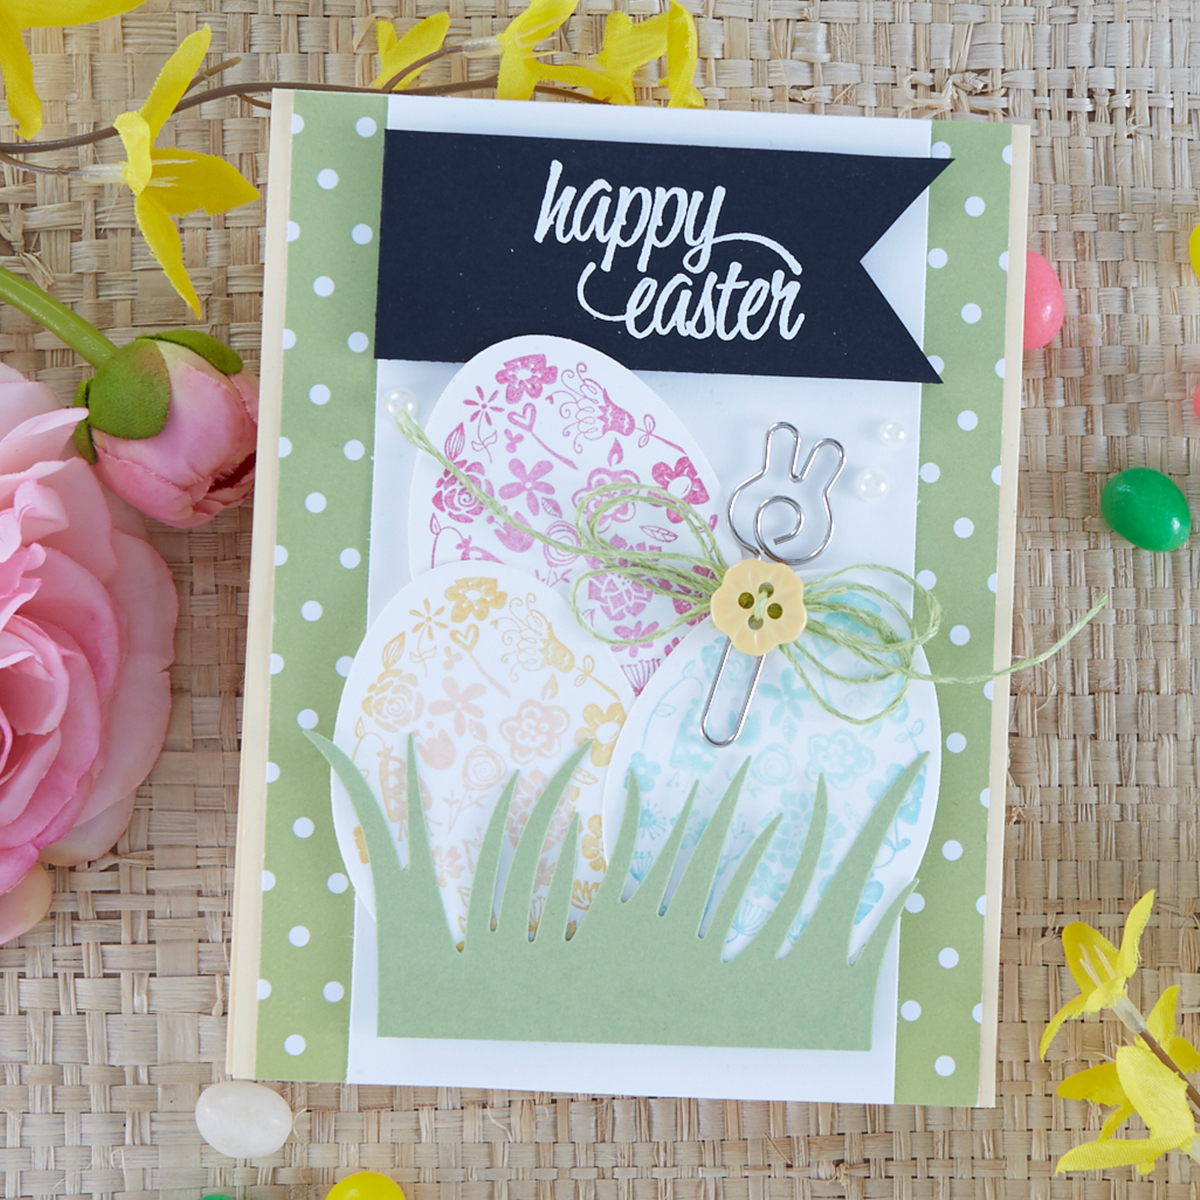
Finished size: 4.25” X 5.5”
Instructions:
- Fold Banana Cream cardstock to create card base, adhere printed paper to card front and narrow Whip Cream panel to printed paper.
- Stamp (3) eggs with pairs of ink by first inking lighter color, then rolling edge of stamp to darker color ink: Peaches and Cream with Orange Creamsicle, Watermelon Fusion with Sweet Berry and Cool Pool with Beach Breeze; die cut eggs.
- Stamp sentiment with Clear Pigment ink on Black Licorice cardstock and heat emboss with white embossing powder; trim into banner shape on right side and adhere to card front with foam adhesive.
- Layer die cut grass and eggs and adhere to card front with foam adhesive.
- Tie triple bow using Lemongrass twine and thread button with small piece of thread; add clip to Cool Pool egg and adhere bow and button
- Affix pearls to embellish.
Supplies:
Joyful Greetings SS-0689, Happy Spring Minis AT-0359; Joyful Greeting DI-0547, Border Details DI-0147; Cool Pool IP-0074, Beach Breeze IP-0044, Watermelon Fusion IP-0027, Sweet Berry IP-0029, Peaches and Cream IP-0149, Orange Creamsicle IP-0015, Clear Pigment IP-0102, White Embossing Powder IP-0098; Whip Cream CS-0040, Banana Cream CS-0087, Black Licorice CS-0003, Lemongrass CS-0019, Playful Prints PP-0057 ACCESSORIES: Lemongrass Thread AC-0132, Pearls AC-0024, Fun Day Elements AC-0101 BASIC SUPPLIES: Easy Glide Permanent Adhesive Runner AD-0081, Journey Craft Glue AD-0111, Journey Foam Squares Small AD-0084, Crease Tool TO-0040.
All Things Are Possible Card
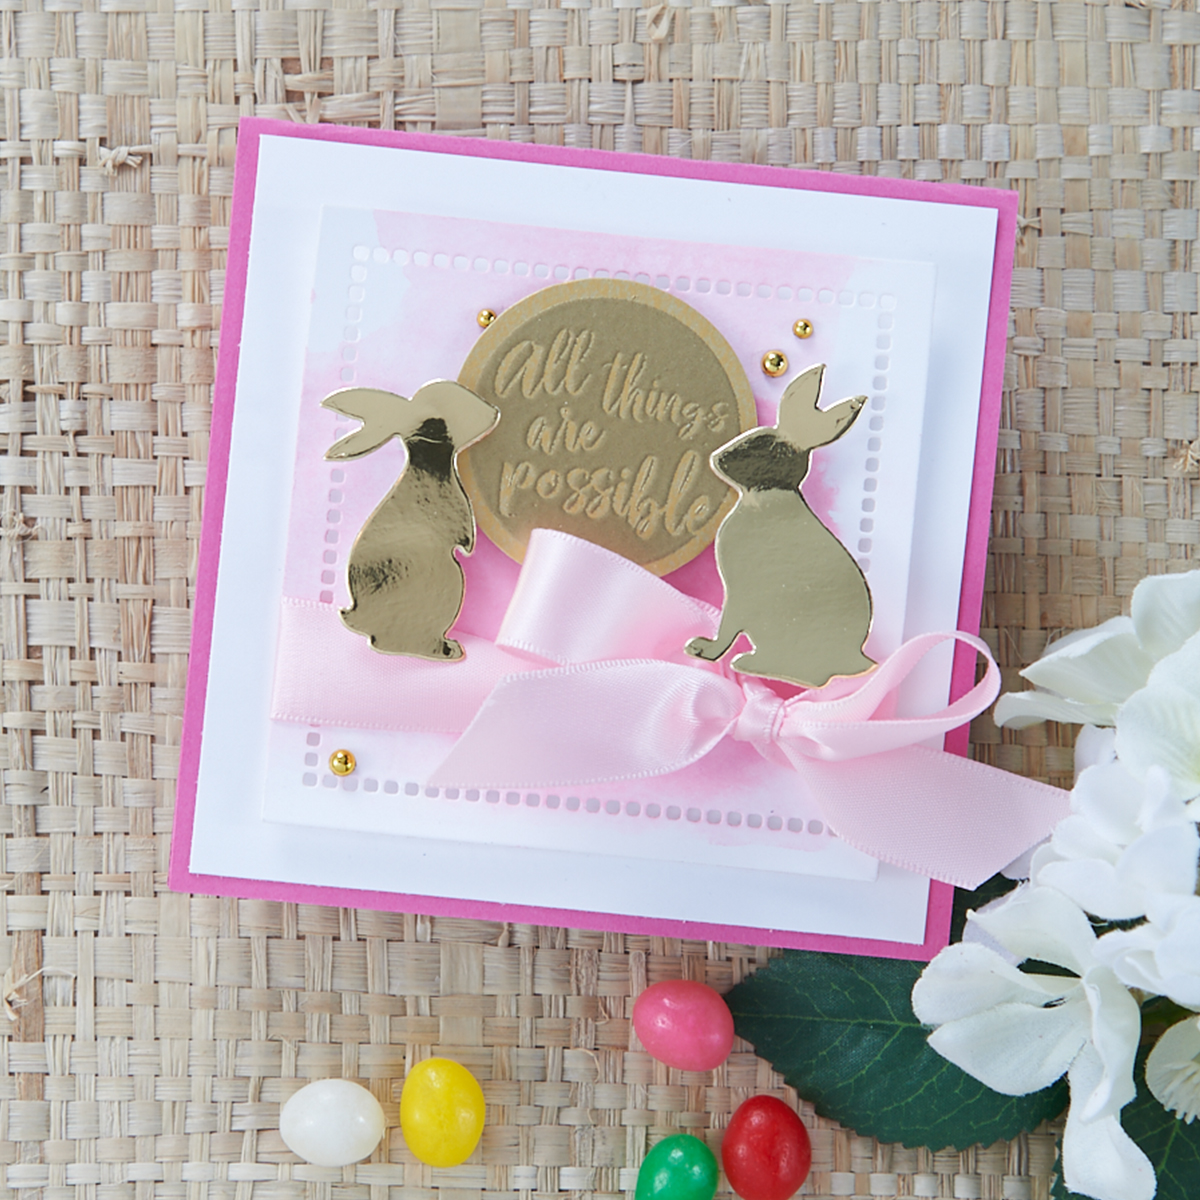
Finished size: 4.25” X 4.25”
Instructions:
- Fold Watermelon Fusion cardstock in half to create card base, adhere Whip Cream mat to card base.
- Die Cut (2) bunnies from Mirror Gold cardstock.
- Add small amount of Bubble Gum Silk to non-porous surface and slightly dilute with water, dip Hemstitch die cut square into puddle to create watercolor effect, let dry.
- Stamp sentiment on Brush Gold die cut circle with Clear Pigment ink and heat emboss with Gold embossing powder.
- Tie Bubble Gum ribbon around Hemstitch square and tie bow on right side; adhere to card front with foam adhesive.
- Pop up sentiment circle and bunnies with foam adhesive to card front.
- Embellish with Fashion Gold dots.
Supplies:
Happy Spring Minis AT-0359 DIES: Bunny Trio DI-0545, Hemstitch Squares S4-929, Journey Circles; Bubble Gum Silk IP-0092, Clear Pigment Ink IP-0102, Gold Embossing Powder IP-0101; Whip Cream CS-0040, Watermelon Fusion CS-0039, Journey Brush Gold CS-0134, Mirror Gold CS-0134; Fashion Gold AC-0292, Bubble Gum Satin Ribbon AC-0105; Easy Glide Permanent Adhesive Runner AD-0081, Journey Craft Glue AD-0111, Journey Foam Squares Small AD-0084, Crease Tool TO-0040.
Sending Easter Wishes Card
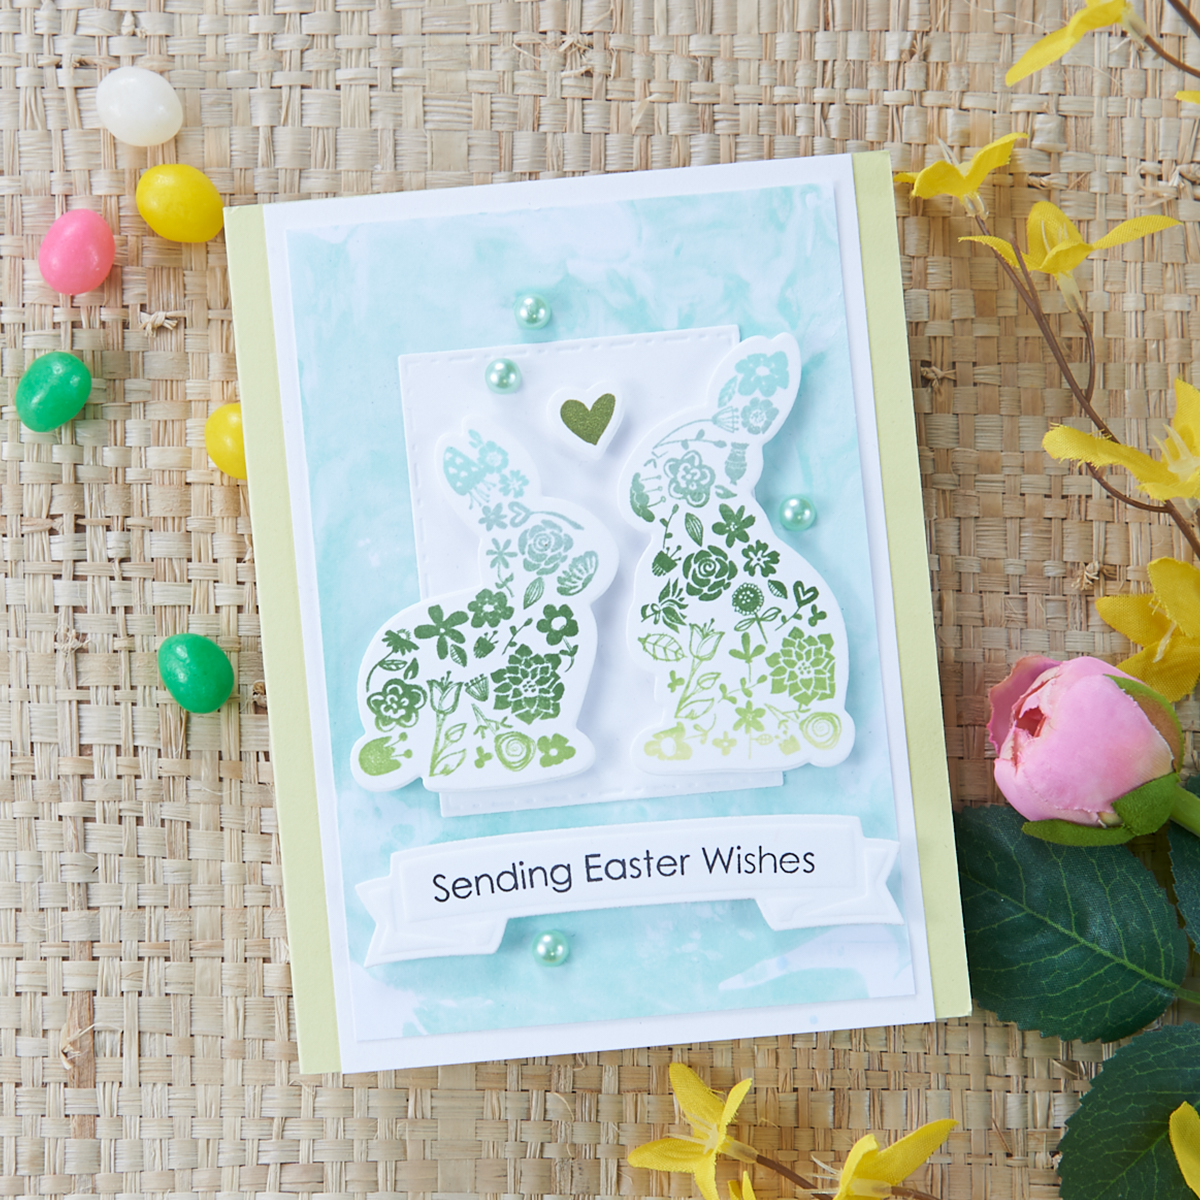
Finished size: 4.25” X 5.5”
Instructions:
- Fold Sweet Pear cardstock in half to create card base, adhere panel of Whip Cream cardstock to center of card base.
- Create marble background by adding Cool Pool Liquid Color to an approximately 4” X 5” rectangle of shaving cream (applied to non-porous surface), then swirl liquid color into shaving cream with palette knife or crease tool; press Whip Cream panel into shaving cream and scrape off with Crease Tool (experiment with different amounts of colors on scrap paper), let dry.
- Add Liquid Color to Create-A-Palette in this order: Sweet Pear, Limeade Splash, Fresh Forest, Fresh Sage and Cool Pool; stamp (2) bunnies and small heart using prepared ink pad and die cut images.
- Stamp sentiment on die cut Ribbon Banner using Black Licorice ink.
- Adhere marble background to card front (trim to 3.5” X 5” if needed) and adhere rectangle die cut to center of background.
- Adhere die cut bunnies, heart and sentiment banner to card front with foam adhesive.
- Affix pearls to embellish.
Supplies:
Joyful Greetings SS-0689; Joyful Greetings DI-0547, Ribbon Banners S4-324, Fancy Edged Rectangles S4-905; Whip Cream CS-0040, Sweet Pear CS-0095; Create-A-Palette IP-0139, Sweet Pear Liquid Color IP-0162, Limeade Splash Liquid Color IP-0133, Fresh Forest Liquid Color IP-0131, Fresh Sage Liquid Color IP-0156, Cool Pool Liquid Color IP-0140, Black Licorice IP-0041; Meadow Pearls AC-0404 BASIC SUPPLIES: Easy Glide Permanent Adhesive Runner AD-0081, Journey Craft Glue AD-0111, Journey Foam Squares Small AD-0084, Crease Tool TO-0040; Shaving Cream.
FSJ Ready, Set, Spring Project Kit – Video Tutorial
Watch video tutorial using this kit below or on Youtube:
EXTRA Supplies NEEDED:
One Comment
Andre M.
These are the sweetest easter cards, love that all the elements are included.