Yana’s Foiled Basics Inspiration | Feminine Cards with Yasmin
Hello Spelbinders’ and FSJ friends! Yasmin, here sharing with you 3 inspiration projects featuring the new; Yana’s Foiled Basics Project Kit. This kit comes with four gorgeous Glimmer Hot Foil Plate sets along with four rolls of foil. Which means that you’ll be ready and set to create beautiful cards just, like these 3 that I’m about to share with you.
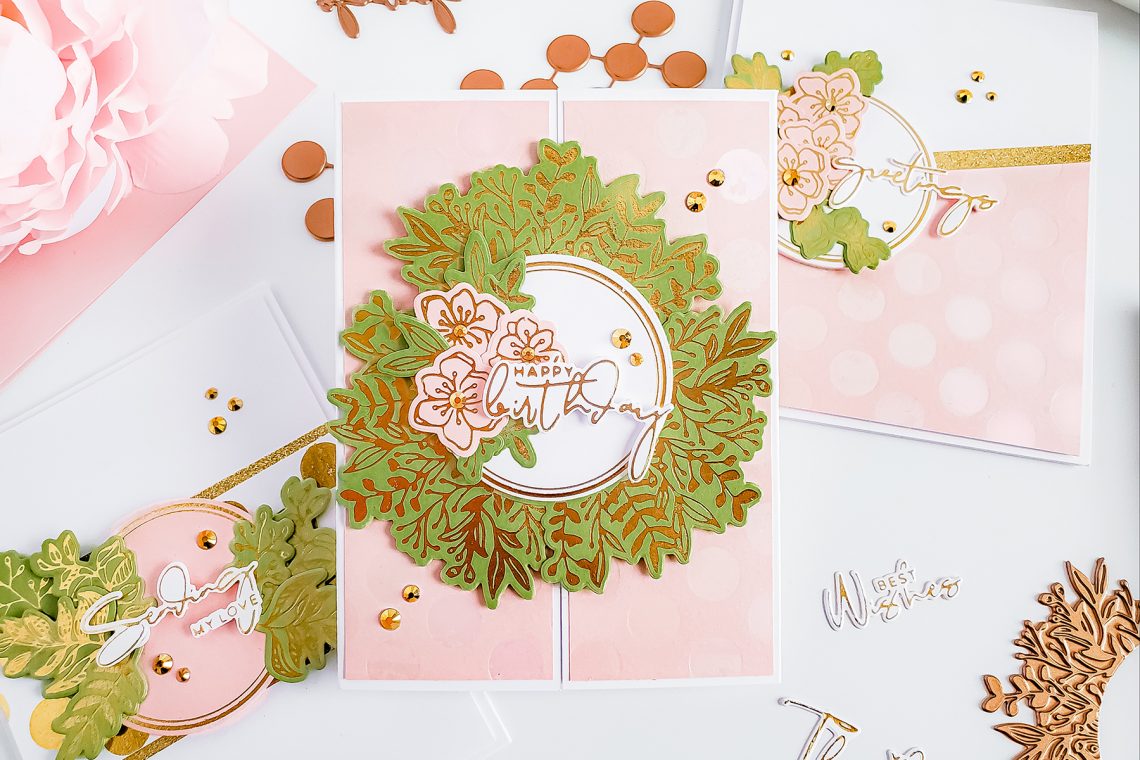
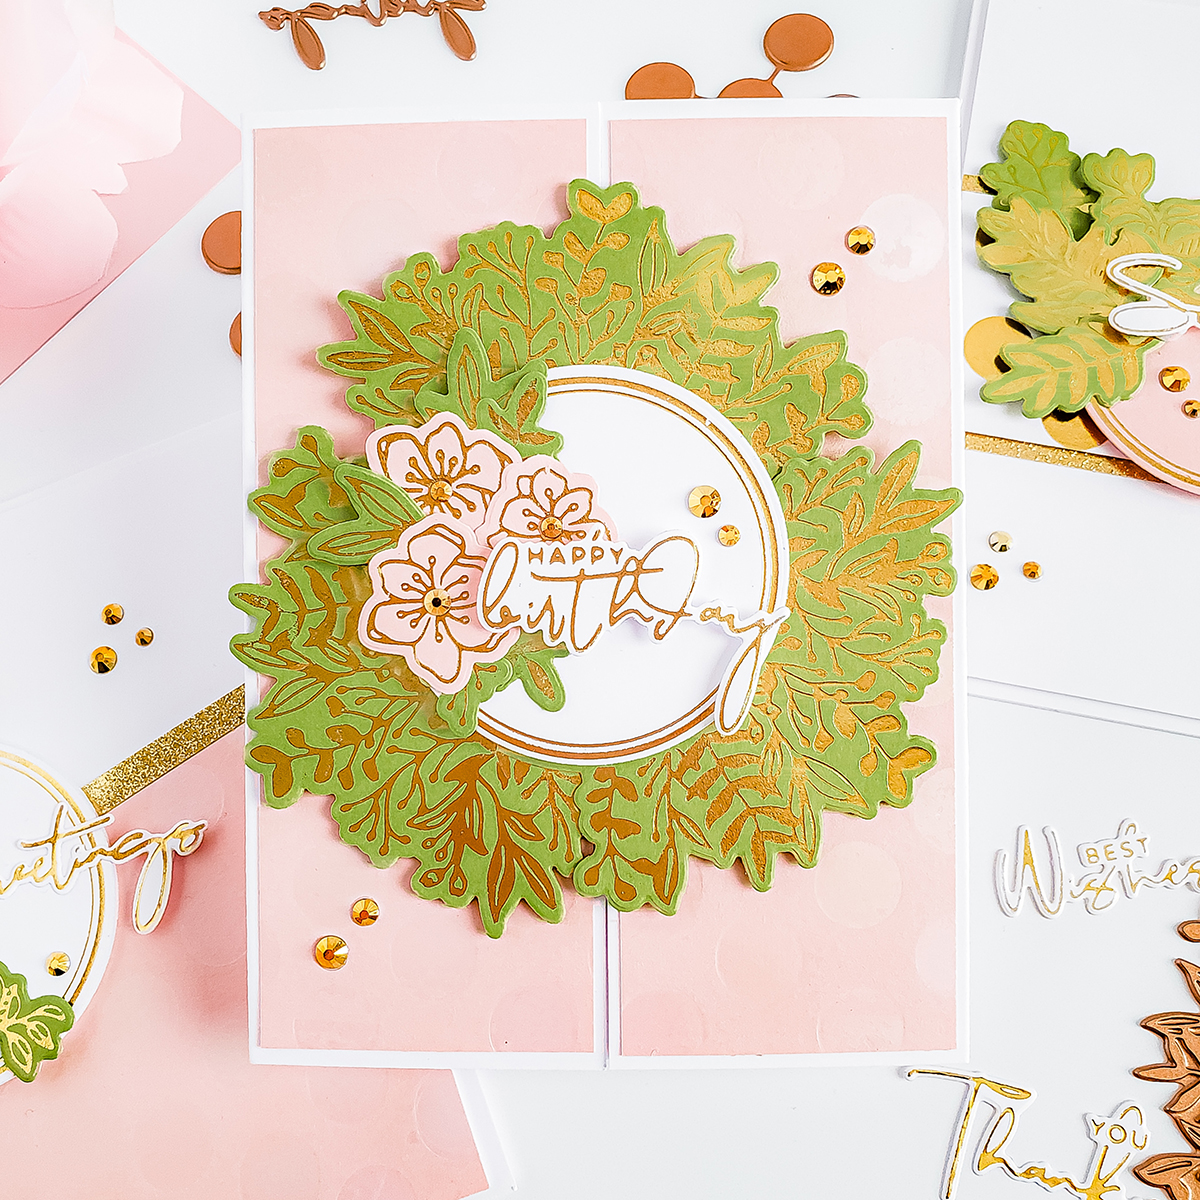
Gate Fold Card with Foliage Border
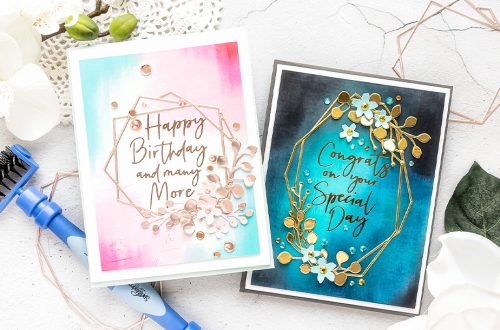
To create this Gate Fold with a Foliage Border card, I started by scoring and folding the card base. The card base measurements were; W 8 1/4’’ x H 5 1/2’’ in. Once, I had the large white card base, I placed it over the scoring board, and I made the first score line at the 2 1/8’’ in mark. Next, I turned the card base around, and I scored a second line at the same mark. Then, I reinforced the folds using a bone folder for a clean and smooth look. Right after that, I set the card base aside and I started the foiling process.

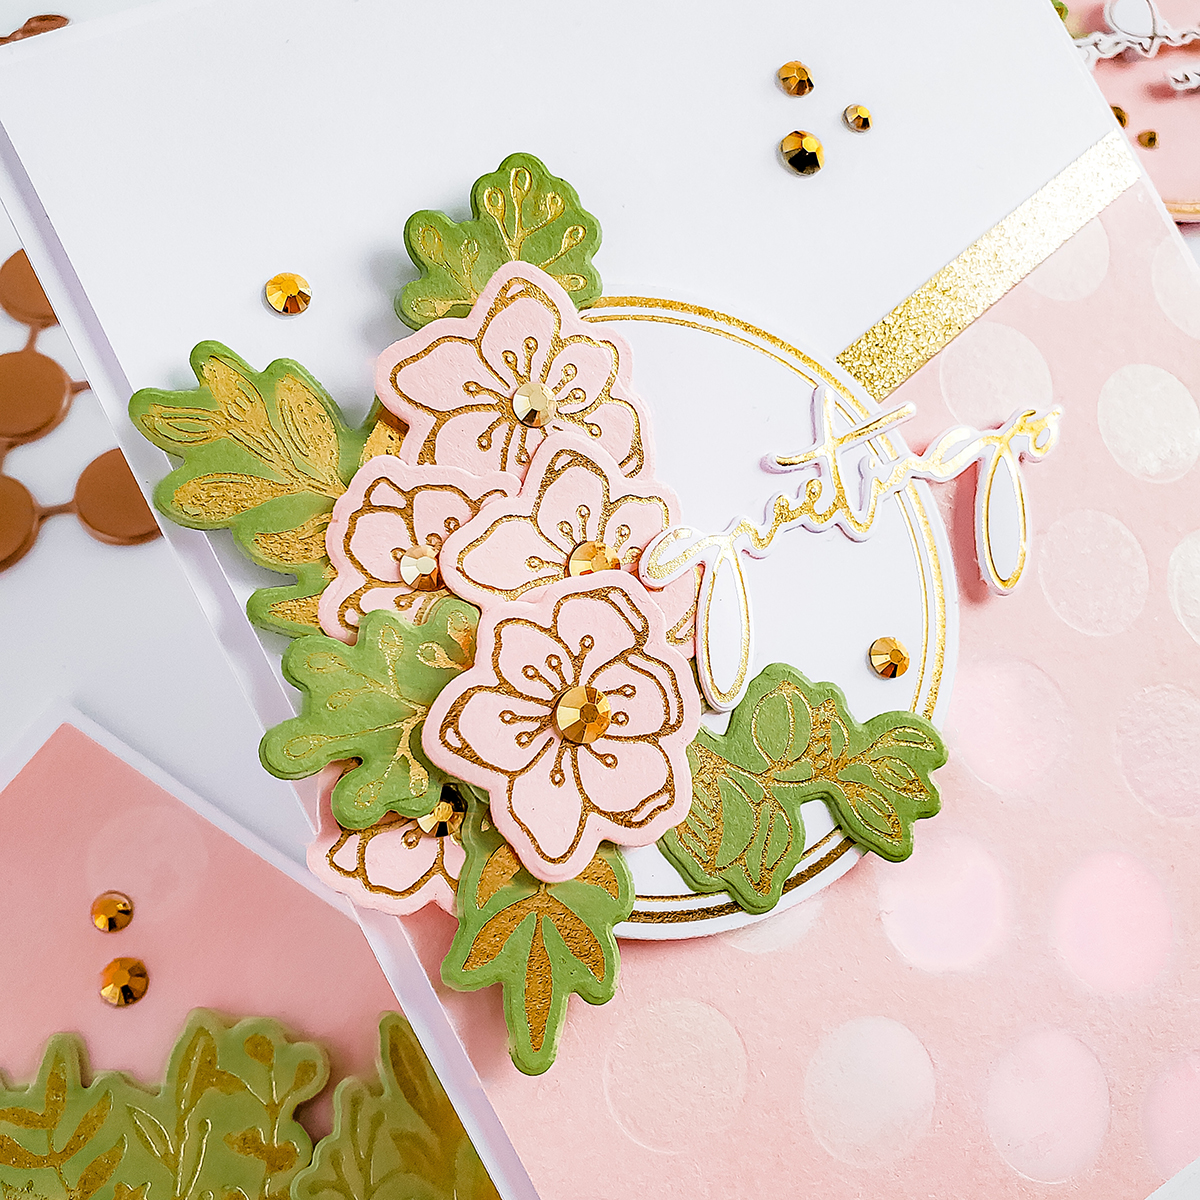
To create the card background, I placed the Polka Dot Strip Glimmer Hot Foil Plates over the Glimmer Hot Foil Platform to foil 4X a pink card panel with the Opal hot foil roll included in the kit. Once, the entire card panel was foiled, I cut it in half. Then, I trimmed the edges off from each piece to be exact at W 1 7/8’’in x H 5 1/4’’in. Then, I adhered the backing of each piece with double-sided tape to the sides of the card base as, shown above. To create the wreath for the card, I placed the Foliage Border Glimmer Hot Foil Plate over the hot foil platform, and I foiled it on green cardstock 3X using; the gold foil roll included in the kit. Along with the foliage border, I also foiled a few more leaves in the same green cardstock as, well as the flowers included in the set which were foiled on the same pink color cardstock that, I used for the card base.
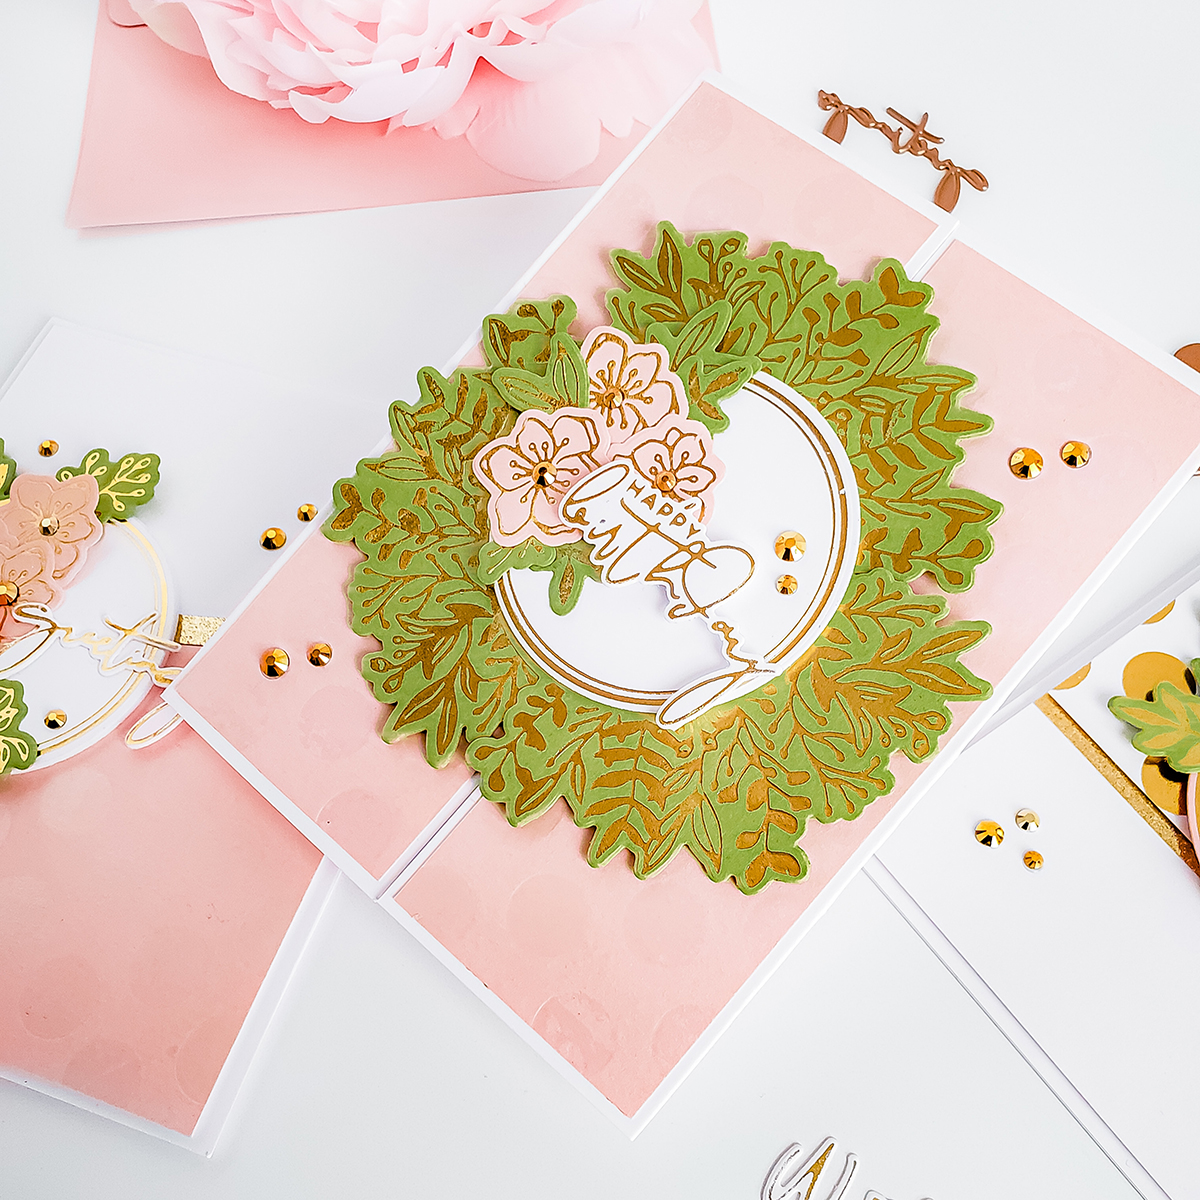
Once, I was done with the foiling pieces for the wreath, I decided to foil on white cardstock 2X and, 1X in pink color cardstock the circle from the set. It might seem lots of foiling but, I promise you that is a life saver. As, you can foil lots of pieces at once to create more than 1 card at a time. So, to finish the foiling process, I foiled the sentiments from the Yana’s Sentiments Glimmer Hot Foil Plate & Die Set on white cardstock, and soon after that, I moved on to the fun part which was die-cutting. To do that, I ran each image through the Platinum 6 Die Cutting and Embossing Machine along with their coordinated dies which are also included in each set to die-cut them out of the cardstock. For the wreath assemble, I created a sandwich so, I started by adhering the 3 green foliage images between the white foiled circle and an extra circle die-cutting that, I create to cover the back on the wreath. Once the wreath was completed, I adhered half of it to the left side of the card. Lastly, to add extra dimension, I created a floral cluster on the left side of the card with the extra leaves and flowers. To finish the card off, I mounted with dimensionals the Happy Birthday sentiment, and I adhered a few gold jewels here and there to complement the gold from the Gold Foiling.
Half Tone on Tone Polka Dot Background
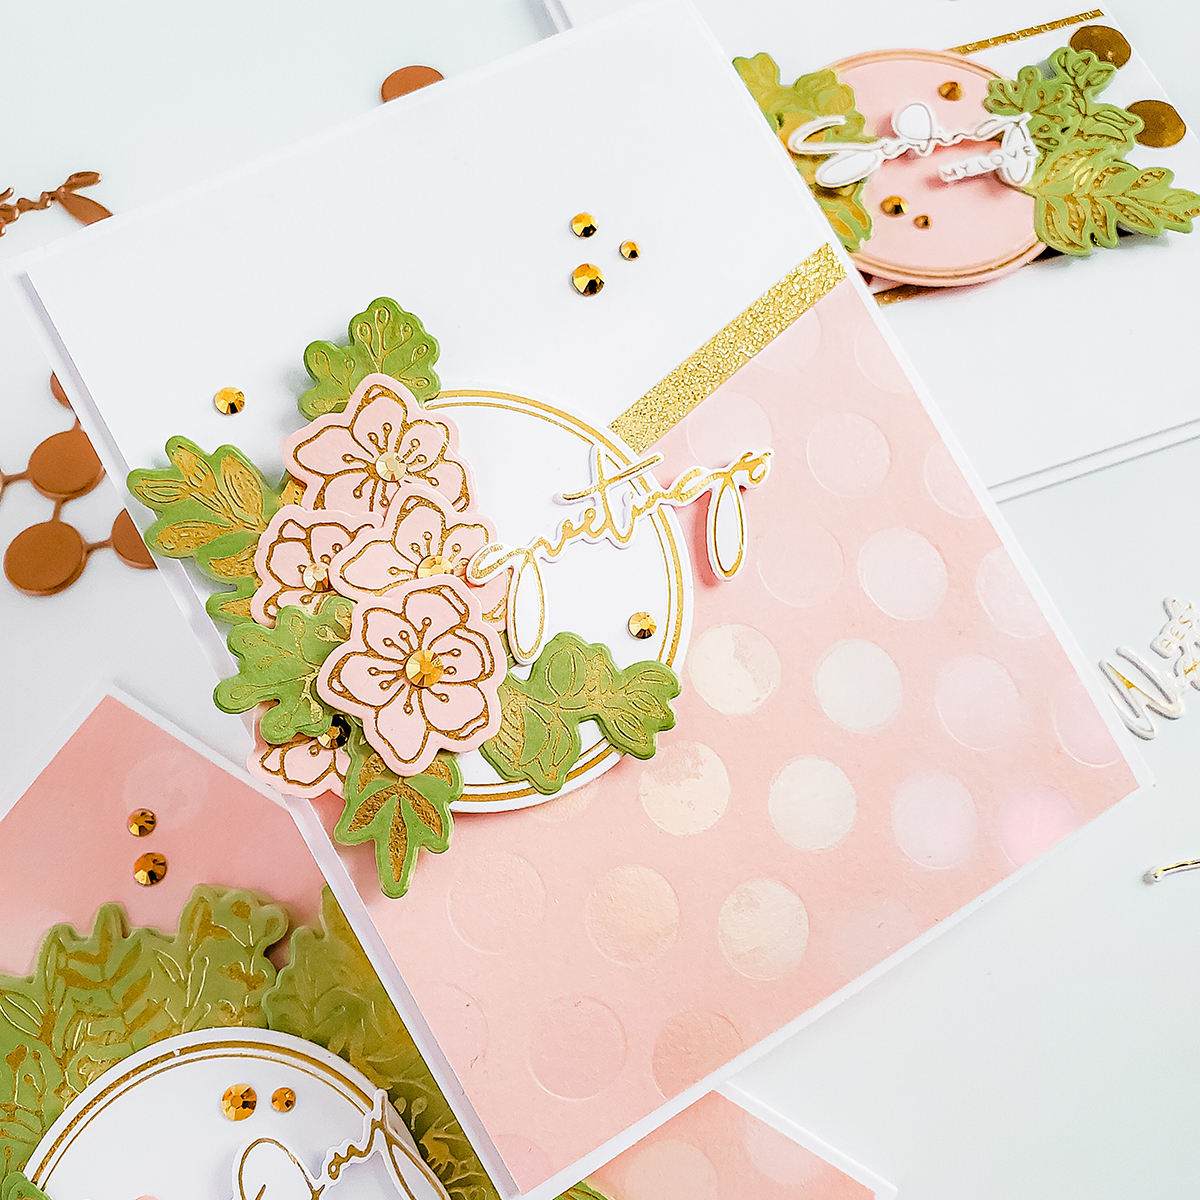
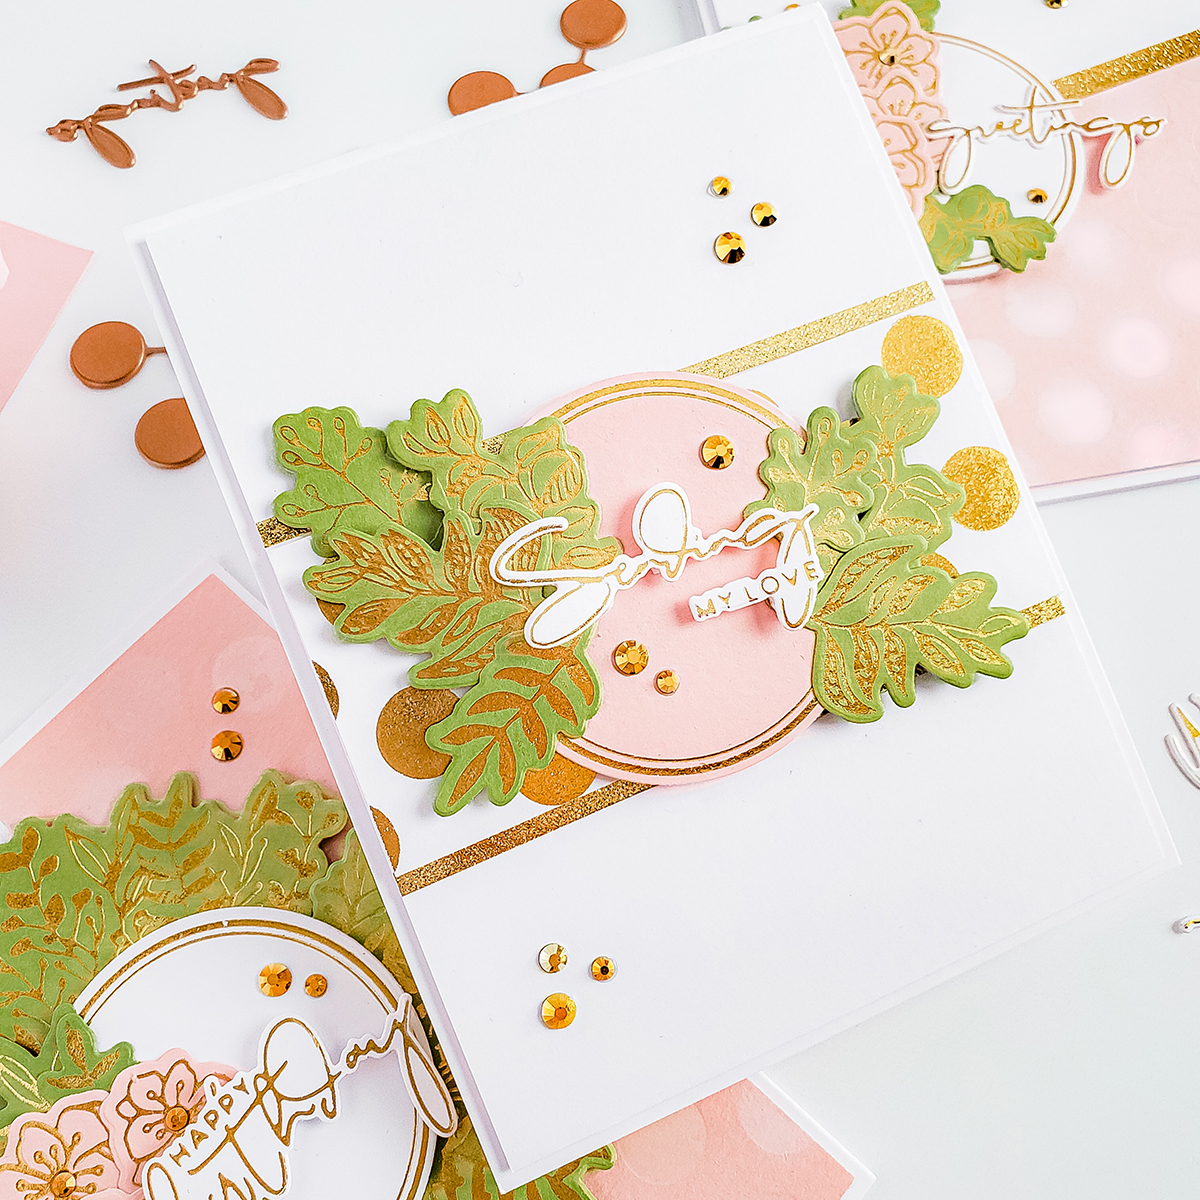
The second example was much easier to make as, I already had the flowers and leaves foiled and die-cut them. So, to create the background, I place the polka dot plate over the glimmer hot foil platform, and I ran the platform through the die-cutting machine 4X.
Once I had the card panel foiled, I made a second diagonal cut because, I was going to adhere the bottom part to an A2 white card panel. Right after when both pieces were adhered together, I decided to add a strip of gold cardstock between them to complement the gold from the die-cutting pieces.

Lastly, I trimmed off the sides from the card panel, slightly smaller than the card base, and I foam mounted it to an A2 top folding white card base. As for the focal point for the card, I adhered the second white foiled circle on the left side, and I create over it a floral cluster with the flowers and leaves as shown above. Last but certainly not least, I mounted the sentiment with dimensional to balance it out as part of it was hanging over the card panel, and I adhered here and there gold jewels for an extra touch of sparkle.
Clean and Simple Organic Foliage with Gold Polka Dots
For the last and third example, I created a very clean and organic yet, with lots of gold touches card.

So, to do that, I placed once again the Polka Dot Strip Glimmer Hot Foil Plate over the glimmer hot foil platform to foil it on white cardstock with same glimmer gold foil roll included in the kit. Once I had it foiled, I trimmed it down to W 4 1/4’’in x H 1 3/4’’in and, I foam mounted it to the center of an A2 white card panel. At first, I was going to leave it as is but, then I decided to add a strip of gold cardstock to make the polka dots pop even more.
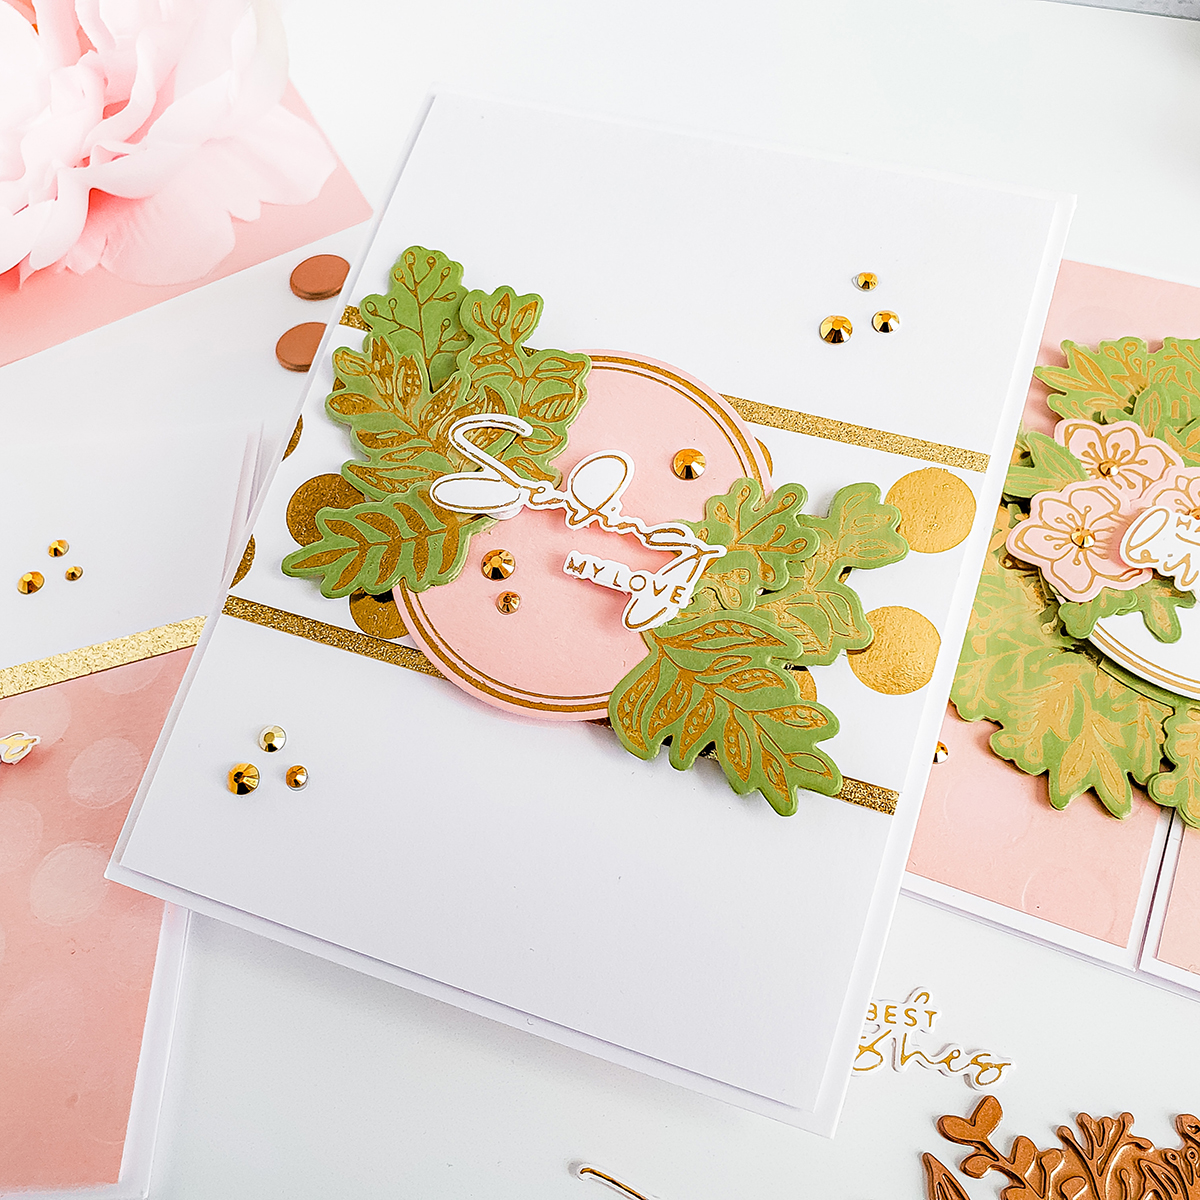
Lastly, I trimmed the edges off from the card panel, and I foam mounted it to an A2 top folding white card base. To finish the card off, I foam mounted the pink foiled circle in the center of the card, to add the organic look, I decided to skip the flowers so, I only adhered on both sides of the circle the green foiled foliage leaving the center space clean for the sentiment. As, the last touch, I adhered gold jewels here and there and my 3 inspiration projects using the new; Yana’s Foiled Basics Project Kit and Glimmer Hot Foil System were complete.
Spellbinders Supplies:
I hope that you’ve enjoyed learning about how, I’ve created these cards! Be sure to tag us in your social medias using the hashtags #Spellbinders #NeverStopMaking #glimmerhotfoilsystem when sharing your creations so, we can see what you are creating with this beautiful collection. With that being said, thank you so much for stopping by, we hope to see you soon.
Have a fabulous crafty day!
2 Comments
Deb Olson
I am looking for the Dimensional Doilies die—-do you know where I can get it?
Yana Smakula
Deb, the Dimensional Doilies collection isn’t live yet. It will go live in Spring