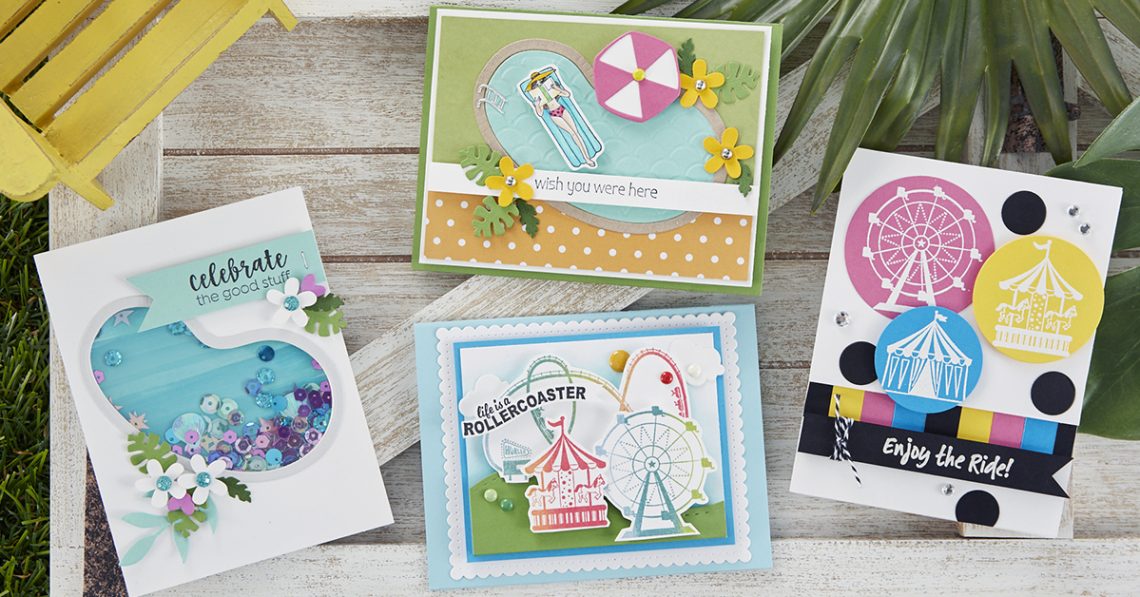
Happy Place Project Kit is Here!
Hello Spellbinders’ and FSJ fans! Our Happy Place Project Kit is here!
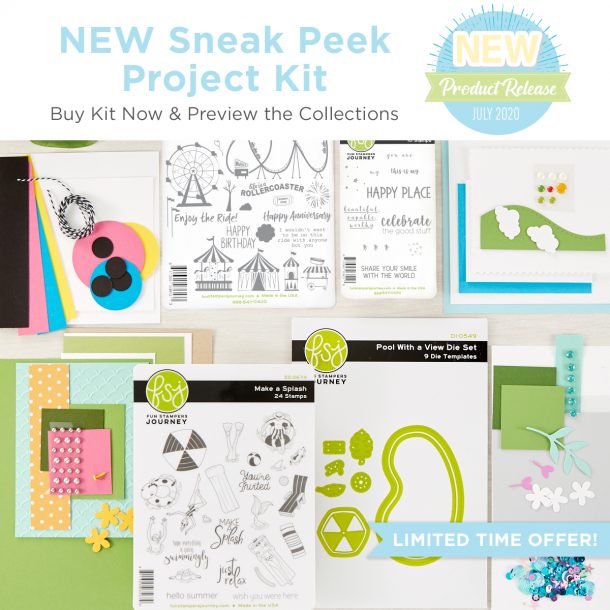
This Happy Place Project Kit is the perfect way to get your hands on early products from the upcoming July Collection. This kit comes with an assortment of THREE stamp sets, ONE die set, and a card making project kit to make FOUR cards.
Also included are full color instructions and an online Video Tutorial. You will be guided through every step of the way as your create die cut projects.
Included in Project Kit:
- Make a Splash Stamp Set SS-0674
- Pool with a View Die Set DI-0549
- Share Your Smile Stamp Set AT-0360
- Enjoy the Ride Stamp Set SS-0692
- Kit Materials to create FOUR Cards
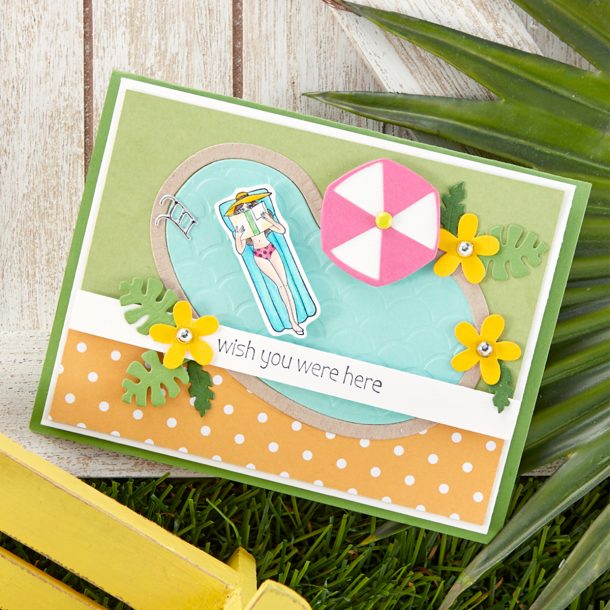
Wish You Were Here Card
Finished Size: 5 1/2” x 4 1/4”
Instructions:
- Fold Limeade Splash in half to create card base, pop up Whip Cream panel to card base.
- Die cut: Embossed Cool Pool panel with pool die; Oatmeal Cookie panel with pool edge die; Watermelon Fusion and Whip Cream pieces with umbrella die; Limeade Splash and Fresh Forest with both leaf dies; Mirror Silver with ladder die (Flowers are die cut for you).
- Stamp floating lady stamp on Whip Cream cardstock with Black Licorice ink, color with Color Burst pencils, detail cut image.
- Stamp sentiment on Whip Cream strips, trim to 1/2”.
- Assemble card by adhering Lemongrass and polka dot strip to Whip Cream panel (*Tip: adhere two pieces together and trim to 3 7/8” X 5 1/8” before adhering).
- Adhere pool, pool edge and ladder to card front; adhere sentiment to card front covering seam of polka dot print using foam adhesive.
- Adhere umbrella(s) together using Craft Glue and layer remaining elements on card front by adhering with Craft Glue and/or foam adhesive (see photo).
- Embellish with Fashion Silver dot.
Supplies:
STAMPS: Make a Splash SS-0674; DIE SETS: Pool with a View DI-0549, Spring Bloom Minis DI-0008; EMBOSSING FOLDER: Layered Scallops EF-0018; CARDSTOCK: Limeade Splash CS-0020, Lemongrass CS-0019, Cool Pool CS-0118, Watermelon Fusion CS-0039, Lemon Drop CS- 0018, Whip Cream CS-0040, Fresh Forest CS-0011, Oatmeal Cookie CS-0023, Mirror Silver CS-0137, Good Vibes Prints PP-0056; INKS: Black Licorice IP-0041; COLORS: Journey Color Burst Pencils JM-0077 ACCESSORIES: Fashion Silver AC-0293, Be Bright Brads AC-0217; BASIC SUPPLIES: Easy Glide Permanent Adhesive Runner AD-0081, Journey Craft Glue AD-0111, Journey Foam Squares Small AD-0084, Crease Tool TO-0040.
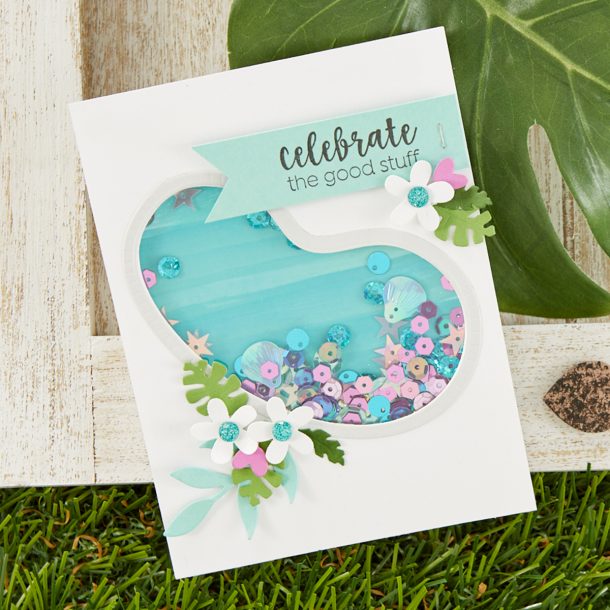
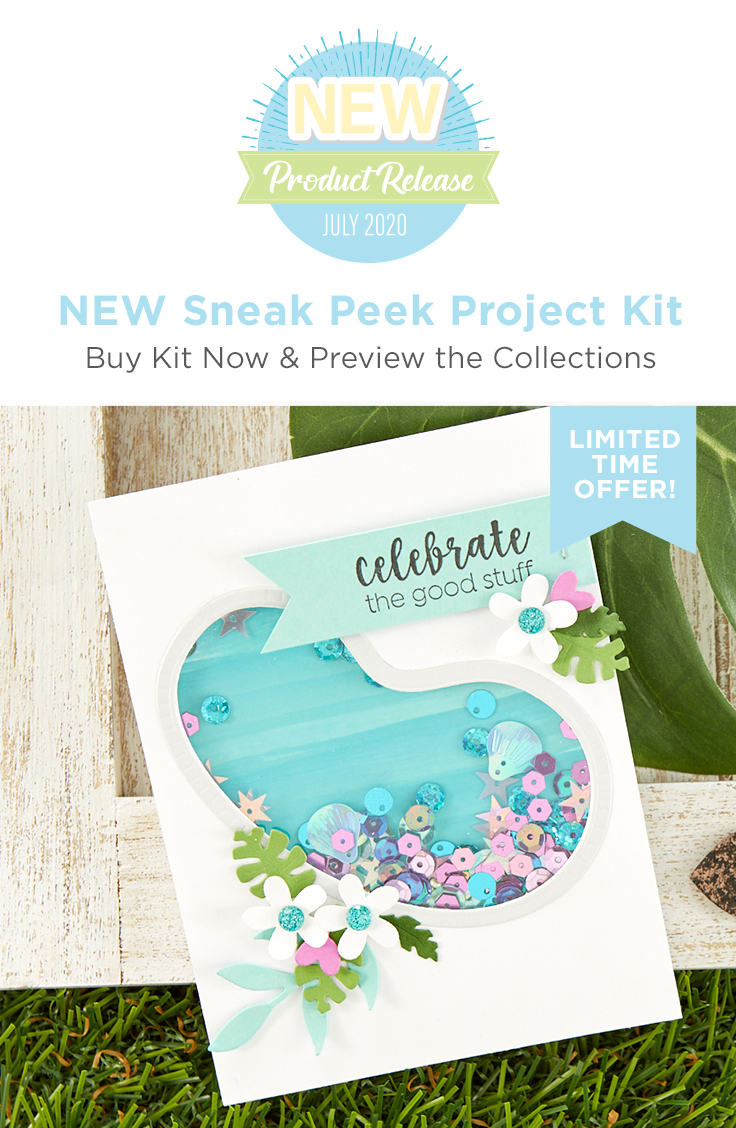
Celebrate The Good Stuff Card
Finished Size: 4 1/4” x 5 1/2”
Instructions:
- Fold Whip Cream cardstock in half to create card base.
- Die cut Whip Cream panel using pool die (position as seen in photo); also die cut pool edge from Tin Pail cardstock and adhere to die cut panel
Using both Turbo Teal and Cool Pool Liquid Colors, add color to non-porous surface and add small amount of water to dilute colors; brush color on extra panel of Whip Cream cardstock using a square paintbrush – leave “strokes” of color to resemble water, let dry. - Create shaker card panel by adhering Clearview Sheet to back of die cut panel; use foam adhesive to completely surround “pool” area; also add foam adhesive to edge of panel.
- Adhere colored panel to card front, pour desired amount of sequins to colored area, keeping sequins in center of “pool”; carefully adhere clear window panel to card front.
- Stamp sentiment on Cool Pool strip with Black Licorice ink, trim into banner shape, add staple for accent and adhere to card front with foam adhesive.
- Die cut leave(s) from both Limeade Splash and Fresh Forest cardstock, layer with pre-cut flowers and branch to card front with foam adhesive
Embellish flower centers with blue sparkle dots.
Supplies:
STAMPS: Share Your Smile AT-0360; DIE SETS: Pool with a View DI-0549, Spring Bloom Minis DI-0008; CARDSTOCK: Whip Cream CS-0040, Cool Pool CS-0118, Cosmic Grape CS-0122, Limeade Splash CS-0020, Fresh Forest CS-0011, Tin Pail CS-0147; INKS: Black Licorice IP-0041, Turbo Teal Liquid Color IP-0163, Cool Pool Liquid Color IP-0140; ACCESSORIES: Splash Zone Sequins AC-0424, Summer Play Sparkles AC-0280; TOOLS: Journey Stapler TO-0118, Silver Staples TO-0120, Square Paintbrush TO-0102; OTHER: Clearview Sheets CS-0121; BASIC SUPPLIES: Easy Glide Permanent Adhesive Runner AD-0081, Journey Craft Glue AD-0111, Journey Foam Squares Small AD-0084, Crease Tool TO-0040.
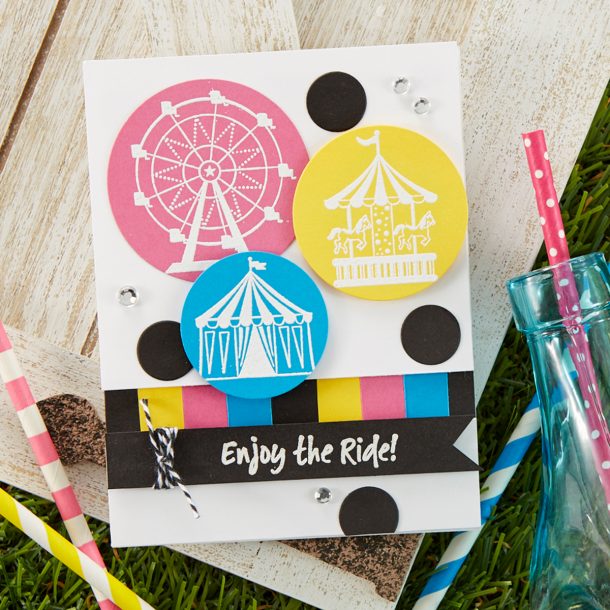
Enjoy The Ride Card
Finished Size: 4 1/4” x 5 1/2”
Instructions:
- Fold Whip Cream cardstock in half to create card base.
- Trim Whip Cream panel 1” from bottom of panel, then remove 1/2” from remaining panel to create card front (see photo).
- Trim Lemon Drop, Watermelon Fusion, Black Licorice and Beach Ball cardstock into 1/2” strips; adhere strips to small Whip Cream strip to create background (alternate colors as desired).
- To assemble card, adhere colorful strip so it shows in “window” between (2) Whip Cream panels, then adhere panels with foam adhesive.
- Stamp amusement rides with Clear Pigment Ink to (3) cardstock circles: ferris wheel on Watermelon Fusion, carousel on Lemon Drop and tent on Beach Ball; heat emboss with white powder, repeat process with “Enjoy the Ride” sentiment on Black Licorice strip.
- Trim sentiment strip into banner shape and tie twine around left side of strip.
- Adhere ferris wheel and black dots on card front; adhere carousel, tent and sentiment strip with foam adhesive.
- Embellish with cut rhinestone.
Supplies:
STAMPS: Enjoy the Ride SS-0692; DIE SETS: Journey Circles DI-0039, Circle Around DI-0466; CARDSTOCK: Whip Cream CS-0040, Watermelon Fusion CS-0039, Lemon Drop CS-0018, Beach Ball CS-0088, Black Licorice CS-0003; INK & EMBOSSING POWDER: Clear Pigment Ink IP-0102, White Embossing Powder IP-0098; ACCESSORIES: Cut Rhinestones AC-0023, Black Licorice Twine AC-0267; BASIC SUPPLIES: Easy Glide Permanent Adhesive Runner AD-0081, Journey Craft Glue AD-0111, Journey Foam Squares Small AD-0084, Crease Tool TO-0040.
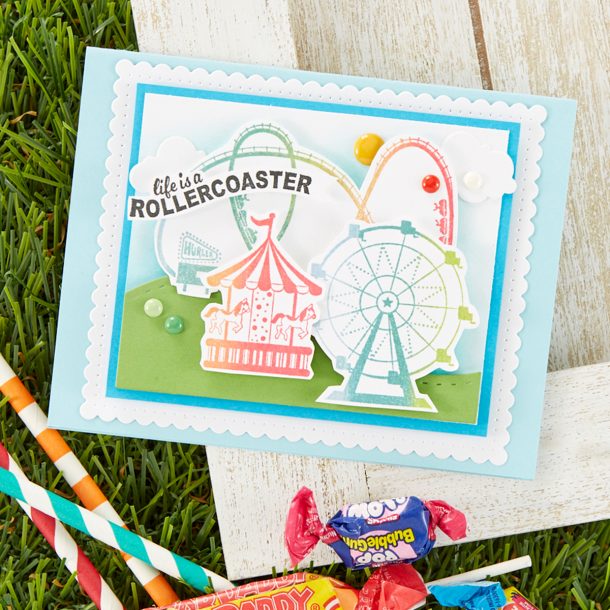
Life is a Rollercoaster Card
Finished Size: 4 1/4” x 5 1/2”
Instructions:
- Fold Pool Play in half to create card base.
- Adhere scallop rectangle to card base, pop up Beach Ball panel on card front using foam adhesive.
- Add Beach Breeze ink to smaller Whip Cream panel using a fusion ink sponge.
- Adhere die cut hill to Whip Cream inked panel using foam adhesive.
- Load Liquid Color ink onto Create-A-Palette ink pad and use pad to stamp roller coaster, carousel and ferris wheel (*Tip: use different portions of ink pad to create different colors on stamped images).
- Detail cut stamped images; adhere clouds and amusement rides to Whip Cream panel using foam adhesive.
- Stamp sentiment on Whip Cream cardstock using Black Licorice ink; detail cut and trim into banner shape and adhere over roller coaster.
- Adhere completed panel to Beach Ball mat; embellish with enamel dots.
Supplies:
STAMPS: Enjoy the Ride SS-0692; DIE SETS: Spring Build-A-Scene DI-0525, Sweet Home Accents DI-0523, Fancy Edge Scallop Rectangles S4-905; CARDSTOCK: Whip Cream CS-0040, Pool Play CS-0105, Beach Ball CS-0088, Limeade Splash CS-0020; INKS: Black Licorice IP-0041, Beach Breeze IP-0044, Create-A-Palette Ink Pad IP-0139 LIQUID COLORS: Candy Apple IP-0129, Catalina Splash IP-0130, Limeade Splash IP-0133, Lemon Drop IP-0132, Orange Creamsicle IP-0135; ACCESSORIES: Party Burst Dots AC-0350, Sweet Candy Drops AC-0275; TOOLS: Fusion Ink Sponges JM-0014; BASIC SUPPLIES: Easy Glide Permanent Adhesive Runner AD-0081, Journey Craft Glue AD-0111, Journey Foam Squares Small AD-0084, Crease Tool TO-0040.
Happy Place Project Kit – Video Tutorial
Watch video tutorial using this kit below or on Youtube:

One Comment
Veronica
I am in love with those pool cards! So pretty and fun!