Joy and Wonder Project Kit is Here!
Hello Spellbinders’ and FSJ fans! Our Joy and Wonder Project Kit is here!
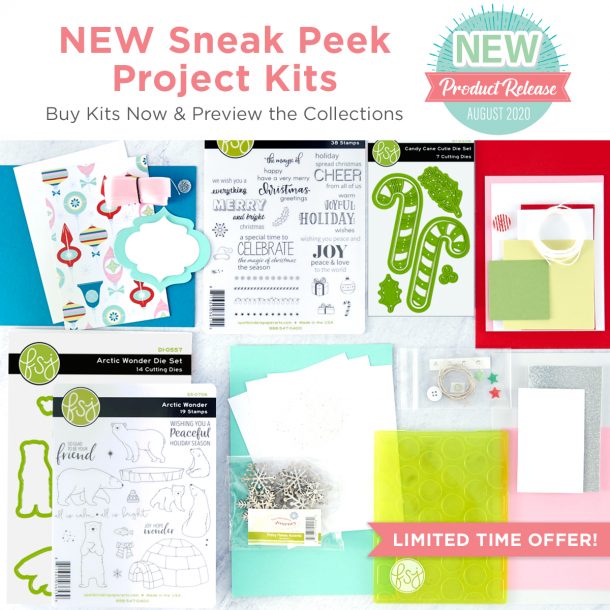
This Joy & Wonder Project Kit is the perfect way to get your hands on early products from one of the upcoming August Holiday Collections. This kit comes with an assortment of ONE Embossing Folder, TWO die sets, TWO Stamp Sets, and a card making project kit to make FOUR cards.
Also included are full color instructions and an online Video Tutorial. You will be guided through every step of the way as your create die cut projects.
Included in Project Kit:
- Big Dot Embossing Folder EF-0044
- Candy Cane Cutie Die Set DI-0552
- Arctic Wonder Die Set DI-0557
- Holiday Sentiment Stacks Stamps Set SS-070
- Arctic Wonder Stamp Set SS-0706
- Kit Materials to create FOUR Cards
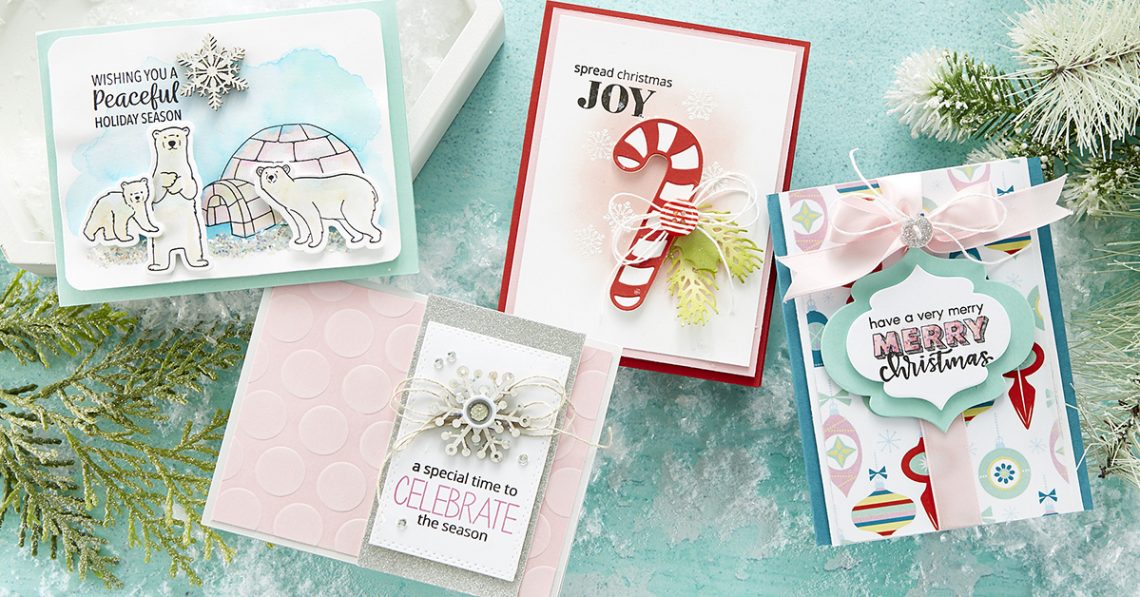
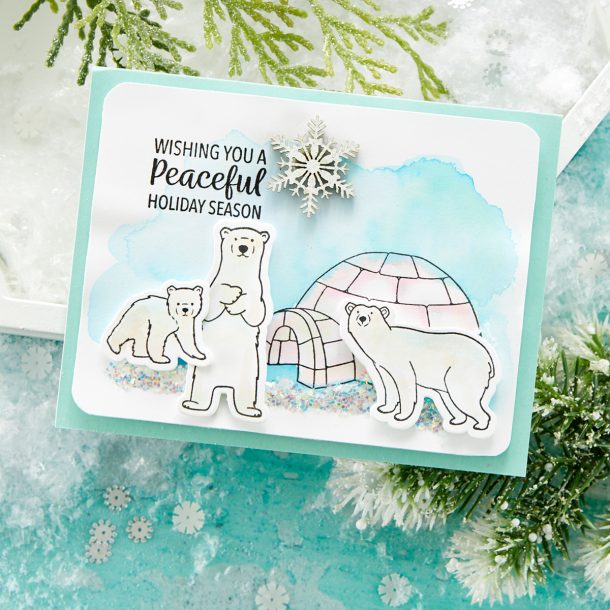
Peaceful Holiday Season Card
Finished Size: 5 1/2” x 4 1/4”
Instructions:
- Stamp igloo image to right side of Whip Cream panel (see photo) and stamp (3) polar bears on Whip Cream cardstock using Black Licorice ink; die cut polar bears with coordinating dies.
- Color background of igloo panel using Jane Davenport INKredible inks (or other water based ink), let dry.
- Lightly watercolor igloo and polar bears using Color Splash pencils (or color with medium of your choice).
- Apply Journey Glaze along edge of “ground” below igloo and sprinkle Sparkle Cuts into wet glaze, let dry thoroughly.
- Stamp sentiment on water colored Whip Cream panel in upper left corner using Black Licorice ink.
- Assemble card by adhering polar bears to card base with foam adhesive; adhere snowflake to right of sentiment.
Supplies:
STAMPS: Arctic Wonder SS-0706; DIES: Arctic Wonder DI-0557; CARDSTOCK: Whip Cream CS-0040, Cool Pool CS-0118; INKS: Black Licorice IP-0041; COLORS: Jane Davenport INKredibleTM Inks (Fresh Air JD-127, Fairy Floss JD-123, Violet Syrup JD-132), Color Splash Pencils JM-0078; ACCESSORIES: Pretty Flakes Accents AC-0240, Sparkle Cuts AC-0151; BASIC SUPPLIES: Journey Glaze AD-0002, White Liner Tape AD-0001, Easy Glide Permanent Adhesive Runner AD-0081, Journey Foam Squares Medium AD-0085, Journey Craft Glue AD-0111, Crease Tool TO-0040.
Merry Christmas Card
Finished Size: 4 1/4” x 5 1/2”
Instructions:
- Fold Blue Lagoon cardstock in half to create card base; trim patterned paper to 51/2” X 33/4” and adhere to Whip Cream panel, set aside.
- Stamp stacked sentiments on Whip Cream die cut, stamp “merry” first, then layer top and bottom sentiments; color in “merry” with pink pencil, add Journey Glaze and lightly sprinkle Sparkle Cuts on Glaze, let dry.
- Wrap Bubble Gum ribbon around patterned panel, tie in a bow at top of panel, trim ribbon ends, add Whip Cream Thread around ribbon bow and thread Celebrations button through (tying off twine behind button).
- Adhere Cool Pool die cut below ribbon bow with foam adhesive and then add stamped die cut to center with foam adhesive.
- Affix finished panel to card base with foam adhesive.
Supplies:
STAMPS: Holiday Sentiments Stacks SS-0705; DIES: Special Day Tags Set DI-0468; CARDSTOCK: Holly Jolly Prints PP-0071, Whip Cream CS-0040, Blue Lagoon CS-0004, Cool Pool CS-0118; INKS: Black Licorice IP-0041; COLORS: Journey Color Burst Pure Color Pencils JM-0077; ACCESSORIES: Bubble Gum Satin Ribbon AC-0105, Whip Cream Thread AC-0128, Celebration Buttons AC-0226, Sparkle Cuts AC-0151; BASIC SUPPLIES: Journey Glaze AD-0002, White Liner Tape AD-0001, Easy Glide Permanent Adhesive Runner AD-0081, Journey Foam Squares Medium AD-0085, Journey Craft Glue AD-0111, Crease Tool TO-0040.
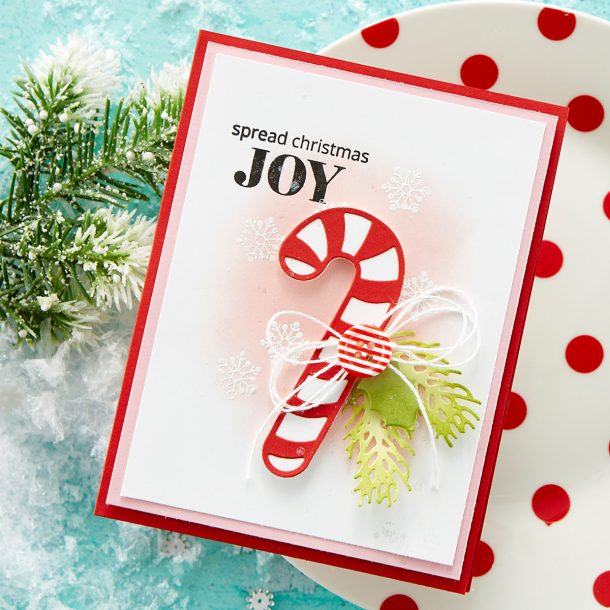
Spread Christmas Joy Card
Finished Size: 4 1/4” x 5 1/2”
Instructions:
- Fold Candy Apple cardstock in half to create card base.
- Sponge Bubble Gum ink in center of Whip Cream panel, lightly fade ink from center to outer edge of oval (see photo), let dry.
- Stamp stacked sentiment using Black Licorice ink in upper left of inked panel.
- Stamp small snowflakes over inked panel using Clear Pigment ink, heat emboss with white powder.
- Die cut candy cane from Candy Apple and Whip Cream cardstock, adhere layer together; die cut pine boughs from Sweet Pear cardstock and holly leaf from Lemongrass, sponge Lemongrass ink on edges of both.
- Tie triple bow using Whip Cream thread, layer die cut elements to inked panel using foam adhesive and adhere bow to center of candy cane; adhere button to center of bow.
Supplies:
STAMPS: Holiday Sentiment Stacks SS-0705; DIES: Candy Cane Cutie; DI-0552 CARDSTOCK: Whip Cream CS-0040, Bubble Gum CS-0099, Candy Apple CS-0007, Sweet Pear CS-0095, Lemongrass CS-0019; INKS: Black Licorice IP-0041, Bubble Gum IP-0058, Lemongrass IP-0022, Clear Pigment IP-0102, White Embossing Powder IP-0098, Sparkle Silk IP-0126; ACCESSORIES: Whip Cream Thread AC-0128, Candy Cane Buttons AC-0379; TOOLS: Fusion Ink Sponges JM-0014; BASIC SUPPLIES: White Liner Tape AD-0001, Easy Glide Permanent Adhesive Runner AD-0081, Journey Foam Squares Medium AD-0085, Journey Craft Glue AD-0111, Crease Tool TO-0040.
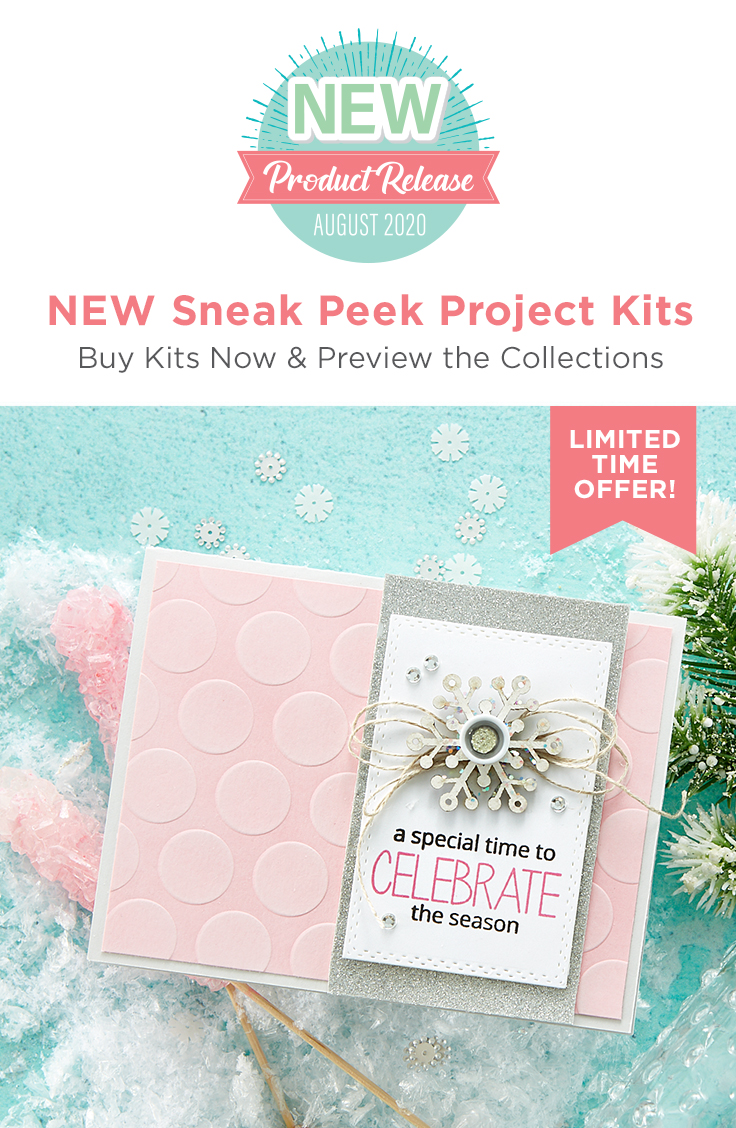
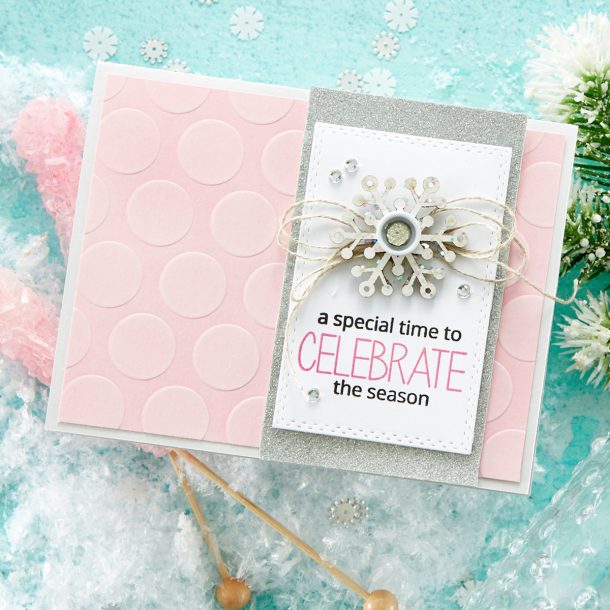
Celebrate the Season Card
Finished Size: 4 1/4” x 5 1/2”
Instructions:
- Fold Tin Pail cardstock in half to create card base; emboss Bubble Gum cardstock with Big Dot folder.
- Add ink to embossed cardstock directly to paper by holding ink pad level with paper and lightly rubbing ink across raised surfaces, let dry then trim to 4” X 51/4”.
- Stamp stacked sentiment on Whip Cream die cut using both Black Licorice and Watermelon Fusion inks.
- Adhere Sparkle Drop to center of button and button to center of snowflake, let dry.
- Assemble card by adhering embossed panel to card base, then adhering sparkle trio strip to right side of card front.
- Pop up stamped die cut to center of sparkle paper, tie a triple bow with Natural Thread and adhere bow and snowflake to die cut; embellish with Cut Rhinestones.
Supplies:
STAMPS: Holiday Sentiment Stacks SS-0705; DIES: Frame It DI-0503; EMBOSSING FOLDER: Big Dot EF-0044; CARDSTOCK: Whip Cream CS-0042, Bubble Gum CS-0112, Tin Pail CS-0153, Sparkle Trio ST-1047; INKS: Black Licorice IP-0041, Whip Cream IP-0009, Watermelon Fusion IP-0027 ACCESSORIES: Pretty Flakes Accents AC-0240, Natural Thread AC-0133, Button Up AC-0224, Cut Rhinestones AC-0023, Sparkle Drops AC-0022; BASIC SUPPLIES: White Liner Tape AD-0001, Easy Glide Permanent Adhesive Runner AD-0081, Journey Foam Squares Medium AD-0085, Journey Craft Glue AD-0111, Crease Tool TO-0040.
Joy and Wonder Project Kit – Video Tutorial
Watch video tutorial using this kit below or on Youtube:


One Comment
susieprovince
Nice work. Never too early for Christmas ideas.