The Warm Holiday Wishes Project Kit | Cardmaking Inspiration with Jennifer Colacicco | Video
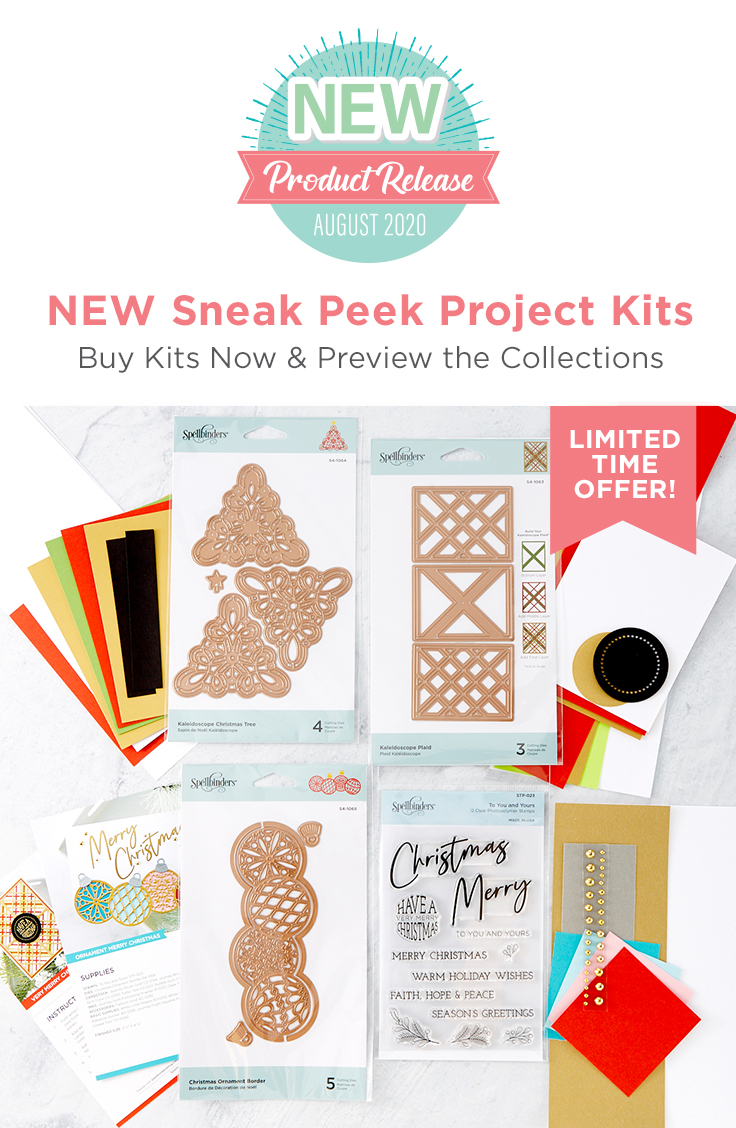
The Warm Holiday Wishes Project Kit is here! This Warm Holiday Wishes Project Kit is the perfect way to get your hands on early products from one of the upcoming August Holiday Collections. This kit comes with an assortment of THREE die sets, s clear stamp set and, a card making project kit to make THREE cards.

Included in Project Kit:
- Kaleidoscope Plaid Die Set S4-1063
- Kaleidoscope Christmas Tree Die Set S4-1064
- Christmas Ornament Border Die Set S4-1068
- To You and Yours Clear Stamp Set STP-023
- Kit Materials to create THREE Cards
Also included are full color instructions and an online Video Tutorial. You will be guided through every step of the way as your create die cut projects.
Join designer Jennifer Colacicco as she shares 3 beautiful cards created using this kit. Watch video below or on Youtube:
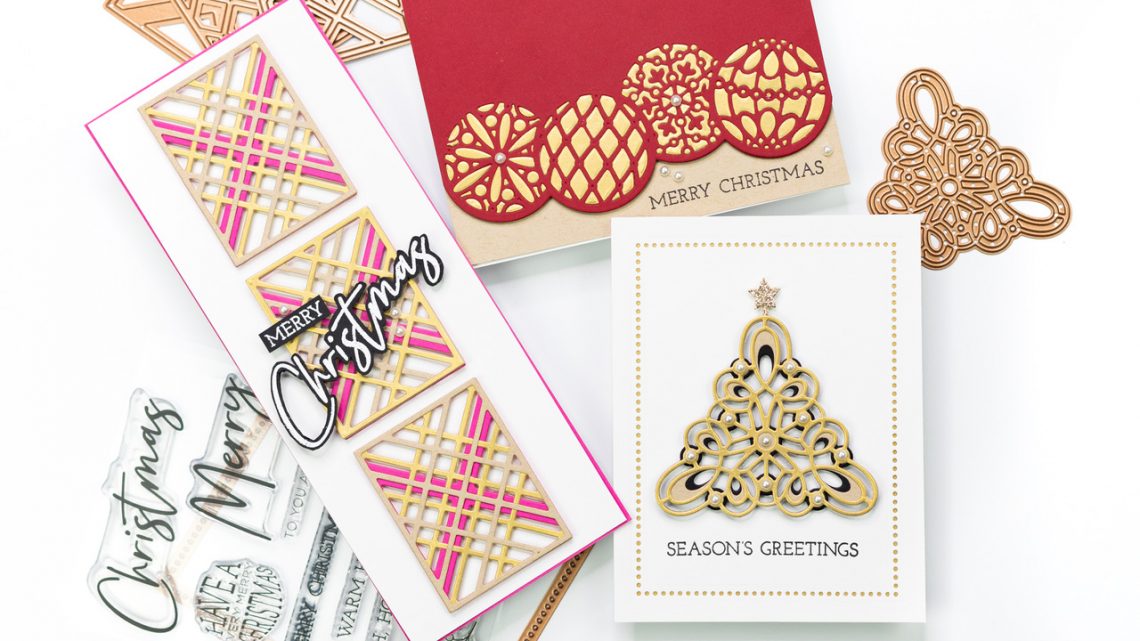
Kaleidoscope Christmas Tree Card

- Die cut each layer of the Kaleidoscope Tree from a different color cardstock – I used FSJ Black Licorice, Oatmeal Cookie and Brush Gold.
- Die cut the star tree topper in the die set from glitter card stock.
- Adhere each layer of the tree together with liquid glue and set aside to dry.
- Trim a panel of Whip Cream cardstock to 4.25” x 5.5” and die cut with a dotted rectangle from Essential Rectangles.
- Adhere a panel of Brush Gold cardstock to the back of the Whip Cream panel so that the gold peeps through the die cut holes.
- Stamp the sentiment from the To You and Yours stamp set using FSJ Black Licorice ink.
- Adhere the Kaleidoscope Tree and star with foam squares trimmed to size to the centre of the panel and affix to a card base.
- Affix pearls.
Christmas Ornaments Card
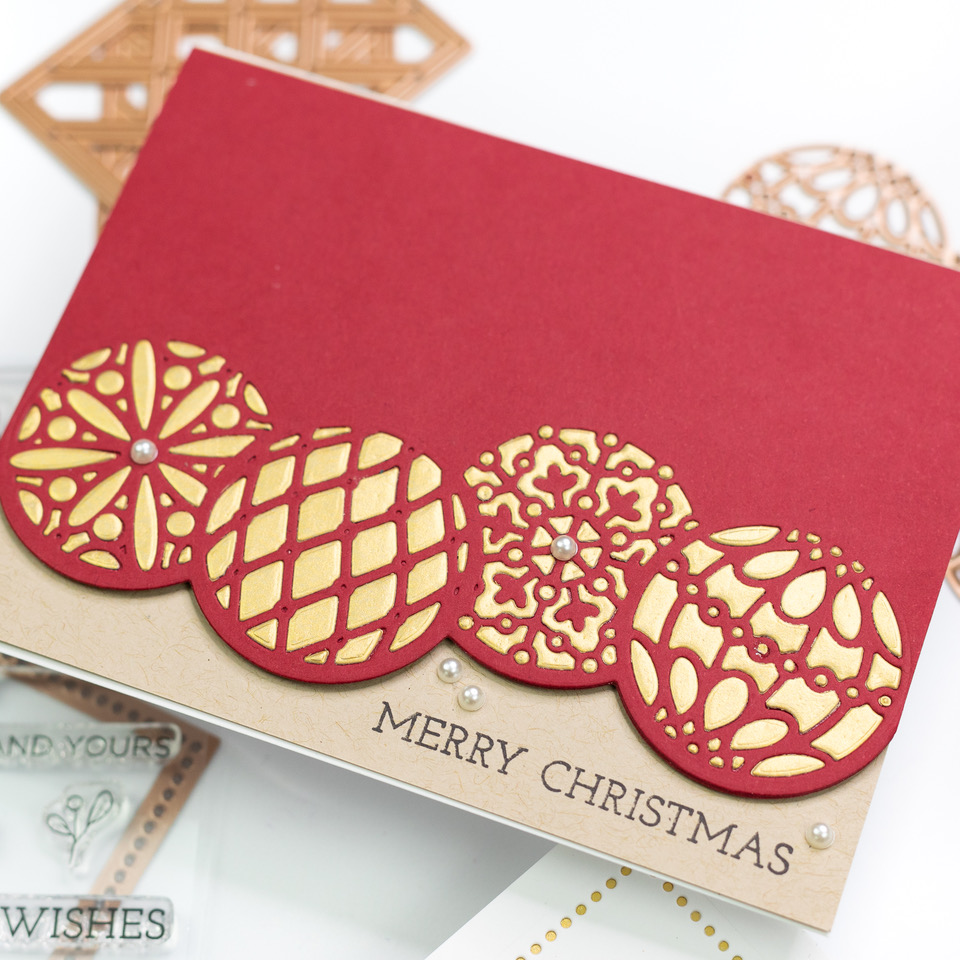
- Trim a panel of FSJ Cranberry Bliss cardstock to two 4.25 x 5.5” panels.
- Die cut one panel with the Christmas Ornament Border approximately half an inch from the right hand side of the panel.
- Use the right hand side border edge to trim the same panel to create an edge to the ornaments.
- Use the right hand side border edge only to trim the second panel, lining it up on your Platinum 6 die cutting machine using the first panel so that the panels align. Completely coat this panel with dry adhesive and adhere the panels together.
- Die cut a panel of FSJ Brush Gold with the Christmas Ornament Border die and keep the die and pieces within the die as much as possible.
- Line up the cardstock and/or the die with the Brush Gold pieces still inside the die/cardstock over the top of the Cranberry Bliss panel and use your Tool-’n-One to push the pieces into the dry adhesive. Adhere any stray pieces and push all Into place.
- Mount the panel onto an Oatmeal Cookie panel trimmed to 5.5” x 4 1/8” with foam adhesive.
- Stamp the sentiment from the To You and Yours stamp set using FSJ Black Licorice ink and affix to a white card base.
- Affix pearls.
Kaleidoscope Plaid Slimline Card
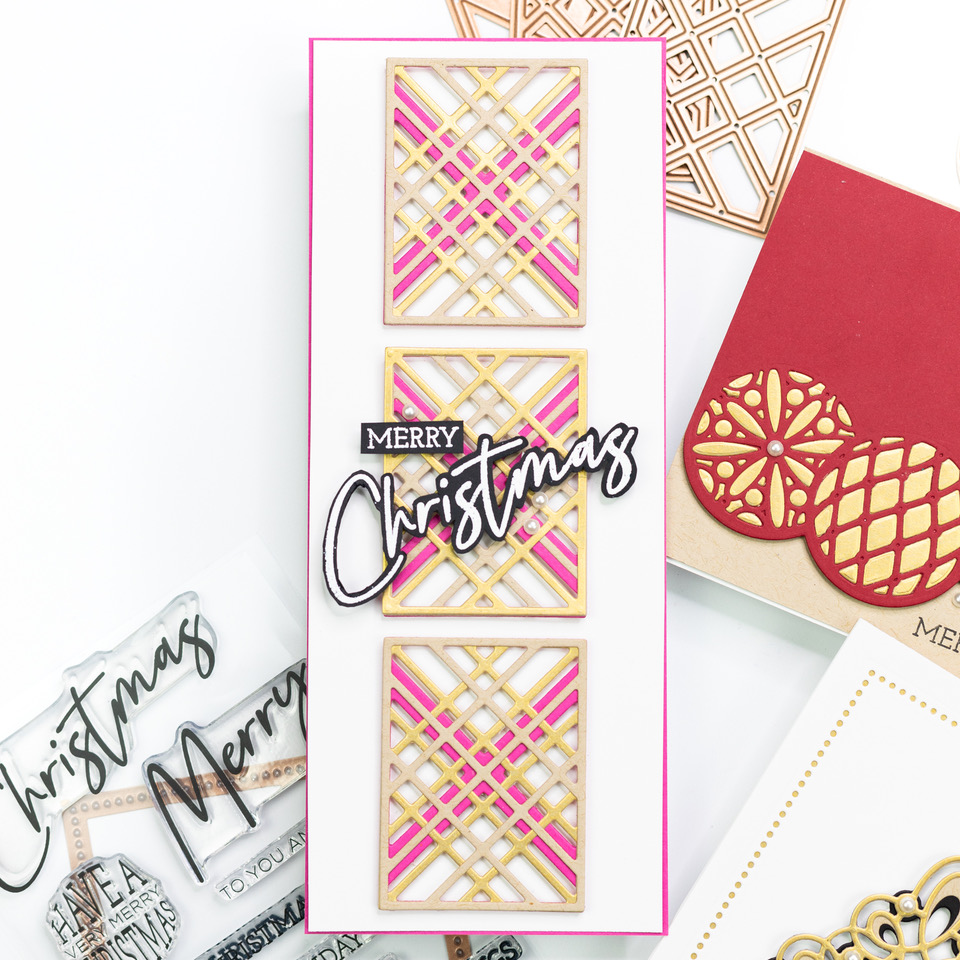
- Die cut each of the dies from the Kaleidoscope Plaid die set three times each from FSJ Oatmeal Cookie, Brush Gold and Watermelon Fusion cardstock.
- Adhere the layers together with liquid glue, swapping the order of the top layers on one of the panels.
- Trim a panel of Whip Cream cardstock to just under 8.5” x 3.5” and adhere the plaid panels down the center with foam adhesive, using a t-ruler to keep them straight and aligned.
- Affix the panel to an 8.5” x 3.5” panel of FSJ Watermelon Fusion cardstock.
- Stamp the large Celebrate sentiment and Merry Christmas sentiment from the To You and Yours stamp set using embossing ink onto FSJ Black Licorice cardstock.
- Heat emboss in white embossing powder and fussy cut out the sentiments.
- Adhere sentiment with foam adhesive and adhere to a card base.
- Affix pearls
Spellbinders Supplies:
Other supplies:
MISTI, Recollections Gold Glitter cardstock, WOW! Embossing Opaque Bright White embossing powder, WOW! Embossing ink, pearls, liquid glue.


2 Comments
susieprovince
Awesome cards. Thank you for sharing your talents. God bless.
Bonnie Thrasher
Beautiful cards. Thanks for the tutorial, I have a feeling it is going to be most helpful. Have a blessed Christmas, and stay safe.