Sparkling Christmas Collection – Cardmaking Inspiration with TaeEun Yoo
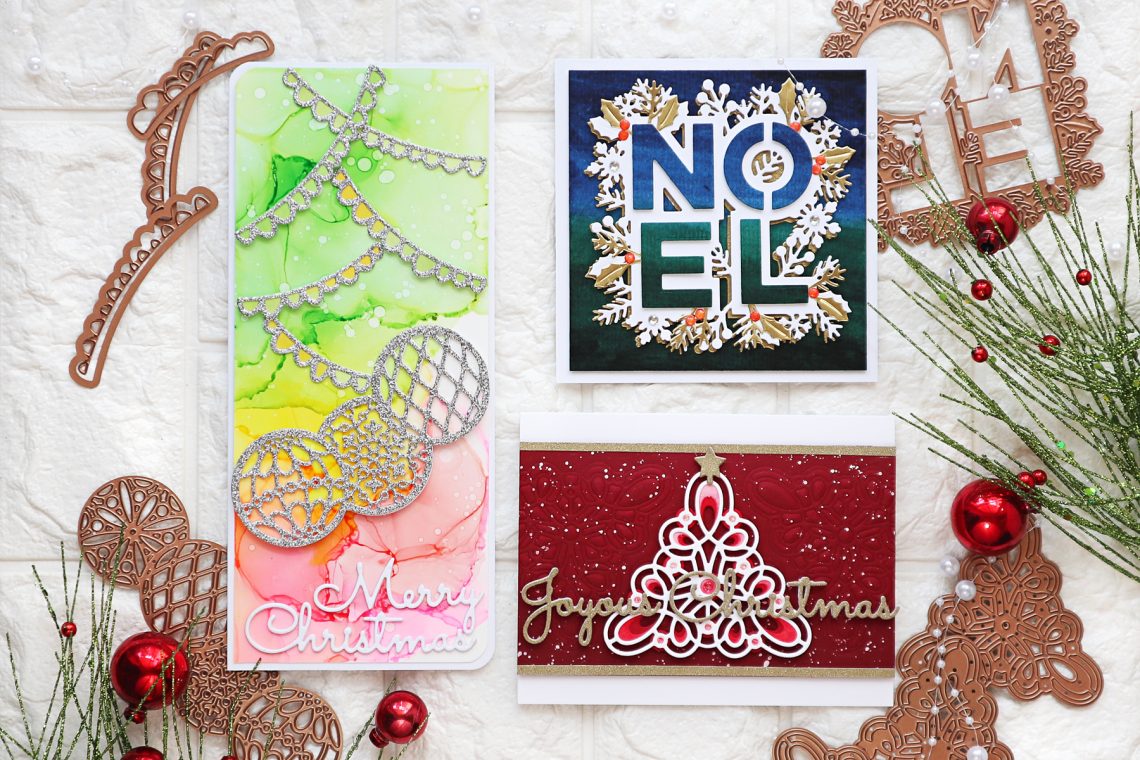
Hello crafty friends, I’m TaeEun from Rainbow in November! I’m so thrilled to be guest designing on the Spellbinders blog again! Today I’m sharing three Christmas cards I made using the Sparkling Christmas Collection! We all start making holiday cards early, right ? Better too early than too late!

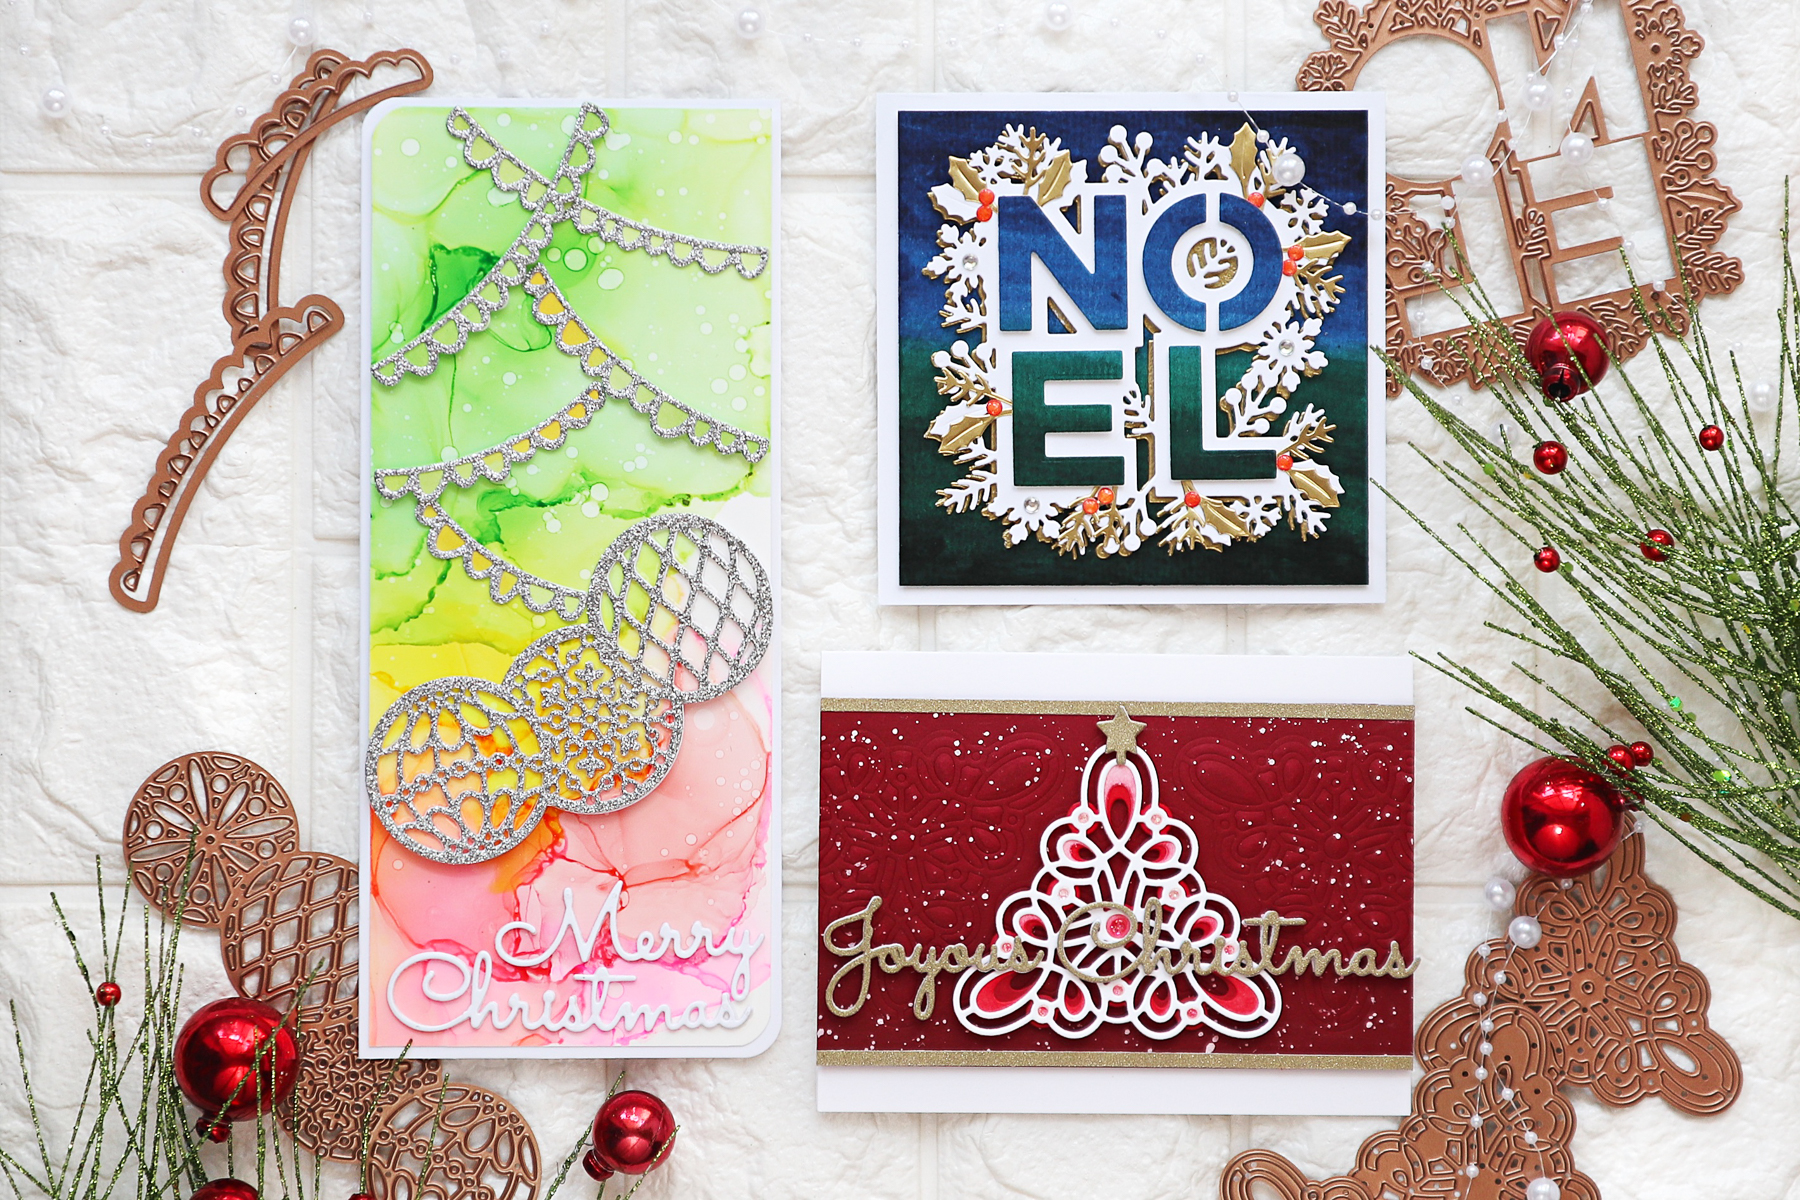
Festive Noel
My first card is featuring S4-1062 Festive Noel die set.
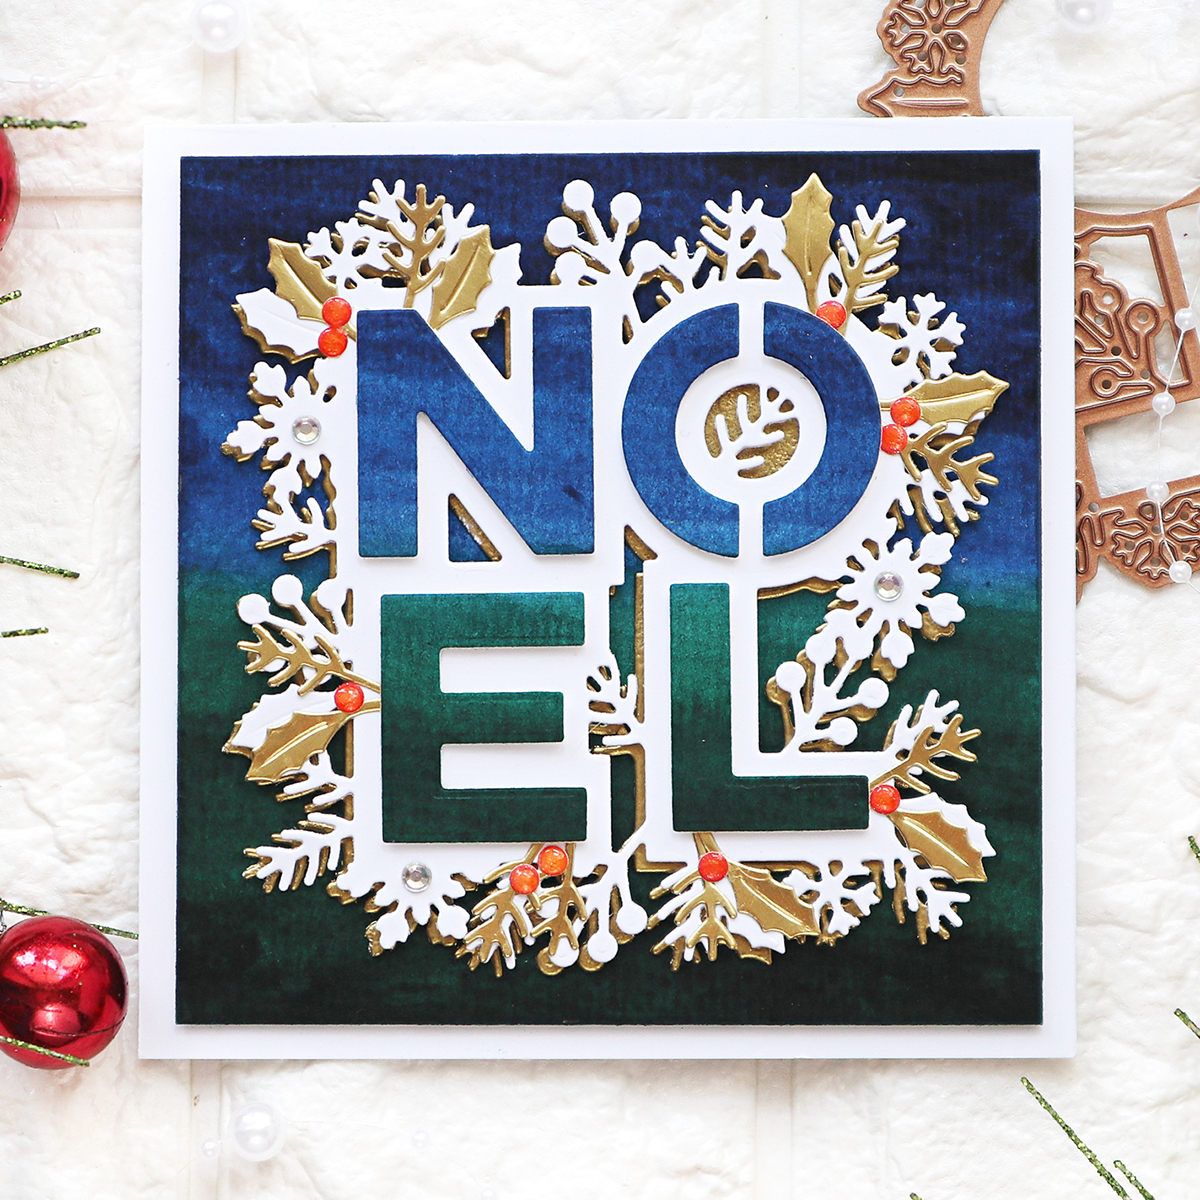
To start off I created a watercolored ombre panel which shows dark blue to dark green from the top towards the bottom. After the panel was dry I cut the panel to a 4 3/8 “ square and cut the letter NOEL from it using the dies included in the set.
The shade layer was cut two times from some heavyweight white cardstock and I gold heat embossed one of them.

I foam mounted the ombre background panel on a 4.75” square white cardbase and adhered the gold heat embossed shade layer on it. I then added the white shade layer slightly off set on the golden layer using foam tape and foam mounted the letters onto their places. I cut the small leaves from some gold foil cardstock and the berries from a red cardstock and embellished the letters with them. I finished off the card by adding some clear gems to the center of the snowflakes and Glossy Accents to the berries.
Kaleidoscope Christmas Tree
The second card is showing S4-1064 Kaleidoscope Christmas Tree and S4-1065 Christmas Mix & Match Sentiments die sets.

I started off by cutting the three layers of the Kaleidoscope Christmas Tree from some heavyweight white cardstock. I ink blended the first and the second layer in red using Candied Apple and Barn Door Distress inks keeping the bottom part and the lower layer darker.
To create the ombre background panel I ink blended the bottom part of a red cardstock panel in Barn Door and Fired Brick Distress inks. Then I dry embossed it using the third layer die of the Kaleidoscope Christmas Tree die set three times and splattered white opaque ink all over the panel.

I added thin strips of gold glitter paper on the top and bottom end of the background panel and foam mounted it on a white cardbase. I layered up the Kaleidoscope Christmas Tree and added it with the golden star to the center of the red panel.
The sentiment was cut once from the gold glitter paper and three more times from some white cardstock using Christmas Mix & Match Sentiments die set. I stacked them together and added it to the card.
Christmas Ornament Border
My last card for today is a slimline Christmas card. To make this I used S4-1068 Christmas Ornament Border, S3-399 Joyful Christmas Tree and S4-1065 Christmas Mix & Match Sentiments die sets.

To start off I’ve made the alcohol inked panel by applying R20, Y06, RV02 and YG07 Copic refills on a Yupo paper panel. I cut the panel in 3 5/8 x 8 5/8” and rounded diagonal corners. I cut the panel using the border die from the Christmas Ornament Border die set where yellow goes into pink color. I mounted the bottom part of it flat and the upper part using some foam tape on a white slimline cardbase.

As I wanted the green part of the panel to look like a Christmas tree, I used the parts of the Joyful Christmas Tree die set as tree decorations. I cut them from some silver glitter paper and layered them up on the base layers which were colored using Copic markers. I cut the three ornaments from the Christmas Ornament Border die set from the same silver glitter paper, stacked them on two layers of white die cut ornaments and added them to the card front as shown in the picture. The sentiment was cut using Christmas Mix & Match Sentiments die set from some white cardstock and adhered on the card. To finish off I applied Glossy Accents on the inside of the ornaments.
Spellbinders Supplies:
Other Supplies
Gansai Tambi watercolor, Neenah Solar white 110lb cardstock, Master’s Touch watercolor paper, Distress inks, Copic Marker Refills, Yupo paper
That’s it from me for today! I hope I was able to show you the cheerful holiday feeling of the Sparkling Christmas Collection!
Thank you for looking, crafty friends and huge thanks to Spellbinders for having me as a guest!
Wishing you a crafty day!
Hugs,
TaeEun

Classics March Inspiration | Colorful Floral Card with Kaja
Video Friday | Classics Layered Backgrounds Cards