CAS Holiday Cards with Carolyn Peeler
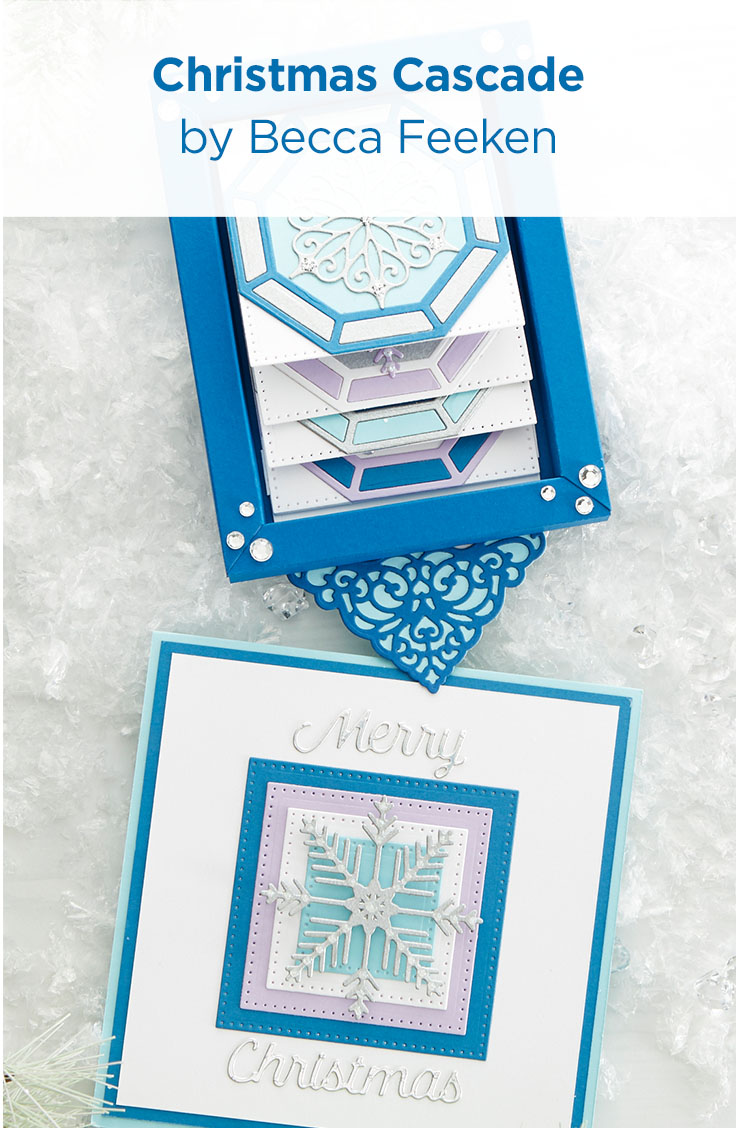
Hi there, my name is Carolyn Peeler. I’m a former scrapbooking product designer who now hosts creative women’s retreats in Tuscany, Italy. I love keeping my foot in the paper crafting world through cardmaking, so a huge thank you to the Spellbinders team for reaching out to me. I am excited to share my clean and simple (CAS) take on the beautiful Christmas Cascade collection by Becca Feeken.
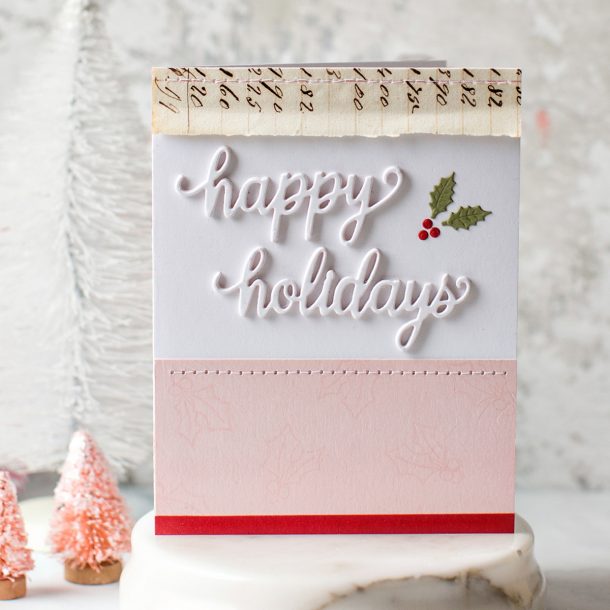
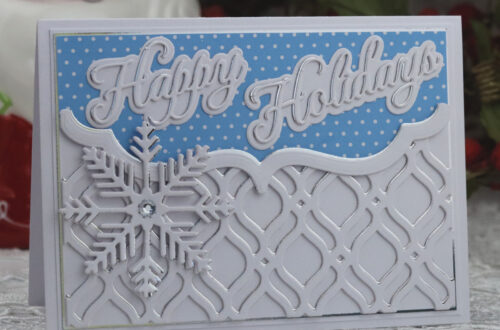
Happy Holidays Card
My first card makes use of Depth and tone on tone.
One of the highest impact things I think you can do to add visual interest to CAS cards is to add depth. On this card I did this in three places:
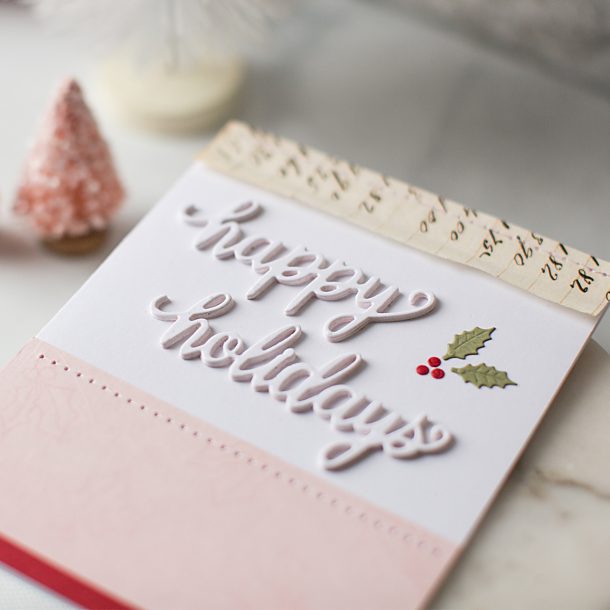
- I cut five of the “happy” and “holiday” die cut greetings from white cardstock, then glued them one on top of the other to create a chipboard-like effect. By stacking the die cuts together they cast a brilliant shadow due to their depth from the background. The more die cuts you stack, the higher your ‘faux chipboard’ will be. Typically I opt for between 3-5 layers when I am using this technique.
- I also gently rounded the bottom edge of the old ledger paper at the top of the card so that is is raised from the background. To do this, I rolled the ledger paper around a pencil. When uncoiled, it will keep that gently rounded shape. Then, I only applied glue to the upper portion of the paper, allowing the bottom half of the strip to gently curl up a bit.
- Because I love the homespun touch sewing adds to my paper crafts projects I added a straight stitch on top of the ledger and pink cardstock pieces.
I also took advantage of the subtlety of tone on tone to keep a CAS/graphic feel. The “happy” and “holiday” greetings on the front of my card are white on a white background, but in my opinion, it’s the very fact that they don’t pop from the background that helps the card look fresh and modern.
The sweet holly and berries from the die cut set add the a holiday detail, without being too intricate for this CAS design.
Finally, I chose to mimic the holly die cut by using a cute Holly stamp by Ellen Hutson and stamping it with the Versamark stamp pad onto pink cardstock. Versamark gives a beautiful watermark look resulting on yet another tone on tone element to the card.
Spellbinders Supplies:
Other Supplies
White, pink, green and red cardstock; Ellen Hutson Holiday characters Stamp set ; Versamark stamp pad; Vintage ledger page; sewing machine and white thread.
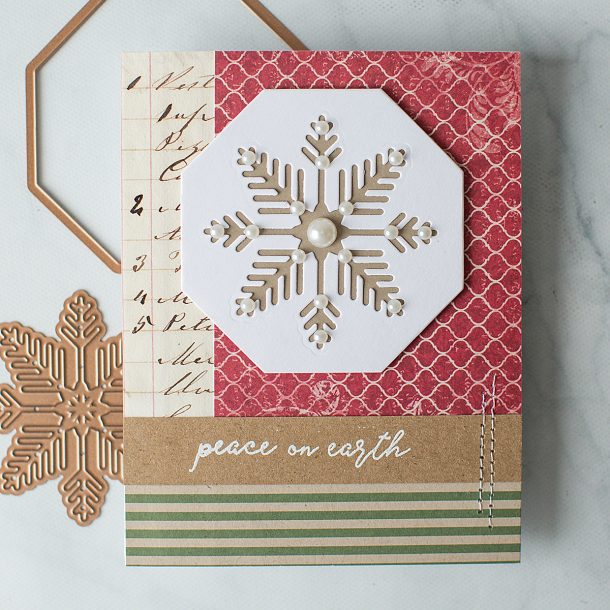
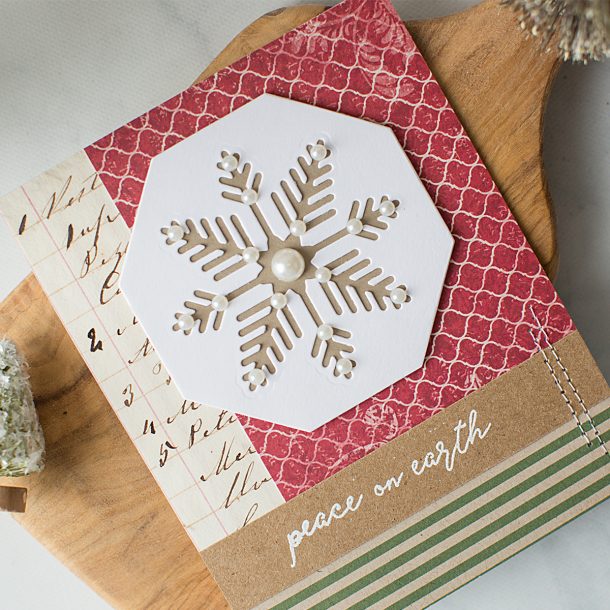
Peace On Earth Snowflake Card
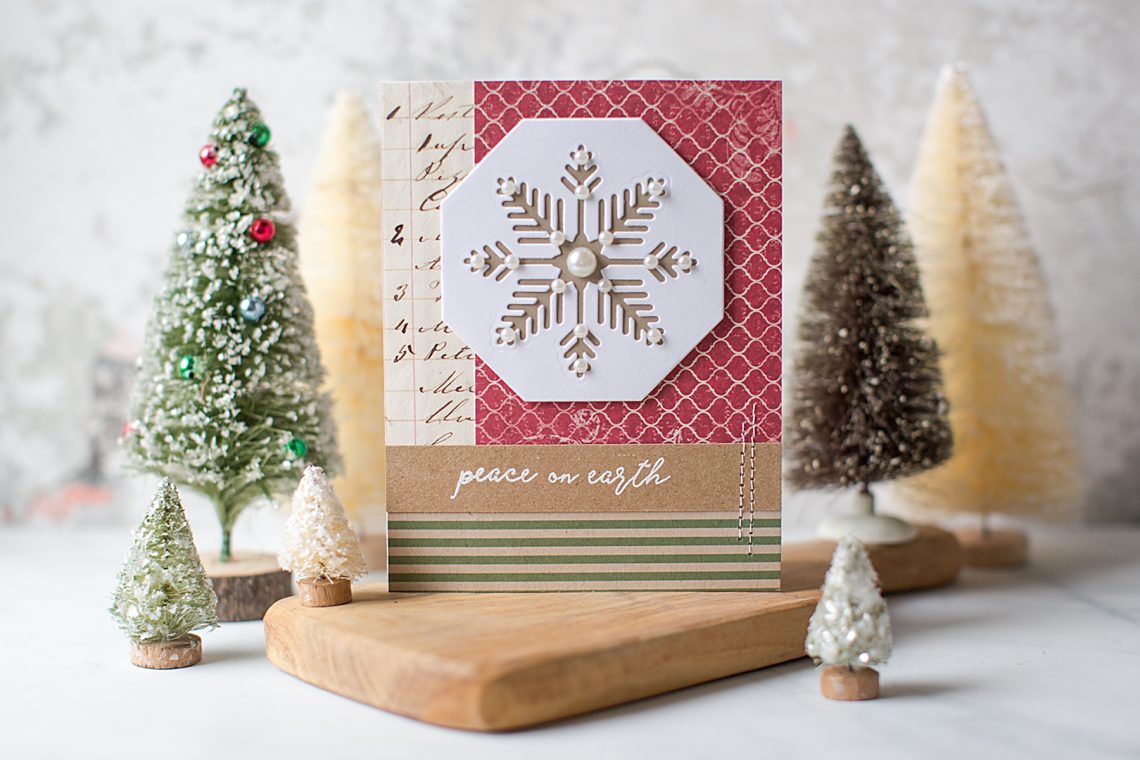
While I would classify my second card as CAS, it is unquestionably more intricate than the first card.
First, I die cut the octagon and snowflake shape from white cardstock, then I backed it with some kraft cardstock. Laying down the pearl embellishments was a fun process. You could add more – or less – pearls as the creative spirit leads. The fewer pearls the more CAS your card will appear. The more pearls, the more “fussy” your card will appear. So, it’s up to you how pearl happy you get based on the look you’re after.
I placed the patterned paper and vintage ledger paper down in block sections, then adhered the snowflake focal point, using foam adhesive, slightly off centre.
The greeting was stamped and heat embossed onto a kraft paper cardstock strip to echo the kraft paper used for the snowflake. Finally, it was glued across the front of the card, and two short lines were sewn vertically to add a finishing homespun touch.
Spellbinders Supplies:
OTHER SUPPLIES:
White and Kraft cardstock; Reverse Confetti Christmas Candles stamp; Versamark ink; White embossing powder by Ranger; Melissa France pearls; Melissa Frances Deck the Halls 6×6 paper pad; My Favorite Things Solid Stripes Kraft 6×6 paper pad; Vintage ledger page; sewing machine and white thread.
I hope you enjoyed my CAS contributions to the Spellbinder blog today – it’s always such a treat to be invited to share my creativity. I invite you to continue getting to know me, by popping over to my Instagram accounts: @carolynpeeler and @pronetowanderretreats. Happy crafting!

