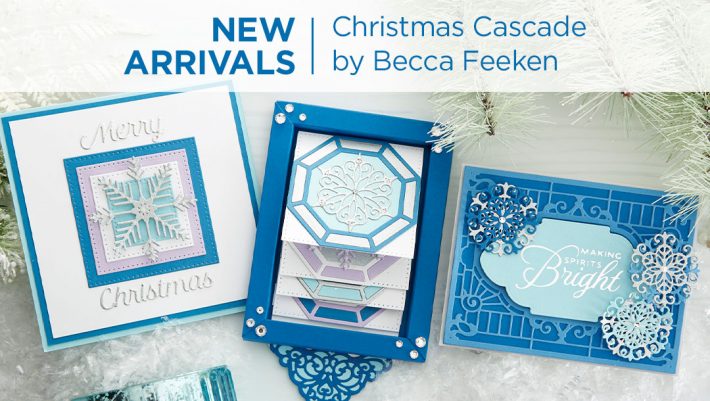
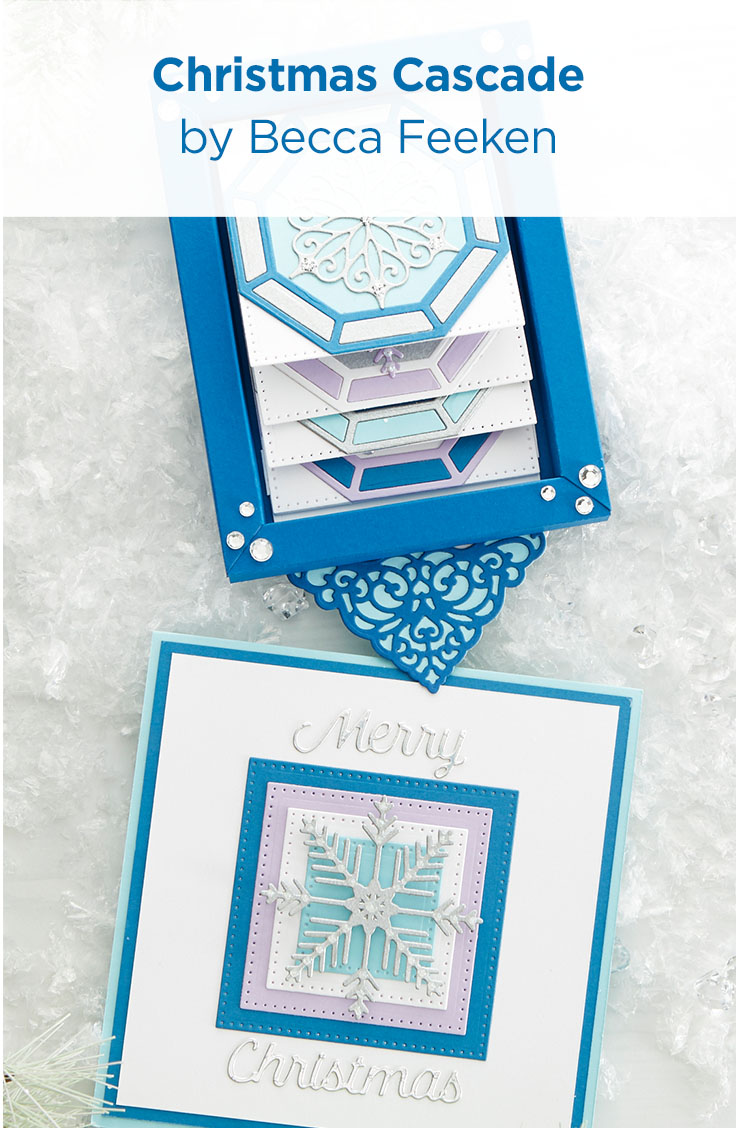
Christmas Cascade Collection by Becca Feeken – Kinetic Cards with Jean Manis
Hello crafty friends! I’m Jean, a papercrafter living in the Pacific Northwest blogging at Right as Rain. I am delighted to be sharing two kinetic cards created with the Christmas Cascade Collection by Becca Feeken at Spellbinders.
With the collection, you can make stunning and distinctive holiday cards. (Of course, kinetic cards can be created for any occasion using the Christmas Cascade Card Base). Once I started die-cutting the pieces for one card, I decided I wanted to try another with different elements and colors. Let’s take a look at both versions!

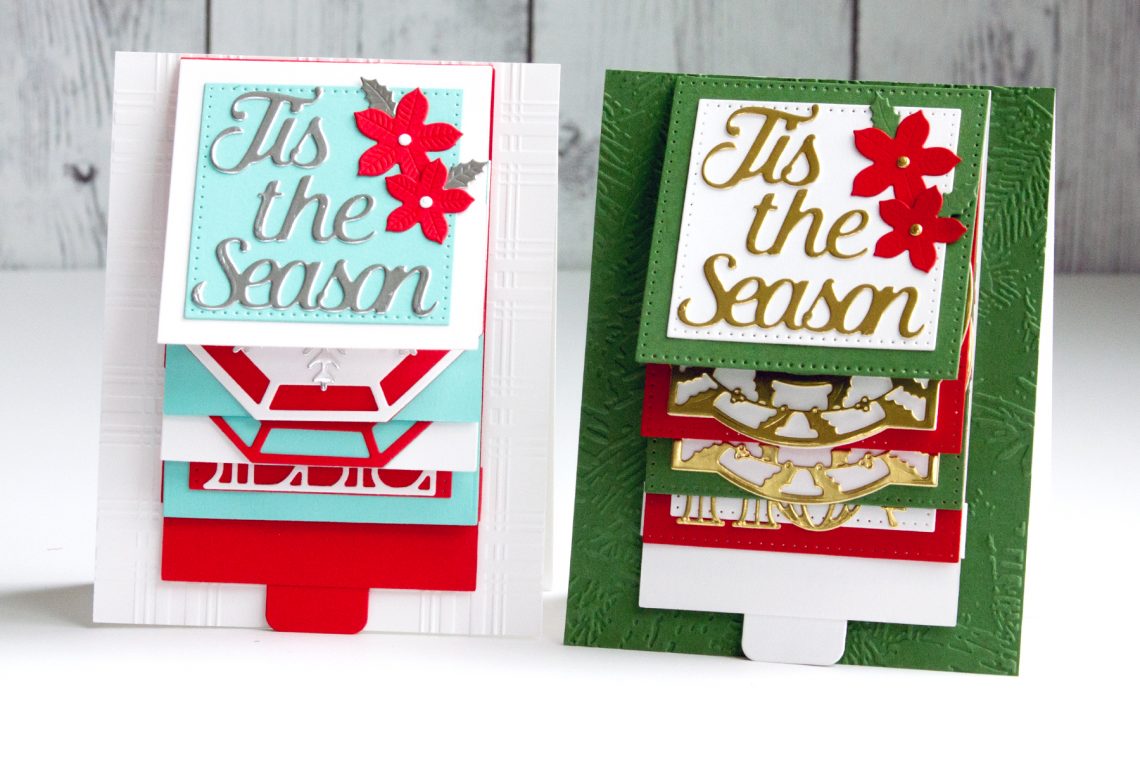
Red, White & Green Kinetic Christmas Card
The steps, in brief, to create the Cascade Card are as follows: cut and assemble the mechanism; die-cut elements for the panels; adhere elements to the panels; attach complete assembly to card base.

My first card pairs a color scheme of red, green, gold, and white with the traditional motifs in the Holly Frame Gala set.
Here are the steps:
- With the Christmas Cascade Card Base set, cut mechanism pieces from Whip Cream cardstock and squares from Candy Apple and green cardstock.
- Assemble per the instructions in this video.
- With the smaller square in the Christmas Cascade Card Base set, cut two squares from Whip Cream cardstock.
- With the Holiday Word Blocks set, cut Tis the Season and Ho Ho Ho from gold foil and the poinsettias from Candy Apple cardstock.
- With the Holly Frame Gala set: cut two leaf frames from gold cardstock, two Whip Cream shapes to go behind the gold foil frames, smaller shape from green cardstock, smaller shape from Candy Apple cardstock, bow from gold foil, ornament and string from gold foil, small circular shape from gold foil, bow and ribbon from Candy Apple cardstock, and leaves from green cardstock.
Assemble elements to the cardstock squares as follows:

- Panel One: Add Whip Cream square to green square, adhere Tis the Season, poinsettia, flower centers, and leaves.

- Panel Two: Adhere gold frame to Whip Cream background. Adhere green shape to center. Add to red square. Adhere ribbon and bow.

- Panel Three: Adhere gold frame to Whip Cream background. Adhere red shape to center. Add to green square. Adhere bow, ornament, and string.

- Panel Four: Add Whip Cream square to red square. Adhere Ho Ho Ho.
Add card mechanism green background embossed with the Evergreen Embossing Folder.

Spellbinders Supplies:
Other Supplies
Gold foil; Stampin’ Up green cardstock; bone folder; double-sided tape; glue.
Red, White & Teal Kinetic Christmas Card

For the second card, I chose a modern color scheme of red, teal, silver, and white to showcase the Snowflake Splendor set.
Here are the steps:
- Cut mechanism pieces from with Christmas Cascade Card Base die set pieces from red cardstock. With the square die in the Snowflake Splendor set, cut squares from teal and Whip Cream cardstock. (This die does not create a dot detail.) Assemble mechanism.
- With the smaller square in the Christmas Cascade Card Base set, cut a square from Whip Cream cardstock and another from red cardstock.
- With the Holiday Word Blocks set, cut Tis the Season and Noel from silver foil and the poinsettias from red cardstock.
- With the Snowflake Splendor set: cut large snowflake from silver foil, other snowflake from Whip Cream cardstock, octagon with detail from Whip Cream cardstock and red cardstock, octagon without detail from red cardstock and teal cardstock.
- With the Holly Frame Gala set: cut small circular shape from Whip Cream cardstock and poinsettia leaves from silver foil.
Assemble elements to the cardstock squares as follows:

- Panel One: Add teal square to Whip Cream square, adhere Tis the Season, poinsettia, flower centers, and leaves.

- Panel Two: Adhere octagon with detail to red octagon. Adhere to teal base. Add silver snowflake.

- Panel Three: Adhere red octagon with detail to teal octagon. Adhere to Whip Cream base. Add Whip Cream snowflake.

- Panel Four: Add red square to teal square. Adhere Noel.
Add card mechanism to Whip Cream background embossed with Pretty Plaid Embossing Folder.
Spellbinders Supplies:
Other Supplies
Silver foil; Stampin’ Up red cardstock; Taylored Expression teal cardstock; bone folder; double-sided tape; glue.
I am delighted you visited today. I hope you’re inspired to create one of these unique cards for the holidays and beyond. There’s no end to the variations possible with the Christmas Cascade Collection by Becca Feeken.


3 Comments
slangnv
Jean did an amazing job explaining each panel. Love the colors she chose and how she arranged the die cuts. Beautiful cards!
Linda W. (ScrappinBari)
Amazing cards by Jean and this looks like a brilliant set to use all year round!!
sunshine wholesale
Amazing thanks for sharing this ideas I will design my self.