Clean & Simple Foiled Cards featuring Yana’s Blooming Birthday Collection with Dilay
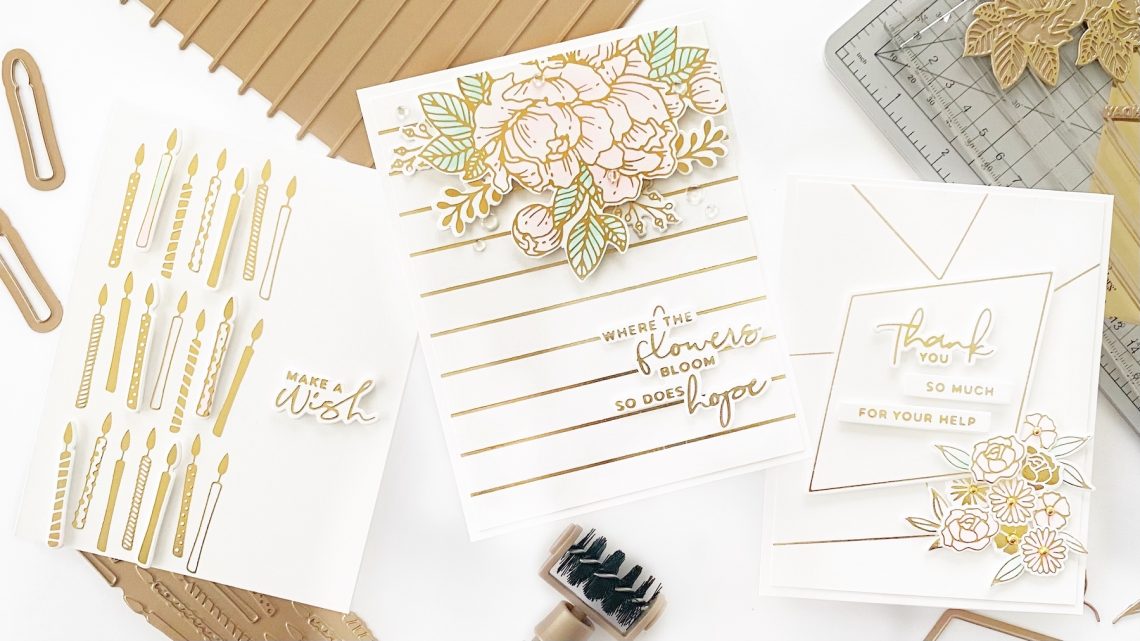
Hello, everyone! Dilay here from JustCallMeDee.com and I am so excited to be sharing a trio of projects with all of you today! These cards feature some gorgeous plates and dies from the brand-new Yana’s Blooming Birthday Collection! For these cards, I used hot foil on a background with lots of white space (my fav!) and a subtle wash of color – a combination of pink and green that I think complements the gold hue of the foil pretty nicely!
Make a Wish Card
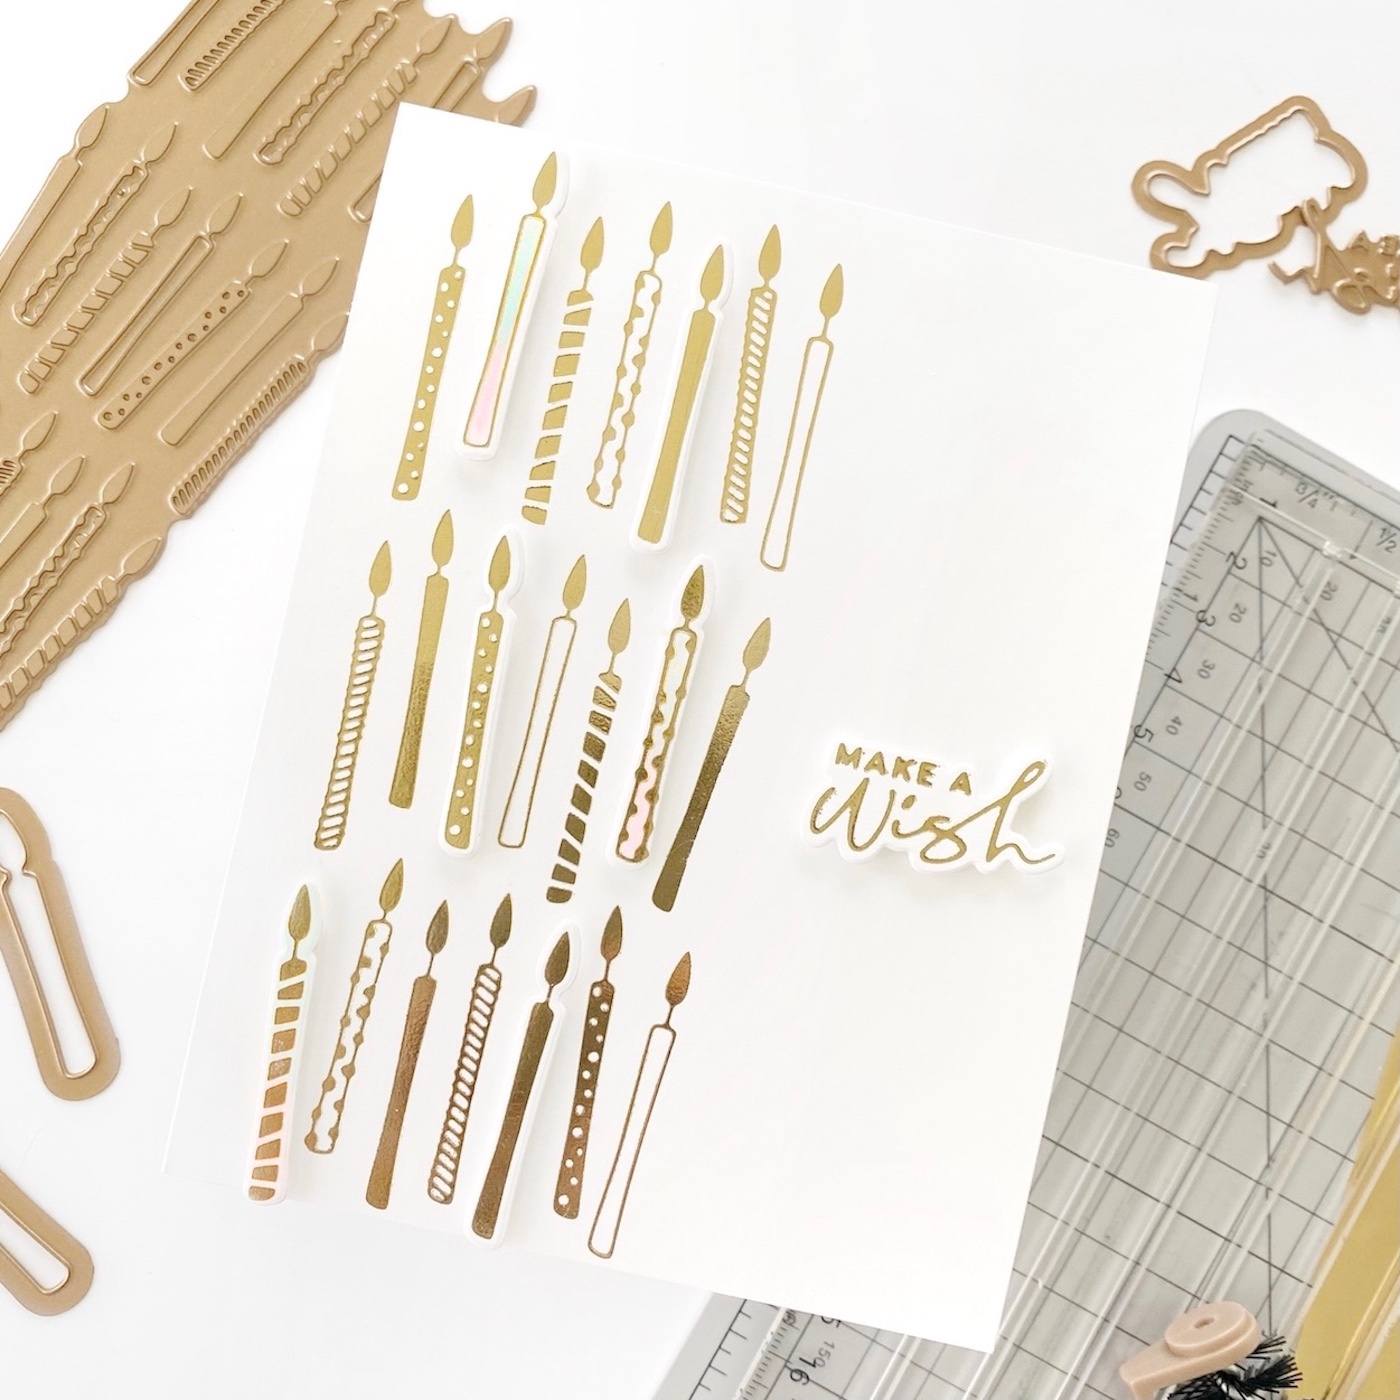
For the first card, I wanted to use the Birthday Candle Background Glimmer Hot Foil and Die Set with some added dimension – I had a lot of fun creating this one! First, I gold foiled the candle background on the left side of an A2- sized panel and again on another piece of white cardstock, using the second one to die cut a few of the candles with their coordinating dies and color them with alcohol markers – soft pink and mint green. Once colored, I popped up the candles directly over the foiled candles using foam squares. For the sentiment, I gold foiled and die cut the ‘Make A Wish’ plate from the Yana’s Special Sentiments and adhered it to the panel using foam tape.
Spellbinders Supplies:
Other Supplies:
Copic Sketch Marker RV0000, Copic Sketch Marker RV000, Copic Sketch Marker RV00, Copic
Sketch Marker G000, Copic Sketch Marker G00
Thank You Card
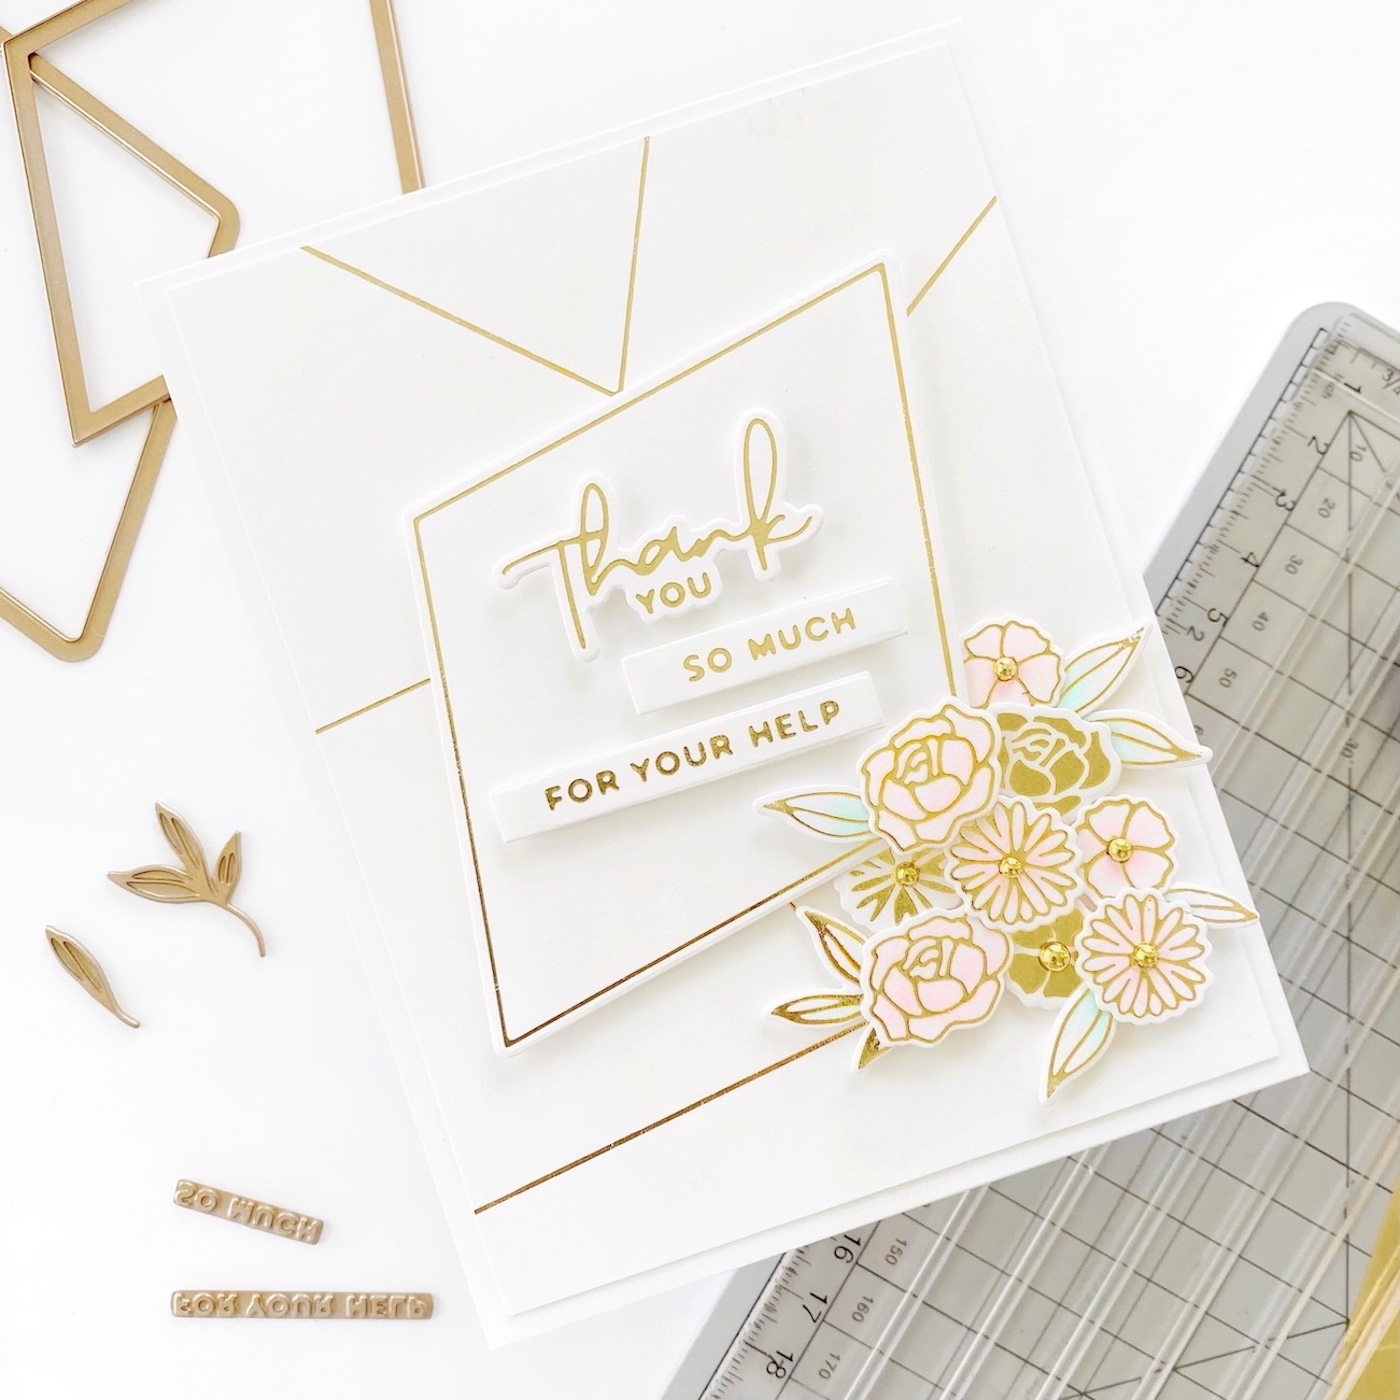
For the second card, I was inspired by a soft and simple geometric pattern from an Art Deco design. Here, I used the Diamond Floral Glimmer Hot Foil Plate and Die Set to gold foil the smaller diamond die in a geometric pattern around an A2-sized panel. I then die cut the larger diamond die from another sheet of white card stock and popped it up at an angle near the center of the panel. Next, I gold foiled the blooms and foliage, die cut them with their coordinating dies, and colored them using the same colors as the previous card. I then adhered them, clustered, to the lower right corner of the panel and added small gold embellishments to the center of the flowers. Finally, I gold foiled and die cut the ‘Thank You’, ‘so much’, and ‘for your help’ sentiments from the Yana’s Special Sentiments set and adhered them to center of the diamond with foam tape.
Spellbinders Supplies:
Other Supplies:
Copic Sketch Marker RV0000, Copic Sketch Marker RV000, Copic Sketch Marker RV00, Copic Sketch Marker G000, Copic Sketch Marker G00
Where Flowers Bloom Card
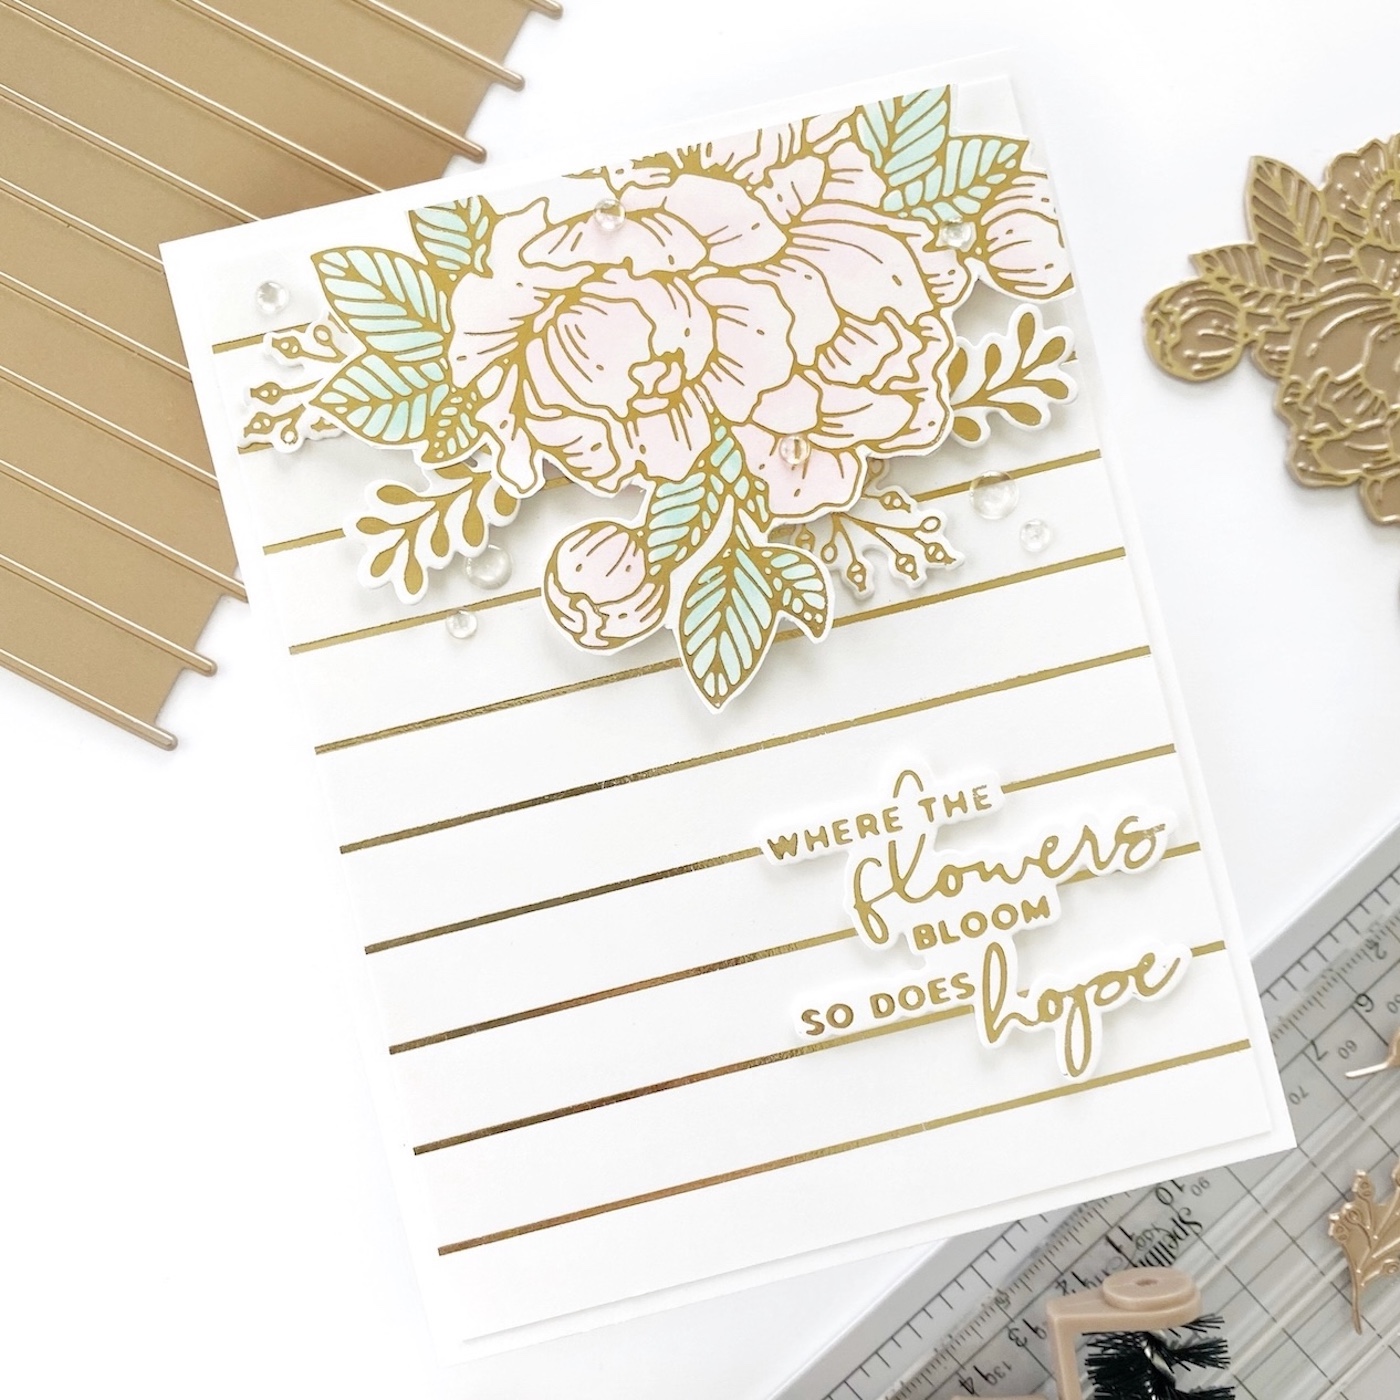
For the last card, I began by gold foiling the Skinny Stripe Background plate onto an A2-sized panel. Next, I gold foiled and colored the Glimmering Peony plate, then fussy cut it and adhered it onto the panel using foam tape (trimming any overhang.) I had some foliage cuts leftover from the last card, so I tucked those in behind the flower for a little added detail. Lastly, I gold foiled and die cut the sentiment from the Blooming Floral Background set and adhered it to the panel using foam tape. As a finishing touch, I added a few clear droplets.
Spellbinders Supplies:
Other Supplies:
Copic Sketch Marker RV0000, Copic Sketch Marker RV000, Copic Sketch Marker RV00, Copic Sketch Marker G000, Copic Sketch Marker G00
I hope that you enjoyed my trio of cards! Be sure to check out the entire Yana’s Blooming Birthday Glimmer Collection, as well as my blog, for more projects using the Glimmer Hot Foil System! Thank you so much for joining me today!
One Comment
Natasha Vacca
These are all STUNNING Dee!!!!!!!!! Beautiful!!!!! Love that shine ❤️❤️❤️❤️❤️