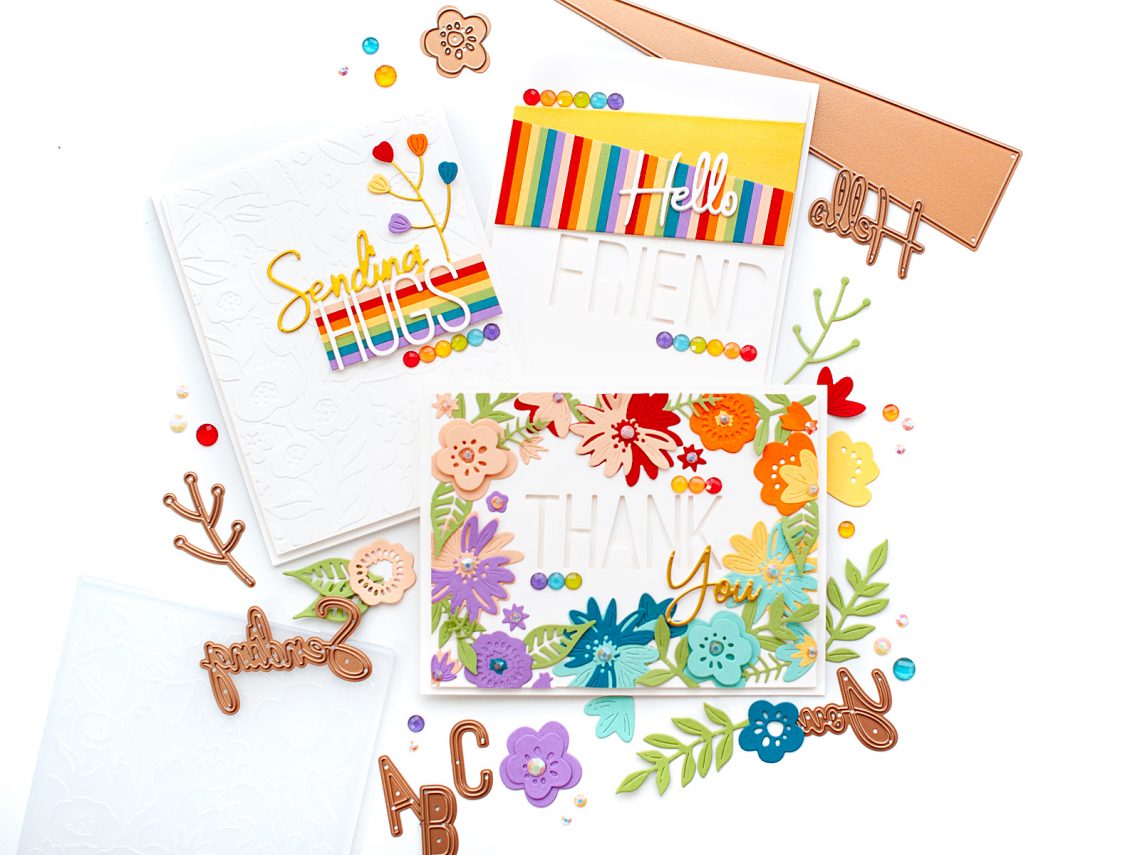
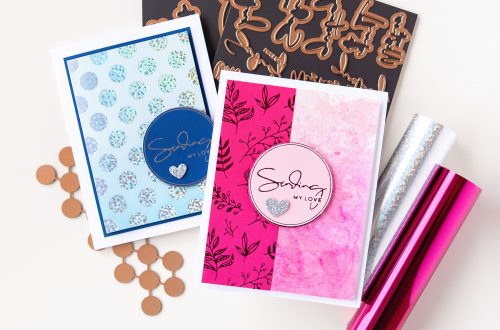
Simply Perfect Collection Card Set with Lea Lawson
Hi crafty friends! Lea Lawson here today to share a card set featuring the new products from the Simply Perfect collection. This is such a fun collection of amazing dies that I would consider essential, and an embossing folder. Let’s take a look at how I created these cards!
Rainbow Thank You Card
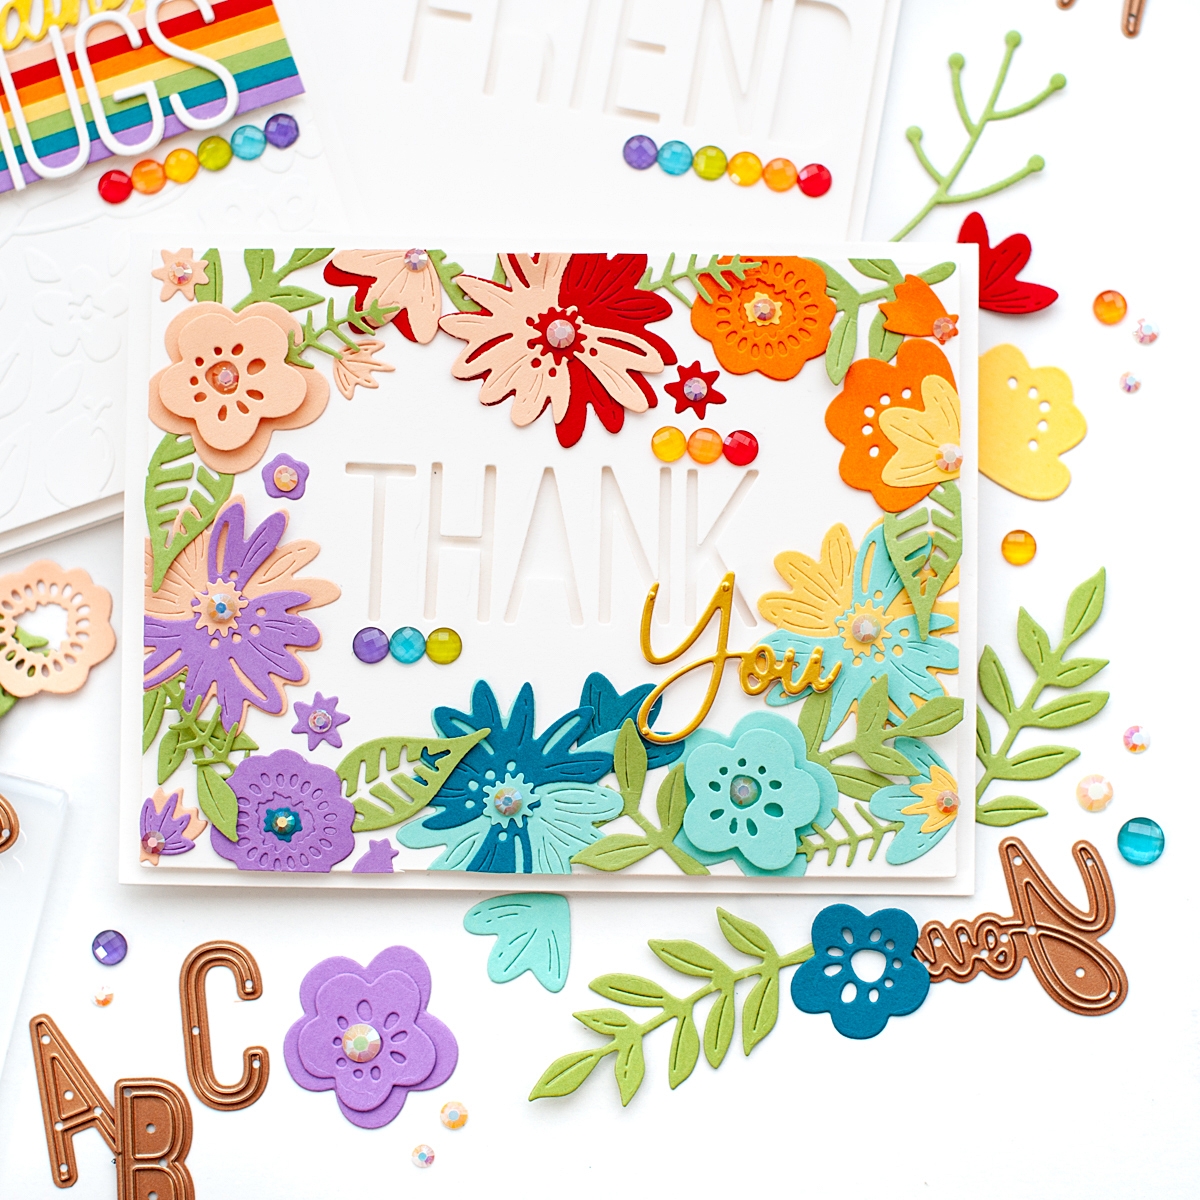
For my first card I started by die cutting the Simply Perfect Layered Blooms from cardstocks in rainbow colors. You won’t use all of the diecut pieces, but I like to have all the extras on hand for future cardmaking. Next I die cut a panel from white cardstock using the largest Essentials Rectangles, then started to arrange the blooms to it in rainbow order. Don’t worry about some of the florals hanging off the edge, because once you’ve completed adding them to the panel you will trim it down with a sharp pair of scissors.

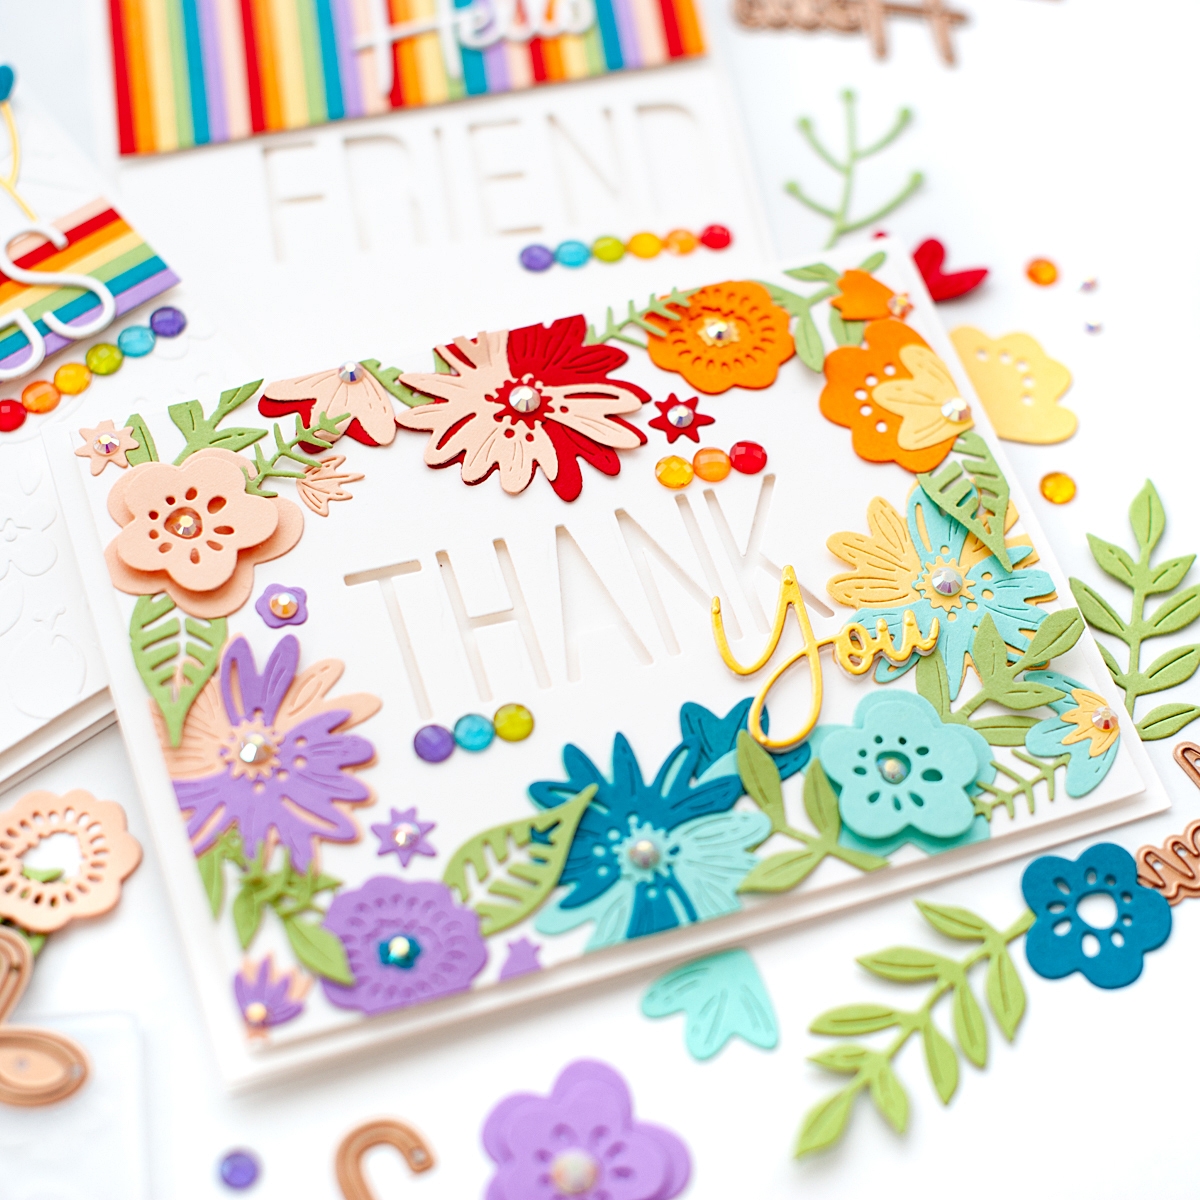
With the flowers arranged, I lined the letters up from the Simply Perfect Alphabet to spell out the word THANKS in the middle of the card. I die cut them and set the letters aside, as I wanted to use the negative for this card. I mounted the floral panel to a white A2 card base with foam tape. Next I die cut the word You from the Simply Perfect Mix & Match Sentiments three times: once from gold foil paper and twice from white cardstock. I stacked & glued the layers together, then attached it to the front. To finish, I accented the card with jewels.
Embossed Sending Hugs Card
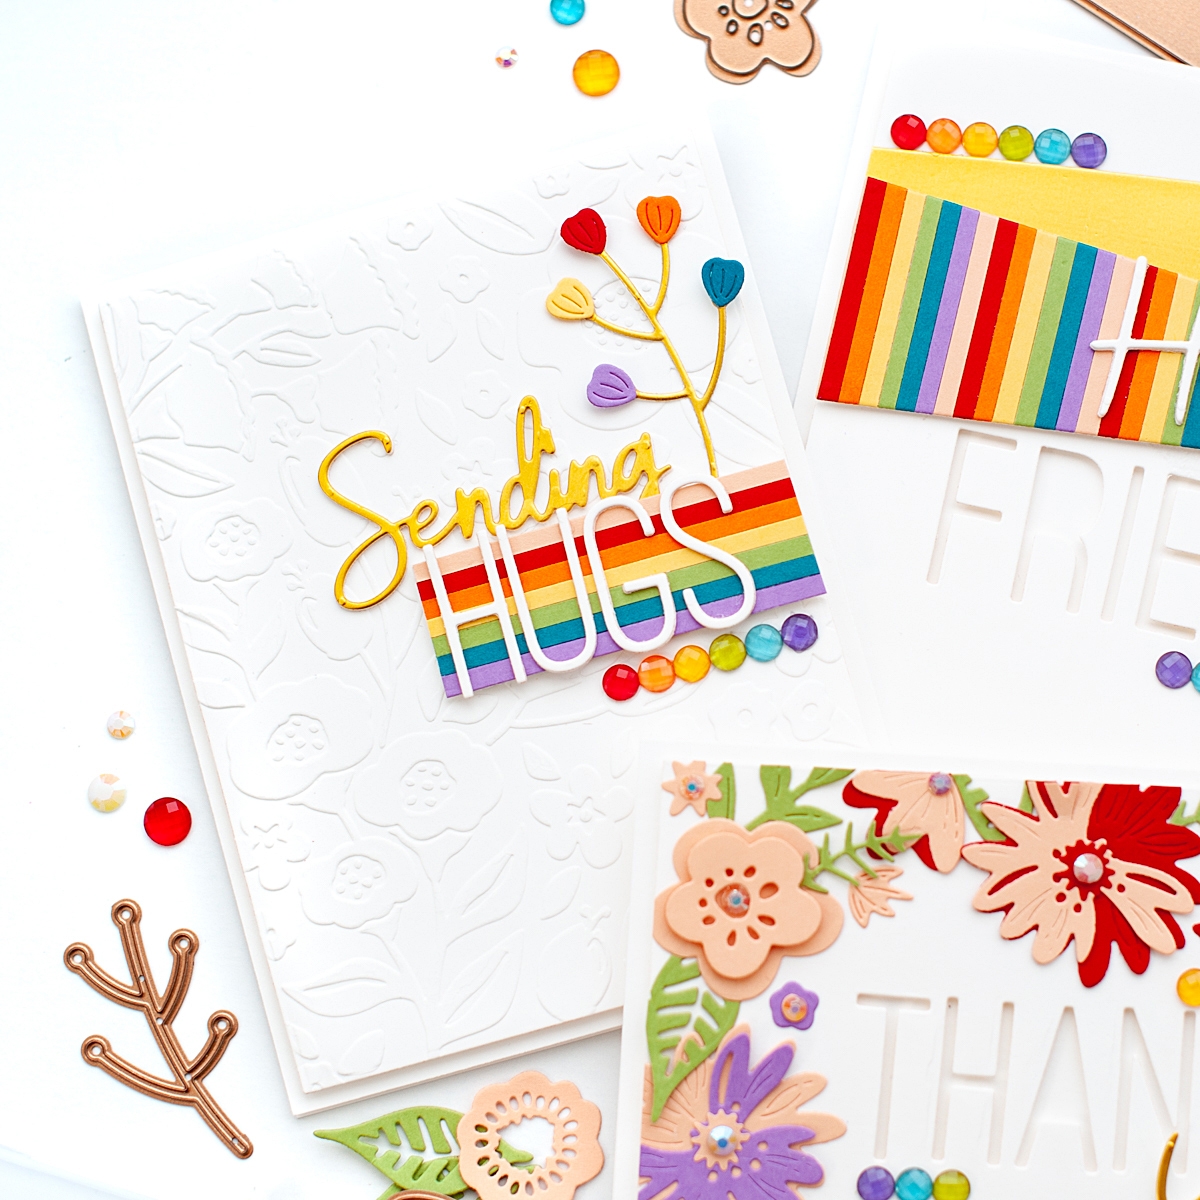
For my second card I die cut a panel from white cardstock using the largest Essentials Rectangles. Then I embossed it with the Simply Perfect Florets embossing folder. I mounted the panel to the front of an A2 white card base with foam tape. Next I die cut the card sentiment using both the Simply Perfect Alphabet and Mix & Match Sentiments die sets. I cut each layer three times, then stacked & glued together for added dimension. I die cut one of the stems from the Simply Perfect Layered Blooms from gold foil paper, then grabbed some of the coordinating colored blooms that I cut when creating the first card, and layered them together.
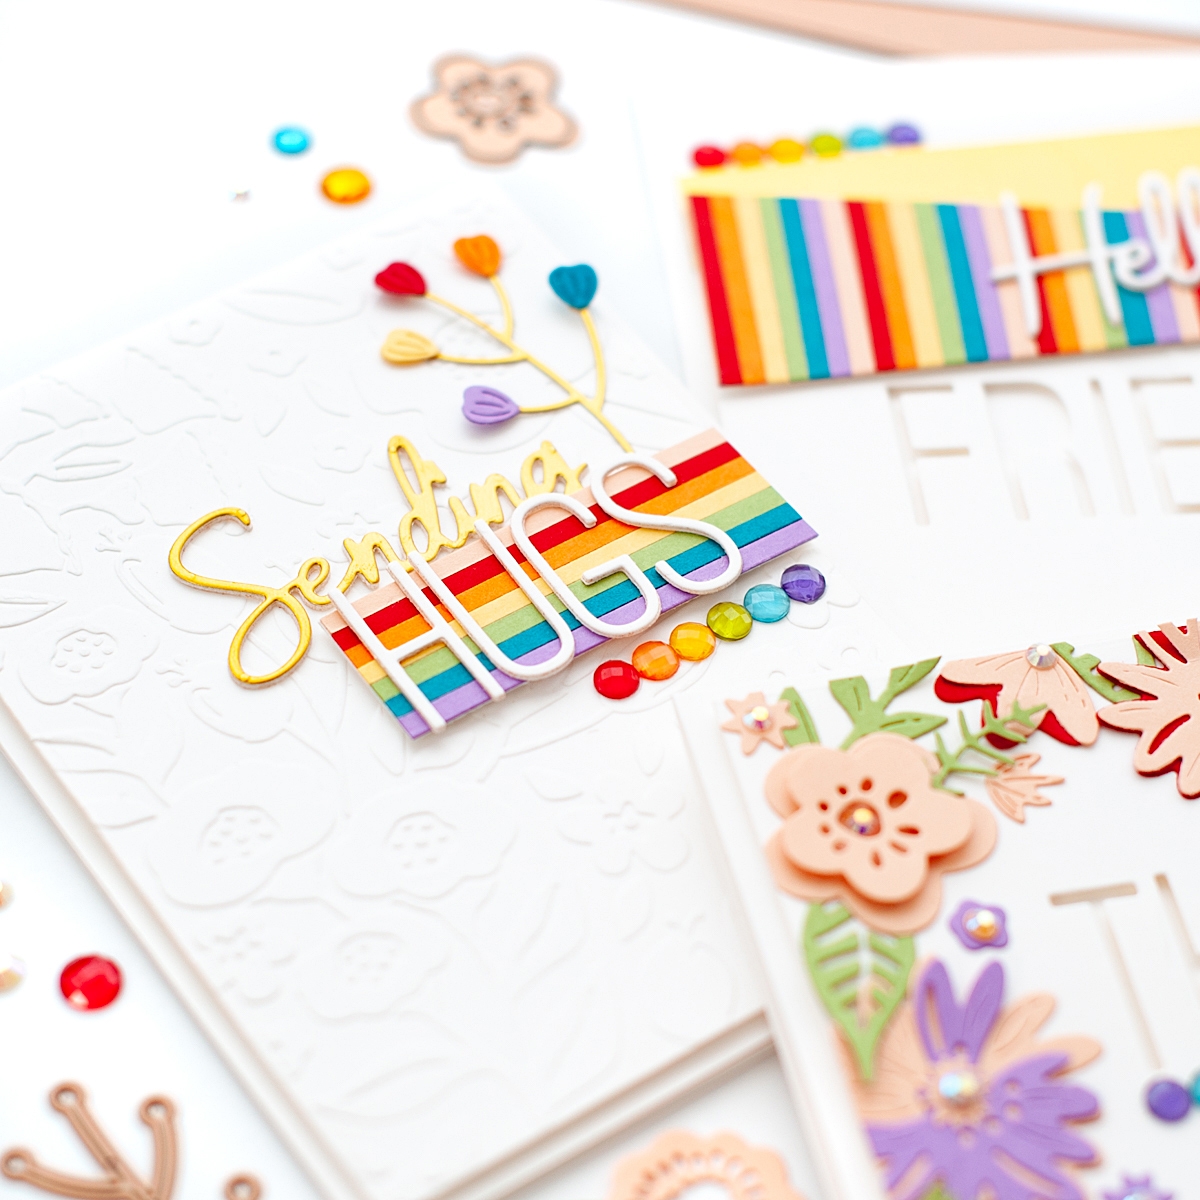
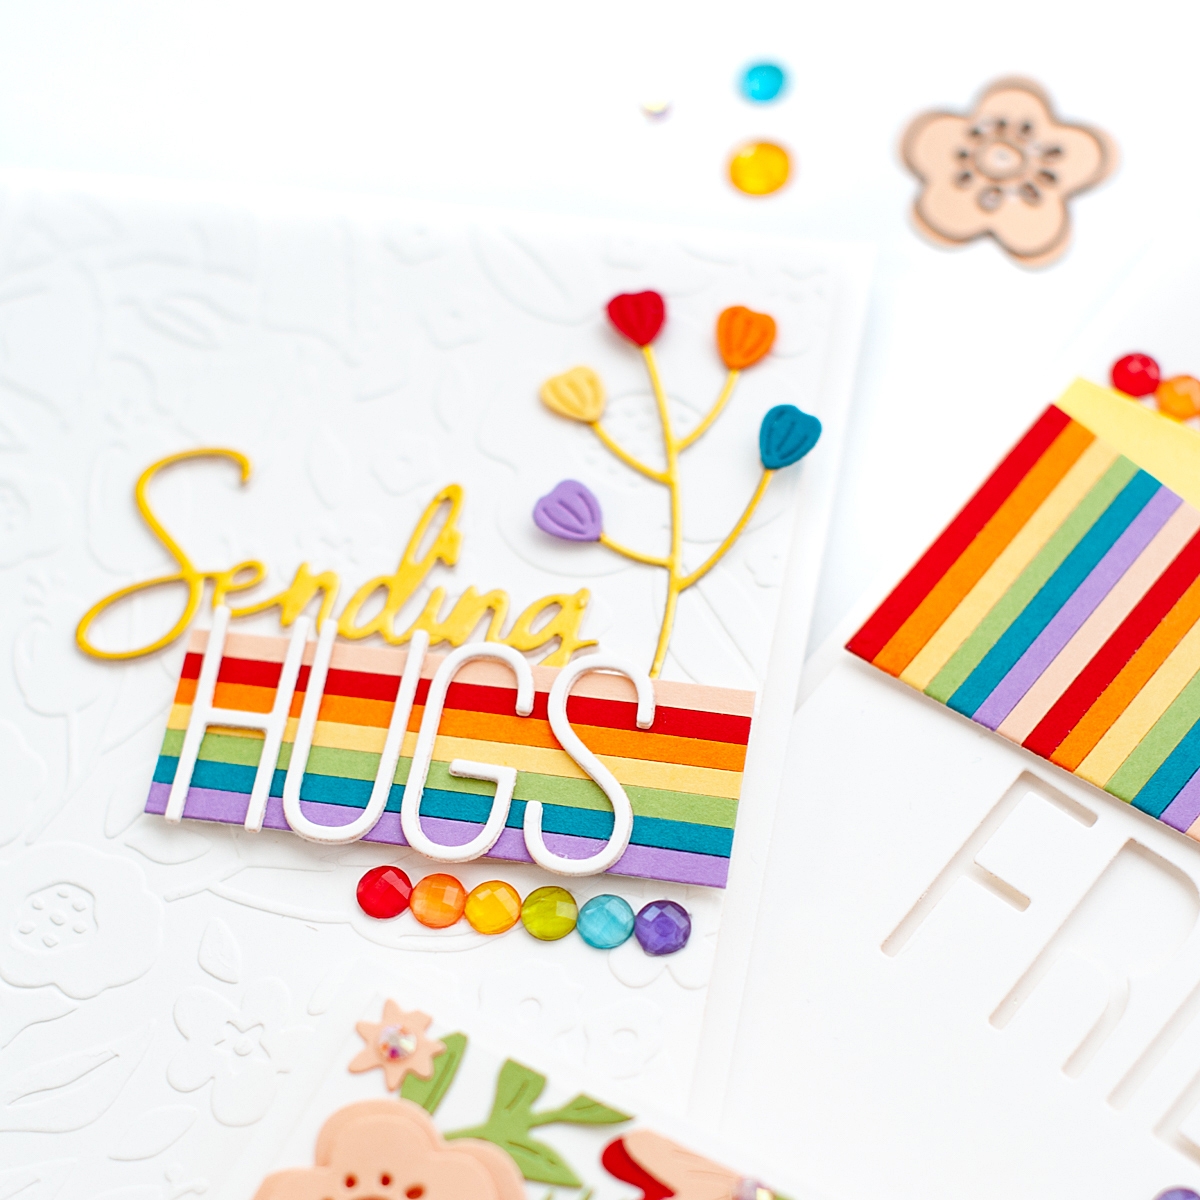
Next I created a sheet with thin rainbow stripes using ⅛” strips of colored cardstock. I trimmed a thin strip from the sheet, and added the word HUGS to it. I mounted the rainbow floral pieces and the sentiments to the card front, popping the striped layer up with foam tape. To finish, I accented with a row of rainbow colored jewels.
Rainbow Hello Friend Card
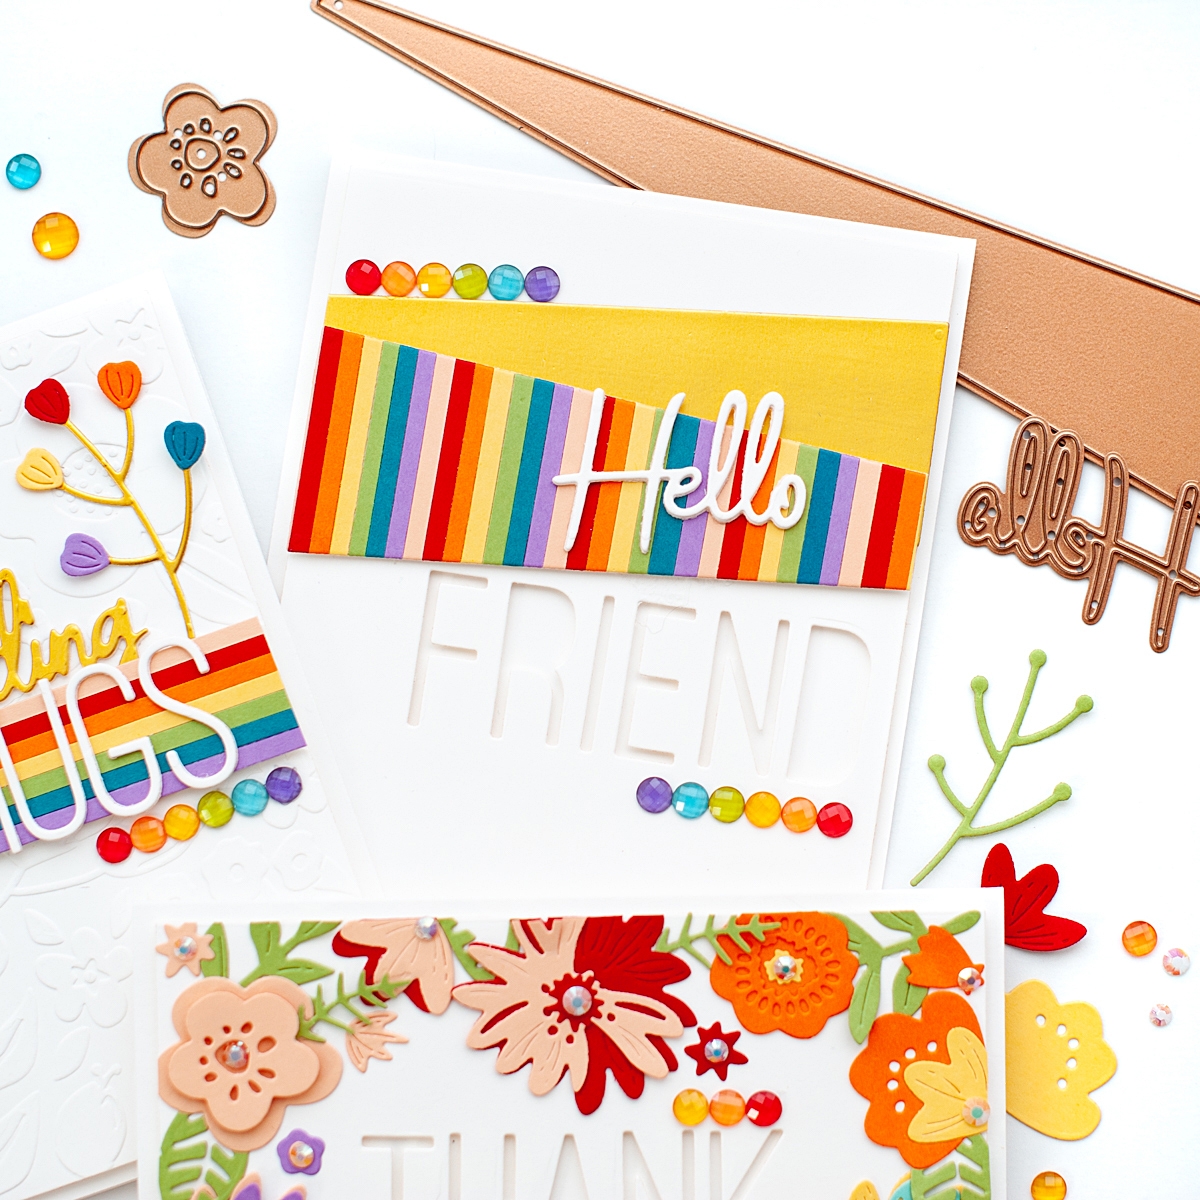
For my final card, I die cut a panel from white cardstock using the largest Essentials Rectangles. Next I die cut the thinner Color Block Slice twice: once from the rainbow striped paper I created for the second card, and once from gold foil paper. Using them as a guide, I lined up the letters from Simply Perfect Alphabet to spell the word FRIEND. I moved the cuts, die cut them and set the letters aside, as I wanted to use the negative for this card as well. I mounted the two Color Block Slice cuts to the card front, popping the rainbow layer up with foam tape. Then I mounted this panel to the front of an A2 white cardbase with foam tape.
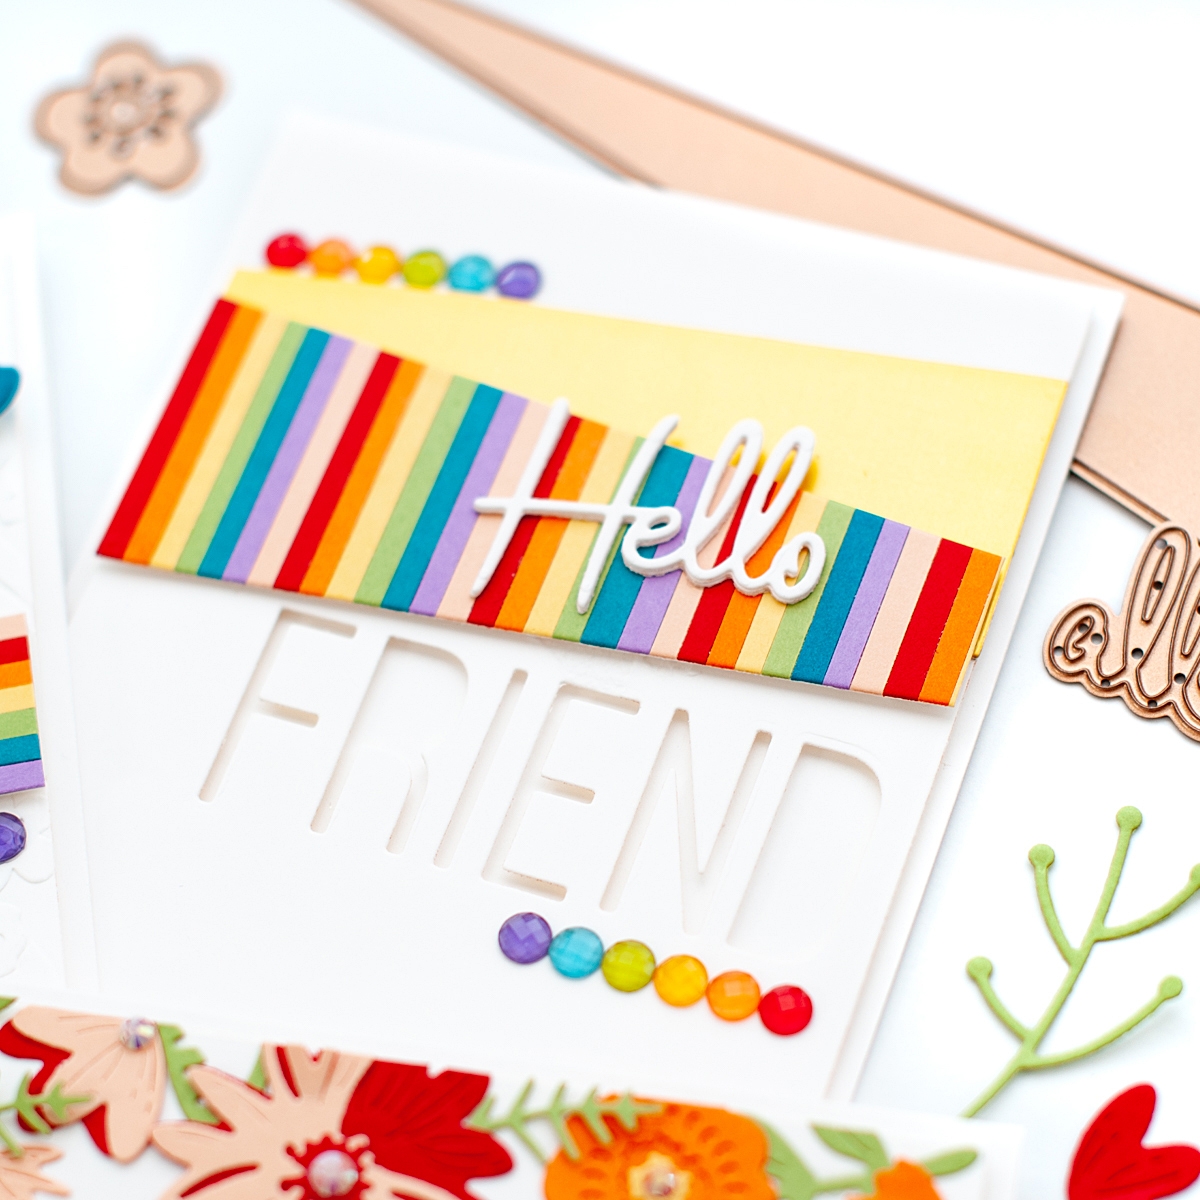

Next I die cut the word Hello from the Simply Perfect Mix & Match Sentiments three times from white cardstock. I stacked & glued them together, then attached to the front of the card at an angle. To finish, I accented with two rows of rainbow colored jewels.

Spellbinders Supplies:

Other Supplies:
80 lb white cardstock, various FSJ colored cardstocks, Tonic gold pearl foil paper, FSJ Rainbow Drops (retired), Pinkfresh Studio Jewels Mix, foam adhesive, glue pen.
I really love this fun Simply Perfect collection! I think it is full of Essential items that you will reach for time & time again. I had so much fun creating this card set and I hope they inspire you as you create with these gorgeous new products. Have a wonderful day!
One Comment
Natasha Vacca
Wow!!!!!!! These are GORGEOUS!!!!!!!! These colors are AMAZING!!!!!!!!!!!!