The Simply Perfect Collection – Countless Combinations and Customizations
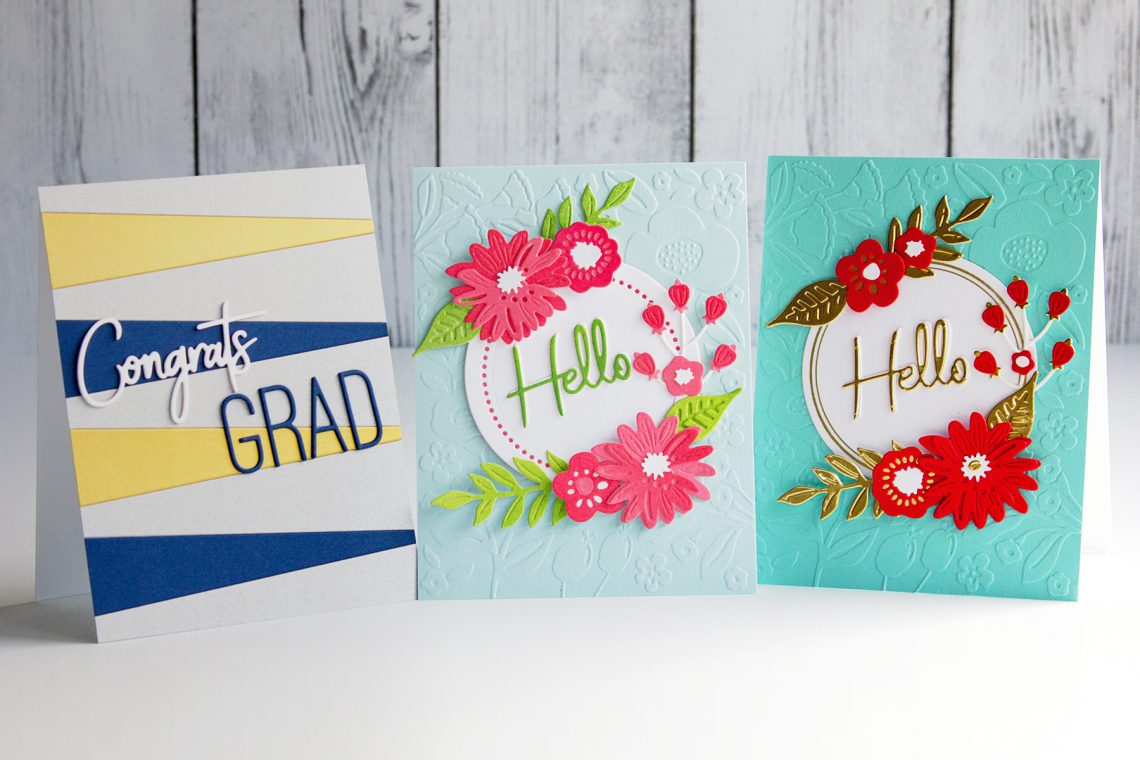
Hello crafty friends! It’s Jean here sharing three cards created with the Simply Perfect Collection. This versatile collection, which includes products to create backgrounds, die-cut and glimmer-foiled sentiments, and focal images, can be used to craft for any number of occasions. The collection’s products work together beautifully for countless variations.
Floral Hello Cards
The first two cards use the Florets Embossing Folder for the background, along with a “Hello” sentiment, from the Mix & Match Sentiments set, and focal images, created with the Layered Blooms set. I created two versions of similar design to highlight how easy it is to change the look.
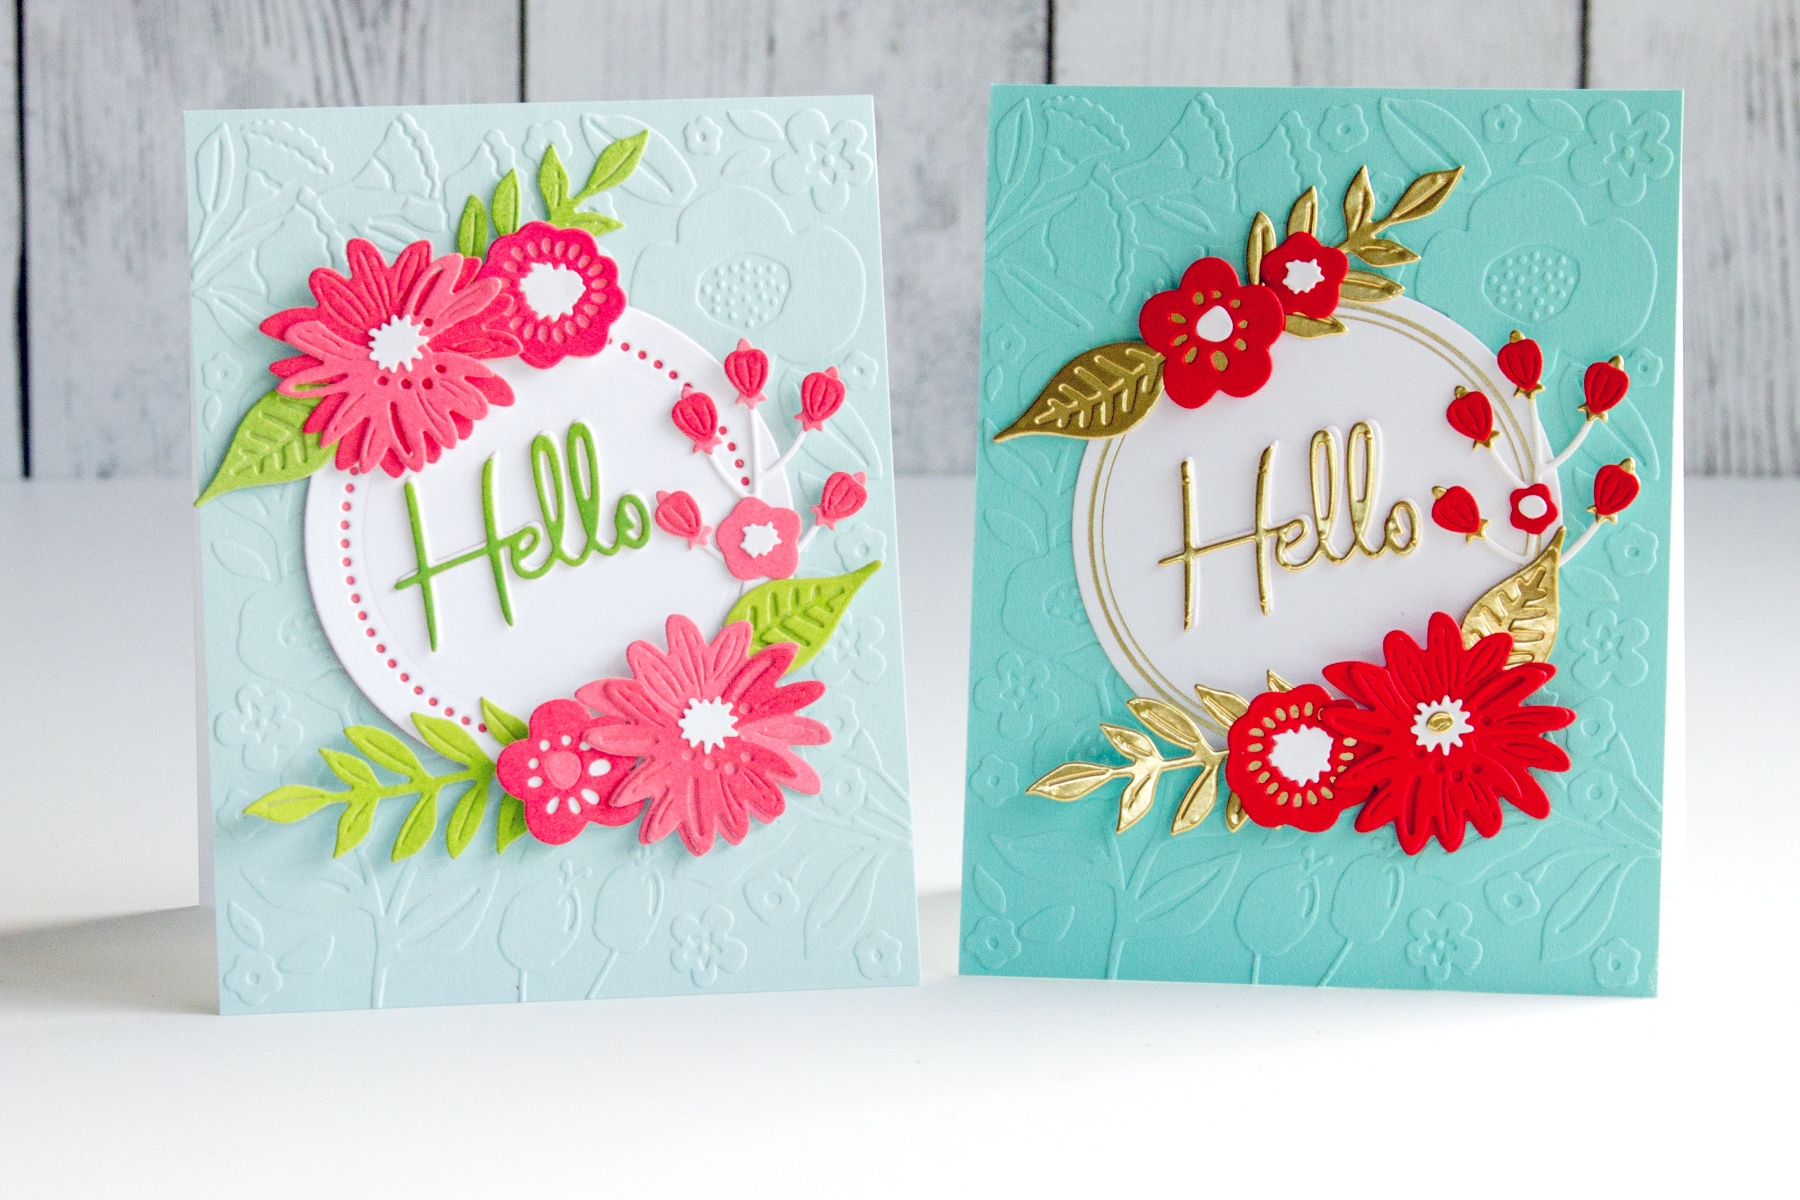
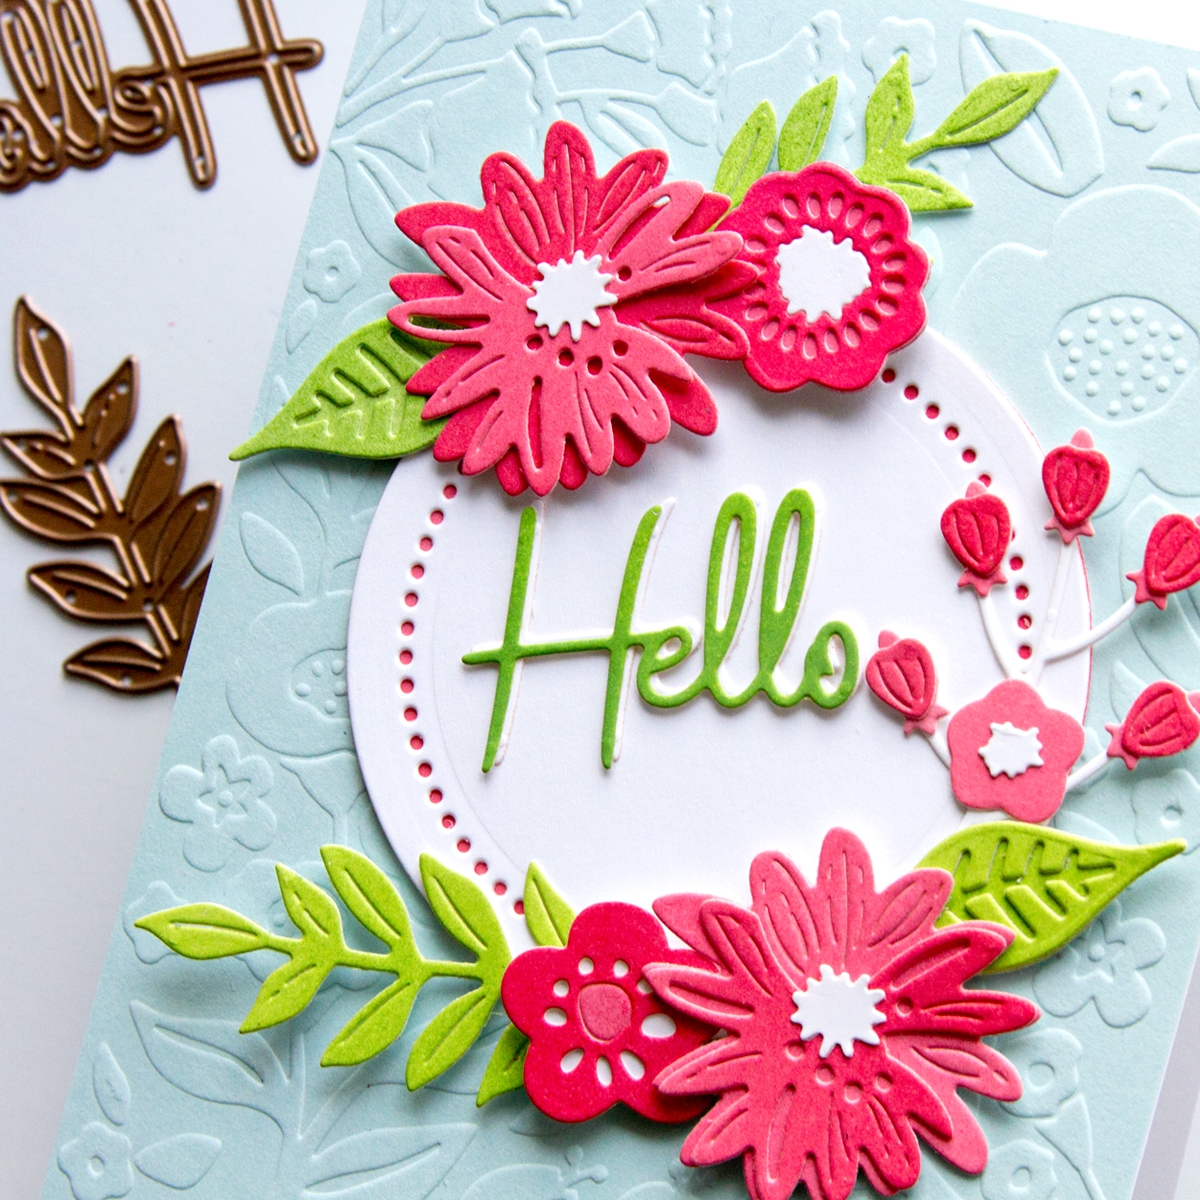
For the first card, the Layered Blooms and the Mix & Match Sentiments “Hello” were die-cut from cardstock colored with Distress Inks for a soft look.
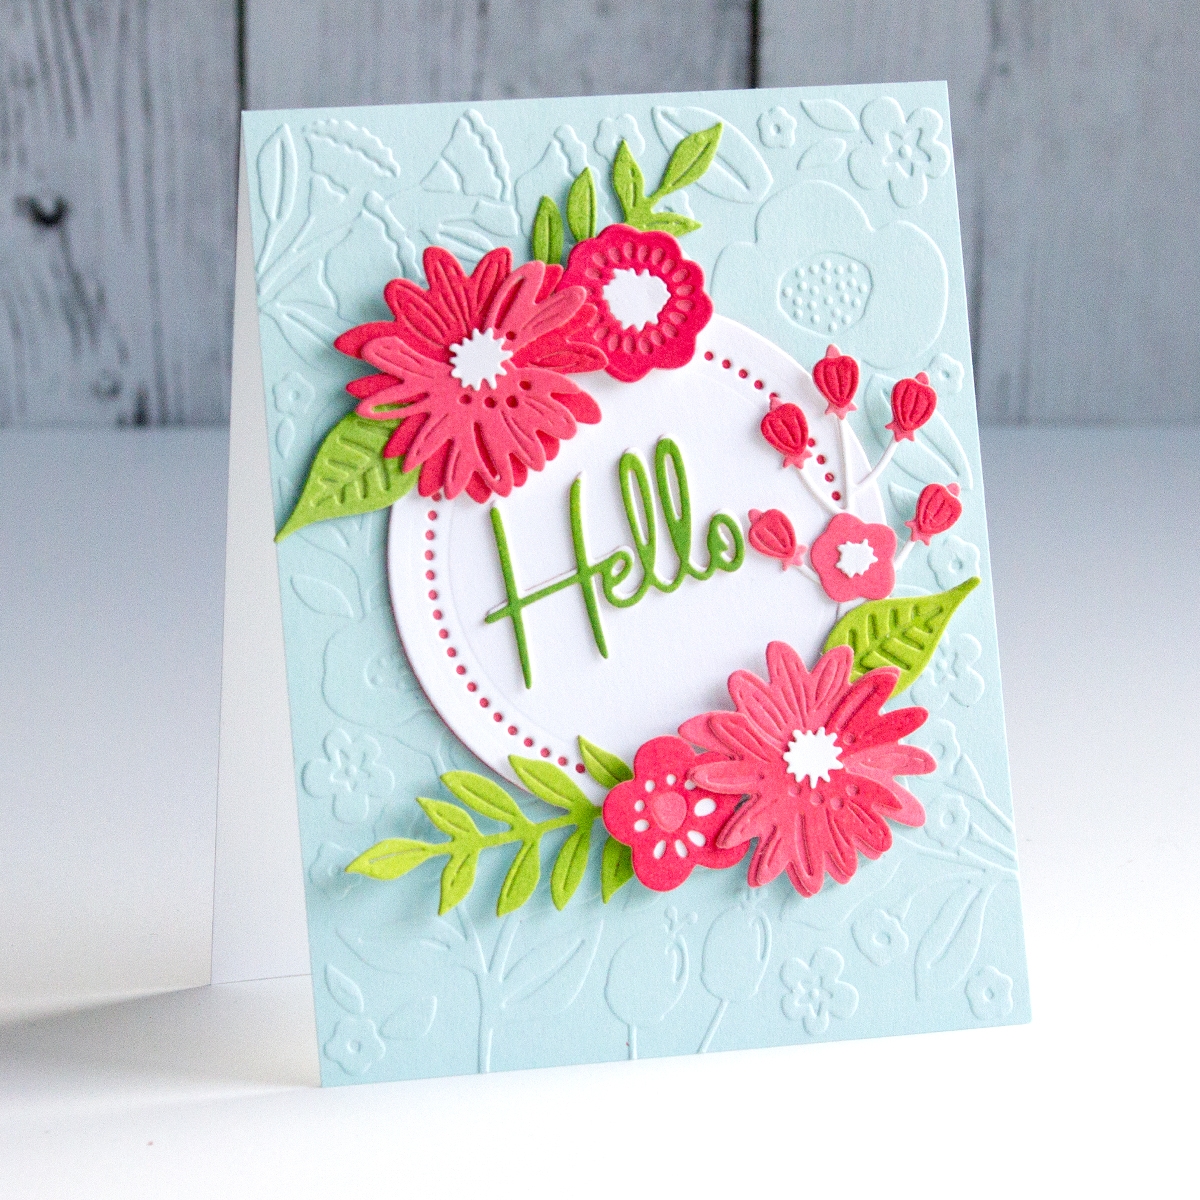
- Cut floral pieces and leaves with the Layered Blooms set and assemble.
- Cut Mix & Match Sentiments “Hello” twice: once from white cardstock and again from cardstock colored with Mowed Lawn Distress Ink. Glue together with the white layer as the drop shadow.
- Dry-emboss A2-size, soft blue cardstock panel with the Florets Embossing Folder.
- Die-cut a 3″ circle from white cardstock, with the dotted-edge inlay, using dies in the Essential Circles Back with 3″ circle cut from ink-colored cardstock.
- Add the circle assembly to the dry-embossed background.
- Adhere flowers, leaves, and sentiment to card base.
Spellbinders Supplies:
Additional Supplies:
solid cardstock: white, soft blue; Distress Inks: Worn Lipstick, Festive Berries, Mowed Lawn; glue; foam adhesive
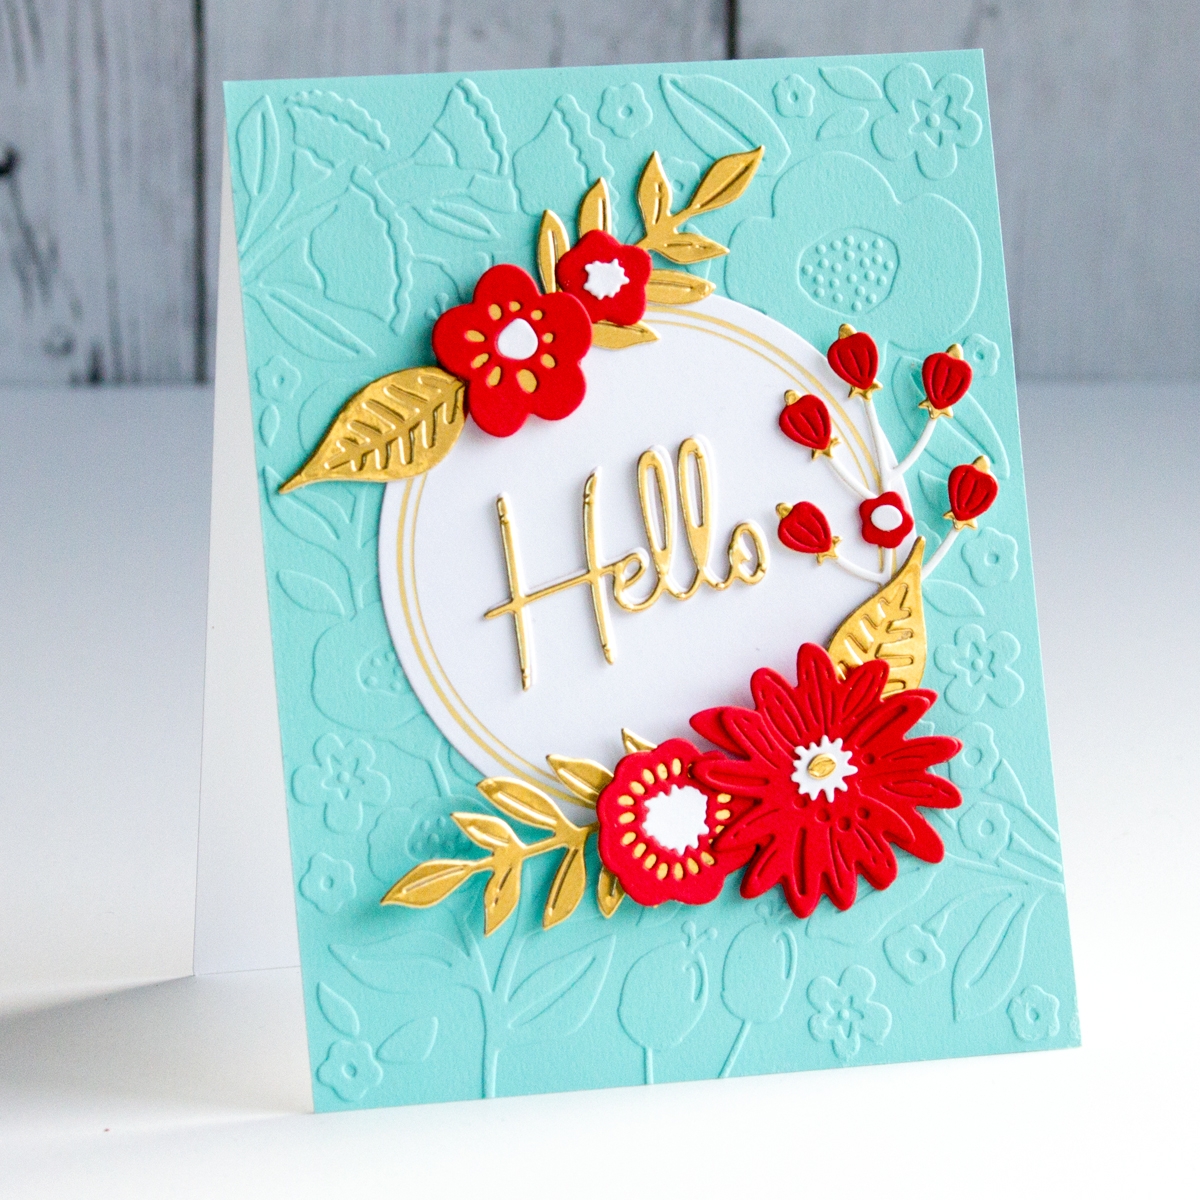
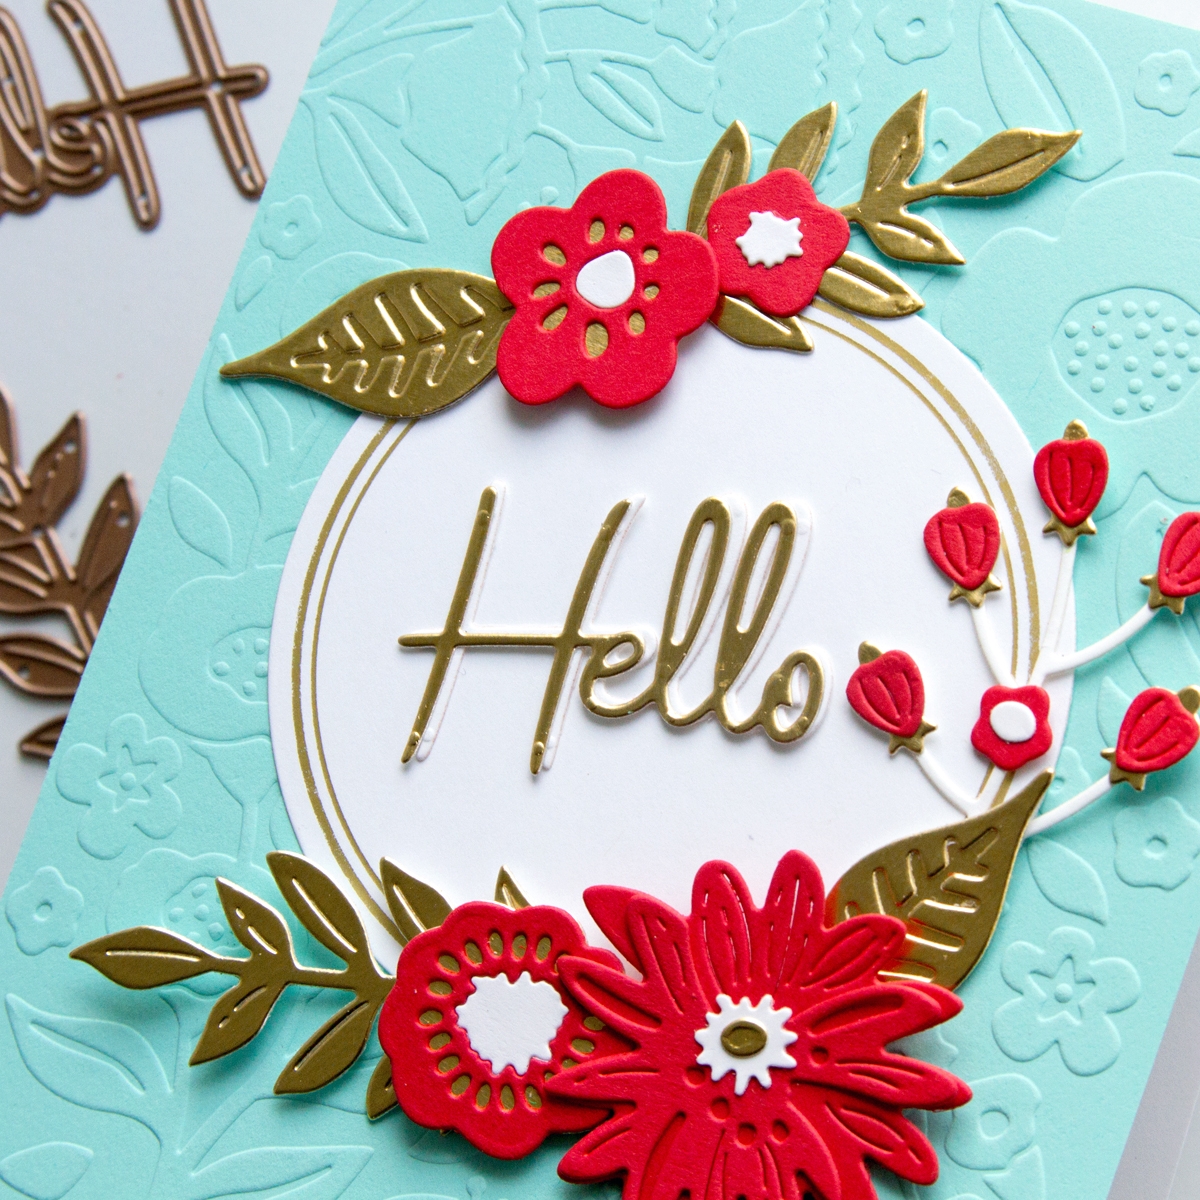
On the second card, the Layered Blooms and the Mix & Match Sentiments “Hello” were die-cut from white, red, and gold foil cardstock for a more dramatic look.
- Cut floral pieces and leaves with the Layered Blooms set and assemble.
- Cut Mix & Match Sentiments “Hello” from white cardstock and again from gold foil. Glue together with the white layer as the drop shadow.
- Dry-emboss A2-size, teal cardstock panel with the Florets Embossing Folder.
- Glimmer-foil Essential Duo Lines Circle in Gold on white cardstock.
- Die-cut the foiled cardstock with the 3″ circle die in the Essential Circles
- Add the circle assembly to the dry-embossed background.
- Adhere flowers, leaves, and sentiment to card base.
Additional Supplies:
solid cardstock: white, red, teal, gold foil; glue; foam adhesive
Congrats Grad Card

For the final card, I created a graduation card customized with the school colors on the background, created with the Color Block Slices set, and the Alphabet die set. The Color Block Slices shape reminds me of a school pennant.
- Die-cut background pieces with Color Block Slices die from navy, Brush Gold, and gray cardstock. Tape together on back and trim to A2-size.
- Cut “Congrats” from white cardstock (twice) with die in the Mix & Match Sentiments Glue together.
- Cut “GRAD” from navy cardstock (twice) with letters in the Alphabet die set. Glue together.
- Adhere sentiment elements to the card base.

Spellbinders Supplies:
Additional Supplies:
solid cardstock: white, navy, gray; glue; tape.
Thanks for dropping by today! I hope you can appreciate the way in which the products in the Simply Perfect Collection work together to create customized cards and are ready to start crafting your own!
3 Comments
Natasha V
These are GORGEOUS!!!!!!! Love these flowers ?
Sheri Kempke
Thanks for sharing these lovely cards! So pretty and helps give me lots of ideas!
slangnv
These floral cards are stunning. Jean has really matched the die cuts to the embossed background. Interesting how two cards similar look so different. But the Grad card, OMG is so clever! She is right, looks like a pennant. That die looks like a real winner!