
Sweet Cardlets II Collection – Card Inspiration with Annie Williams
Hi there, this is Annie Williams and I’m excited to be back on the blog today to share a couple of projects using the new Sweet Cardlets II Collection by Becca Feeken. The beautiful heartfelt sentiments and sweet images in this collection inspired me to create three cheerful cards for a variety of occasions.
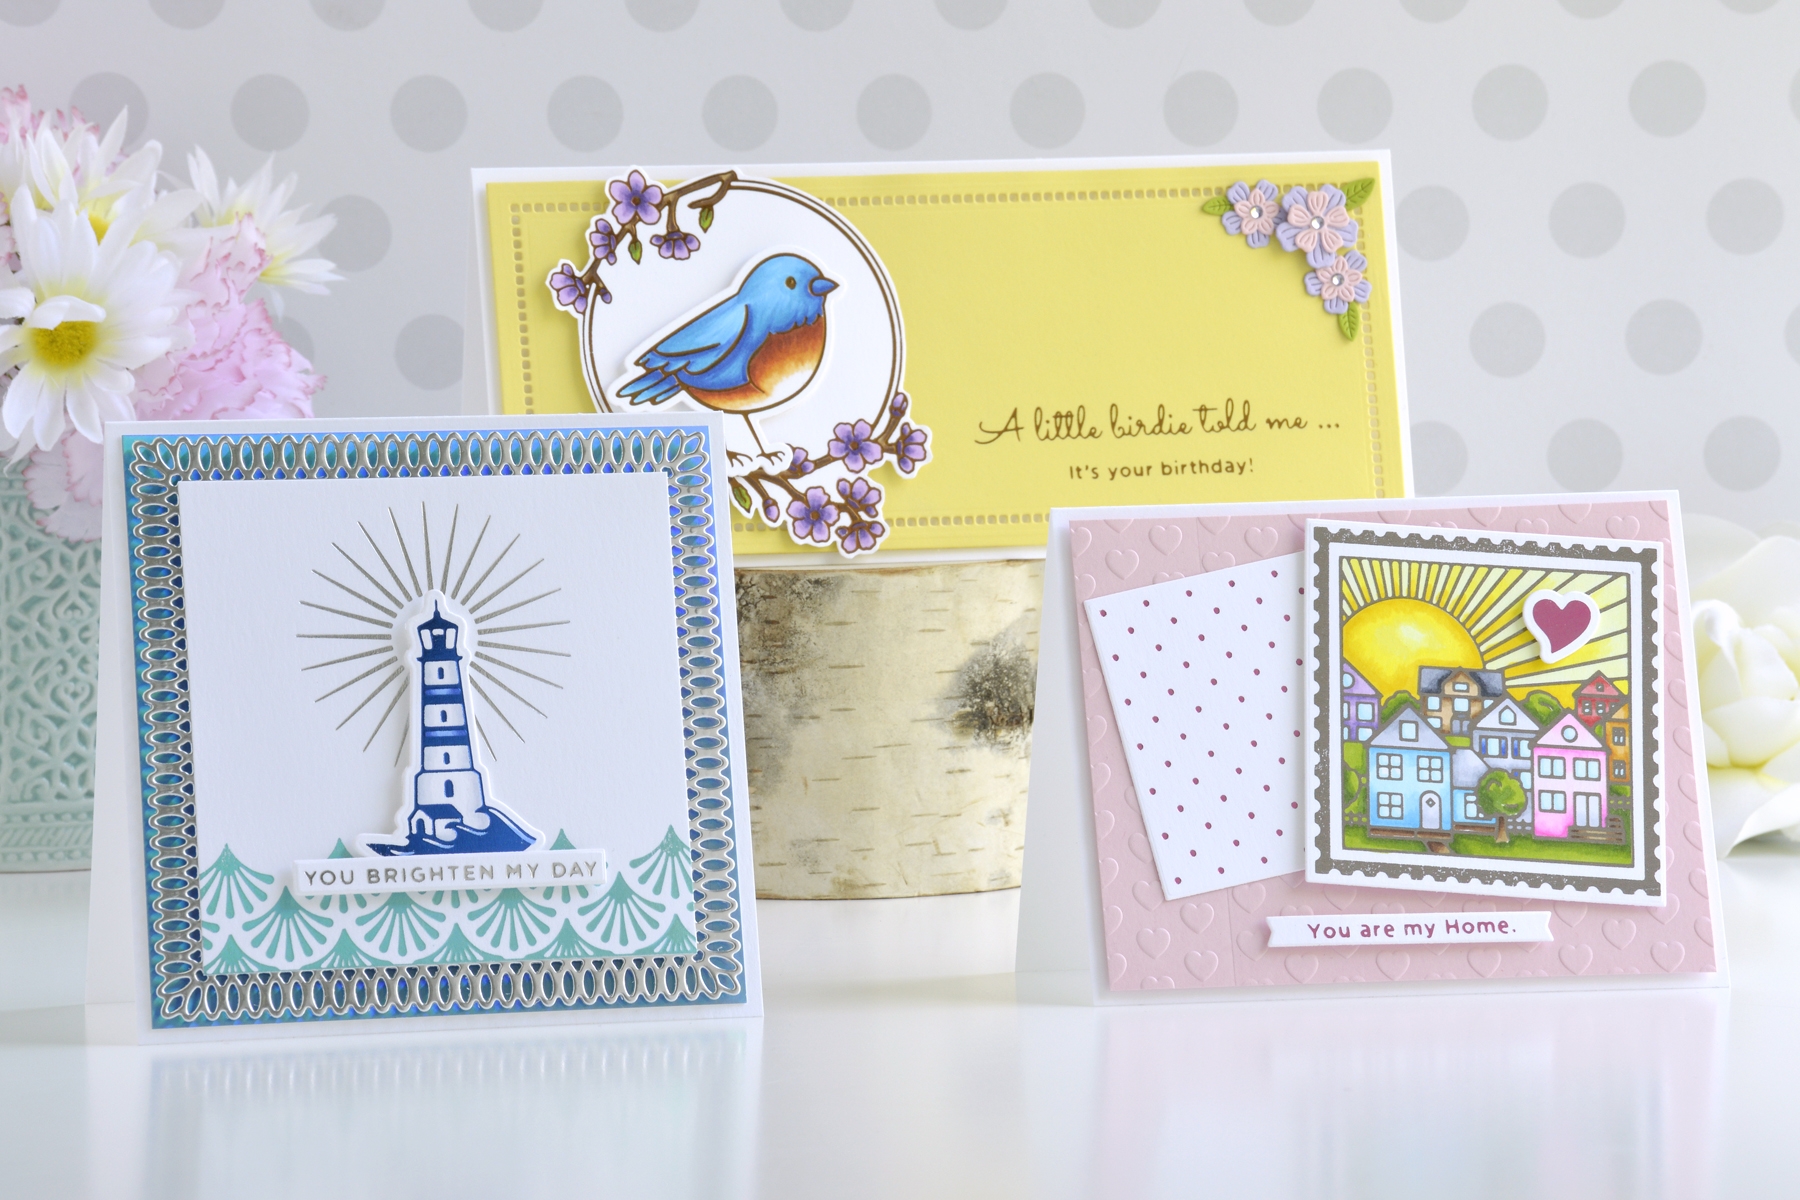
I thought the lighthouse image in the Shine Your Light Glimmer Plate Set was so pretty and perfect for summertime cards. By adding a different sentiment, I created a clean and simple friendship card.

- Trim a piece of white cardstock to 4” x 4”.
- Apply Moondust Hot Foil to the bottom of the panel using the Fanfare Border Glimmer Plate Set and the Glimmer Hot Foil Machine.
- Apply Silver Hot Foil to the middle of the panel using the Frame Inset rays from the Shine Your Light Glimmer Plate Set.
- Die cut Mirror Silver Cardstock using the largest die from the Picot Petite Squares die set.
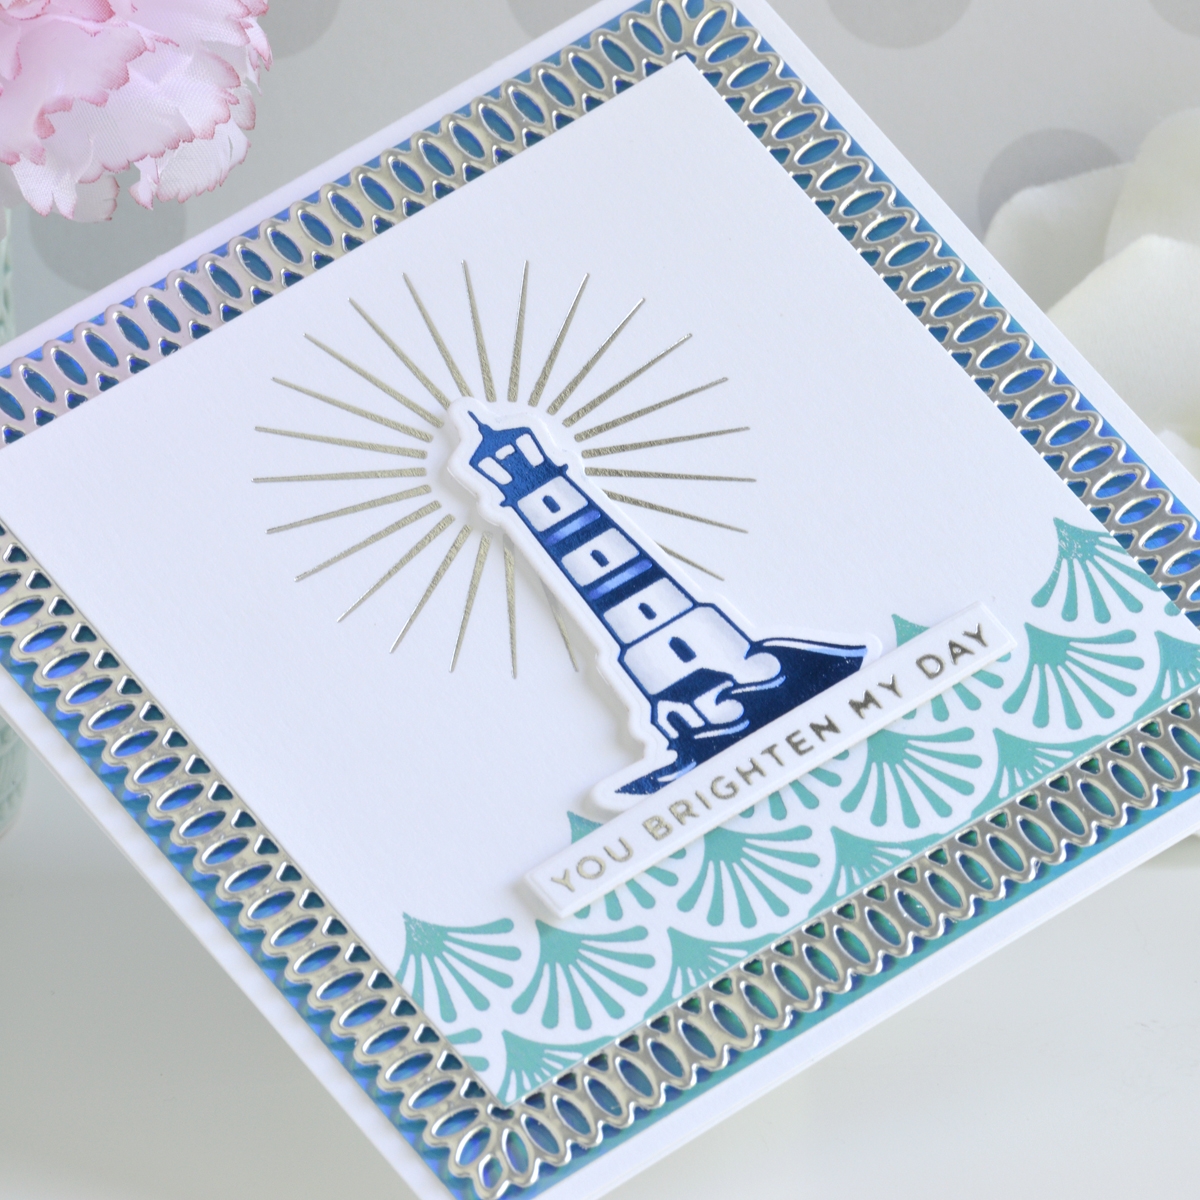
- Apply Cobalt Blue Hot Foil to white cardstock using the lighthouse from the Shine Your Light Glimmer Plate Set.
- Color the image with blue and grey Copic markers to give it some shading and cut it out using the coordinating die.
- Apply Silver Hot Foil to white cardstock using one of the sentiments from the Mini Everyday Sentiments Glimmer Plate Set and cut it out using the coordinating die.
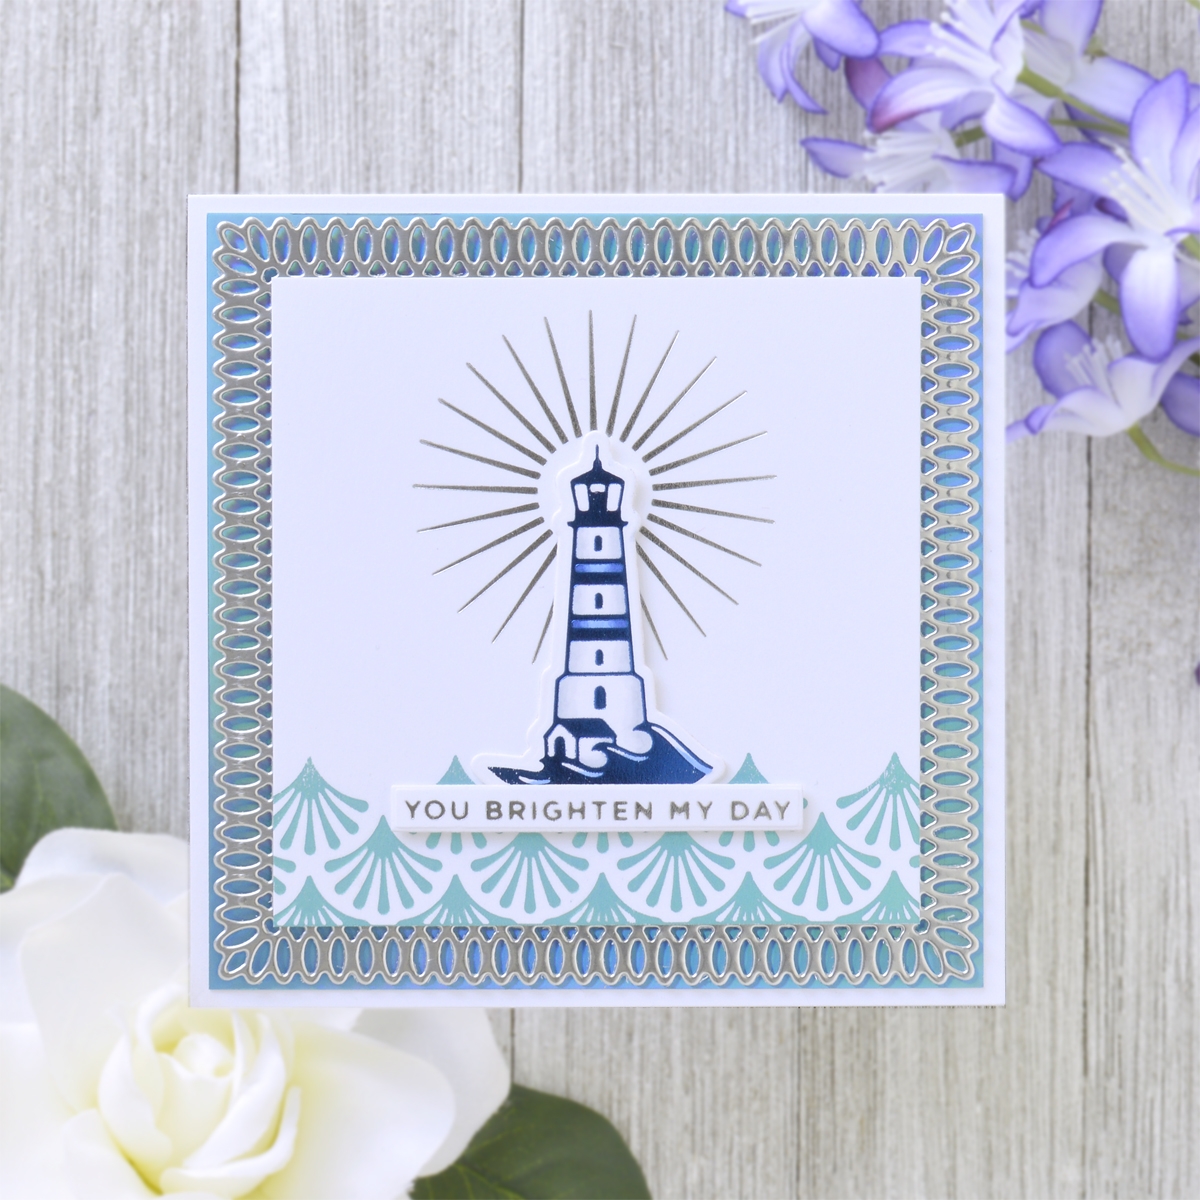
- Adhere the white background panel to the silver die-cut with tape runner. Mat it with blue iridescent cardstock before adhering it to a top-folding 5” square white card base.
- Pop the lighthouse and sentiment up on top with foam adhesive.
Spellbinders Supplies:

Other Supplies
Heavyweight white cardstock, Tonic Studios Mariana Mist Cardstock, Copic markers, tape runner, foam adhesive
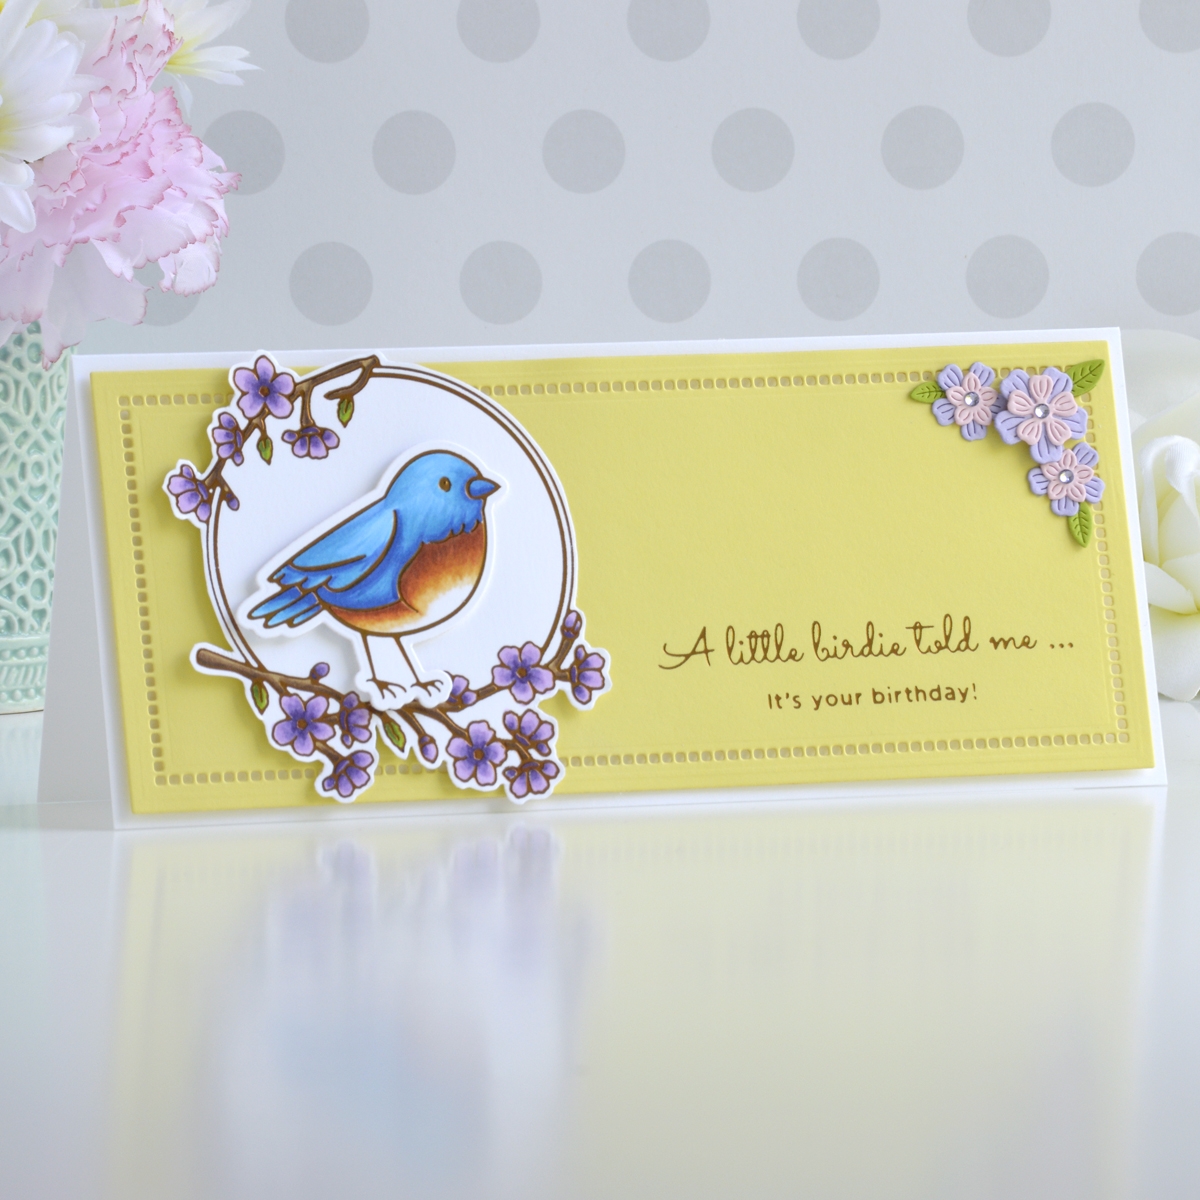
The beautiful floral frame and bird in the A Little Birdie Glimmer Plate Set can be used for so many different occasions. I colored them up with markers and added them to a slimline background for this bright birthday card.
- Apply Copper Hot Foil to yellow cardstock using the sentiments from the A Little Birdie Glimmer Plate Set and the Glimmer Hot Foil System.
- Die cut the yellow cardstock with the Large Rectangle Rim and Hemstitch Insert from the Hemstitch Slimline die set so that the sentiment is positioned in the lower right corner.

- Apply Copper Hot Foil to white cardstock using the Floral Frame and Birdie from the A Little Birdie Glimmer Plate Set.
- Color the images with Copic markers. Die cut the bird out using the coordinating die and fussy-cut the floral frame out with scissors, leaving a small white border.
- Die cut Pink Sand, Purple Mist, and Rainforest Cardstock using the leaf and flower dies from the Mini Sprigs and Flowers die set. Die cut Pink Sand Cardstock using the Large Flower Die from the Bouquet of Flowers die set. Adhere the layers together with liquid glue.
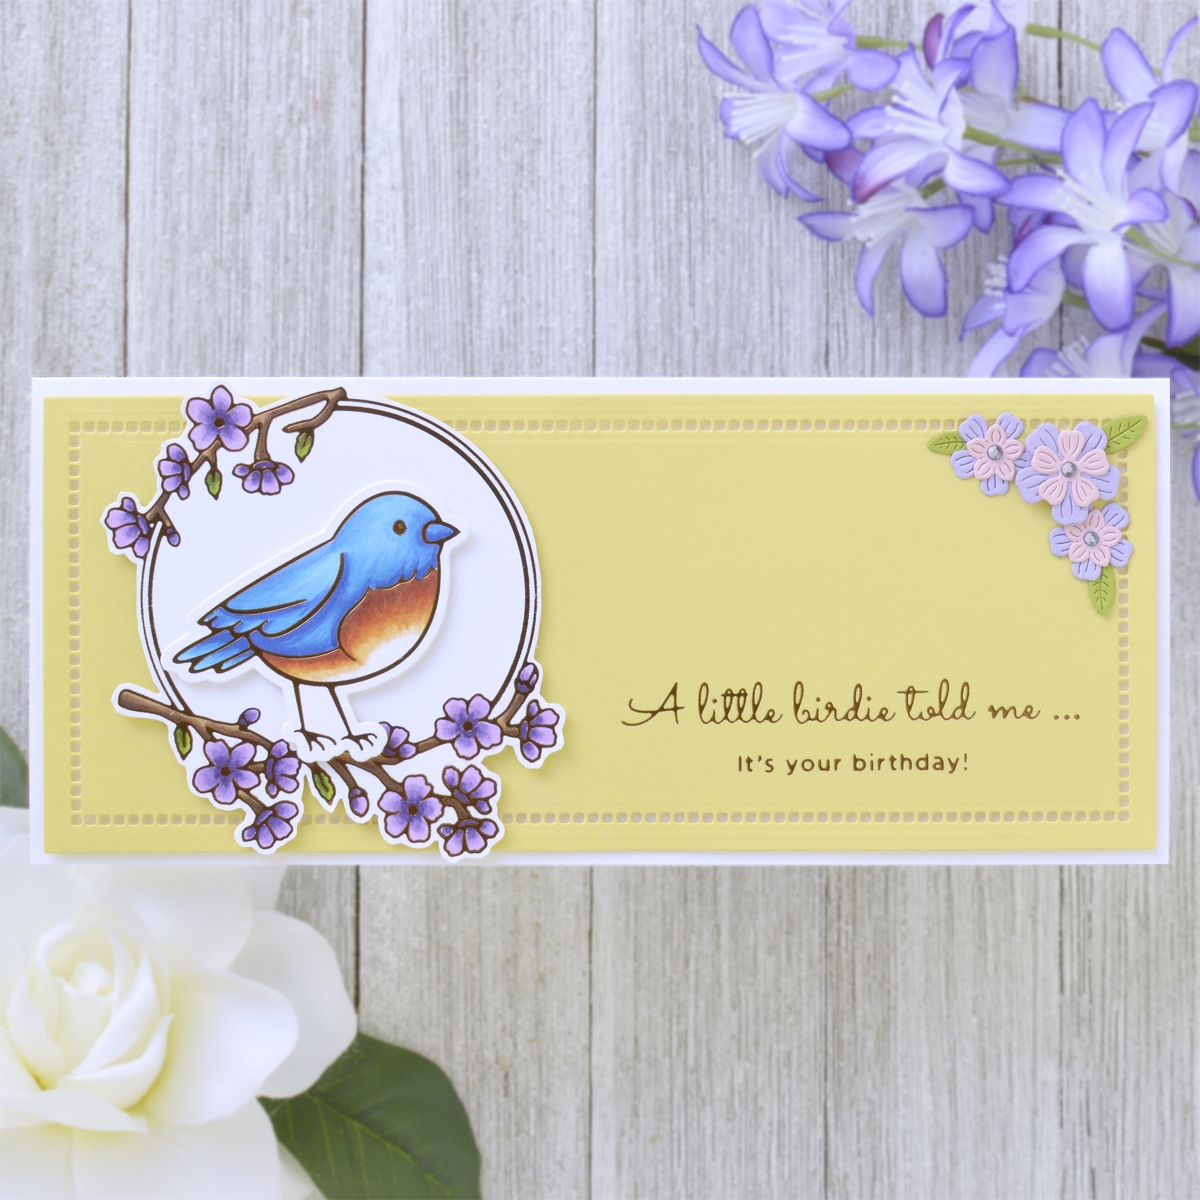
- Adhere the background panel to a top-folding white card base measuring 3.75” x 8.75” with foam adhesive.
- Pop the floral frame and bird up on the left side with more foam adhesive.
- Adhere the flowers in the top right corner with liquid glue. Add lavender rhinestones to the flower centers.
Spellbinders Supplies:
Other supplies
White heavyweight cardstock, Gina K Designs Lemon Drop Cardstock, Copic markers, scissors, lavender rhinestones, liquid glue, foam adhesive
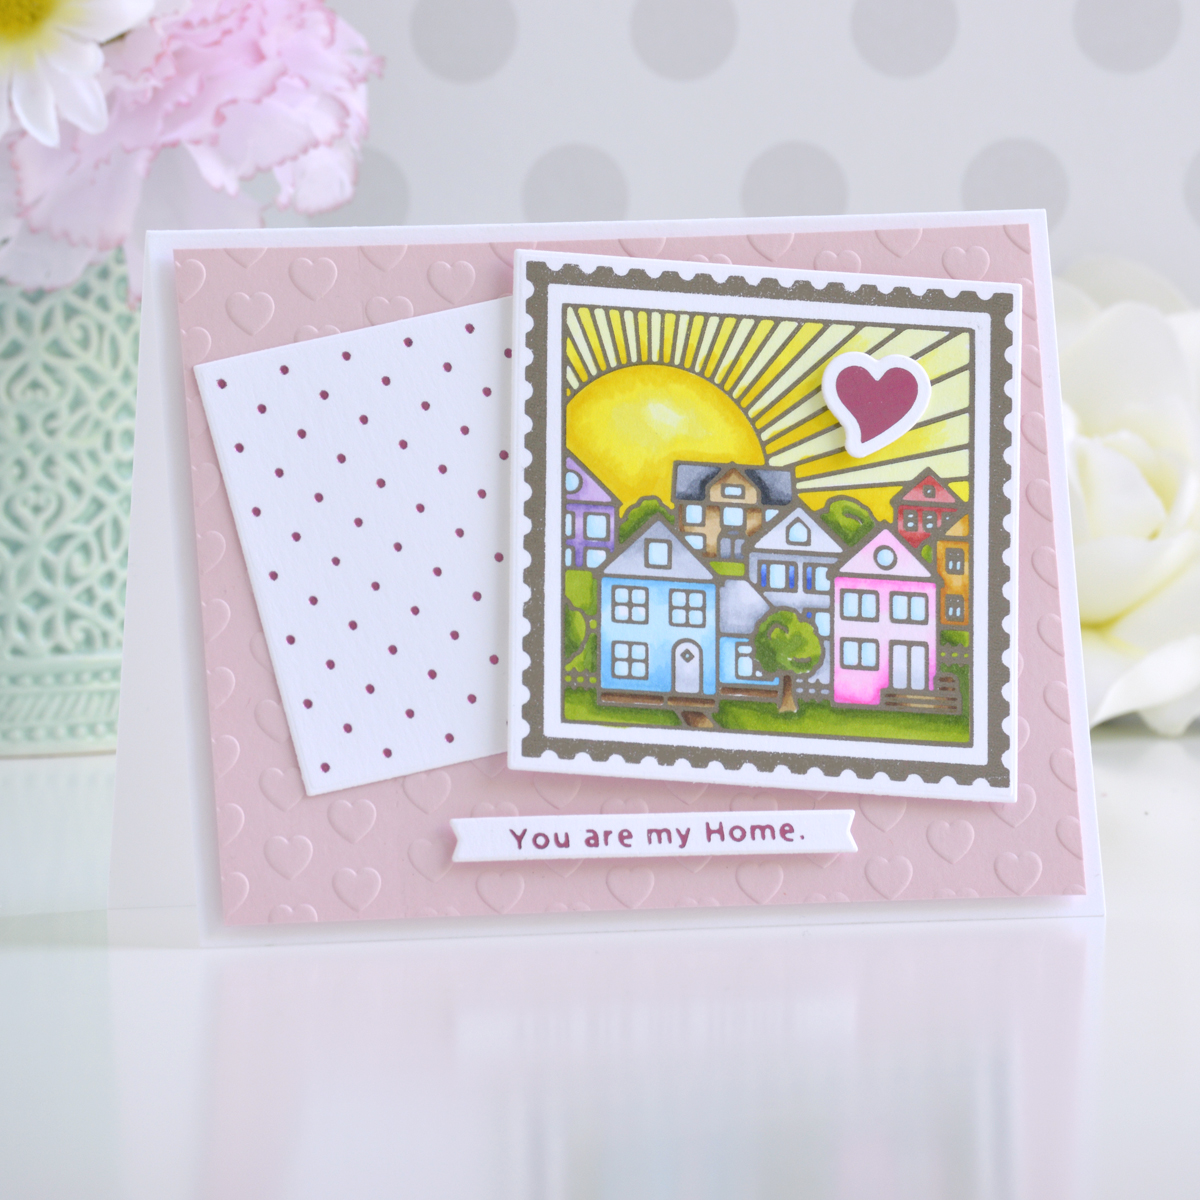
Over the last year, home has meant much more to my family and I, so I was delighted to see the cute house and neighborhood images in the You Are My Home Glimmer Plate Set. Here I’ve foiled the neighborhood postage stamp and added a little quick coloring for sweet and pretty love card.
- Apply Pewter Hot Foil to white cardstock using the Frame and Frame Insert Plates from the You Are My Home Glimmer Plate Set and the Glimmer Hot Foil System.
- Quickly color the neighborhood image in with Copic markers and trim out the frame, leaving a small white border.
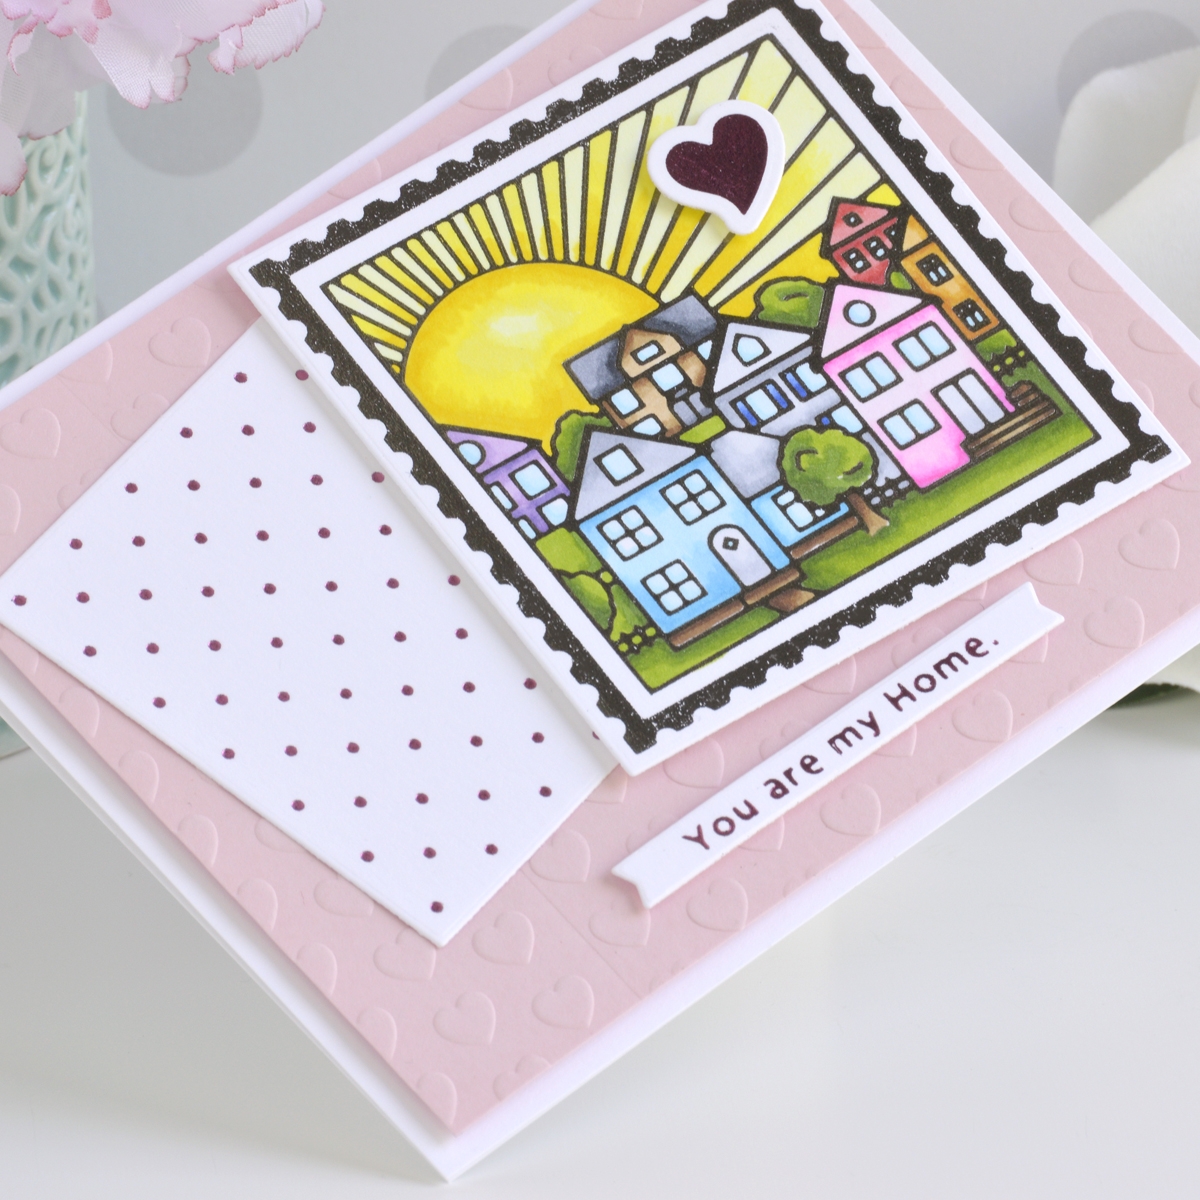
- Apply Bright Pink Hot Foil to white cardstock using the sentiment and heart from the You Are My Home Glimmer Plate Set and the polka dot Frame Insert from the Cup of Kindness Glimmer Plate Set.
- Die cut the sentiment out using the Small Swallowtail Strip Die from the Mini Everyday Sentiments Glimmer Plate Set and the heart out using the coordinating die. Trim around the polka dot pattern with a paper trimmer to form a square.
- Trim a piece of Pink Sand Cardstock to 4” x 5.25” and emboss it using the Heart and Soul Embossing Folder.
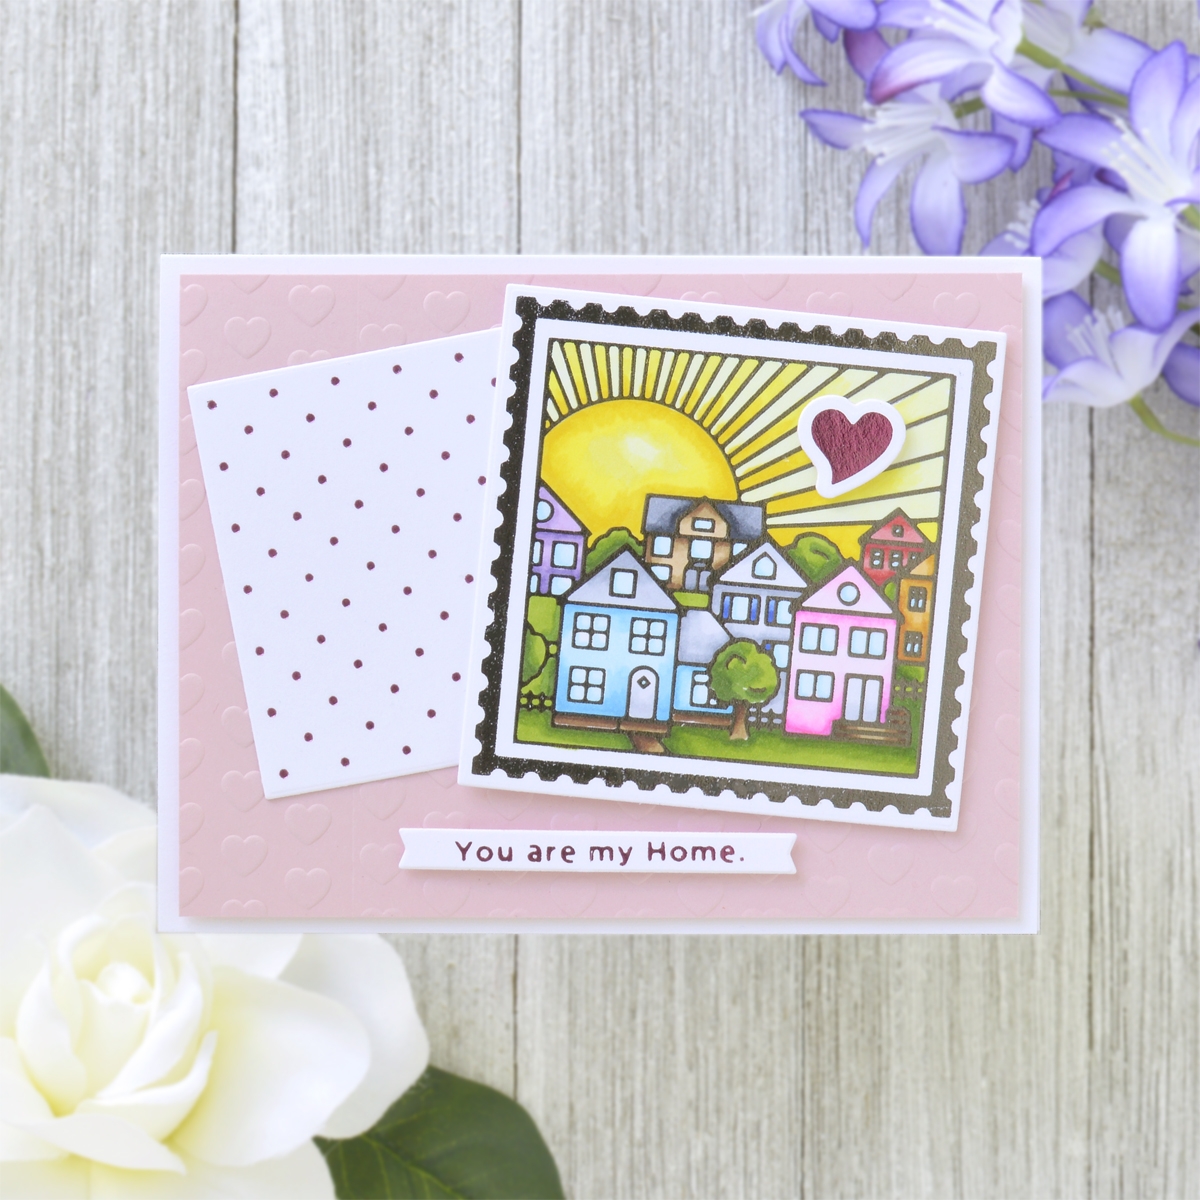
- Adhere the embossed background panel to a top-folding A2-sized white card base with foam adhesive.
- Add the polka dot square directly to the card front with tape runner, then pop the sentiment and neighborhood postage stamp up on top with foam adhesive.
- Add the foiled heart to the neighborhood image with more foam adhesive.
Spellbinders Supplies:
Other supplies
White heavyweight cardstock, Copic markers, liquid glue, tape runner, foam adhesive

I hope you enjoyed this trio of easy foiled cards and thanks so much for stopping by today. You can find more inspiration over at my blog AnnieBWills.com.


One Comment
Andre M.
These cards are just darlling, my fave is the little village scene!