
Open House Collection – Card Inspiration with Annie Williams
Hi there, this is Annie Williams and I’m thrilled to be back on the blog today to share a couple of projects using the new Open House Collection from Spellbinders. The fun and welcoming scene-building die sets in this collection inspired me to create three cheerful cards perfect for sending a warm hello or a special note .

Open House Hello
Scene-building die sets can be a little intimidating, so I wanted to start by creating a simpler front door step with just a few special touches first. Using mainly the Open House Door Base Die set, this cheerful door card is perfect for sending a happy hello, especially to a new neighbor!
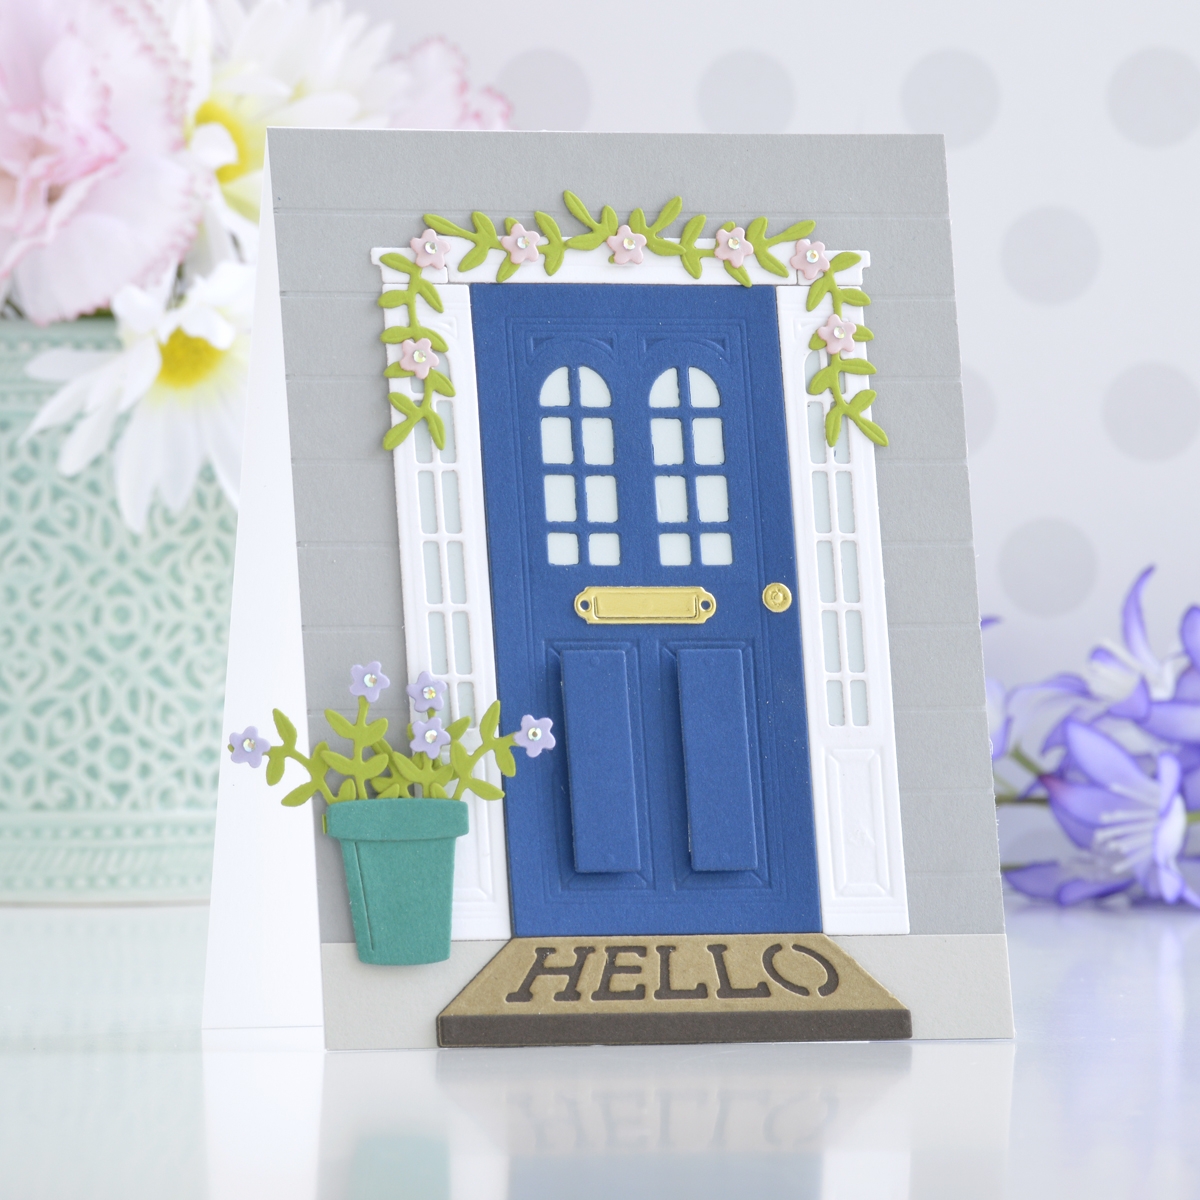
- Trim a piece of medium grey cardstock to 4.25” x 5.5”.
- Using a scoreboard and stylus, score the panel deeply every half-inch to create the look of siding.
- Adhere the panel to a top-folding A2-sized white card base with tape runner. Trim a piece of Silver Fox Cardstock to 4.25” x 0.625” and adhere along the bottom of the card front with tape runner to create the porch floor.

- Die cut Cosmic Sky, white, and Mirror Gold Cardstock with the Open House Door Base Die Set. Add the gold accents with liquid glue and the door panel inserts with foam adhesive for dimension.
- Die cut white cardstock with the side panel and door header dies in the Open House Side Panel Die Set. Add Glacier Cardstock behind all of the window panels with liquid glue.
- Die cut kraft and Timber Cardstock with the door mat dies and Rainforest, Pink Sand, and Purple Mist Cardstock with the flower dies in the Open House Door Base Die Set.
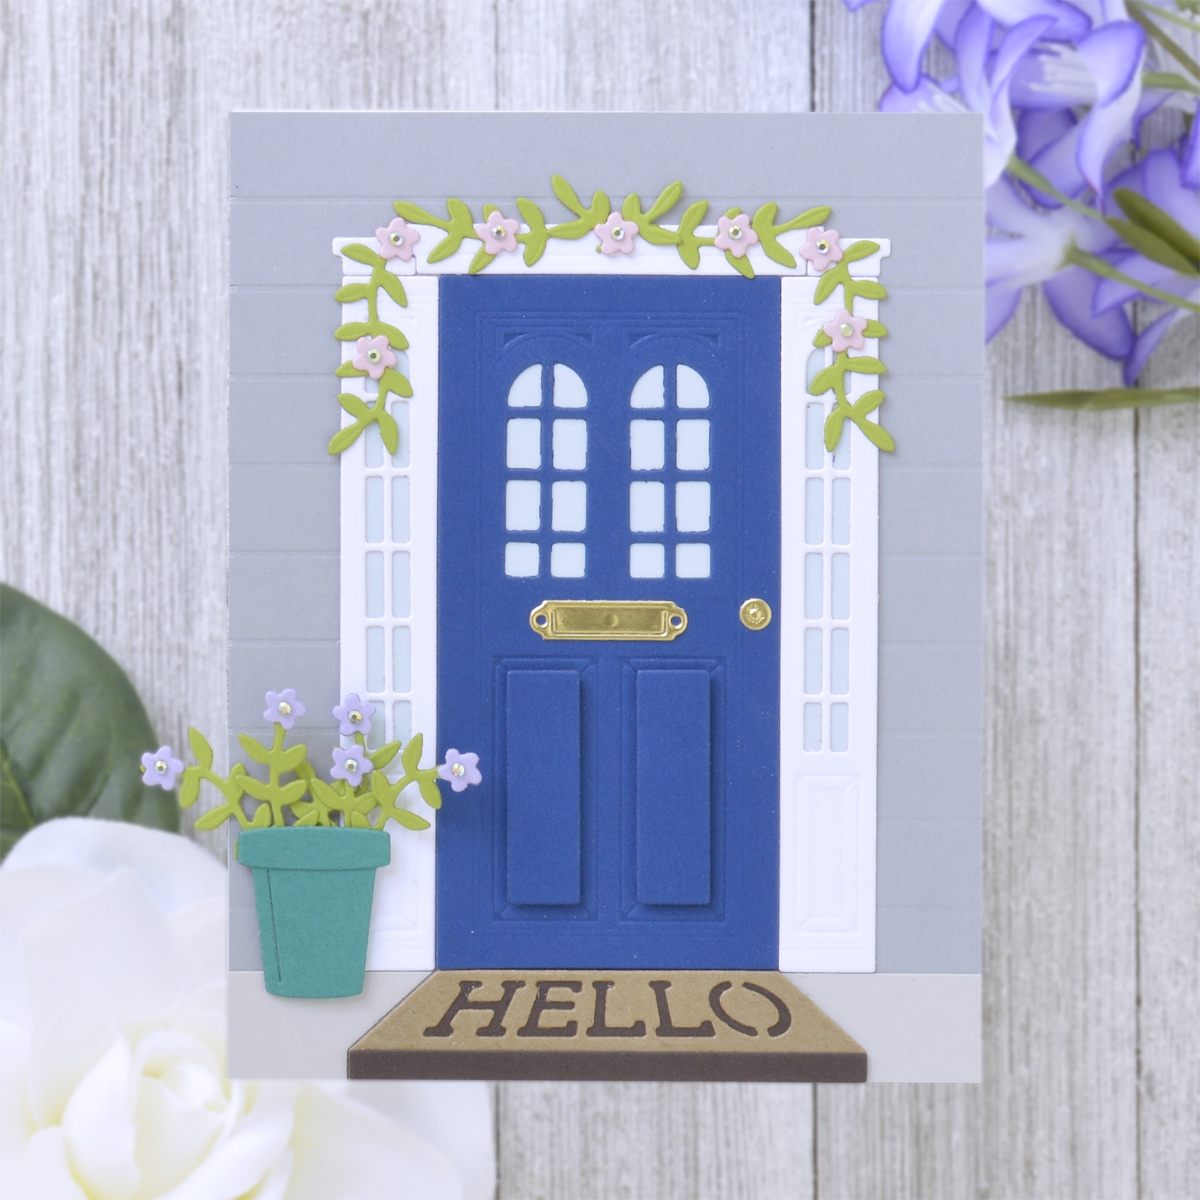
- Adhere the door, mat, and side panels directly to the card front with tape runner.
- Assemble the floral garland above the door and adhere down with liquid glue.
- Add leafy stems and purple flowers in a pot cut from Teal Topaz Cardstock using the Open House Topiary Die Set and pop it up next to the door with foam adhesive.
- Add Crystal Mix Gems to the flower centers.
Spellbinders Supplies:

Other Supplies
Heavyweight white, grey, and kraft cardstock, scoreboard, tape runner, foam adhesive
Open House Happy Birthday
Now that I was comfortable assembling a simpler scene, I wanted to create a door card with tons of little special details. I used feminine colors and some fun texture for this pretty mini slimline birthday card.
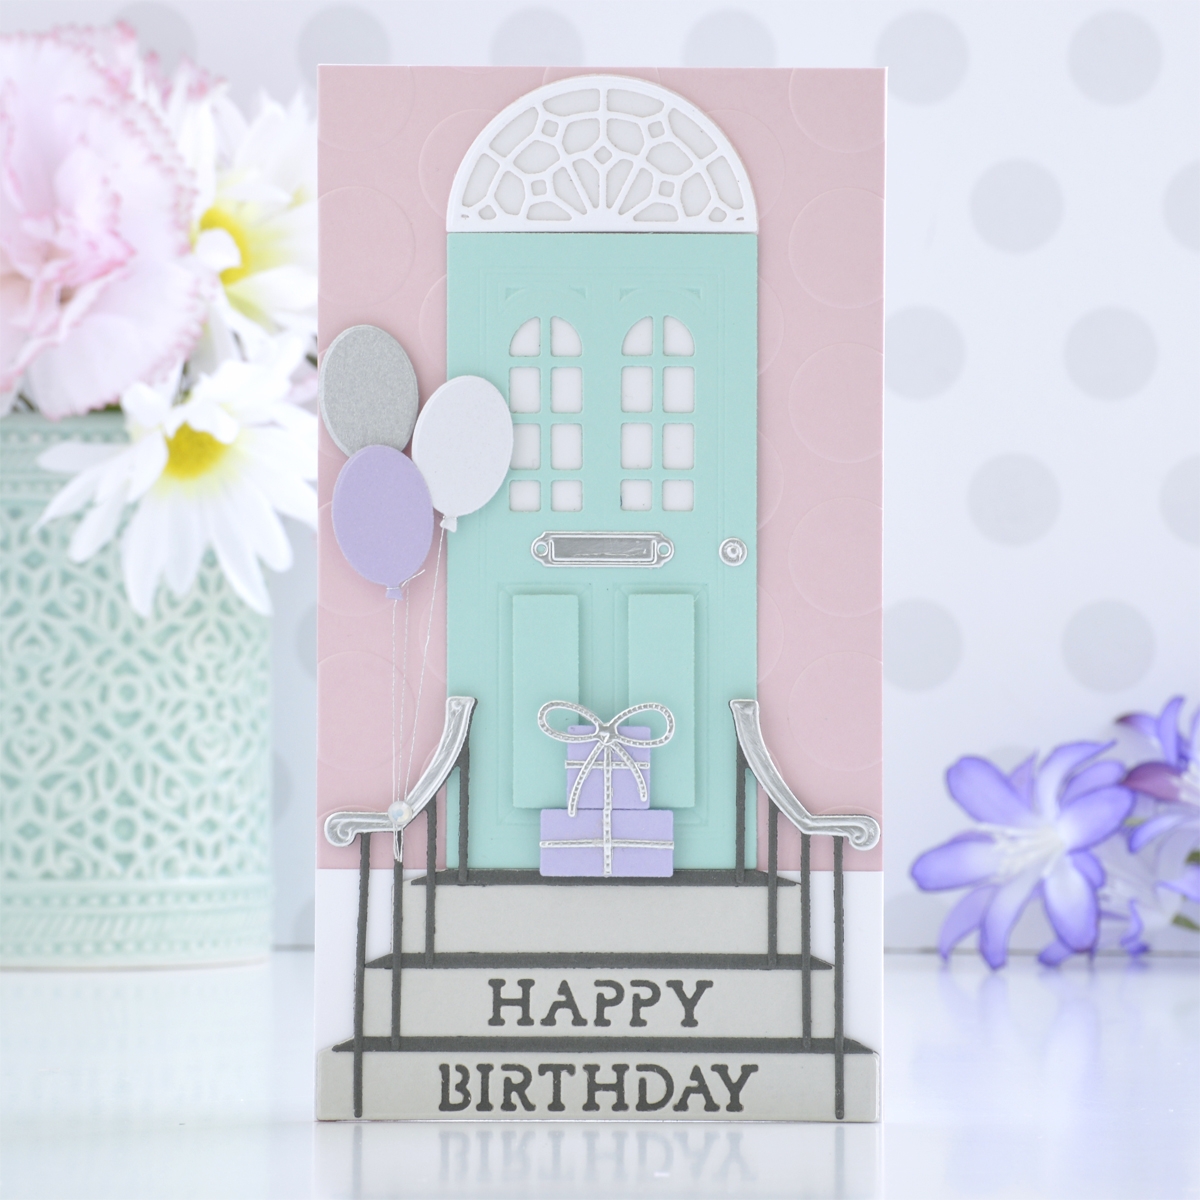
- Trim a piece of Pink Sand Cardstock to 3.5” x 6.5”.
- Emboss it with the Big Dot Slimline Embossing Folder and adhere it to a side-folding mini slimline-sized white card base with tape runner.
- Trim a piece of white cardstock to 1.5” x 3.5” and adhere it to the bottom of the card front with tape runner.
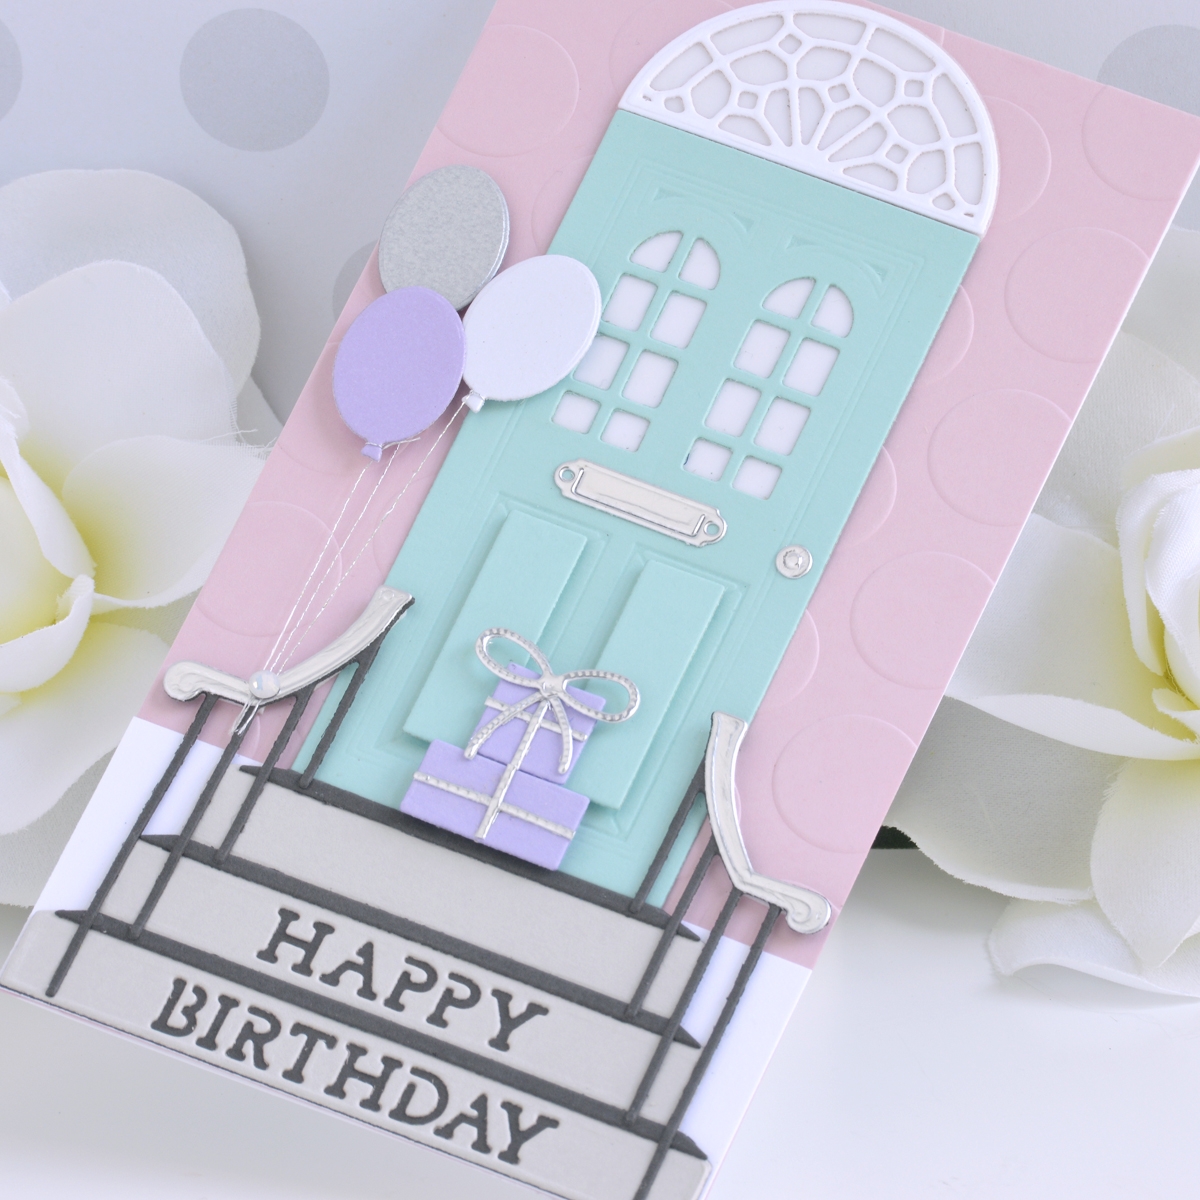
- Die cut Waterfall, Mirror Silver, and white cardstock using the door, accessory, and transom window dies from the Open House Door Base Die Set. Assemble the main door components with liquid glue, adding the door panel inserts on top with foam adhesive for dimension. Add heavyweight vellum and white cardstock behind the windows to mimic frosted glass.
- Die cut Silver Fox, Graphite, and Mirror Silver Cardstock with the railing and step dies from the Open House Sentiment Steps Die Set and adhere together with liquid glue.
- Die cut Purple Mist and Mirror Silver cardstock with the gift box and bow dies from the Shopping Spree Die Set and assemble with liquid glue.
- Die cut purple, silver, and white shimmer cardstock with the balloon outline die from the Sunday Drive Die Set. Tie a small length of silver embroidery thread around each knot.
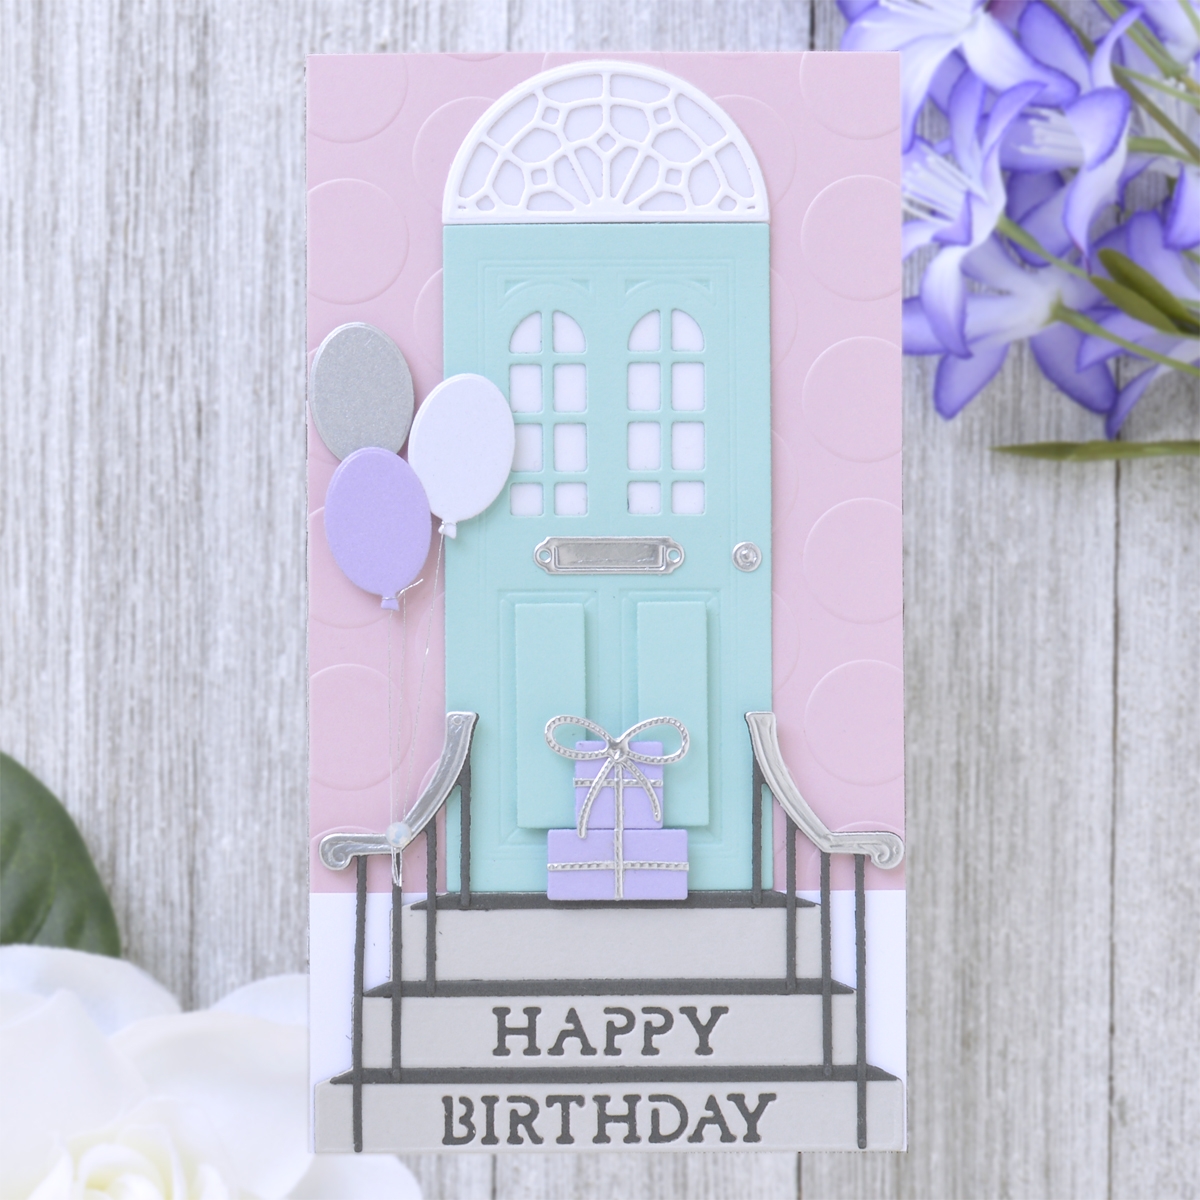
- Adhere the door, steps, and transom window directly to the card front with tape runner and add the railings on top with foam adhesive.
- Pop the gift bundle up in front of the door with foam adhesive.
- Add the three balloons to the side of the door with foam adhesive and secure the balloon strings to the railing with a single Crystal Mix Gem.
Spellbinders Supplies:
Other supplies
White heavyweight cardstock, purple, silver, and white shimmer cardstock, heavyweight vellum, silver embroidery thread, tape runner, foam adhesive
Open House Topiaries
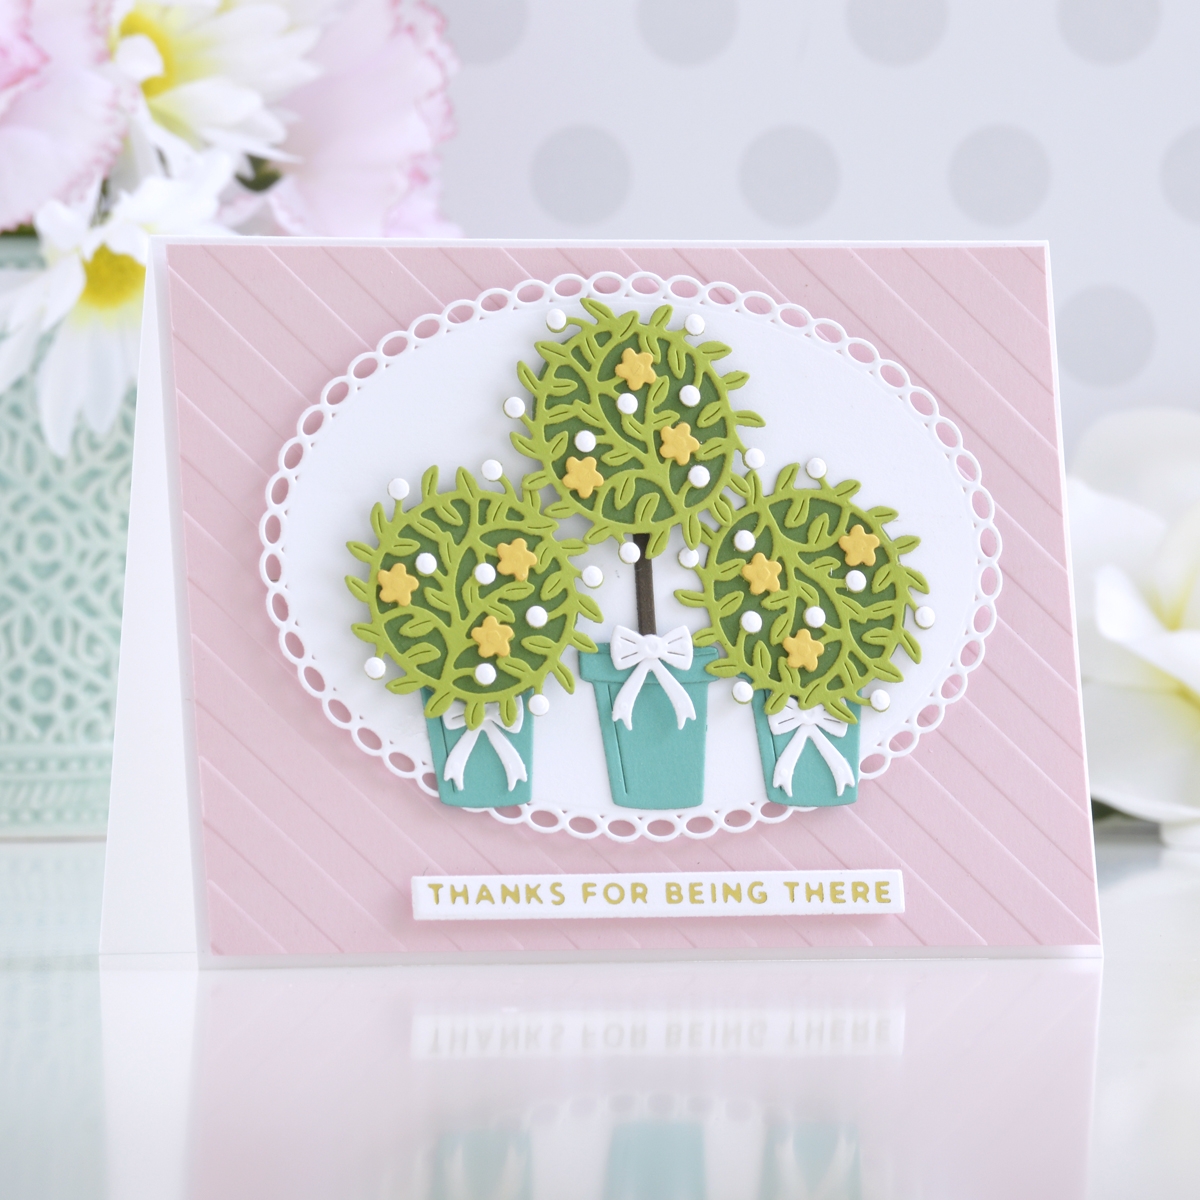
Some of the accessory dies in the Open House Collection work perfectly as focal points on a card as well. Here I’ve used the Open House Topiary Die Set to create this sweet and simple thank you card.
- Trim a piece of Pink Sand Cardstock to 4” x 5.25”.
- Emboss the panel with the Love Stripes Embossing Folder and then adhere it to a top-folding A2-sized white card base with foam adhesive.
- Die cut white cardstock using the largest die from the Elliptical Ovals Die Set.

- Die cut Teal Topaz, Rainforest, Fern, Beeswax, Timber, and white cardstock using the Open House Topiary Die Set. Assemble each topiary with liquid glue, altering heights for added interest.
- Apply Gold Hot Foil to white cardstock using one of the greetings from the Mini Sincere Sentiments Glimmer Plate Set and the Glimmer Hot Foil Machine. Die cut it out using the coordinating die.
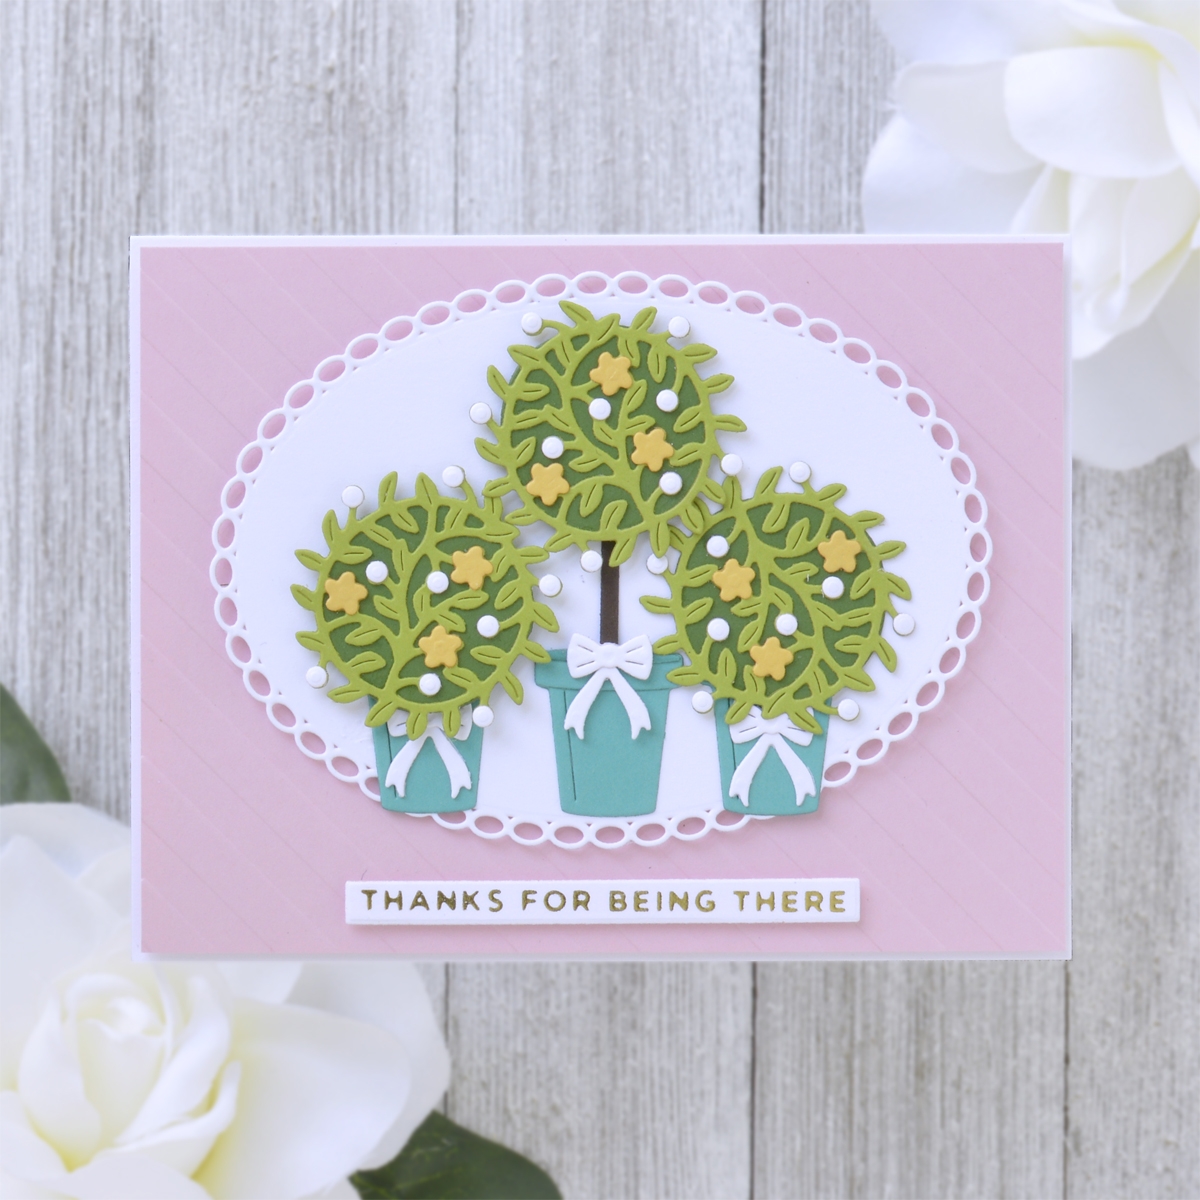
- Adhere the oval panel and sentiment onto the card front with foam adhesive.
- Add the topiaries to the oval with a mix of liquid glue and foam adhesive for lots of dimension.
Spellbinders Supplies:
Other supplies: white heavyweight cardstock, tape runner, foam adhesive
I hope you enjoyed this trio of cheerful and welcoming cards for a variety of occasions and thanks so much for stopping by today. You can find more inspiration over at my blog AnnieBWills.com.
One Comment
MaryH
What’s not to love about this collection. Especially taken with the birthday card; so soft and sweet. The balloons on the railing adorable. Your layouts are charming. You did a cracker job with all the details and embellishments!