The New Holiday Medley Collection by Becca Feeken with Linda
Hello. I’m Linda, a papercrafter from the UK and I was delighted to be invited by Spellbinders to be Guest Designer on their blog. I am showcasing some products from the fabulous new Holiday Medley Collection by Becca Feeken. I have three Christmas projects to share with you today and I do hope you like them.
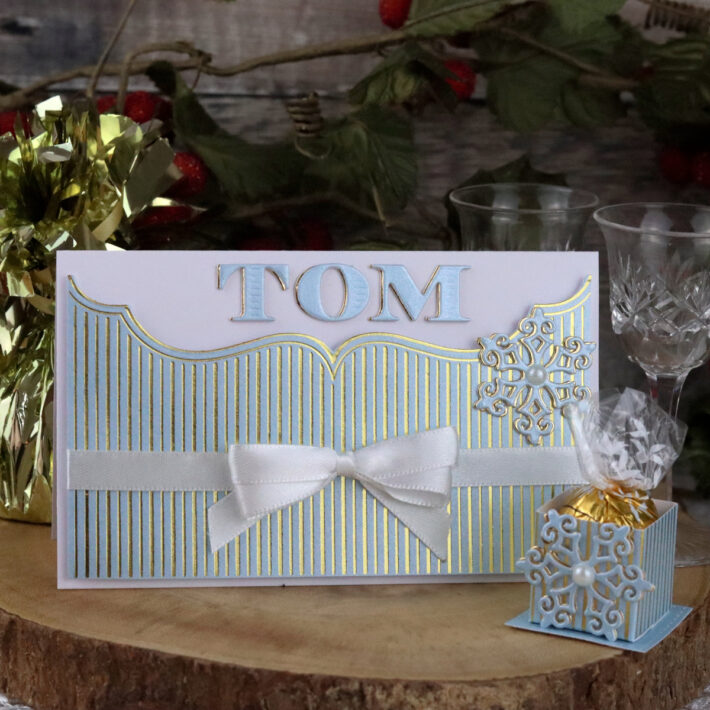
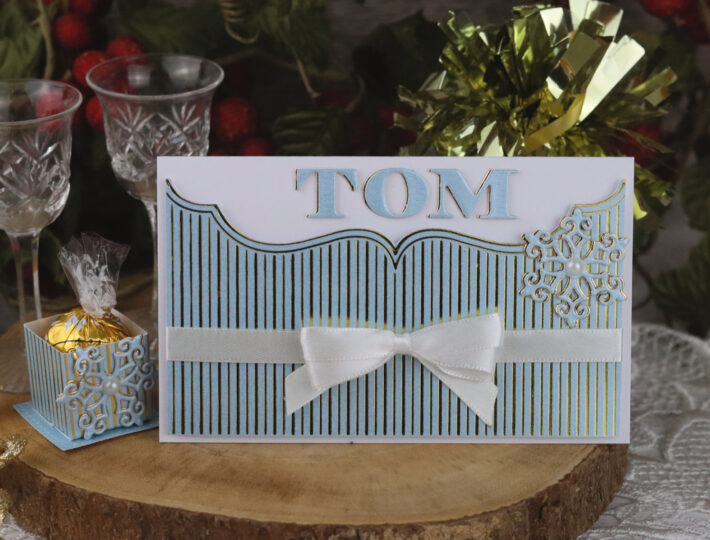
Christmas is the ideal occasion for throwing dinner parties with stunning table displays, and I thought it would be fun to create a personalized guest place setting card. I thought that the gorgeous Pinstripe Bracket Card Builder Hot Foil Plate was just perfect for this. It also occurred to me that this idea would be brilliant for wedding parties.
My place setting card base is 5-3/4” x 7” inches and is scored at 3-1/2” inches on the long side. I foiled the large hot foil plate in gold glimmer foil onto a pearlescent blue piece of card and then die cut it with dies from the new coordinating Mosaic Bracket Card Builder Etched Dies set. I trimmed the finished foiled image. I popped on a decorative satin bow and then adhered the piece to the card base with adhesive backed foam squares. I used my Spellbinders Etched Alphabet dies for my guest’s name, using the pearlescent blue and some gold mirror card, offsetting the letters for greater dimension.
I completed the place setting by adding a pretty snowflake and pearl embellishment. The snowflake is from the new Celebrate Scrollwork Card Builder.
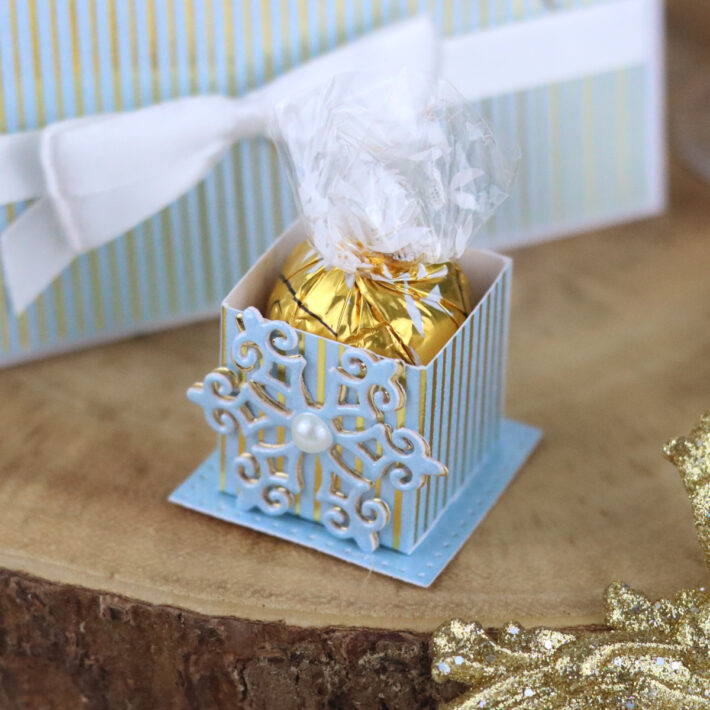
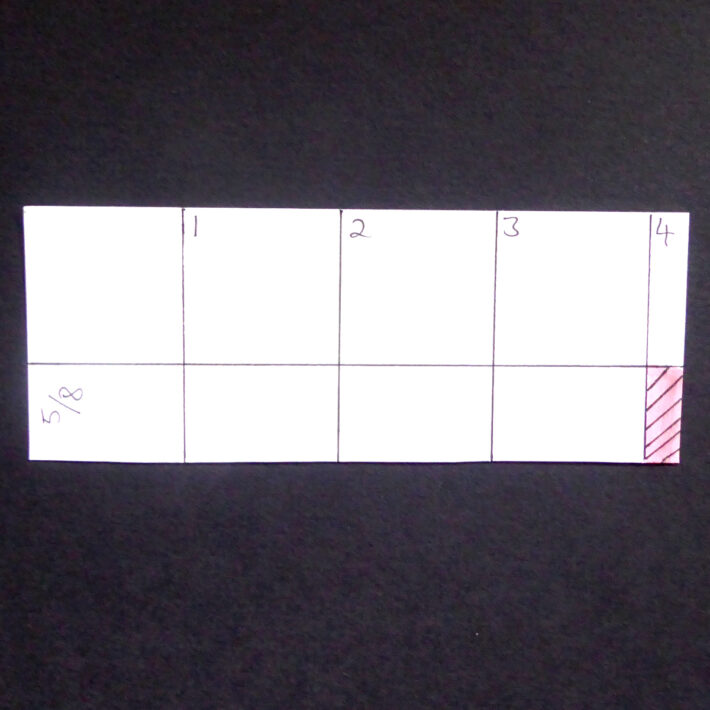
It’s always nice to send your guests home with a little chocolate treat, so I made a simple little treat box. I foiled the Pinstripe Bracket Card Builder Hot Foil Plate onto pearlescent blue card. Then I trimmed this down to 1-5/8” x 4-1/4” inches.
- Score @ 1”,2”, 3” & 4” inches on the long side.
- Score @ 5/8” on the short side.
Now snip up the base vertical score lines up to the 5/8” horizontal score line and snip away the area hatched and highlighted in pink. Add double-sided tape to the small side strip and assemble the simple box base. I popped mine onto a small decorative square base. For this I used the smallest square die from my Christmas Cascade Card Base Etched Dies.
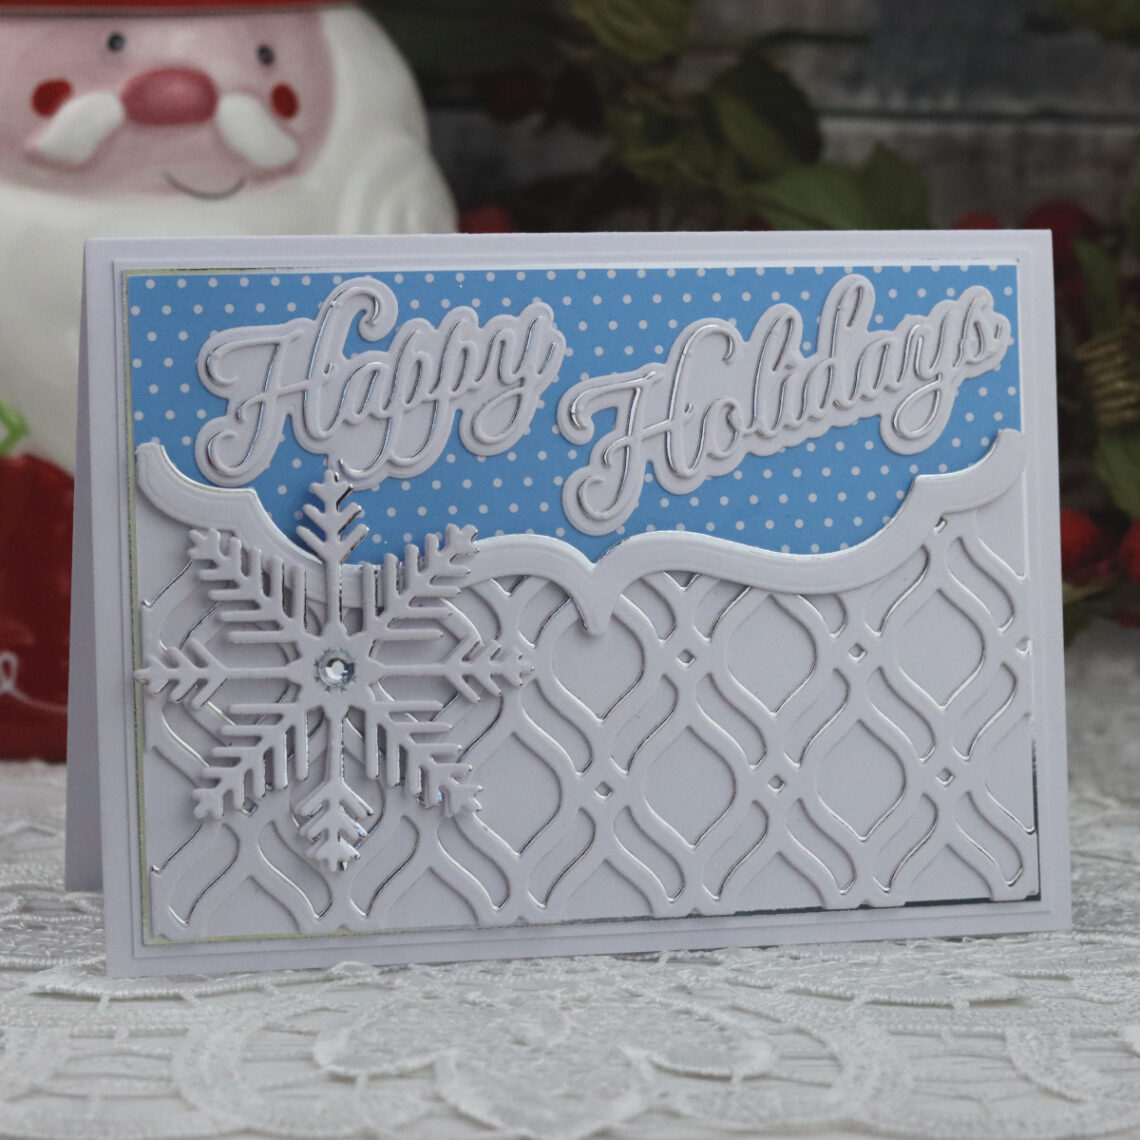
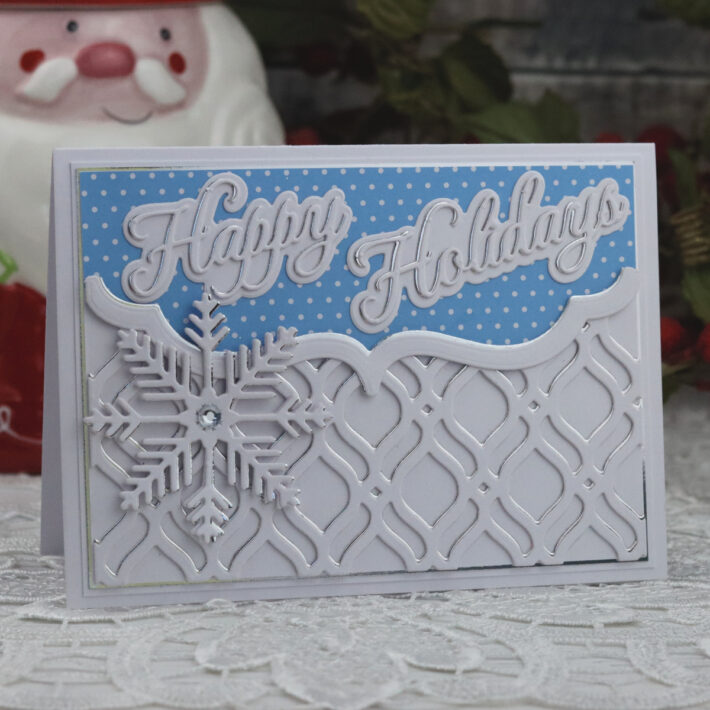
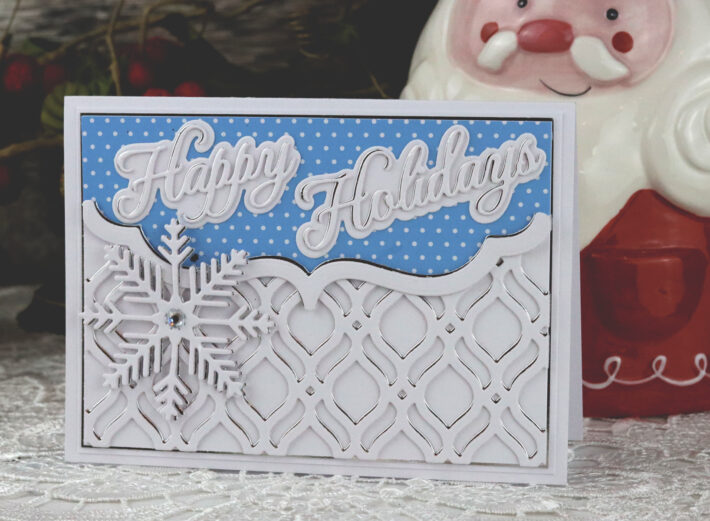
My next project is a cute white and blue Christmas card with silver mirror card accents. This was made using the Mosaic Bracket Card Builder Etched Dies. I love the word dies and really like that they have coordinating shadow dies to really make the words pop. Mine were cut in white and silver mirror card. I offset the white Happy Holiday word dies over the silver before mounting on the white word shadows.
I used the same offsetting technique for the intricate lattice base. I thought the dotty blue background paper resembled snow and added a large blingy snowflake. This snowflake is from the Snowflake Splendor Etched Dies.
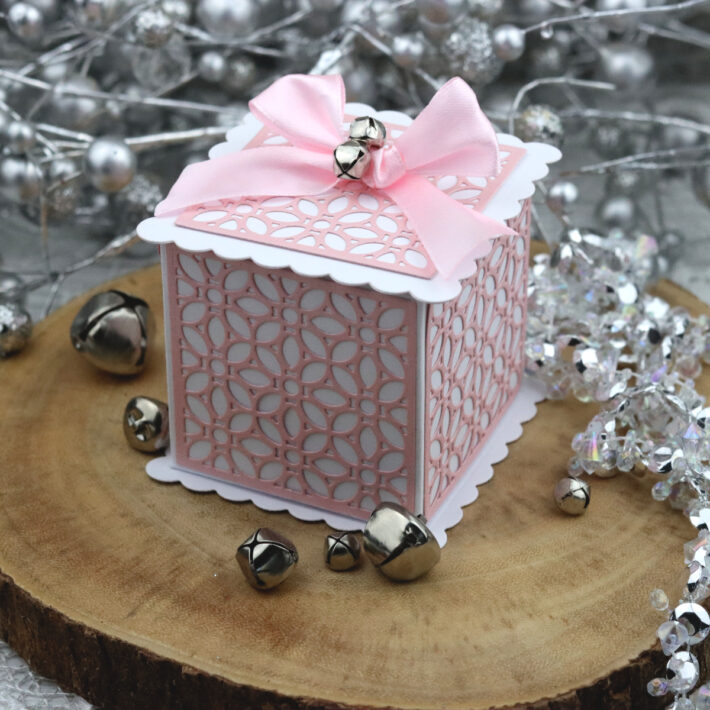
Next up, I have a pretty Christmas Box project. This was made using the All is Calm Word Frame Etched Dies.
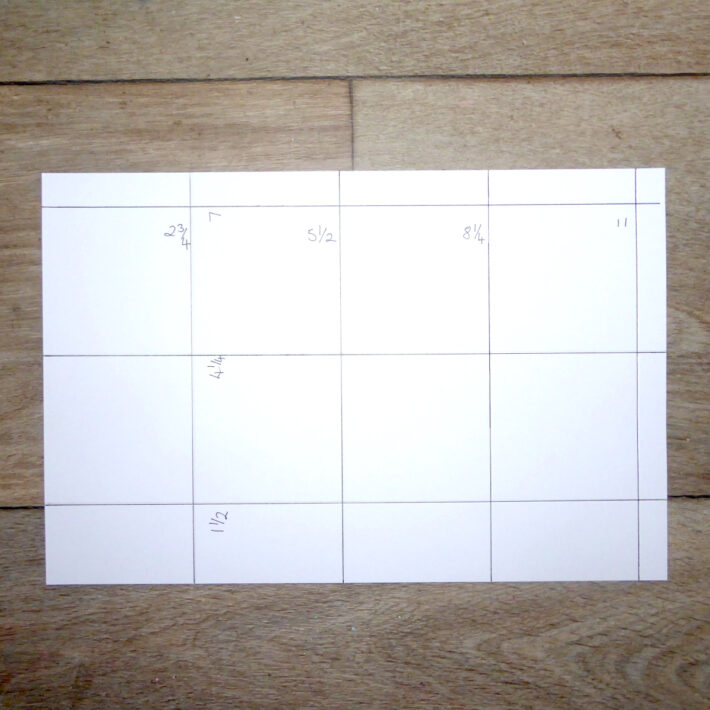
For this box you need a piece of cardstock measuring 11-1/2” x 7-5/8” inches
- Long side score@ 2-3/4”, 5-1/2”, 8-1/4” and 11”
- Short side score @ 1-1/2”, 4-1/4” and 7”
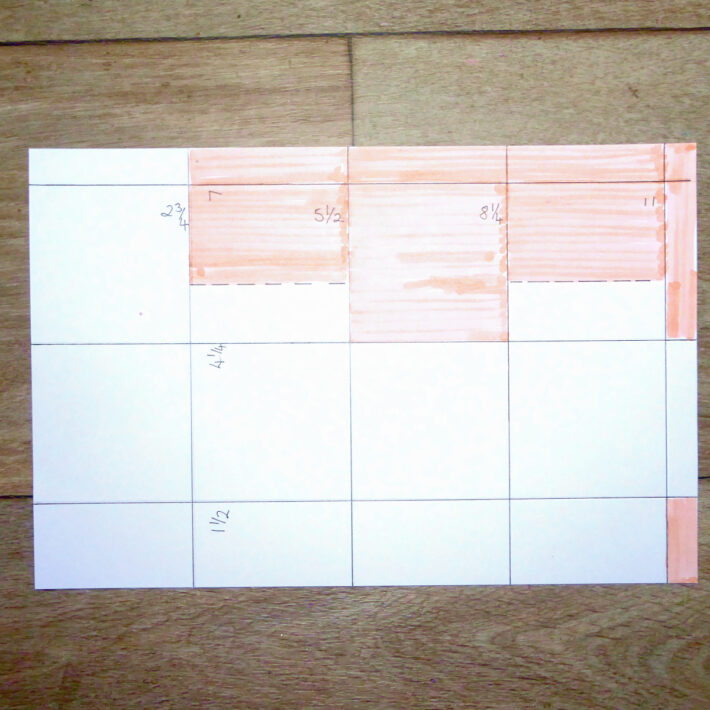
Next cut away the sections shaded with orange highlighter in the illustration below.
Snip up the bottom vertical score lines and applied double back adhesive tape to the narrow side strip shaded with orange highlighter in the illustration below.
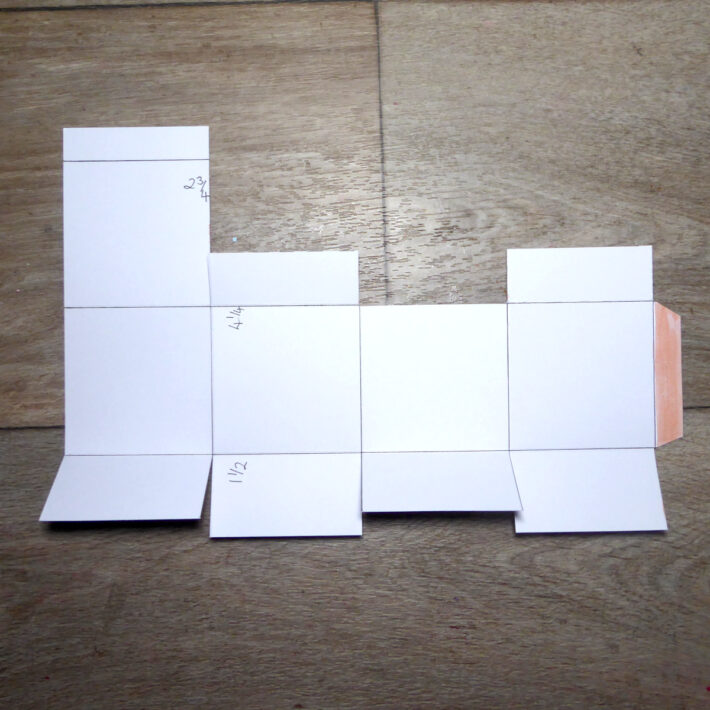
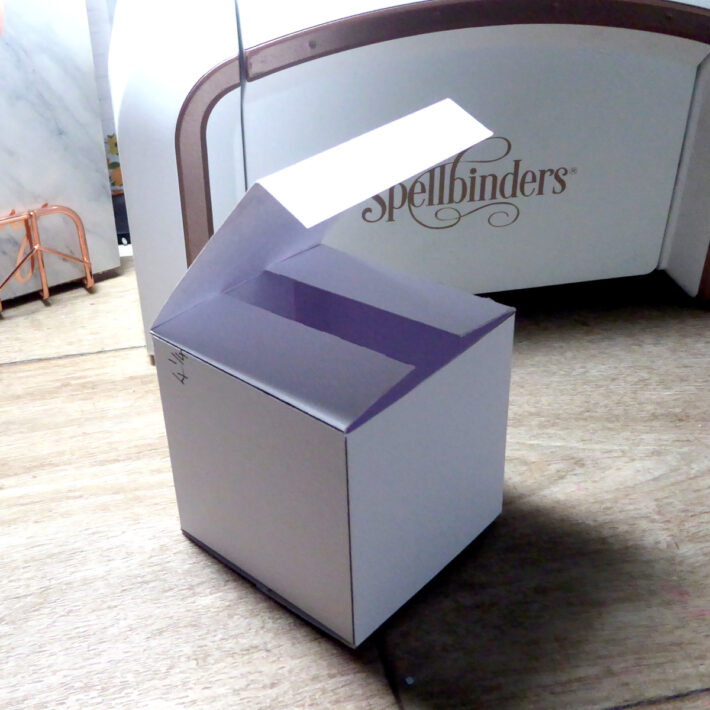
Assemble box which will look like the illustration below.
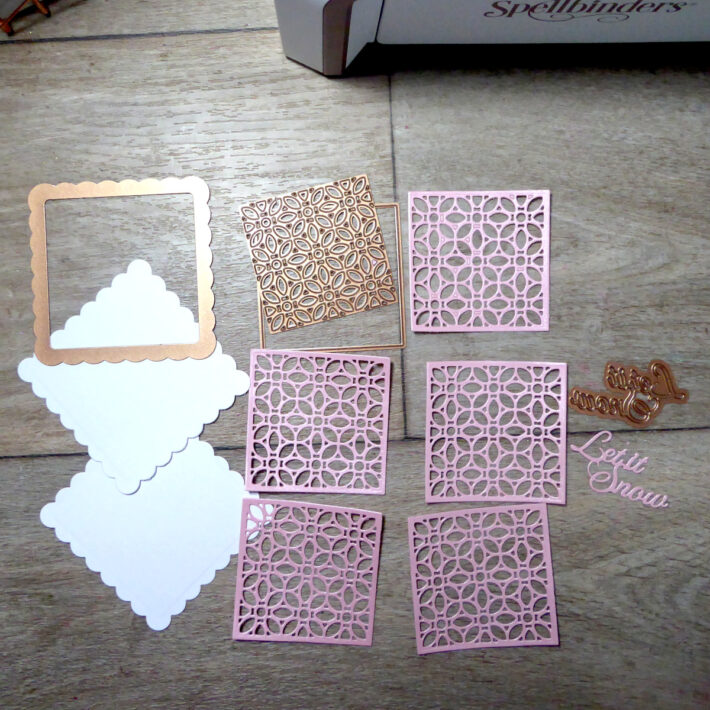
Die-cut two scallop edged squares, 5 intricate squares and one word sentiment. Adhere the scallop edged squares to the top and bottom of the box. Adhere the intricate squares to the sides and top. Adhere your word die to the inside of the lid.
When making this box, I thought that the recipient would get a nice surprise upon opening it, to see the sentiment on the inside of the lid.
Spellbinders Supplies:

Other supplies
Crafters Companion Baby Blue Centura Pearl card stock, Tonic Studios Princess Pink Pearlescent card stock, Daisy Mae Design Simple Spots Paper Pad, CraftStash Adhesive Foam Pads, Stix2 3mm and 6mm Double Sided Tape, Art Glitter Glue
Well, that’s it from me for today. I would like to thank you for stopping by. Pop back soon for more inspiration and new products from Spellbinders. You can catch up with me on my blog at Papercraft With Crafty and follow me on Instagram, Facebook and YouTube
Bye for now,
Linda

6 Comments
MargieH
What a fabulous array of holiday projects. Thanks for the detailed tutorial too. 🙂
papercraftwithcrafty
Thanks Margie
MaryH
Not only were the projects varied and interesting but the narrative was detailed, concise and pictures helped with construction! Your wonderful selection of projects peeked my interest in Becca’s new release and your diverse project selections gave us a flavor of what can be done with her new release. Loved the softer color tones too.
papercraftwithcrafty
Thank you Mary for you kind feedback.
Donna de Gale-Kalloo
Gorgeous cards! Those boxes are so adorable!
papercraftwithcrafty
Thank you Donna. So glad your liked them.