Add to Cart Collection Inspiration with Gemma Campbell
Hello everyone, this is Gemma from mygirllollipop.com. I am excited to be on the Spellbinders blog today. I have three projects to share, highlighting the Add to Cart collection by Becky Roberts.

This fun collection centres around a 3D shopping card, with sets that can be used alongside it or independently. Party, holiday, and girls’ night out are just some of the themes featured. I have three cards to share today, showing different ways to use the Add to Cart collection. Learn how to assemble the shopping cart in Becky’s video below or watch on Youtube:
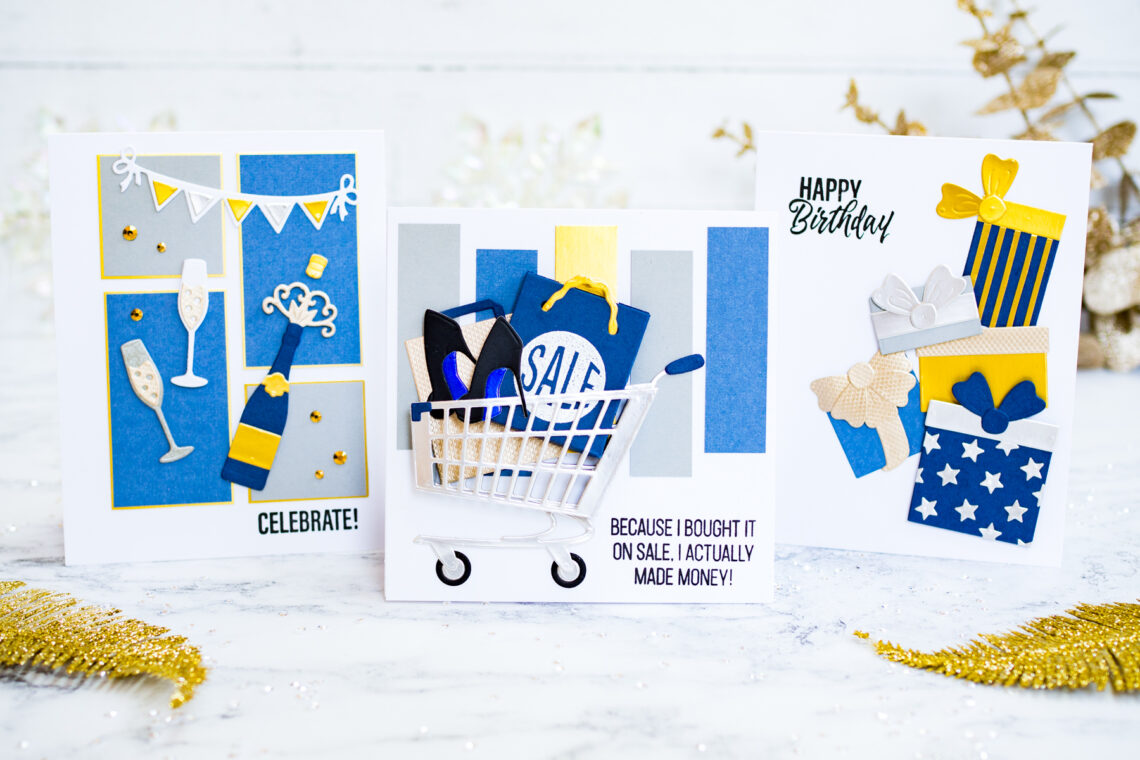
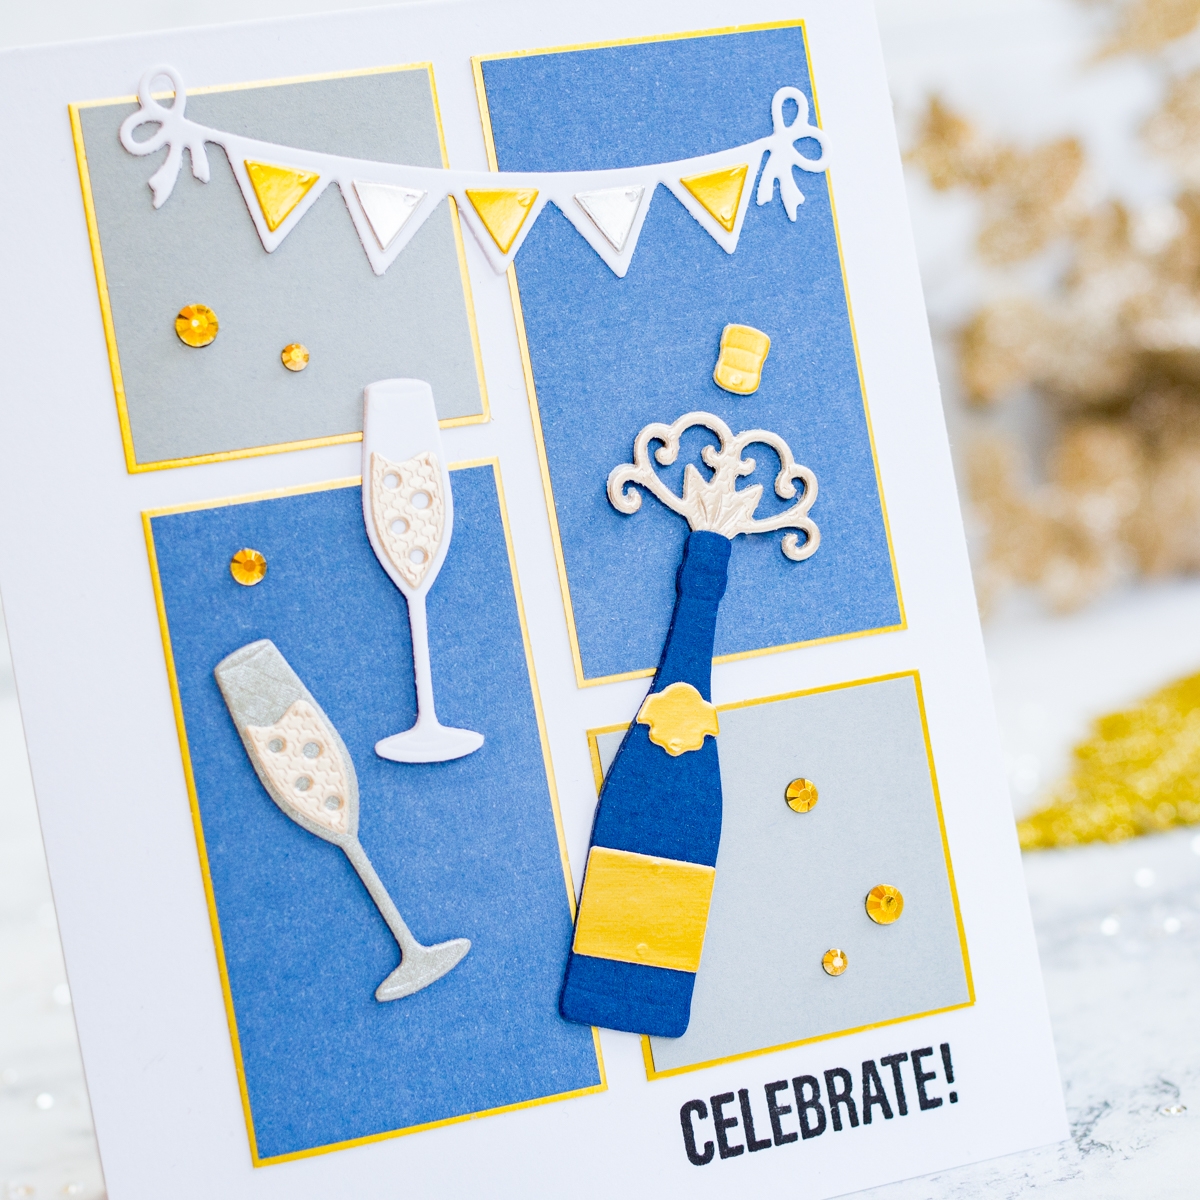
Party On! Card
For my first card, I focused on the Shopping Cart Party On! set. This is a great set for a party, anniversary, and even New Year celebrations.
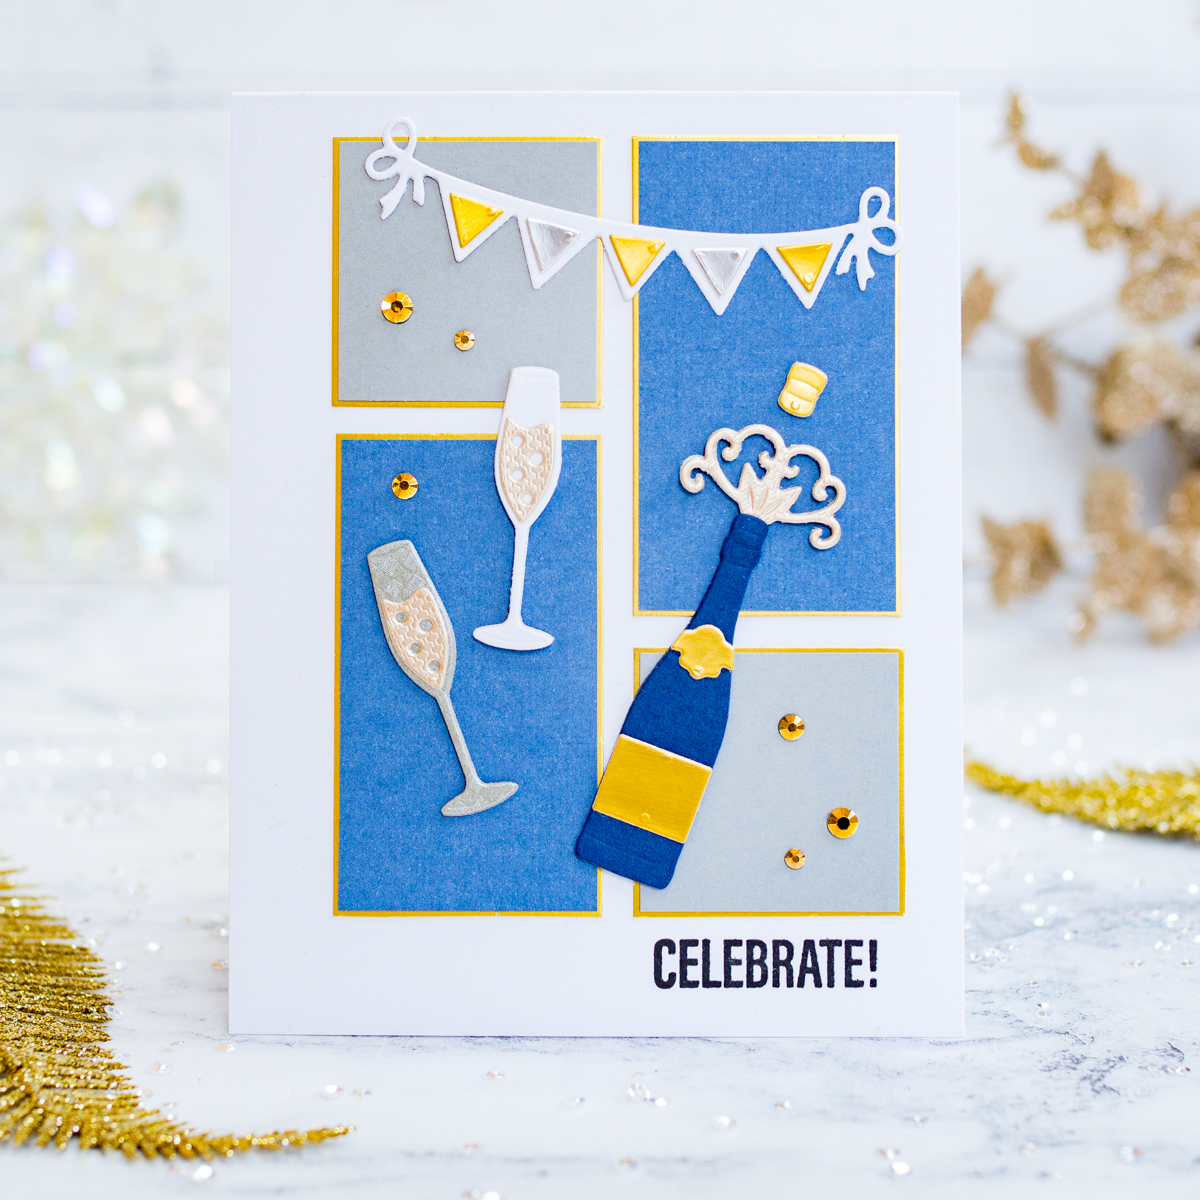
I began by cutting panels of coloured cardstock – two 1.5” squares and two 1.5 x 2.75” rectangles. I layered these over some metallic gold card, then adhered them to an A2 card base, off-centre to the right.
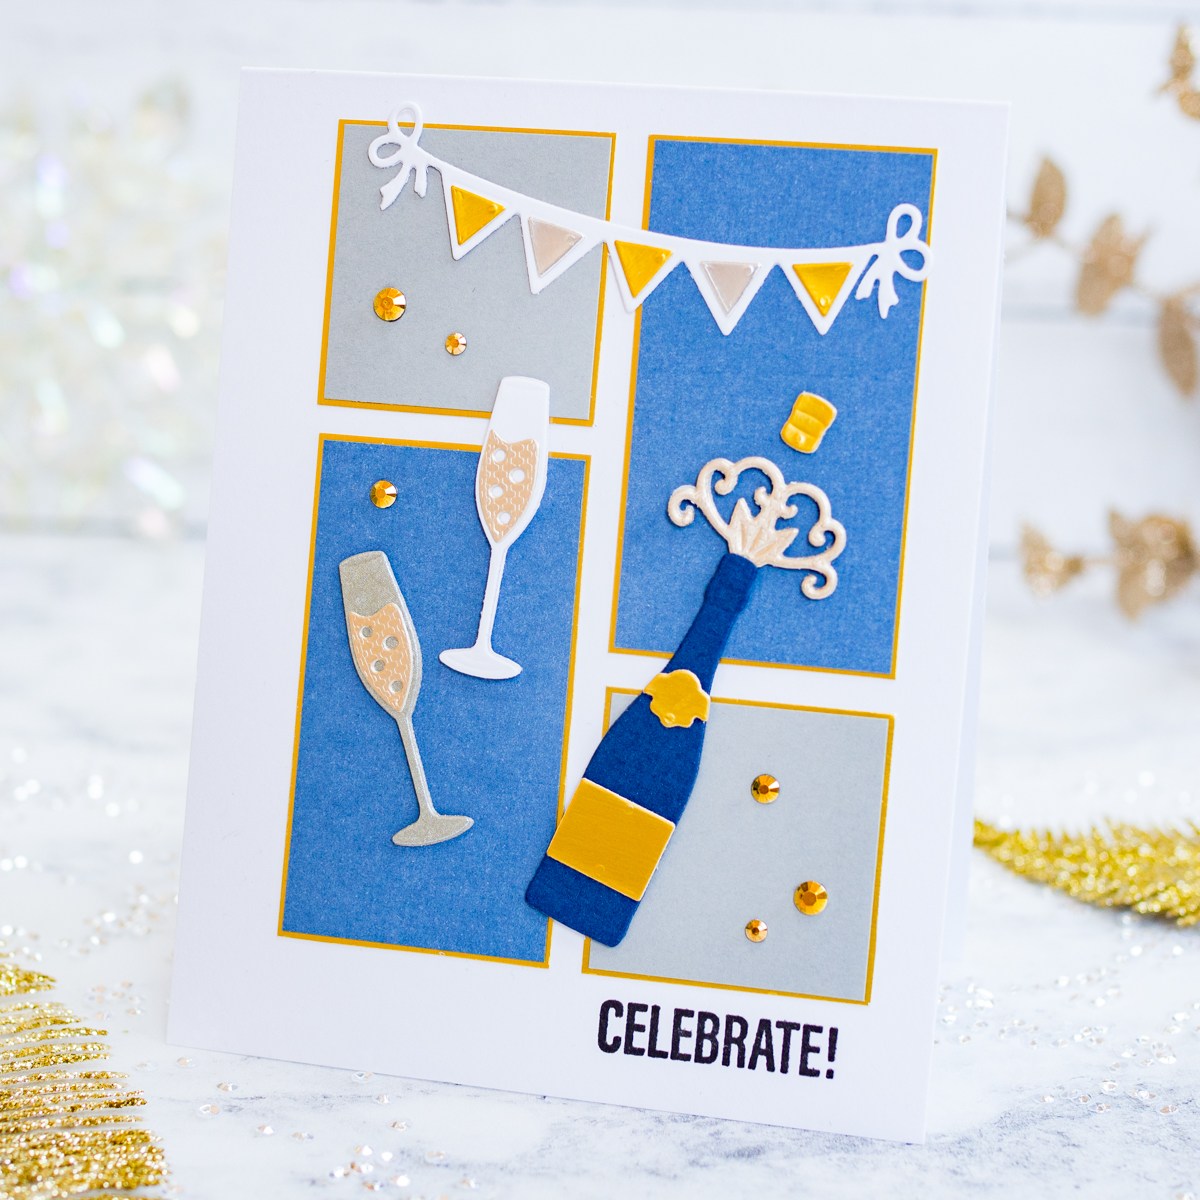
Underneath this, I stamped a sentiment from the Shopping Bag Sentiments stamp set. I die cut elements from the Shopping Cart Party On! set, using colors to complement the background, then finished by adding some metallic gold jewels around the card.
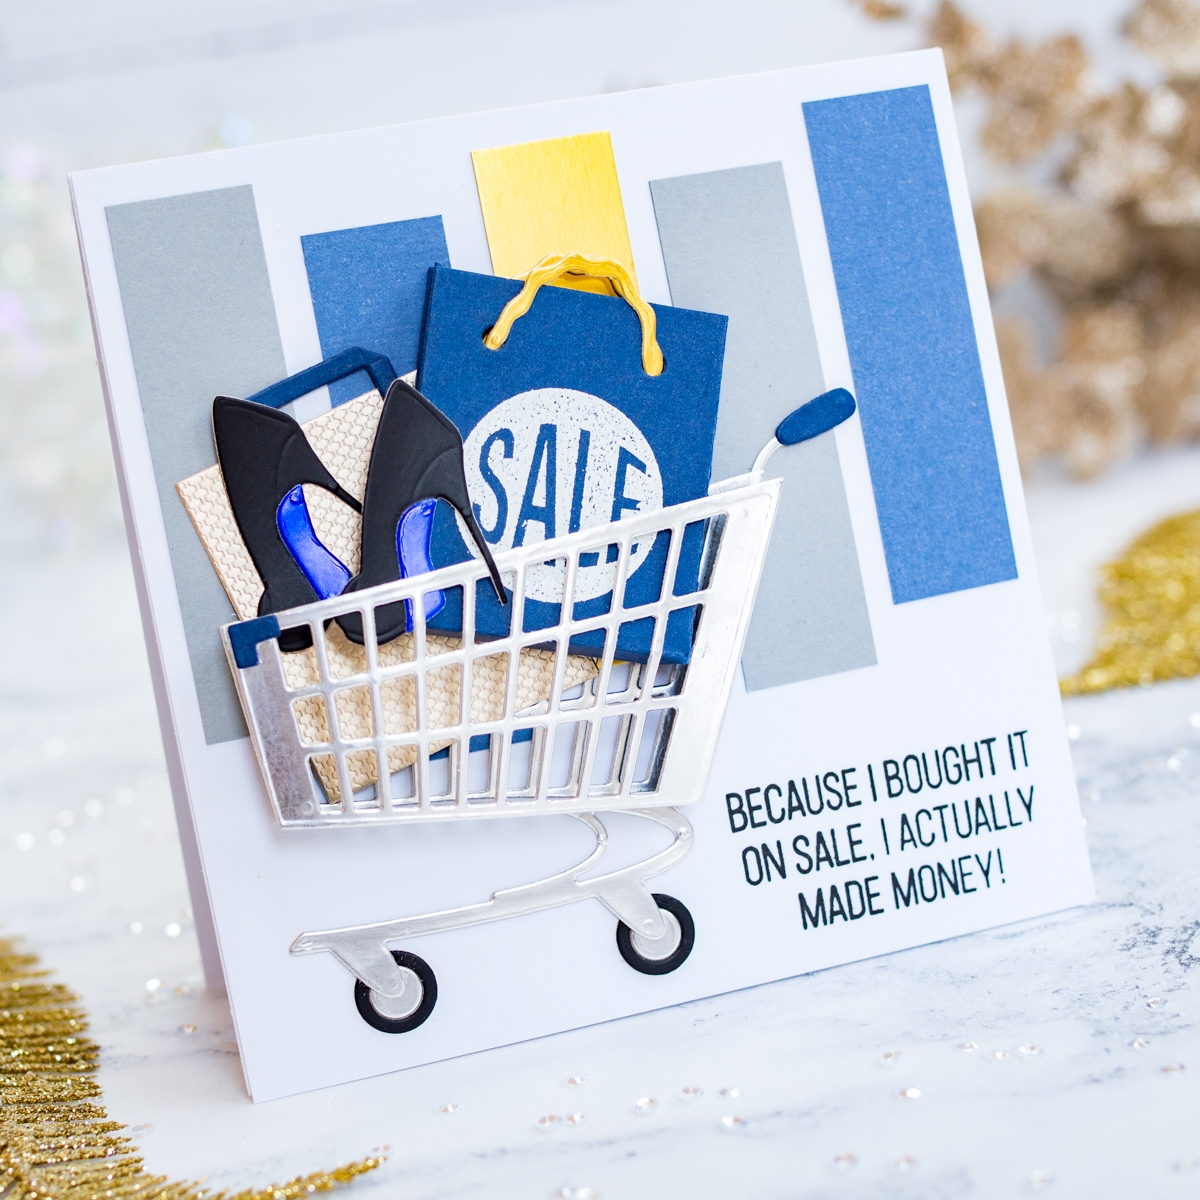
Shopping Cart Card
I chose a 4.75” square card base for my second card. I continued with my color scheme, adhering rectangles of coloured and metallic card to my card base, to give the illusion of shelves in a supermarket.
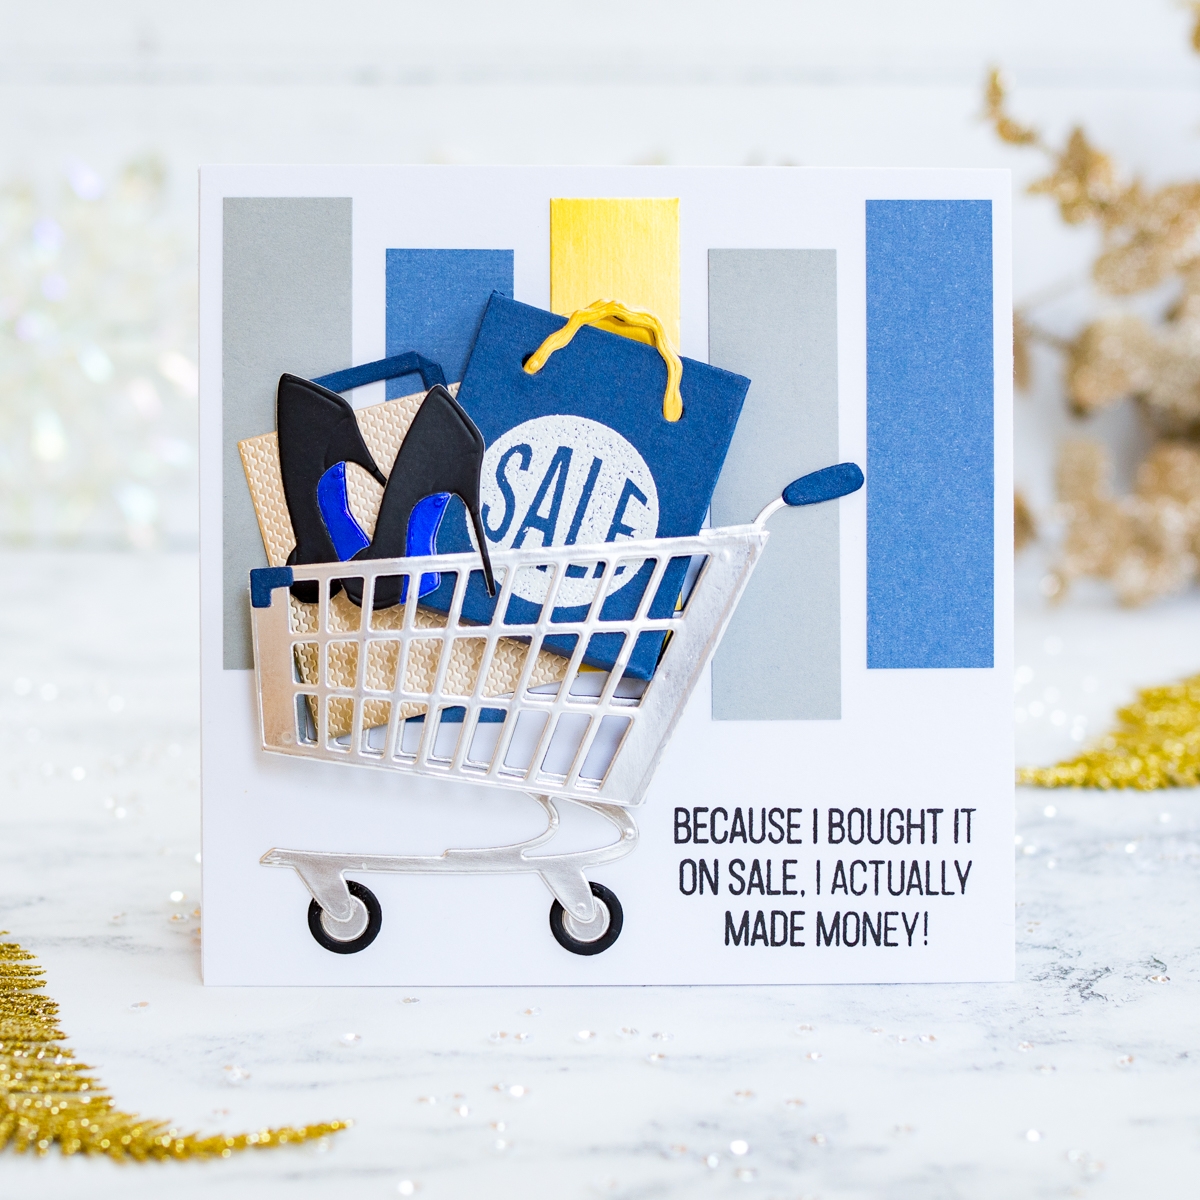
I chose a fun sentiment, from the Shopping Bag Sentiments stamp set, to add to my card base.
Next, I die cut the pieces to create the 3D shopping cart. There are options for both a narrow and wide cart, depending on what you’d like to fit inside. I chose to make a narrow cart. I adhered the cart together, then added it to the card base.
I die cut two bags for my cart, using the Shopping Bags die set. I embossed a sale sign on one of the bags, with white embossing powder, then adhered it together for a 3D look. The sale sign is from the Shopping Bag Sentiments stamp set.
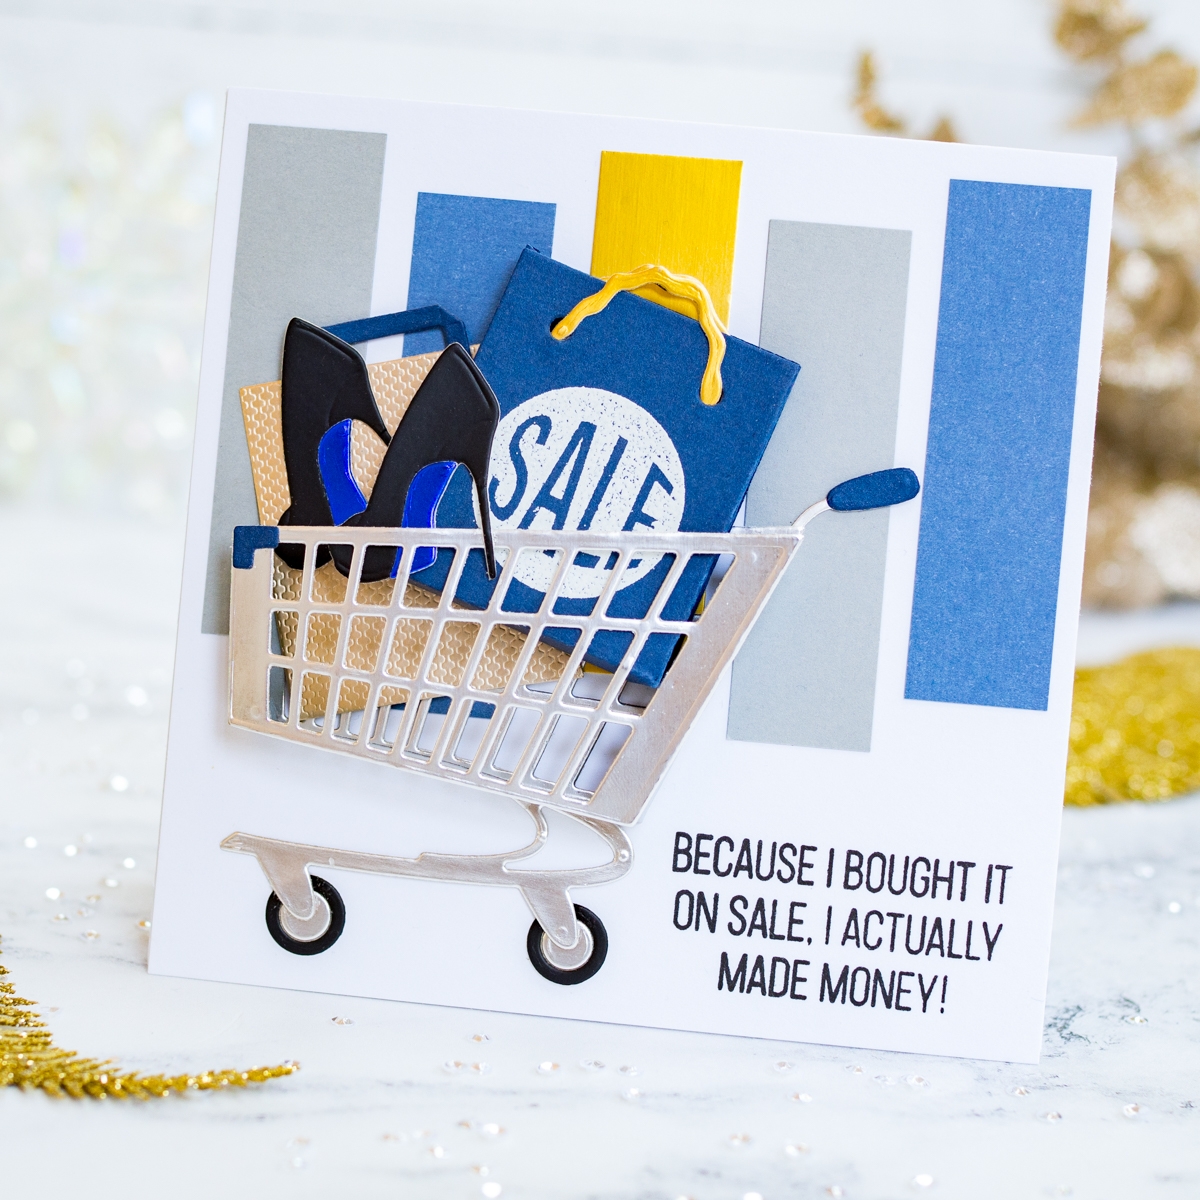
There are many elements in the collection for adding into the bags, if you choose. For my second bag, I adhered it flat in the cart, followed by the 3D bag.
I die cut two shoes from the Shopping Cart Party On! set, then positioned them in the cart to finish.
Holiday & Present Card
For my final card, I used the Shopping Cart Holiday and Presents set. I die cut the pieces to make lots of different sized presents, with the same colour scheme.
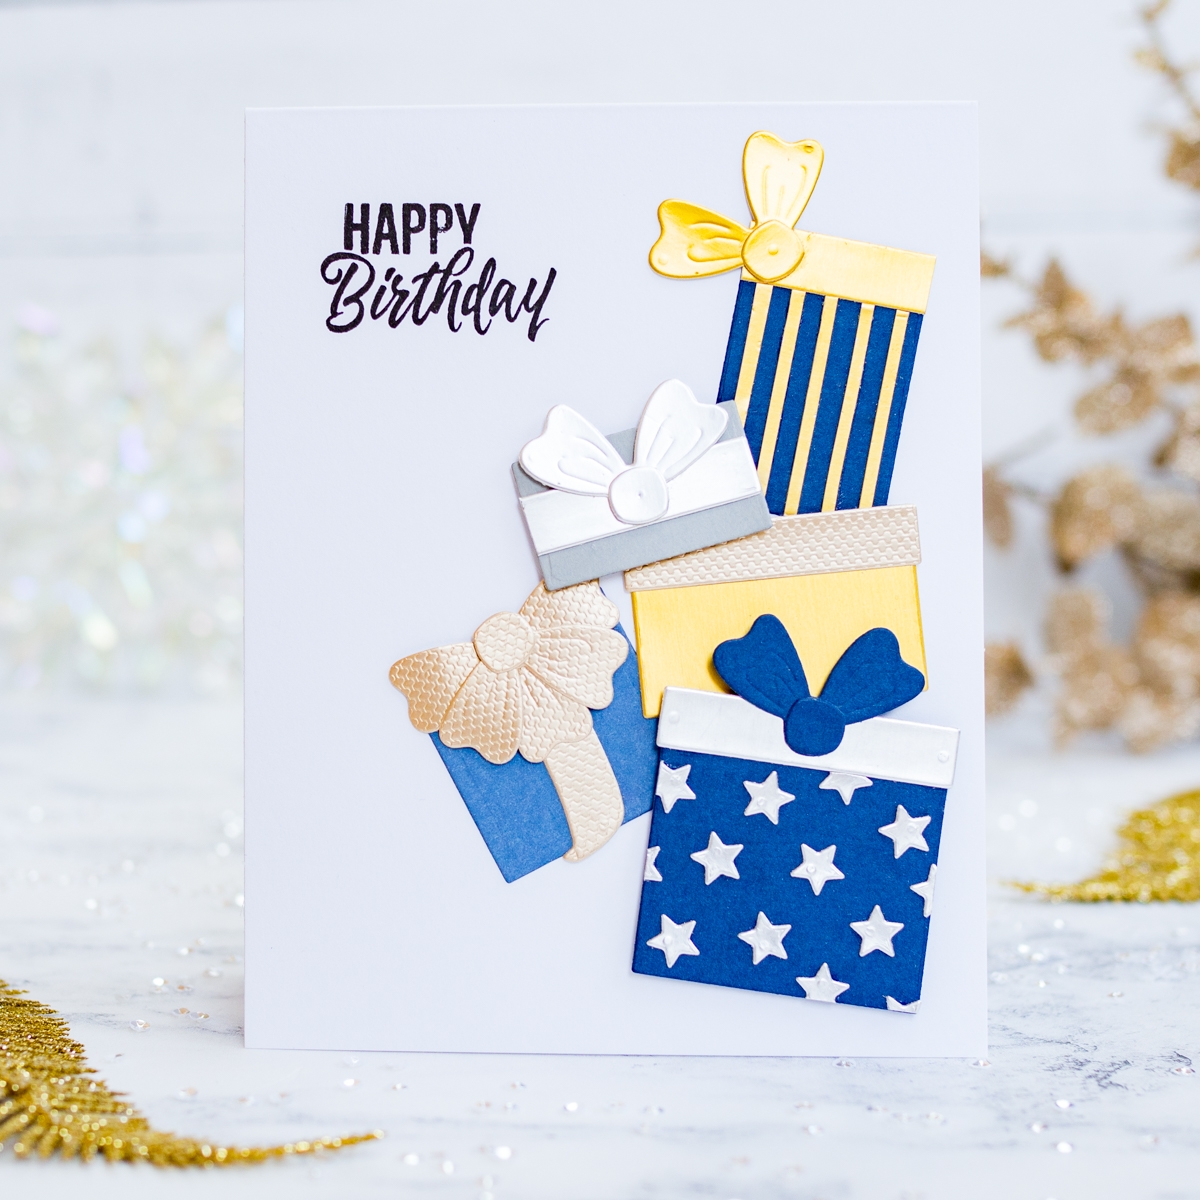
I added some decorative stars to one present and cut some thin stripes for another.
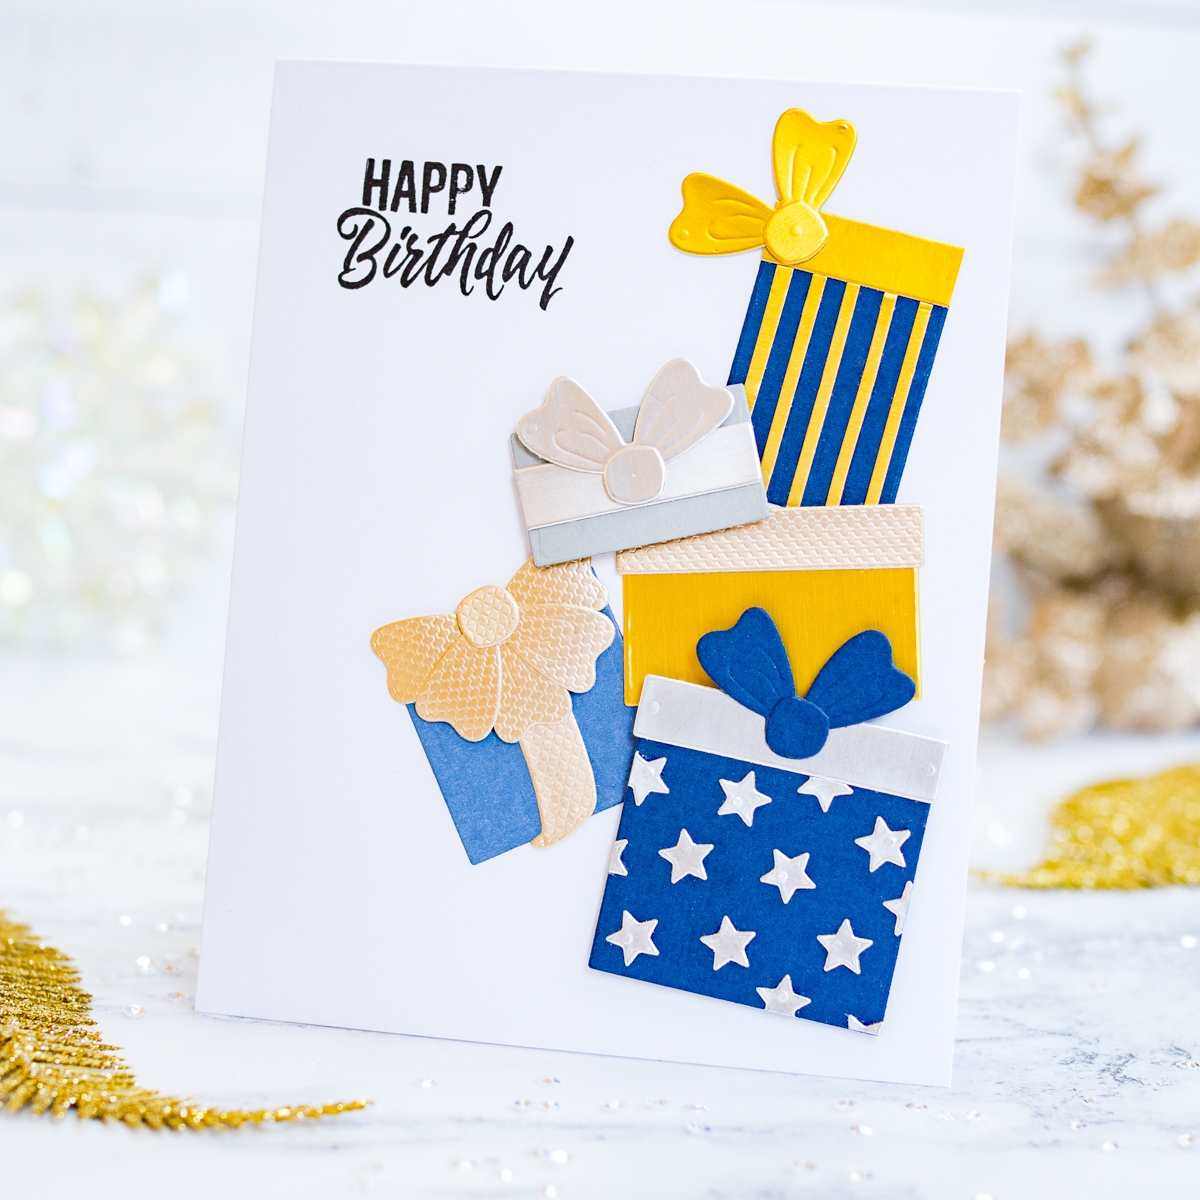
I stamped a birthday sentiment on an A2 card base, from the Shopping Bag Sentiments stamp set, then adhered the presents to the card, using foam tape behind a couple for dimension.

Spellbinders Supplies:

Other supplies
Colored cardstock, Metallic cardstock, WOW Opaque Bright White embossing powder, WOW dual speed heat tool, Pretty Pink Posh Metallic Gold jewels, Versafine Onyx Black ink, Nuvo deluxe adhesive, trimmer, stamping platform, foam squares.
Thank you so much for joining me today. I’ve enjoyed sharing my projects with you all using this fun collection. A big thank you to the Spellbinders team for inviting me to guest design with them. Have an amazing day.
3 Comments
MaryH
These cards are so cute and layouts are eye-appealing. The first one I think is on my list for New Year’s and a birthday card for a friend who is getting her favorite bottle of Prosecco!
Michelle
Love, love, love!
Patricia Wilson
The 3-D Sopping Cart is adorable. I love it. Thanks for showing the assembly of it.