
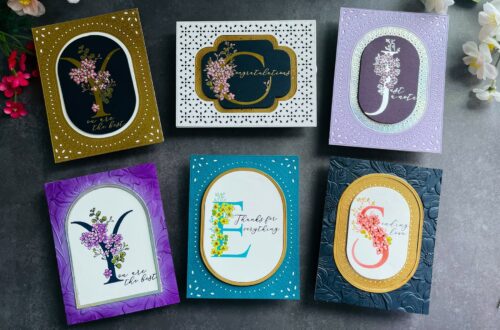
Susan’s Holiday Flora Collection – Christmas Card Inspiration with Annie Williams
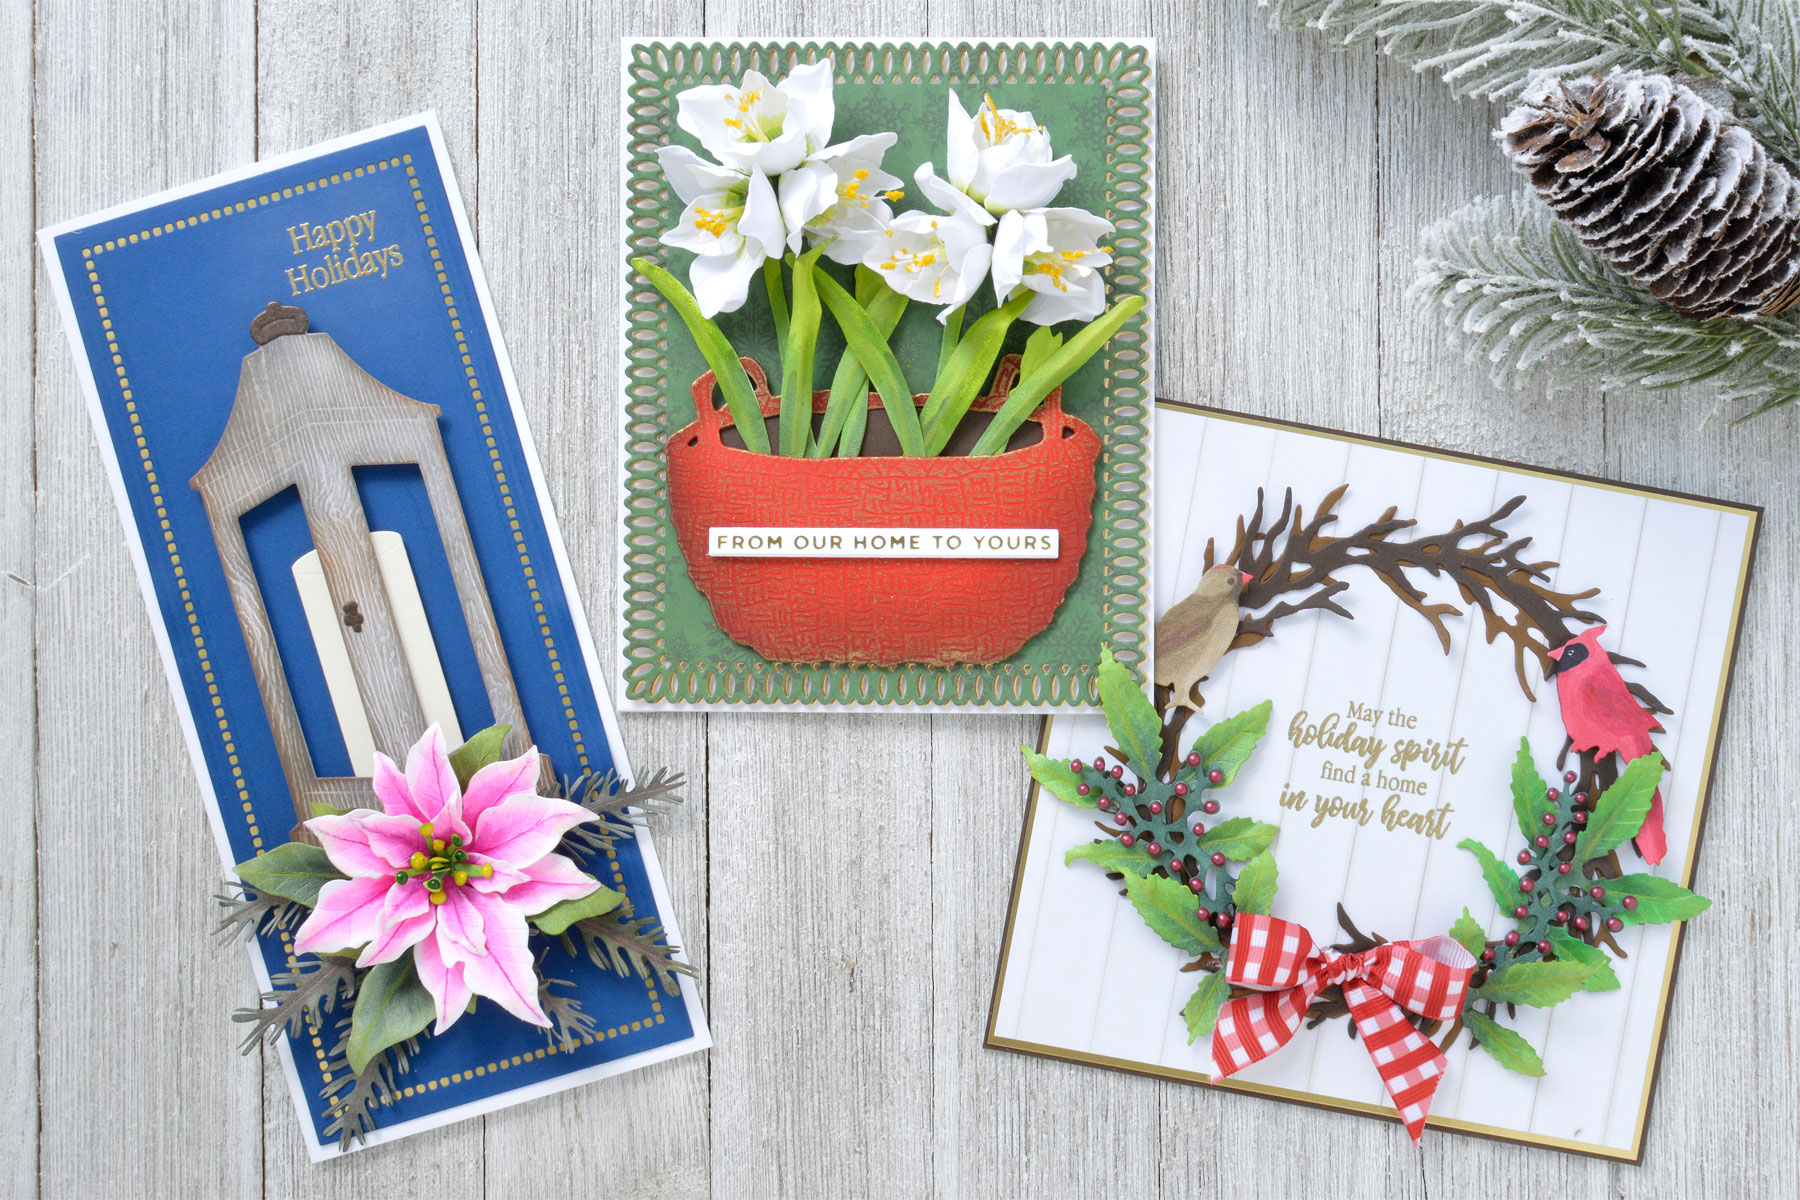
Hi there, this is Annie Williams and I’m excited to be back on the blog today to share a couple of projects using the new Holiday Flora Collection by Susan Tierney-Cockburn. The gorgeous holiday flowers, fun accessories, and beautiful sentiments in this collection inspired me to create three oversized and dimensional Christmas cards featuring realistic-looking leaves and blooms.
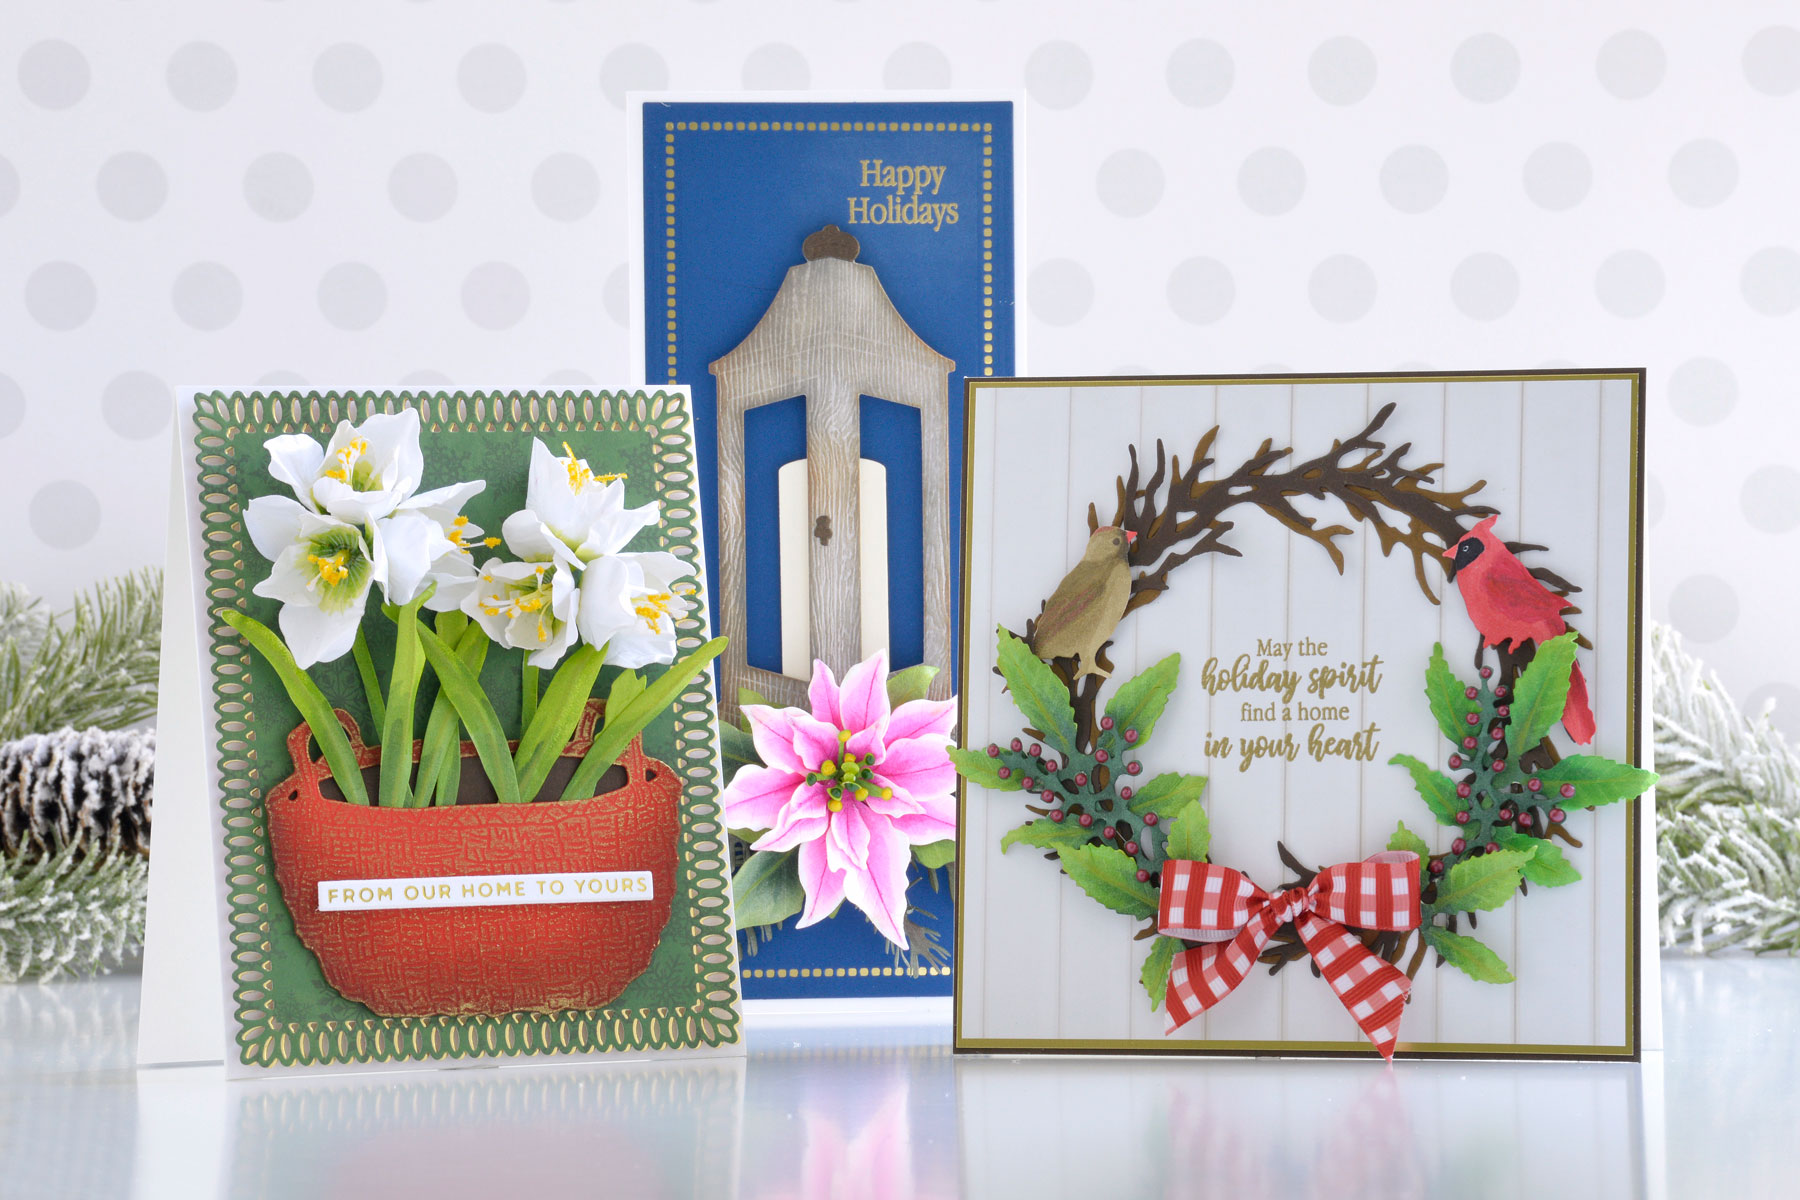
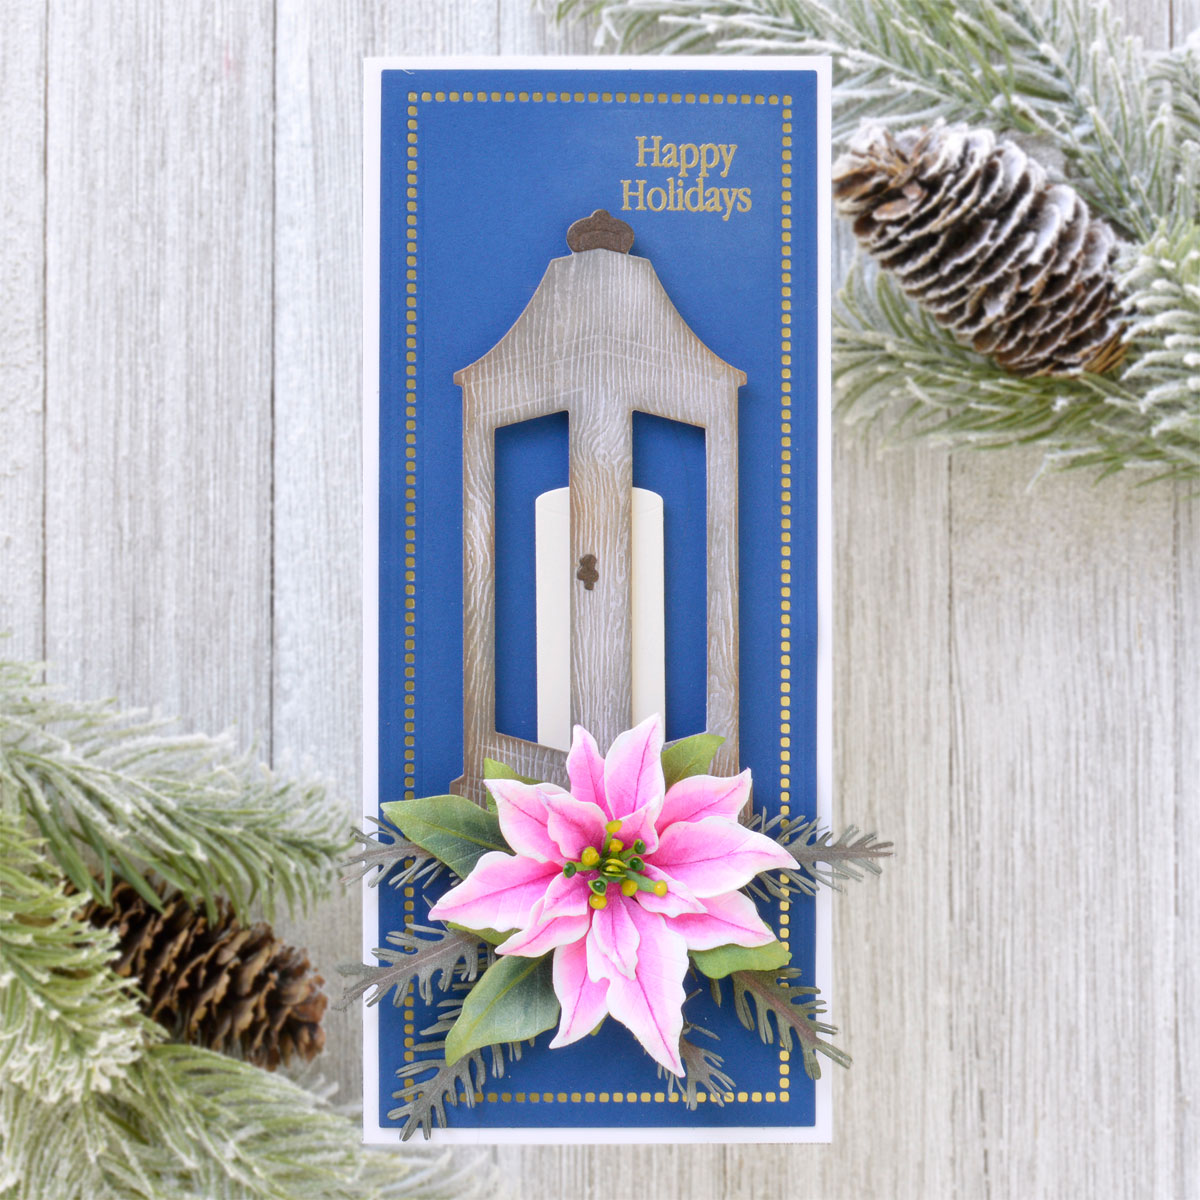
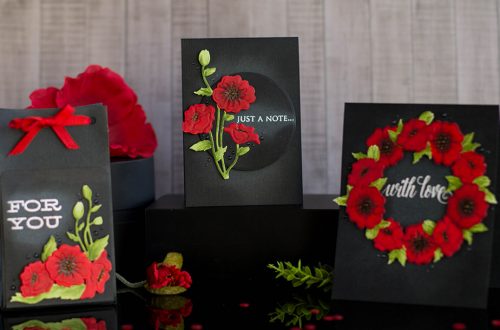
Poinsettias are one of my favorite flowers to create out of paper, but I’ve never made one quite so realistic as this! I added a bright pink version to a bed of pine sprigs as an accent for the beautiful Garden Lantern in the collection on this elegant slimline card.
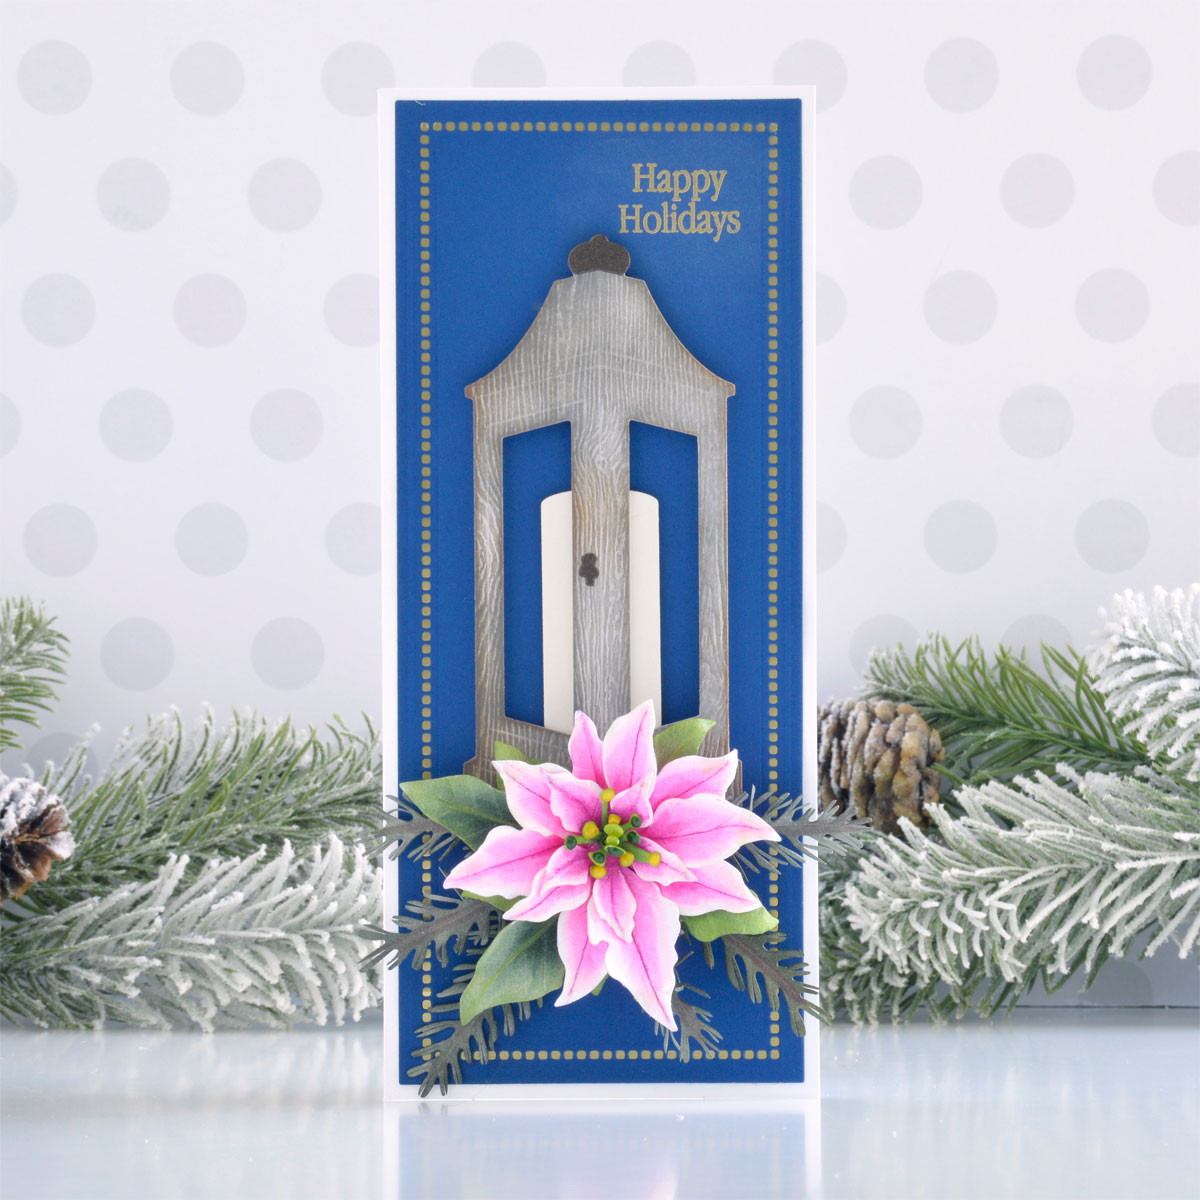
- Die cut Cosmic Sky Cardstock using the Large Rectangle Rim and Insert from the Hemstitch Slimline Die Set.
- Stamp a sentiment from the Holiday Quotes Stamp Set in the top right corner of the panel using Versamark Ink, add gold embossing powder, and melt with a heat tool.
- Add Mirror Gold Cardstock to the back of the background panel and then adhere it to a side-folding 3.75” x 8.75” white card base with tape runner.
- Die cut the lantern from white woodgrain cardstock using the Garden Lantern Die Set.
- Blend Hickory Smoke, Pumice Stone, and Vintage Photo Distress Inks over different areas of the die-cut with a blending tool to give it an aged appearance.
- Die cut bronze shimmer cardstock with the top and door latch dies from the Garden Lantern Die Set and adhere with liquid glue.
- Die cut Alabaster Cardstock using the candle die from the set. Adhere it to the back of the lantern with foam adhesive, then add two layers of foam adhesive to the rest of the lantern before adding it to the center of the card front.
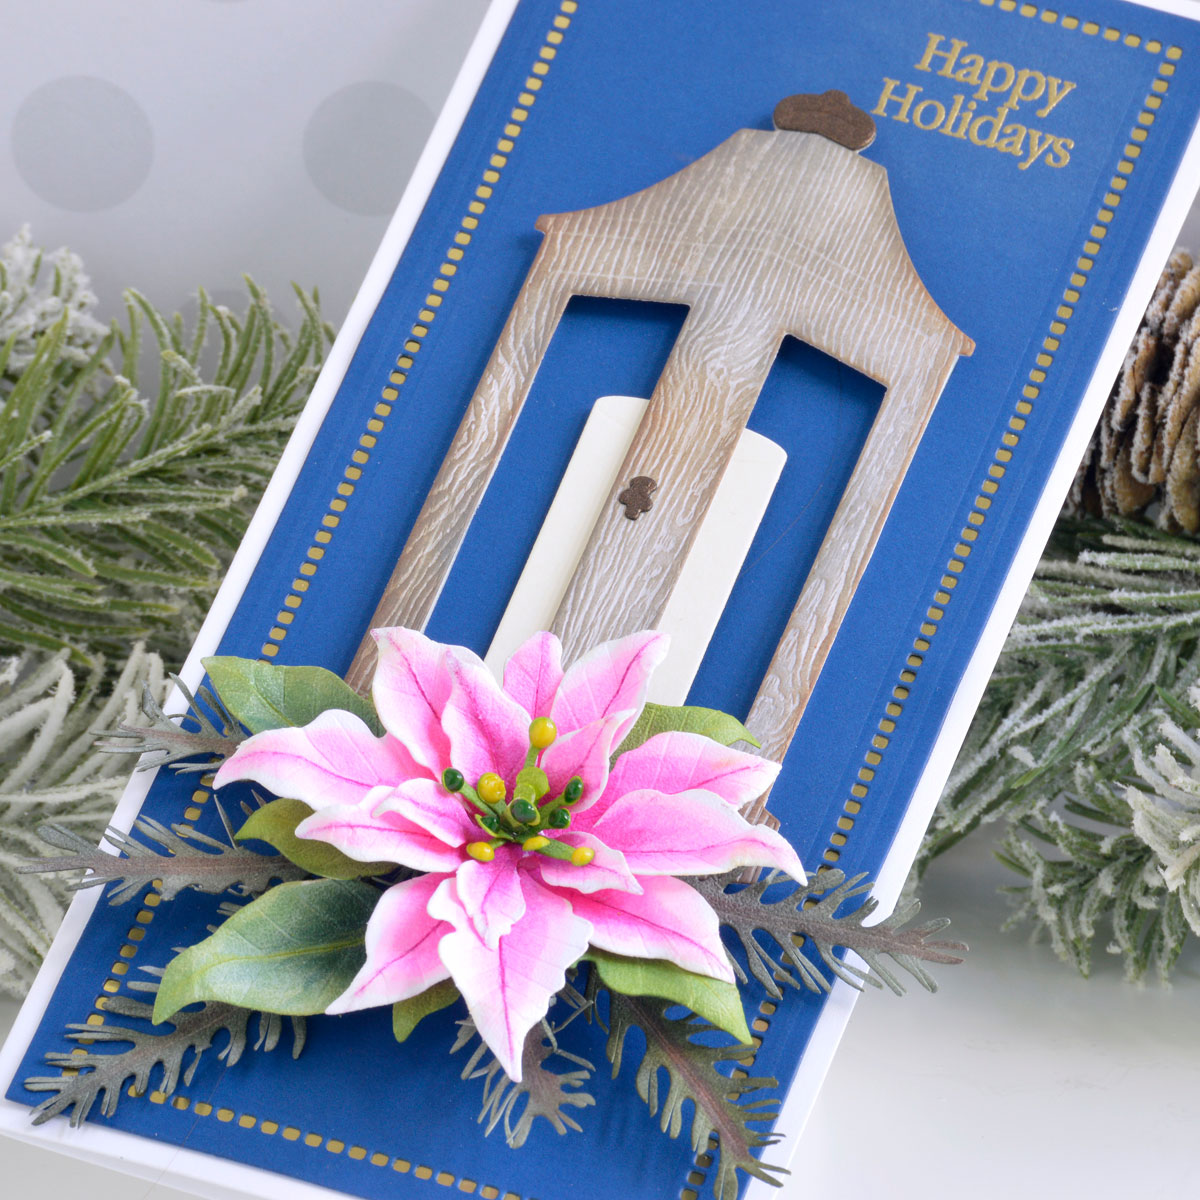
- Die cut Susan’s Garden Specialty Cardstock with all of the dies in the Poinsettia Die Set.
- Color the leaves green with Copic markers and shape them using the leaf tool and small ball stylus in Susan’s Garden Ultimate Tool Kit.
- Color the flower centers green with Copic markers and add Dandelion Yellow and Woodland Green Crystal Drops to the tips.
- Color the flower die-cuts pink with Copic markers, leaving the edges of each “petal” white before shaping them with the leaf tool and small ball stylus.
- Die cut Susan’s Garden Specialty Cardstock using the branch dies from the Pine Cone and Evergreen Bough Die Set, color them with Copic markers, snip the needles apart with scissors, and shape with your hands.
- Assemble the flower with liquid glue, then adhere the pine branches and poinsettia to the base of the lantern using hot glue.
Spellbinders Supplies:

Other Supplies
Heavyweight white cardstock, white woodgrain cardstock, bronze shimmer cardstock, Versamark Ink, gold embossing powder, Pumice Stone, Hickory Smoke, and Vintage Photo Distress Ink, blending tool, Tonic Nuvo Dandelion Yellow Crystal Drops, Tonic Nuvo Woodland Green Crystal Drops, various Copic markers, tape runner, foam adhesive, hot glue gun

Amaryllis are the flower I always think of for gift-giving around the holidays, so I thought it would make the perfect card to accompany a bulb kit for an easy neighbor gift. The Gathering Basket Die Set gives me the perfect vessel for these big, beautiful blooms.
- Die cut patterned paper and Mirror Gold Cardstock using the largest die from the Picot Petite Rectangles Die Set.
- Adhere the die-cuts together, allowing the gold layer to show through just a bit as a shadow, before adhering to a top-folding 4.75” x 6” white card base with foam adhesive.
- Die cut Poppy Field Cardstock with the Gathering Basket Die Set.
- Blend Fired Brick and Gathered Twigs Distress Ink around the edges of the basket with a blending tool. Then gently rub gold gilding wax over the die-cut with your finger to bring out the texture and details.

- Die cut Susan’s Garden Specialty Cardstock with the dies from the Amaryllis Die Set. Repeat this to have enough leaves and flowers for two plants.
- Color the centers of the flowers with green and yellow Copic markers, leaving most of the petals white. Add detail lines with a white gel pen. Shape the petals using the loop tool from the Susan’s Garden Ultimate Tool Kit.
- Roll the stamens for the flower and adhere with liquid glue. Dip the tips into liquid glue and then into Yellow Paper Flower Pollen.
- Color the leaves and stems green with Copic markers and shape them with the leaf tool.
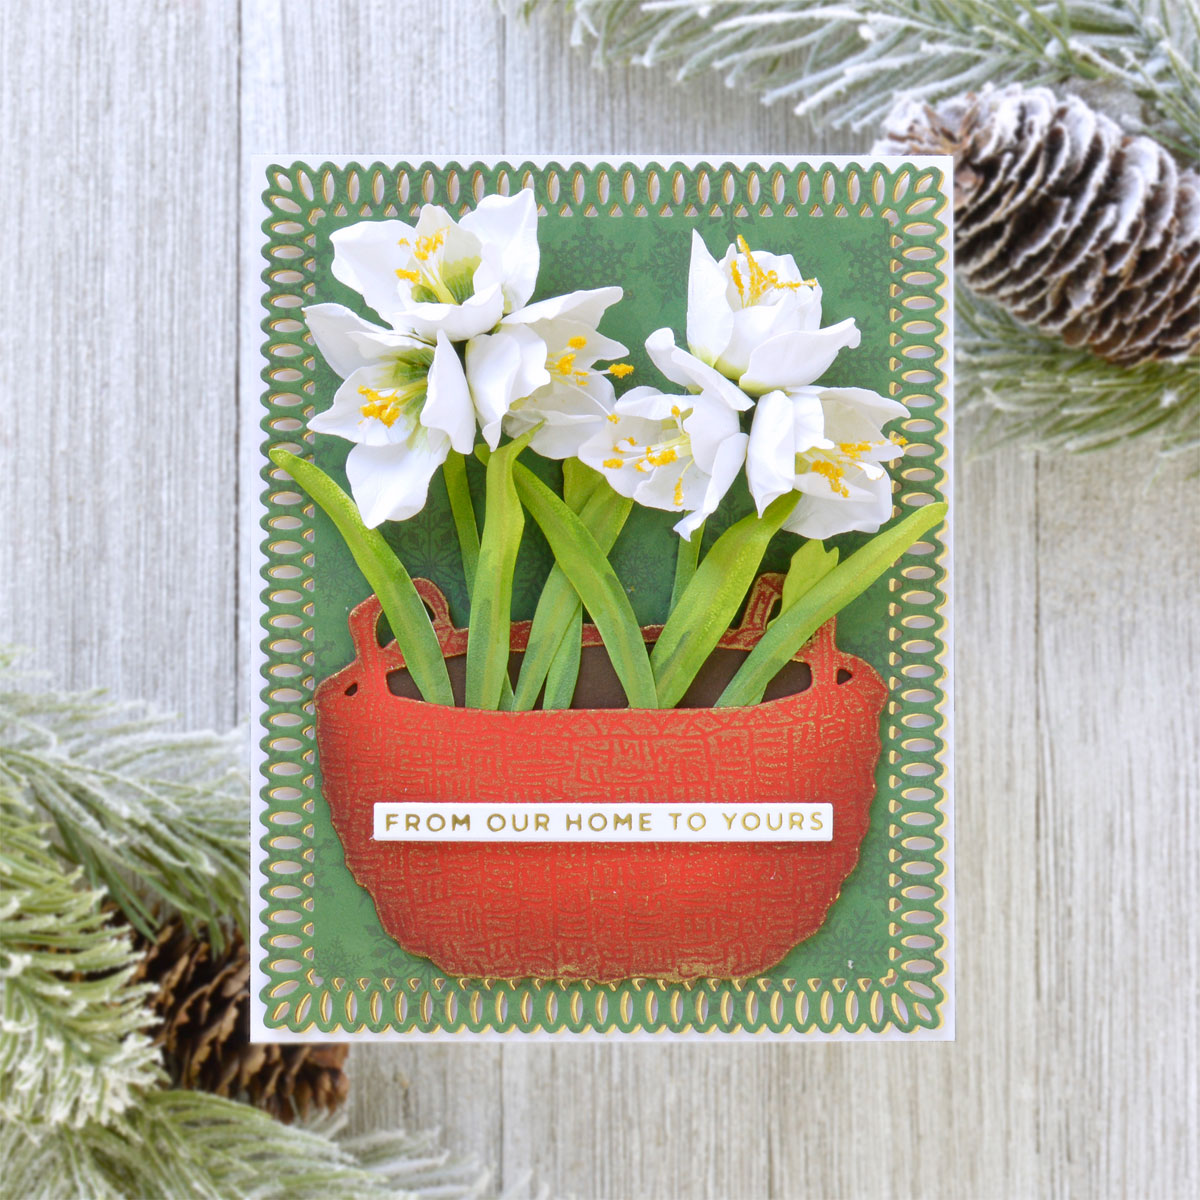
- Apply Gold Hot Foil to white cardstock using one of the sentiments from the Mini Christmas Sentiment Strips Glimmer Plate Set and the Glimmer Hot Foil Machine. Cut it out using the coordinating die.
- Insert the leaves and stems into the Gathering Basket die-cut and adhere to the back with liquid glue. Add a piece of Timber Cardstock behind the stems.
- Adhere the basket to the bottom of the card front with foam adhesive and then pop the sentiment strip up on top of the basket with more foam adhesive.
- Assemble the blooms and add them to the top of the stems with hot glue.
Spellbinders Supplies:
Other supplies
Heavyweight white cardstock, Carta Bella Dear Santa 6×6 Paper Pad, white gel pen, Copic markers, Fired Bright and Gathered Twigs Distress Ink, blending tool, gold gilding wax, hot glue gun, tape runner, foam adhesive
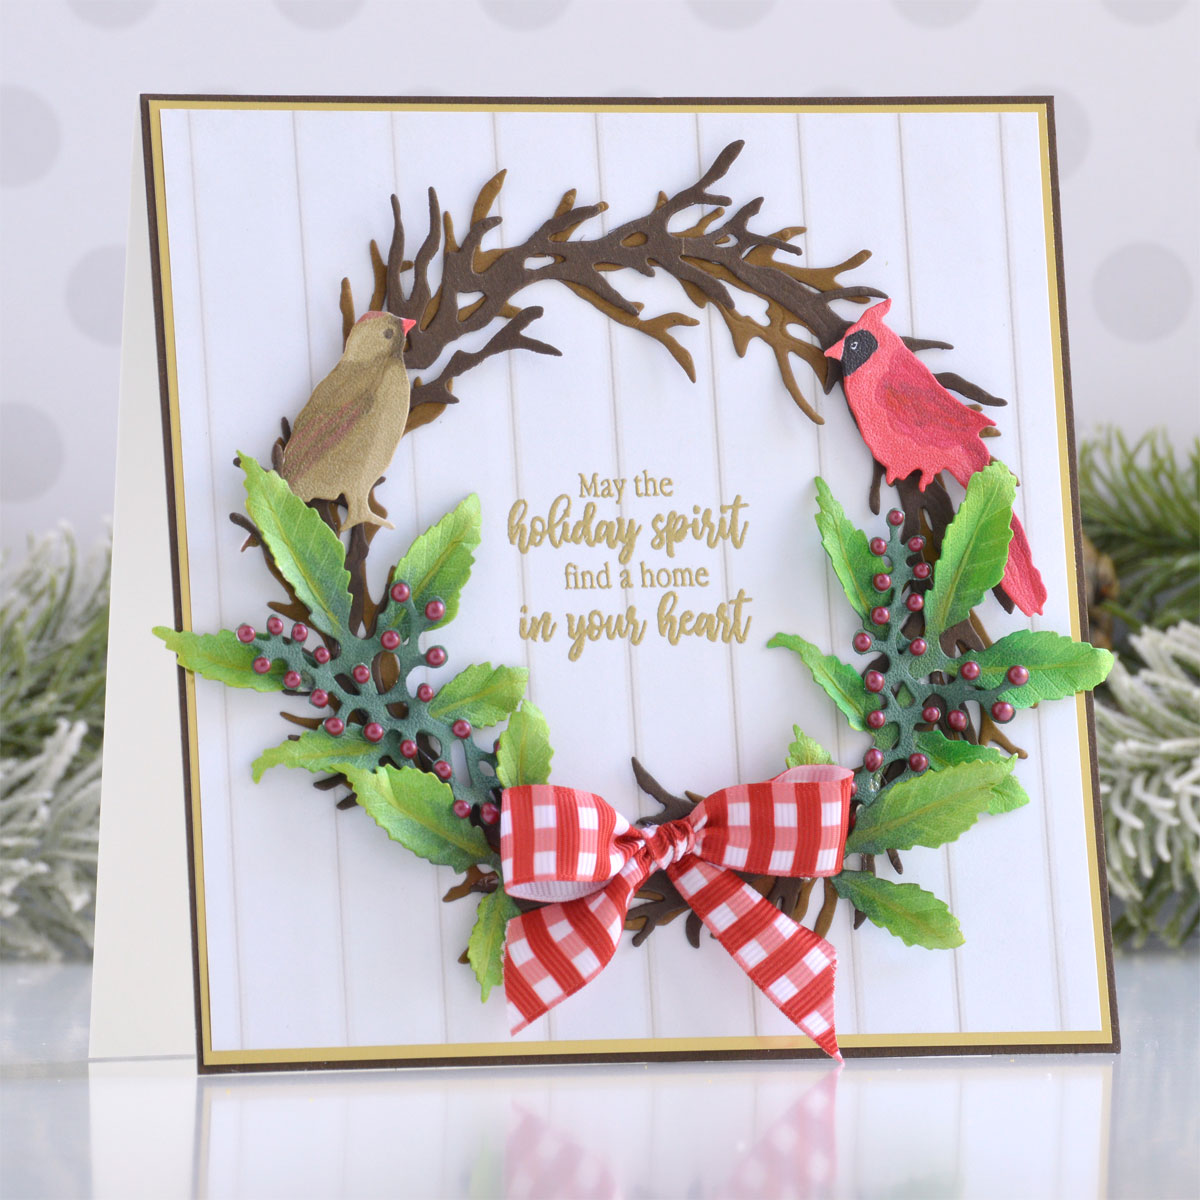
There are so many beautiful greenery options in this collection that I decided to create a card without flowers next. With a few sprigs of winterberry and some feathered friends, this simple square card is perfect for sending a pretty holiday hello.
- Trim a piece of woodgrain patterned paper to 5.75” square.
- Stamp a greeting from the Holiday Quotes Stamp Set in the center of the panel using Versamark Ink, add gold embossing powder, and melt with a heat tool.
- Mat the panel with Mirror Gold and Timber Cardstock before adhering it to a top-folding 6”x 6” white card base with tape runner.
- Die cut Timber Cardstock and a medium brown cardstock with the wreath die from the Woodland Wreath and Feathered Friends Die Set and adhere to the card front with liquid glue.
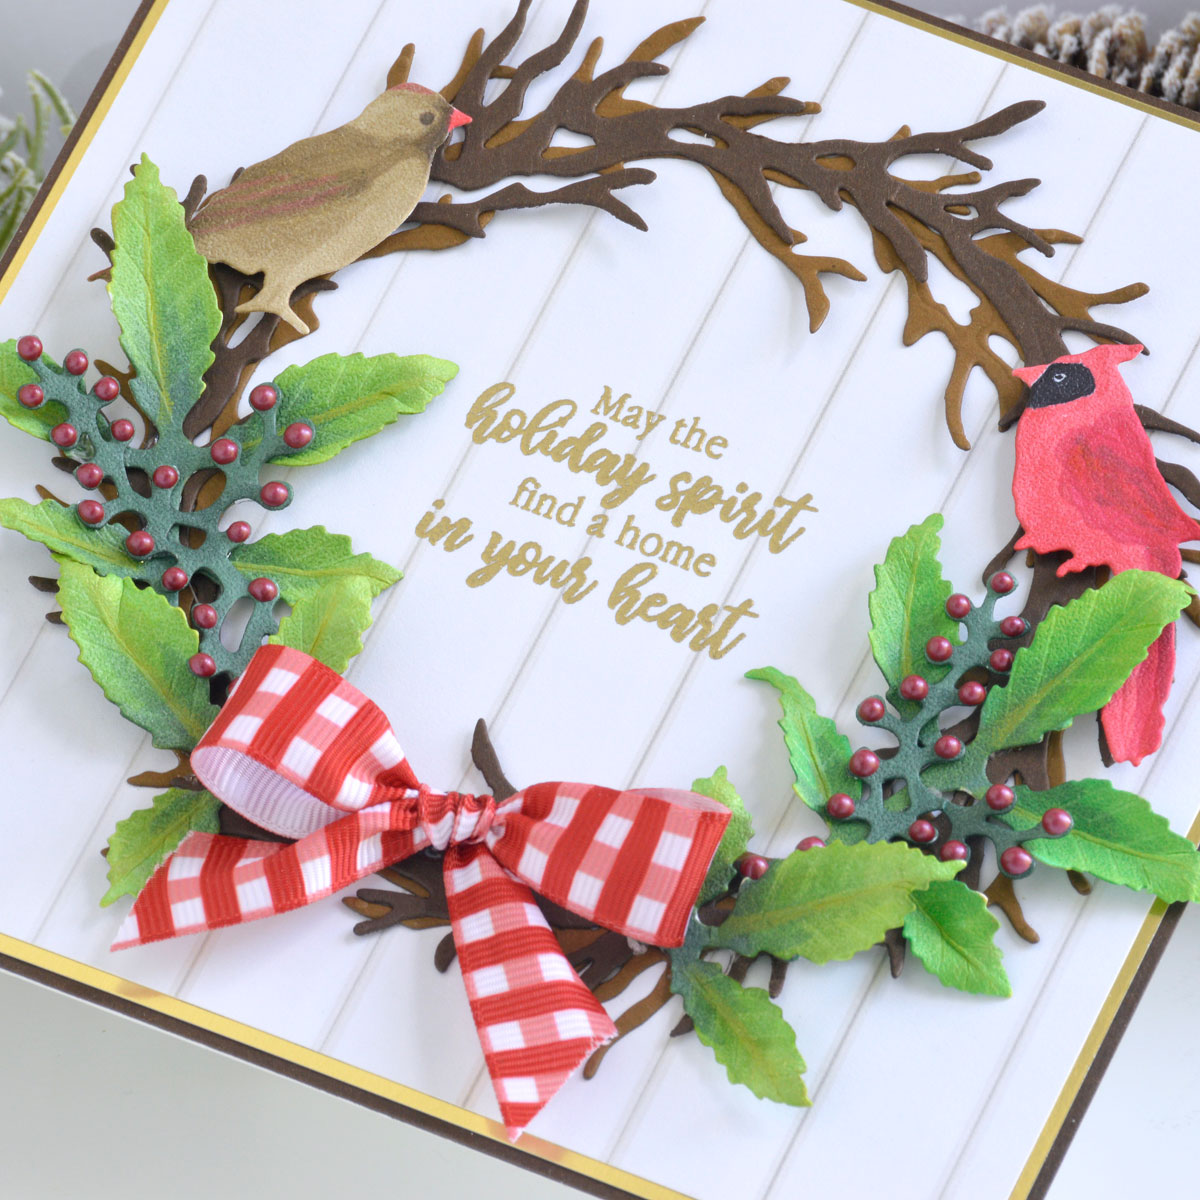
- Die cut Susan’s Garden Specialty Cardstock with the bird dies from the Woodland Wreath and Feathered Friends Die Set and the winterberry dies from the Winterberry and Mistletoe Die Set.
- Color the die-cuts with Copic markers. Add berries to the cluster die-cut with Autumn Red Crystal Drops. Shape the winterberry die-cuts using the leaf tool and small ball stylus from Susan’s Garden Ultimate Tool Kit.

- Add the winterberry to the wreath using hot glue.
- Pop the birds up on top of the wreath with foam adhesive.
- Add a bow to the bottom of the wreath with hot glue.
Spellbinders Supplies:
Other supplies
White heavyweight cardstock, Gina K Designs Warm Cocoa Cardstock, Carta Bella Farmhouse Christmas 6×6 Paper Pad, Versamark Ink, gold embossing powder, hot glue gun, red gingham ribbon, Tonic Nuvo Autumn Red Crystal Drops, Copic markers, tape runner, foam adhesive
I hope you enjoyed this trio of festive holiday cards and thanks so much for stopping by today. You can find more inspiration over at my blog AnnieBWills.com.
One Comment
MaryH
Annie, you certainly had your inspired, creative juices flowing when making these projects. Each one is incredibly beautiful and so realistic. You are one very talented paper crafter and I am sure Susan is proud of these astonishing creations! So glad I didn’t miss these projects. The only thing that would make this better is to watch you creating them – perhaps you will do videos too in the future?