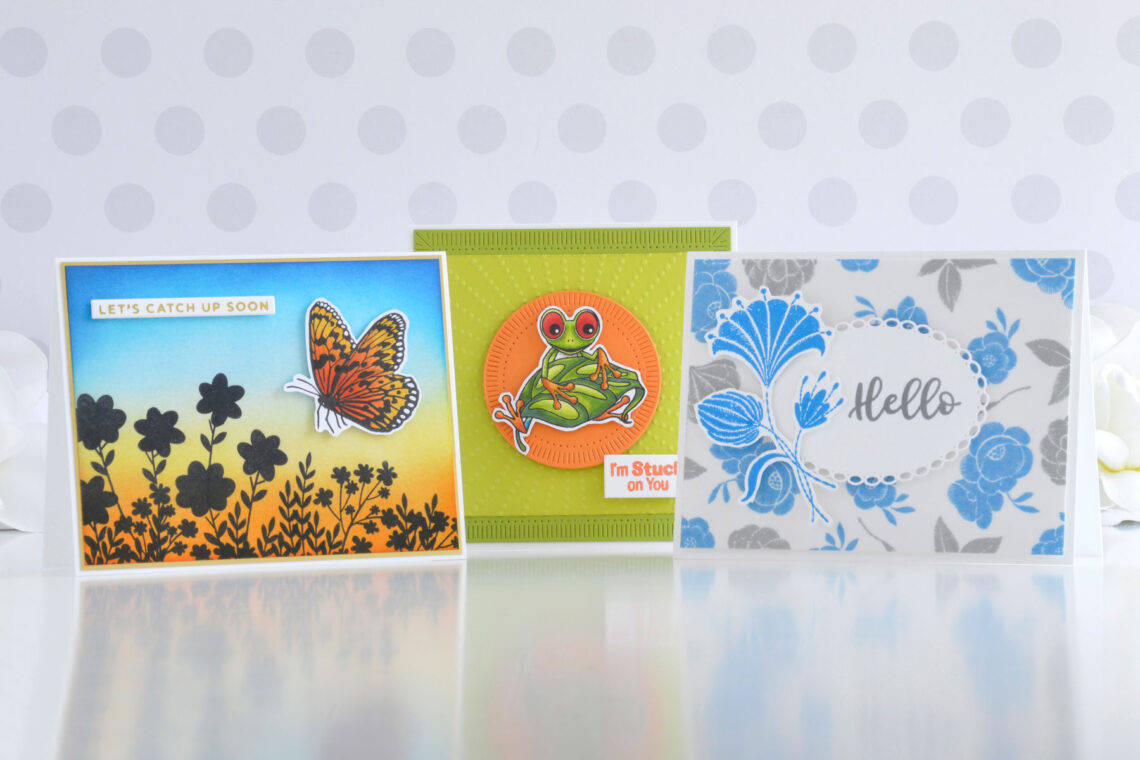
Cardmaker II Collection – Card Inspiration with Annie Williams
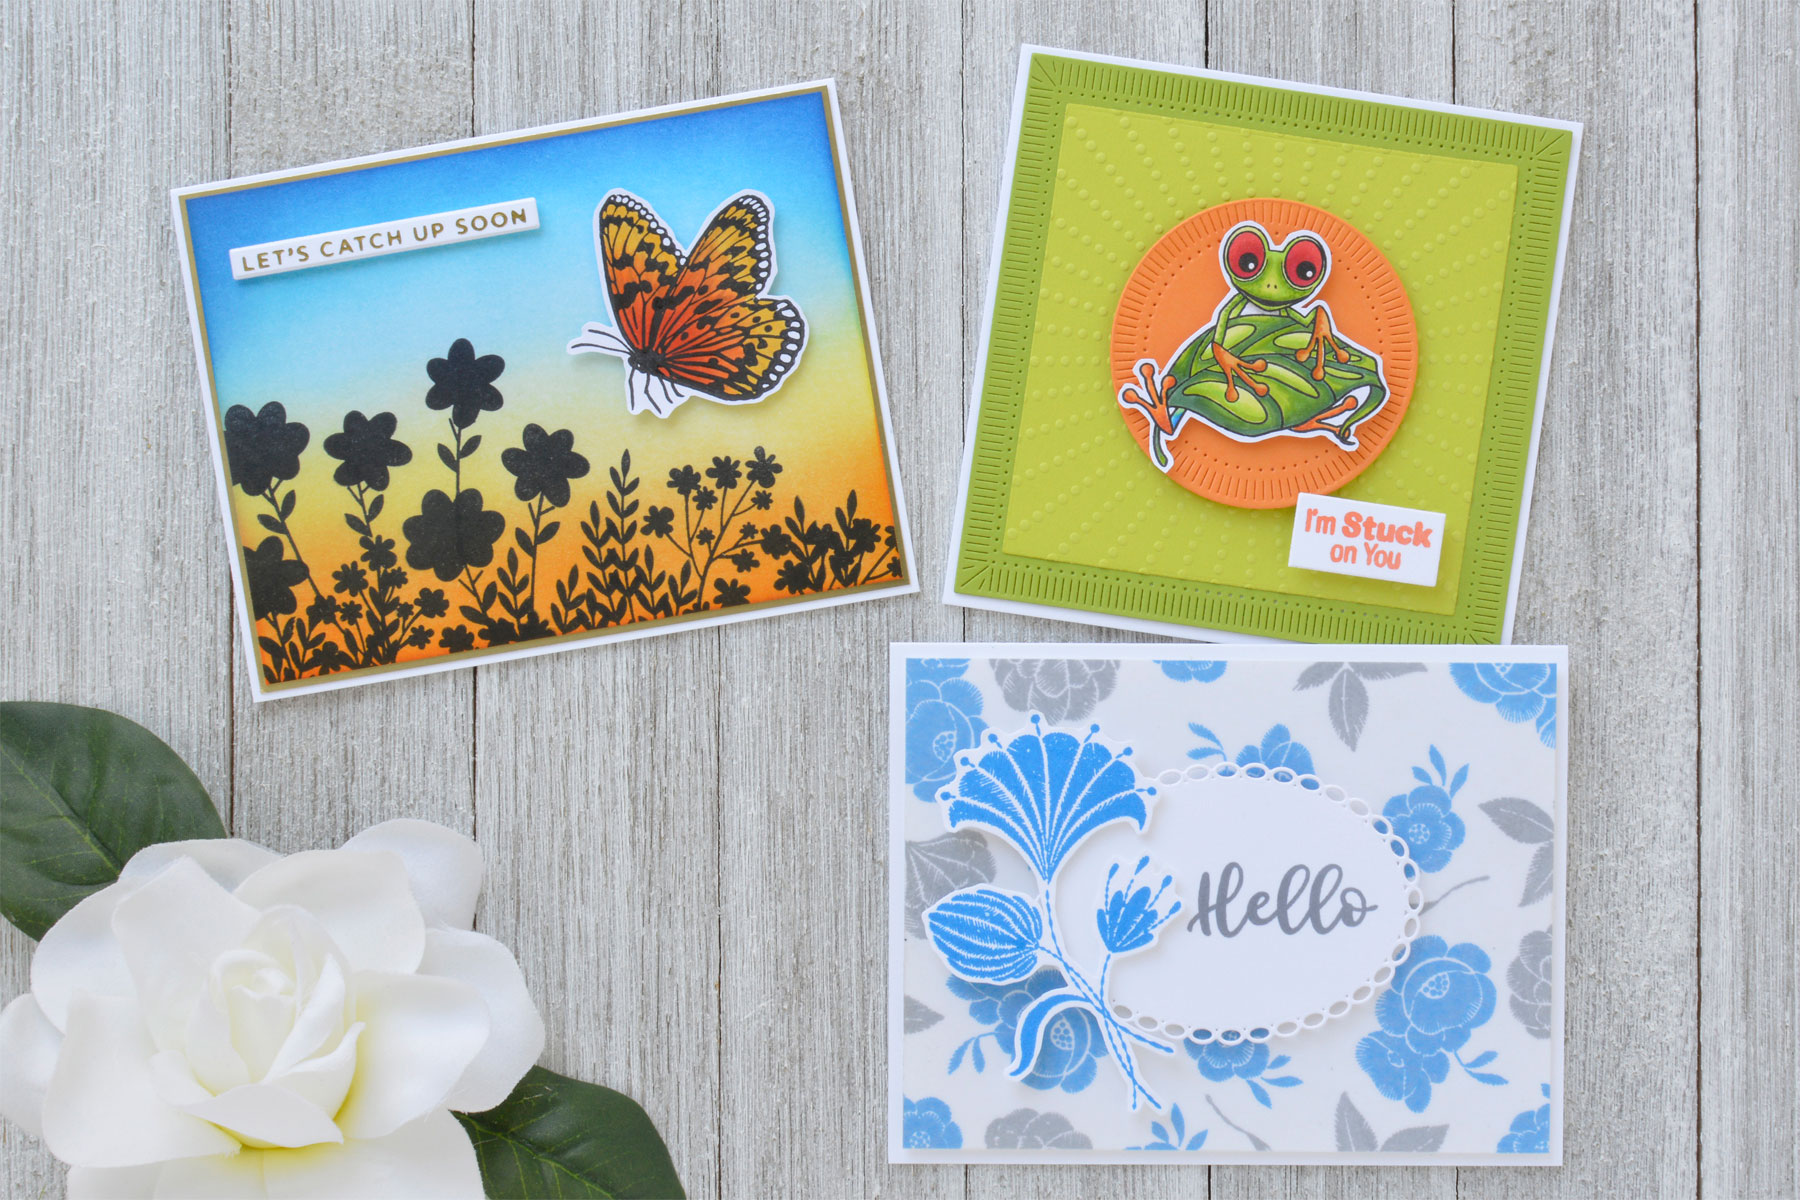
Hi there, this is Annie Williams and I’m excited to be back on the blog today to share a couple of projects using the new Cardmaker II Collection from Spellbinders. With everything from cute frogs to pretty florals and beautiful sentiments, I was inspired to create three easy and fun cards with this collection for a variety of occasions.

There are so many ways to use the beautiful butterfly images in the New Start Stamp Set. Here I added one of them to a pretty field of flowers at dusk for a bright and cheery friendship card.

- Trim a piece of white cardstock to 4” x 5.25”.
- Stamp several of the images from the Love Never Fails Stamp Set across the bottom of the panel using waterproof black ink to form a field of wildflowers.
- Blend Carved Pumpkin, Squeezed Lemonade, Tumbled Glass, Salty Ocean, and Prize Ribbon Distress Inks across the panel from bottom to top with a blending tool to create a sky at dusk.

- Stamp one of the butterflies from the New Start Stamp Set onto white cardstock using black alcohol-friendly ink.
- Color the image in with Copic markers and fussy cut it out with scissors, leaving a thin white border.
- Apply Gold Hot Foil to white cardstock using one of the sentiments from the Mini Sincere Greetings Foil Plate Set and the Glimmer Hot Foil Machine. Cut the sentiment out using the coordinating die.
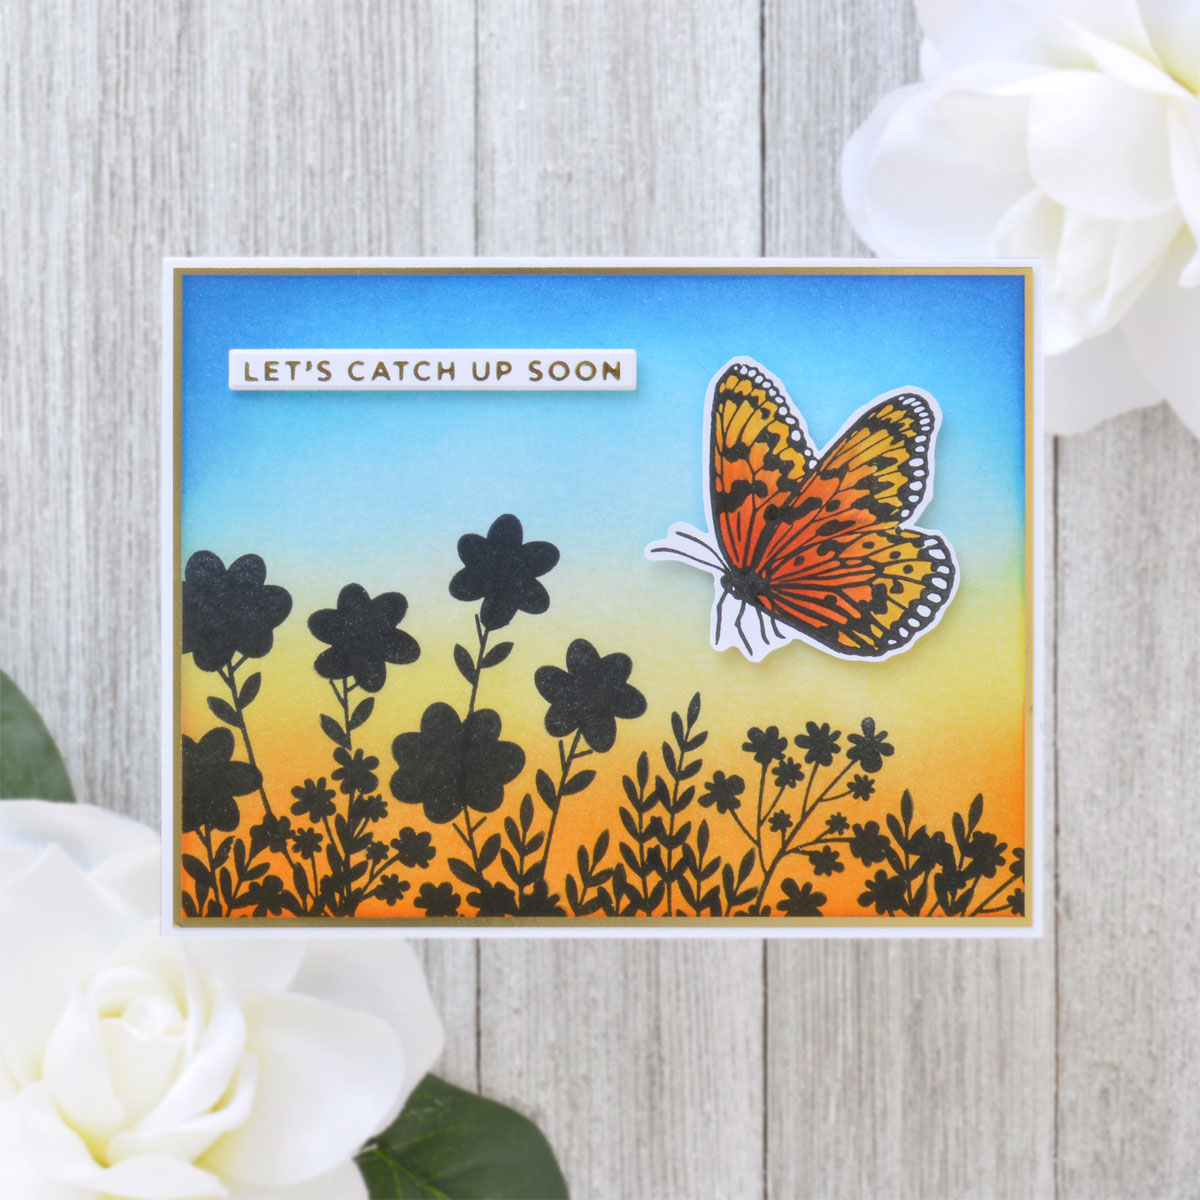
- Mat the background panel with Mirror Gold Cardstock and adhere it to a top-folding A2-sized white card base with tape runner.
- Pop the butterfly and sentiment up on top of the card front with foam adhesive.
Spellbinders Supplies:

Other Supplies
Heavyweight white cardstock, Versafine Clair Nocturne Ink, Hero Arts Intense Black Ink, Copic markers, Carved Pumpkin, Squeezed Lemonade, Tumbled Glass, Salty Ocean, and Prize Ribbon Distress Ink, blending tool, scissors, tape runner, foam adhesive

I couldn’t get over how cute the frogs are in the Jump For Joy Stamp Set. After coloring one of the images up in bright colors, I decided to add it to an equally vivid background for this fun square card.
- Stamp one of the frog images from Jump The Joy Stamp Set onto white cardstock with black alcohol-friendly ink.
- Color the image with Copic markers and fussy cut it out with scissors, leaving a thin white border.
- Stamp one of the sentiments from the Jump For Joy Stamp Set onto white cardstock with orange ink. Trim or die cut the sentiment out into a small strip.
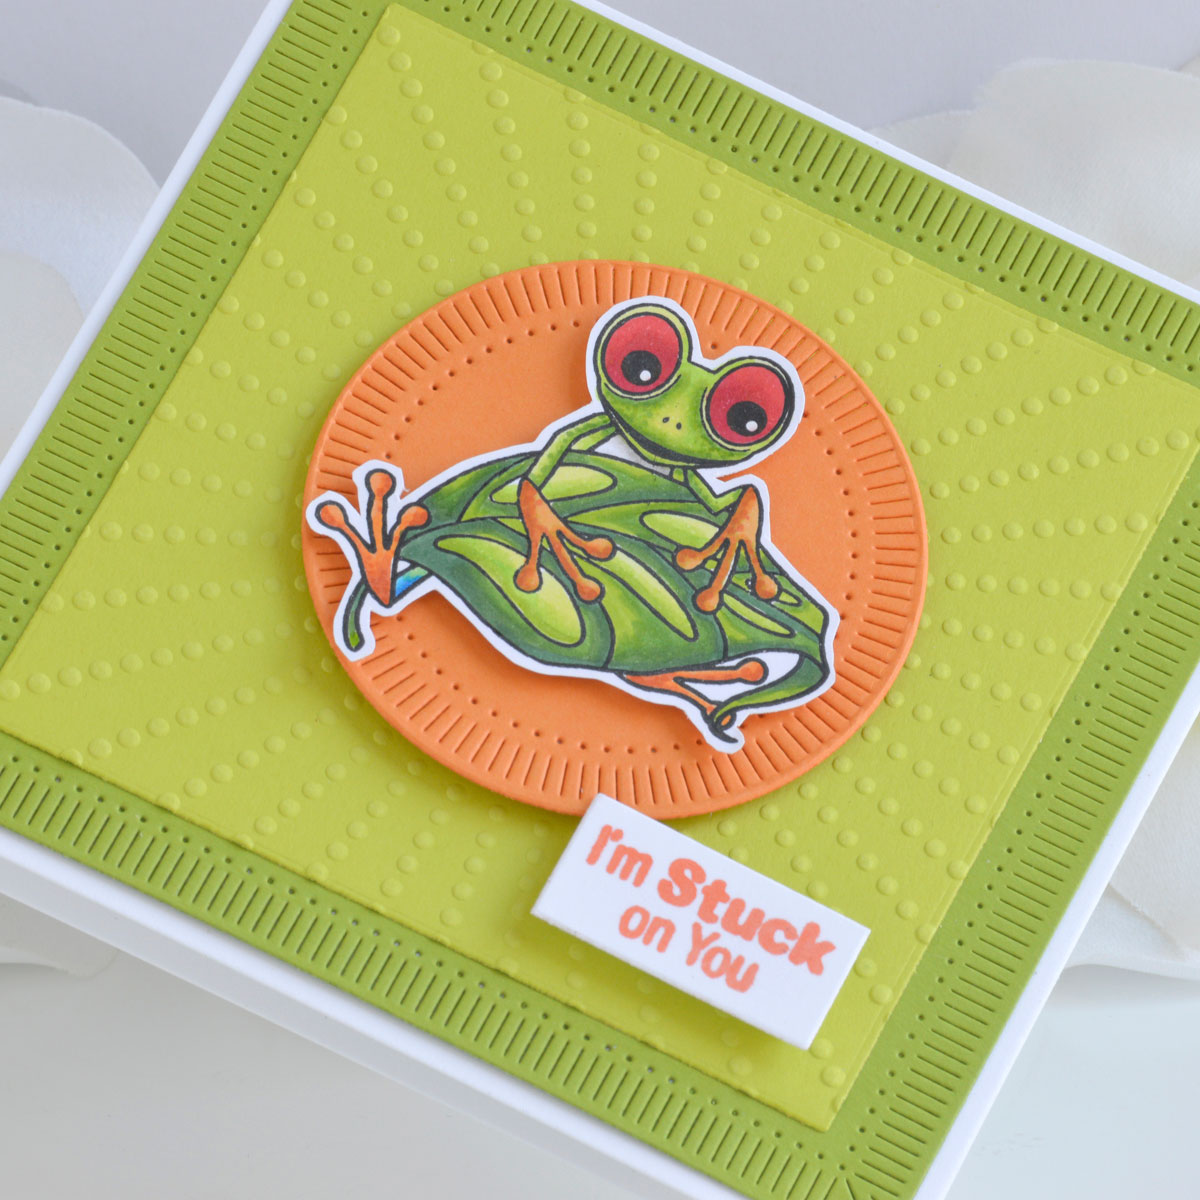
- Die cut Rainforest Cardstock using the Large Square Outer Rim and Insert dies from the Fluted Classics Squares Die Set.
- Die cut Peridot Cardstock using the Large Inner Rim die from the Fluted Classics Squares Die Set. Emboss the die-cut using the Sun Rays Embossing Folder.
- Die cut Persimmon Cardstock using the Small Circle Outer Rim and Insert from the Fluted Classics Circles Die Set.
- Mat the embossed panel with the green die-cut panel and adhere to the front of a top-folding 4.625” square white card base using tape runner.
- Pop the orange die-cut circle up in the center of the card front using foam adhesive.
- Add the frog and sentiment on top with more foam adhesive.
Spellbinders Supplies:
Other supplies
White heavyweight cardstock, Hero Arts Intense Black Ink, Copic markers, Versafine Clair Summertime Ink, scissors, tape runner, foam adhesive
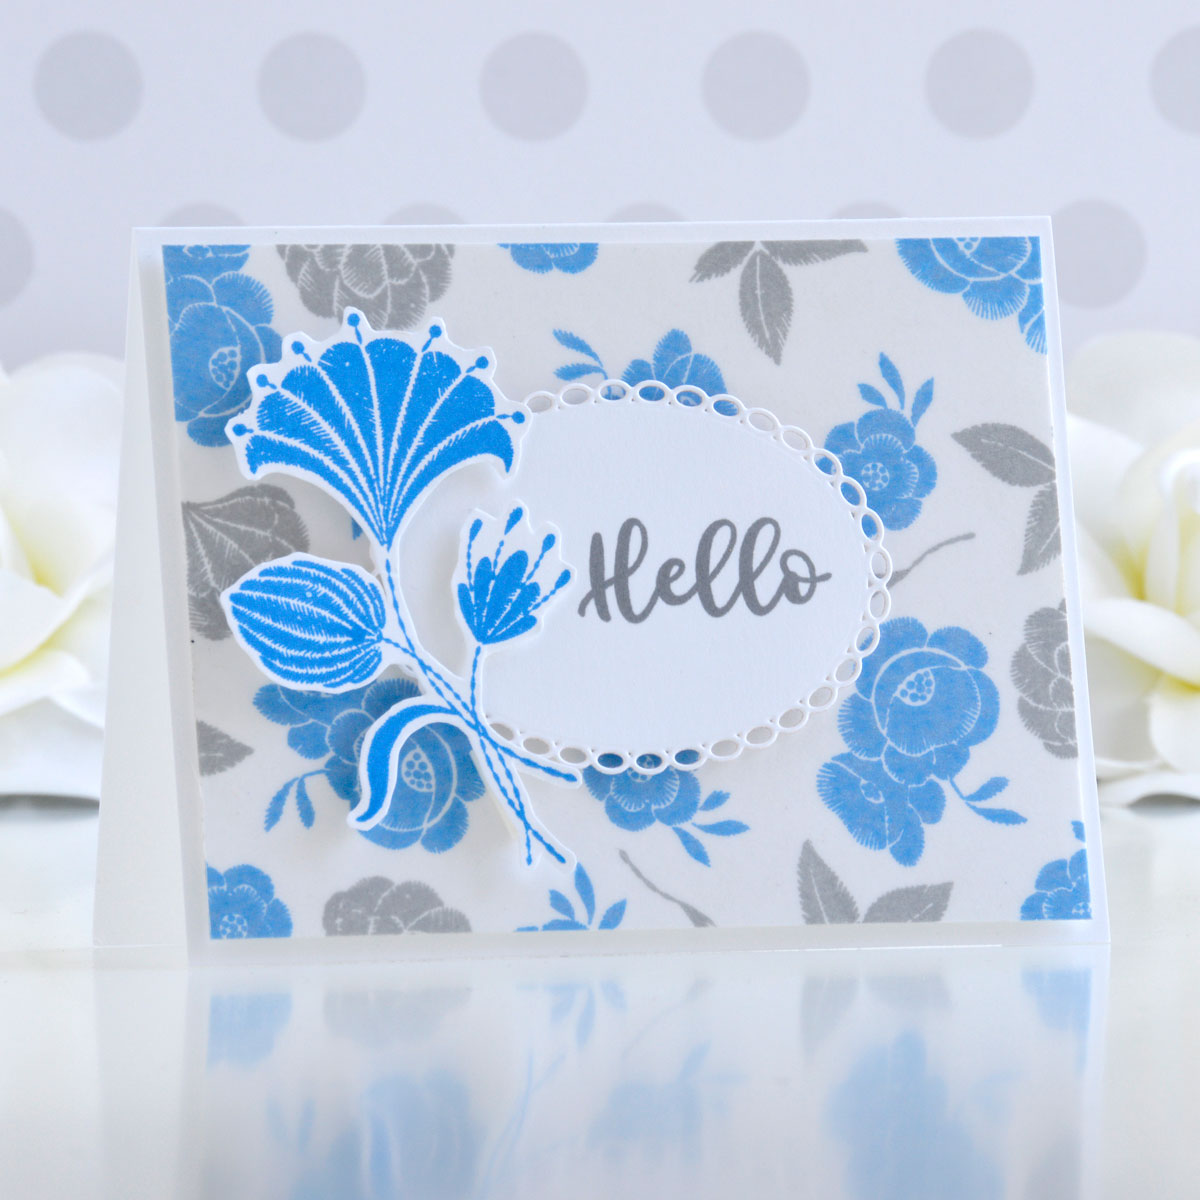
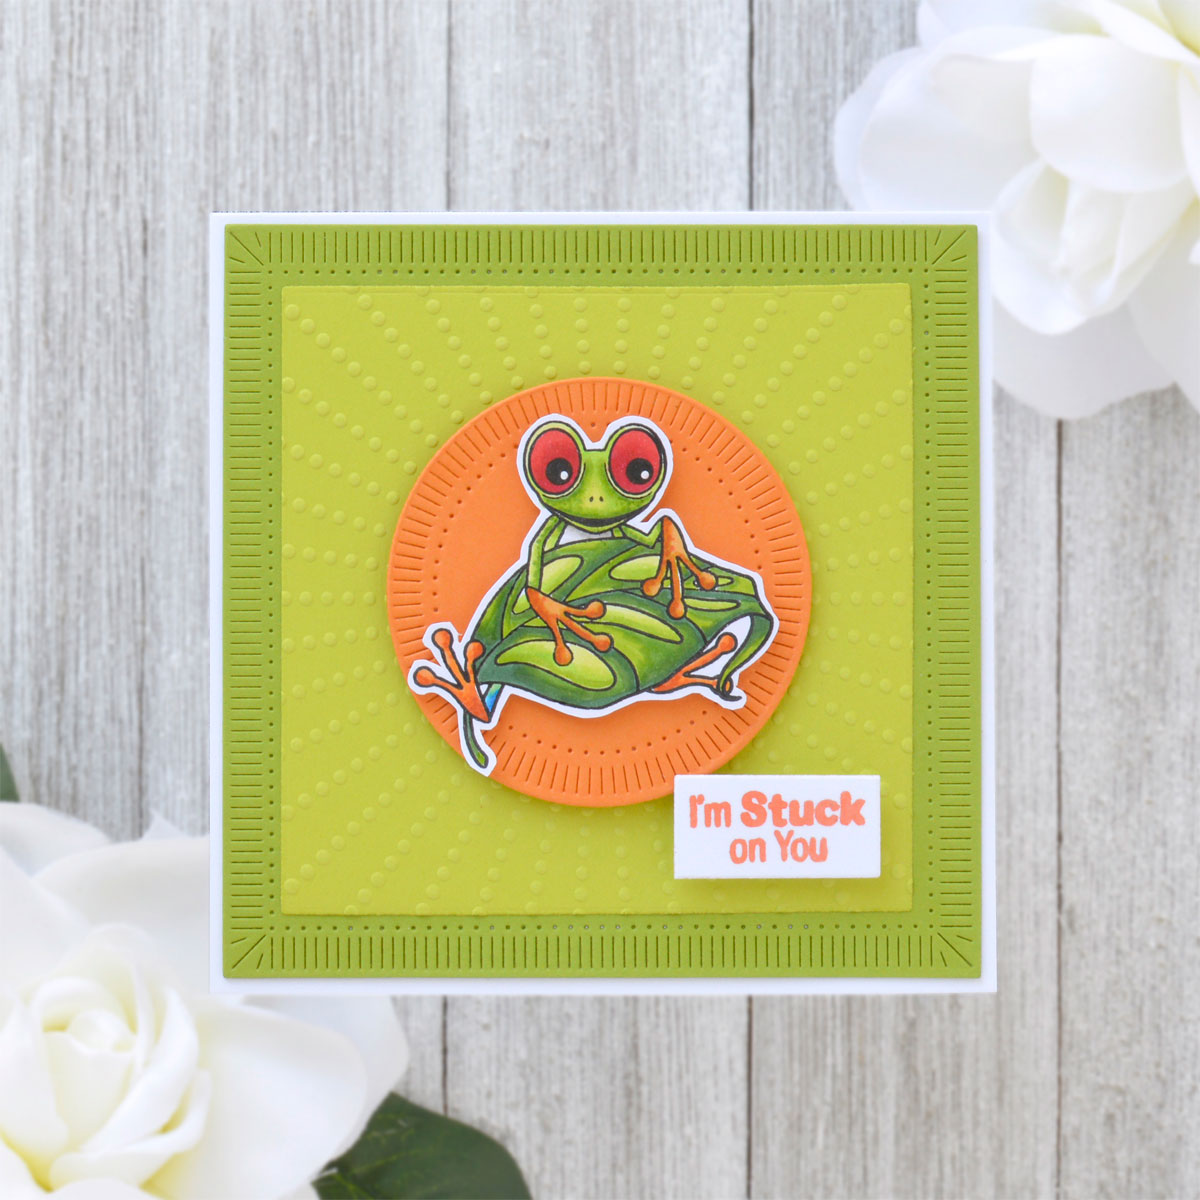
I love the versatility of the Embroidery Flowers Stamp Set…it’s perfect for borders, backgrounds, and focal images! Here I’ve created my own patterned paper with the smaller images and used one of the larger images as a focal point for this pretty hello card.
- Trim a piece of white cardstock to 4” x 5.25”.
- Stamp the smaller images from the Embroidery Flowers Stamp Set all over the panel using blue and grey ink to form a random pattern.
- Trim a piece of heavyweight vellum to 4” x 5.25” and adhere on top of the stamped background panel (I like to use double-sided adhesive sheets over the entire panel so that the glue doesn’t show through) to tone down the background a bit.

- Stamp the large floral image from the Embroidery Flowers Stamp Set onto white cardstock using blue ink and fussy cut it out with scissors.
- Stamp a sentiment from the Simple Sentiments Stamp Set onto white cardstock using grey ink.
- Die cut the sentiment out using the Oval 3 die from the Elliptical Ovals Die Set.
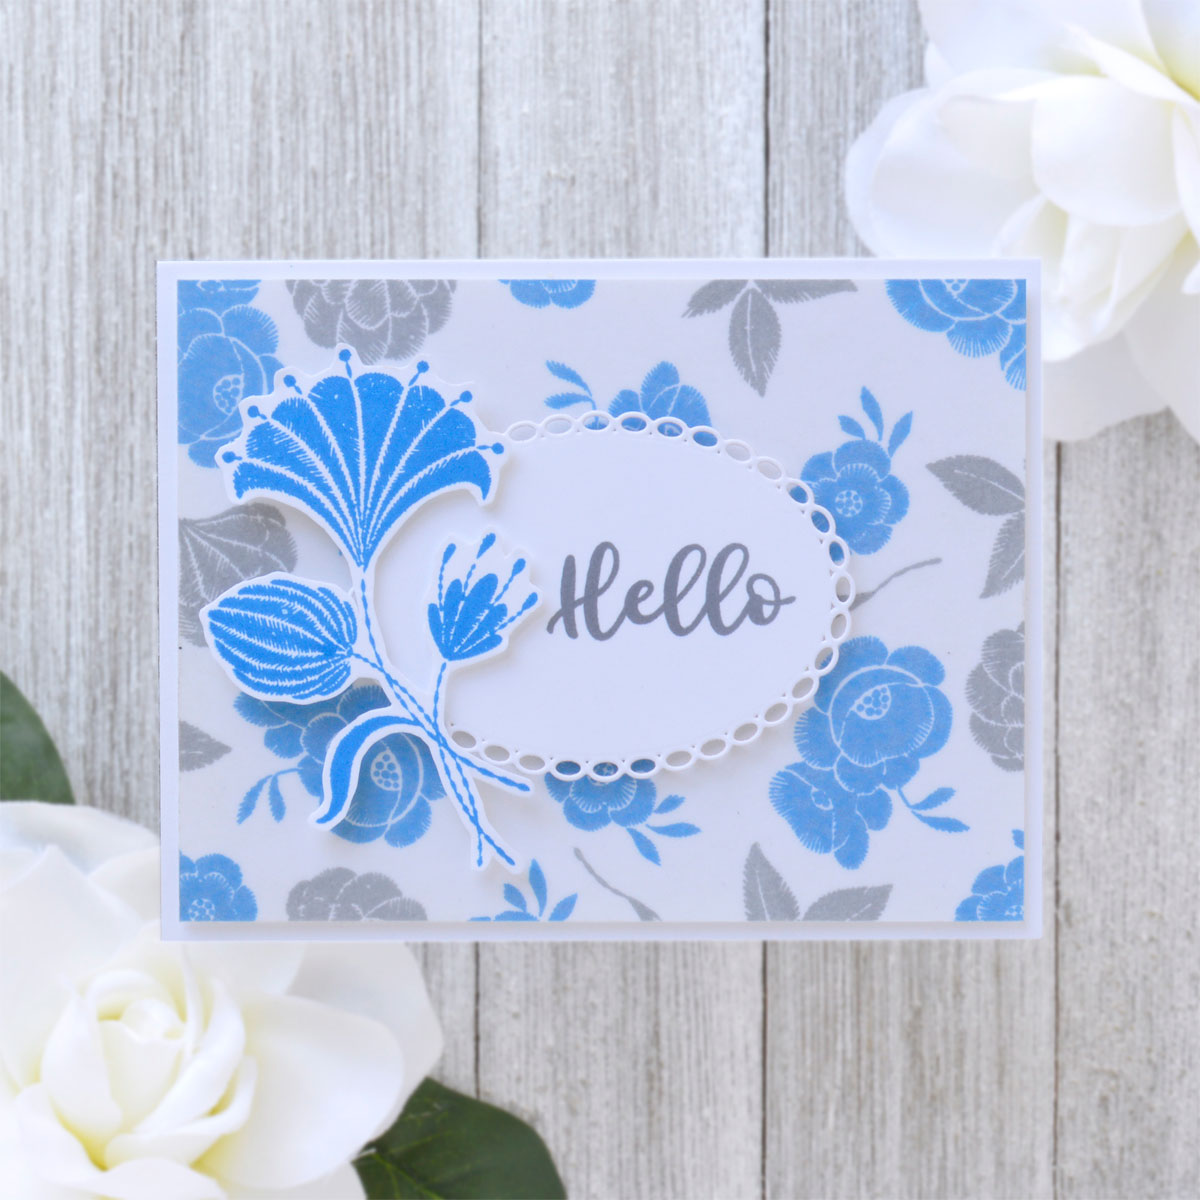
- Adhere the background panel to a top-folding A2-sized white card base with foam adhesive.
- Pop the oval die-cut up in the center of the card front with foam adhesive.
- Add the large stamped floral image on the side of the oval with more foam adhesive.
Spellbinders Supplies:
Other supplies
White heavyweight cardstock, heavyweight vellum, double-sided adhesive sheets, Versafine Clair Paradise and Morning Mist Ink, foam adhesive
I hope you enjoyed this trio of fun and easy cards and thanks so much for stopping by today. You can find more inspiration over at my blog AnnieBWills.com.
One Comment
MaryH
So very cute and fun. The frog is adorable. Very nice job and now my wish list has grown!