The Be Bold Collection – Building Paper Floral Creations
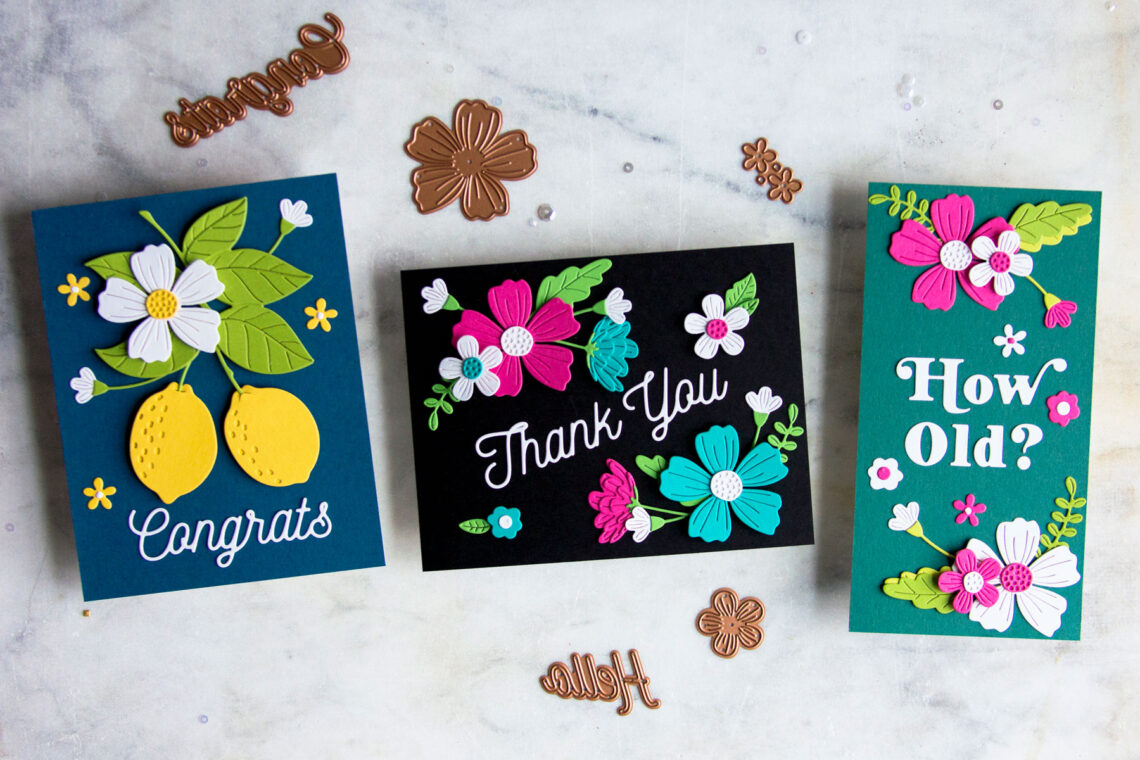
Hello crafty friends! It’s Jean here sharing three cards created with the Be Bold Collection at Spellbinders. This distinctive collection of and floral and foliage dies, lower- and uppercase alphabet sets, punctuation dies, embossing folders, and casual script sentiments lends itself to endless creative possibilities. I took an organic approach to designing my creations like assembling a floral bouquet. Let’s take a look as I share the cards from start to finish.

To begin, I selected three dark cardstock backgrounds. I started die-cutting the letters, sentiments, florals, and foliage from a variety of cardstock colors. Usually, I decide my colors ahead of time, rather than take this more playful approach. After placing the die-cut pieces on the dark-colored backgrounds, I eliminated colors that did not work.
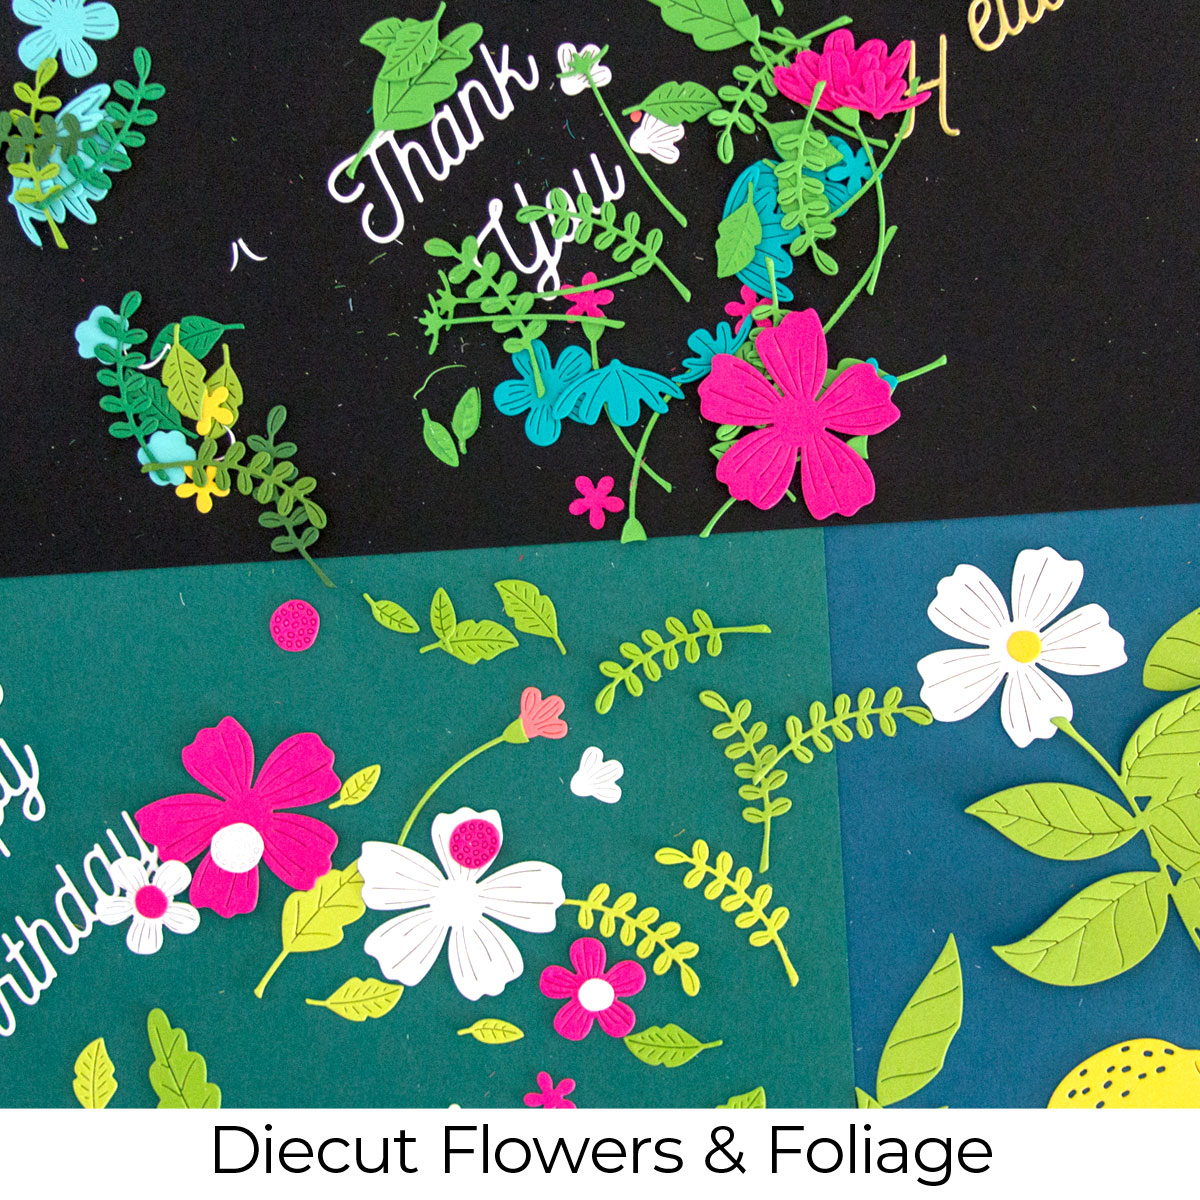
I die cut the Lemon Zest and Be Bold Blooms elements from the chosen colors. At this point, I didn’t know how many I would use, instead, I focused on creating more than enough so that I could play with the elements. Using the analogy of assembling a floral bouquet, I built an inventory of flowers and foliage.
With a variety of flowers and foliage on the backgrounds, I decided which items would be in which colors. I began building paper bouquets, without adhering anything. Like a floral bouquet, I used the largest shapes as the focal and supporting flowers, foliage pieces for structure, and the airy accents as delicate details.
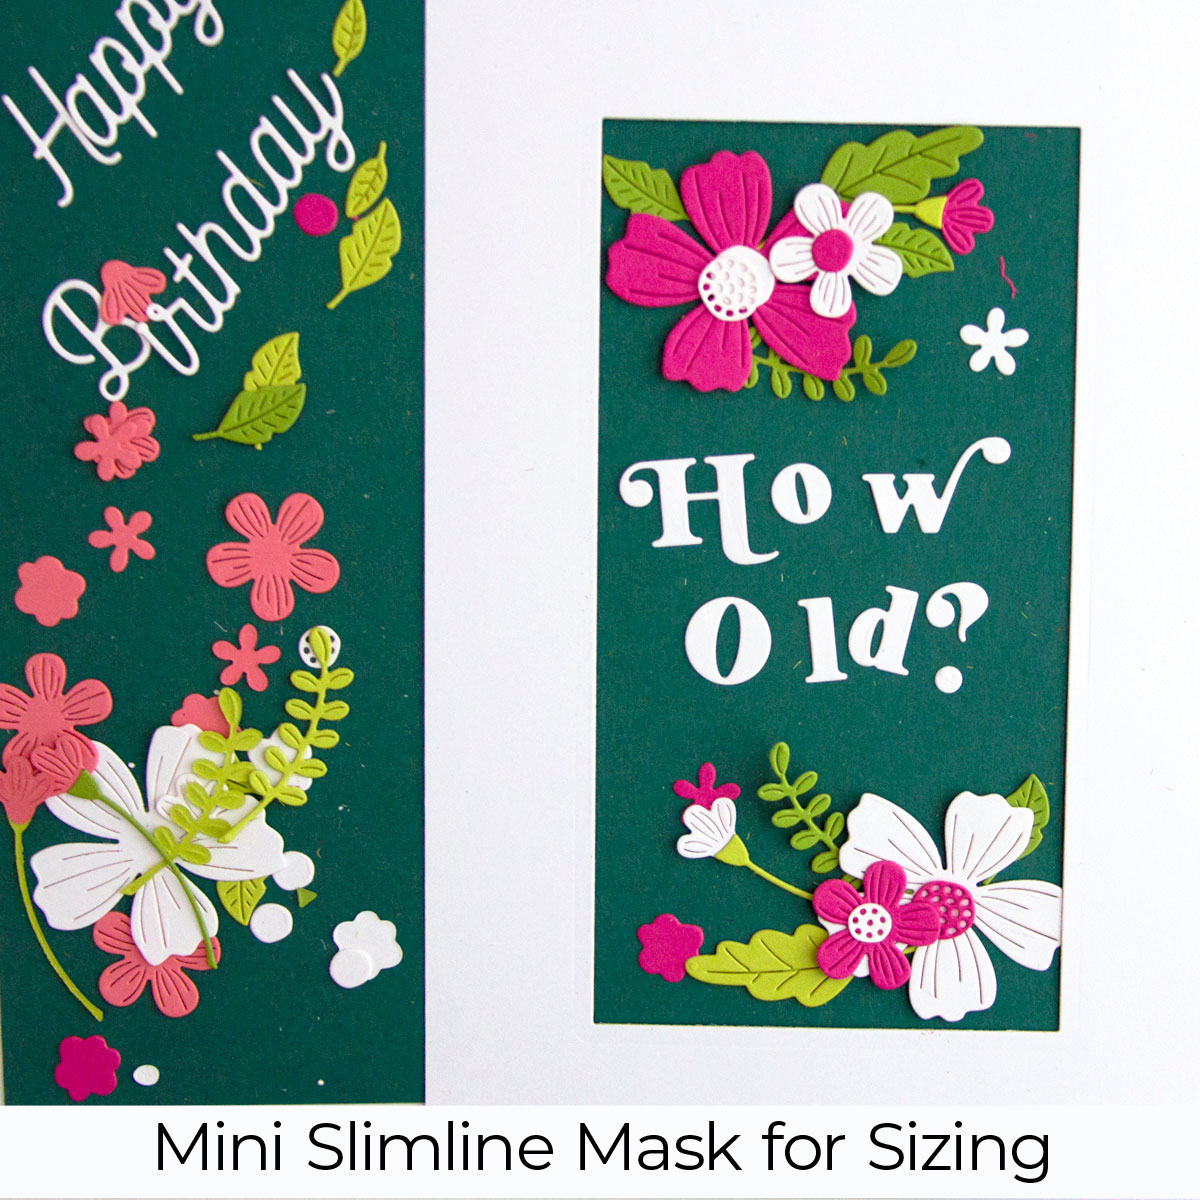
With the bouquets and lemon plant pieces loosely in place, I used masks, A2– and Mini Slimline-sized, to determine what card base size I would use.
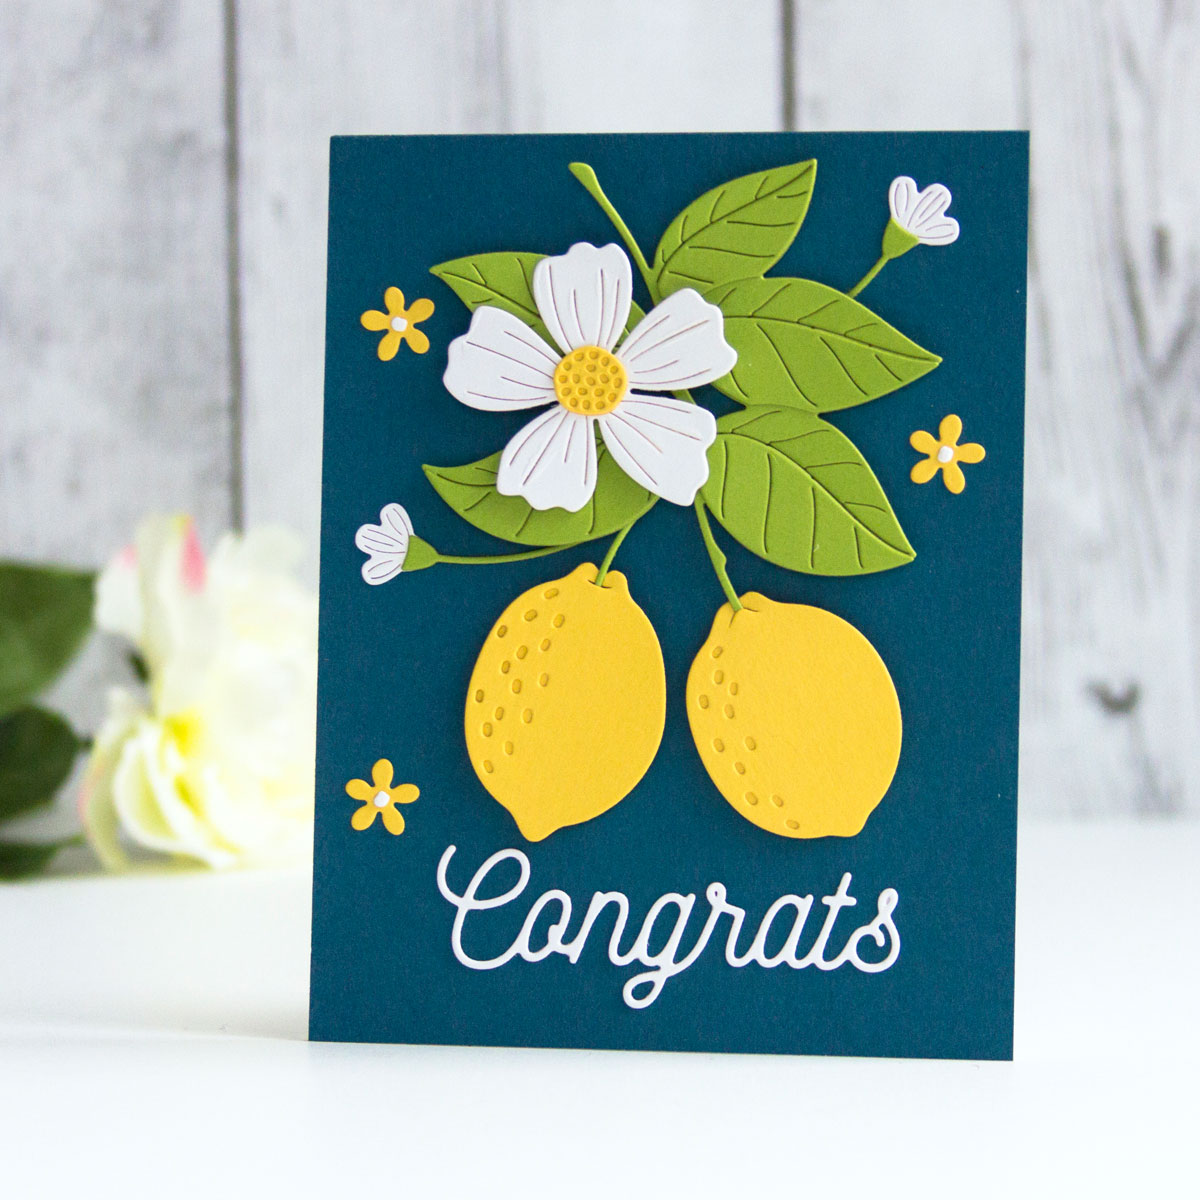
After determining the card base sizes, I adhered the elements to the bases. For the card showcasing the Lemon Zest set, I adhered the large leaf element and Smooth Lines “Congrats” first and built from there.

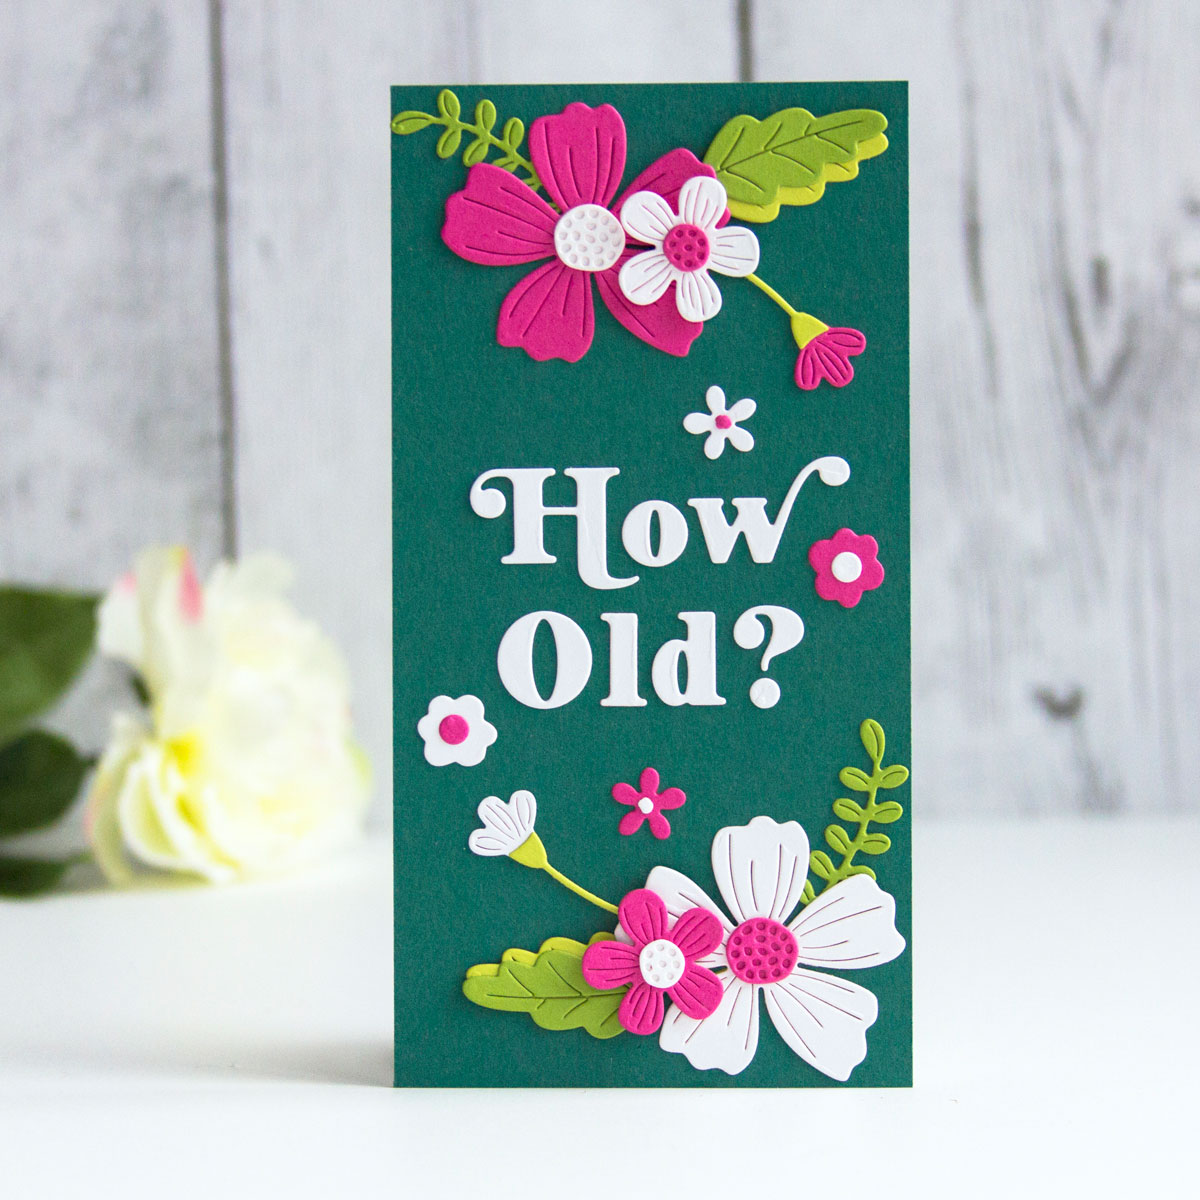
For the Mini Slimline card with the tongue-in-cheek “How Old?” sentiment, cut with the Uppercase, Lowercase, and Punctuation sets, I adhered the sentiment to the center and built the clusters of flowers above and below.
For the card with the Smooth Lines “Thank You” sentiment, I constructed the upper-left and lower-right floral clusters, adhered the sentiment at an angle, and filled in with smaller florals.
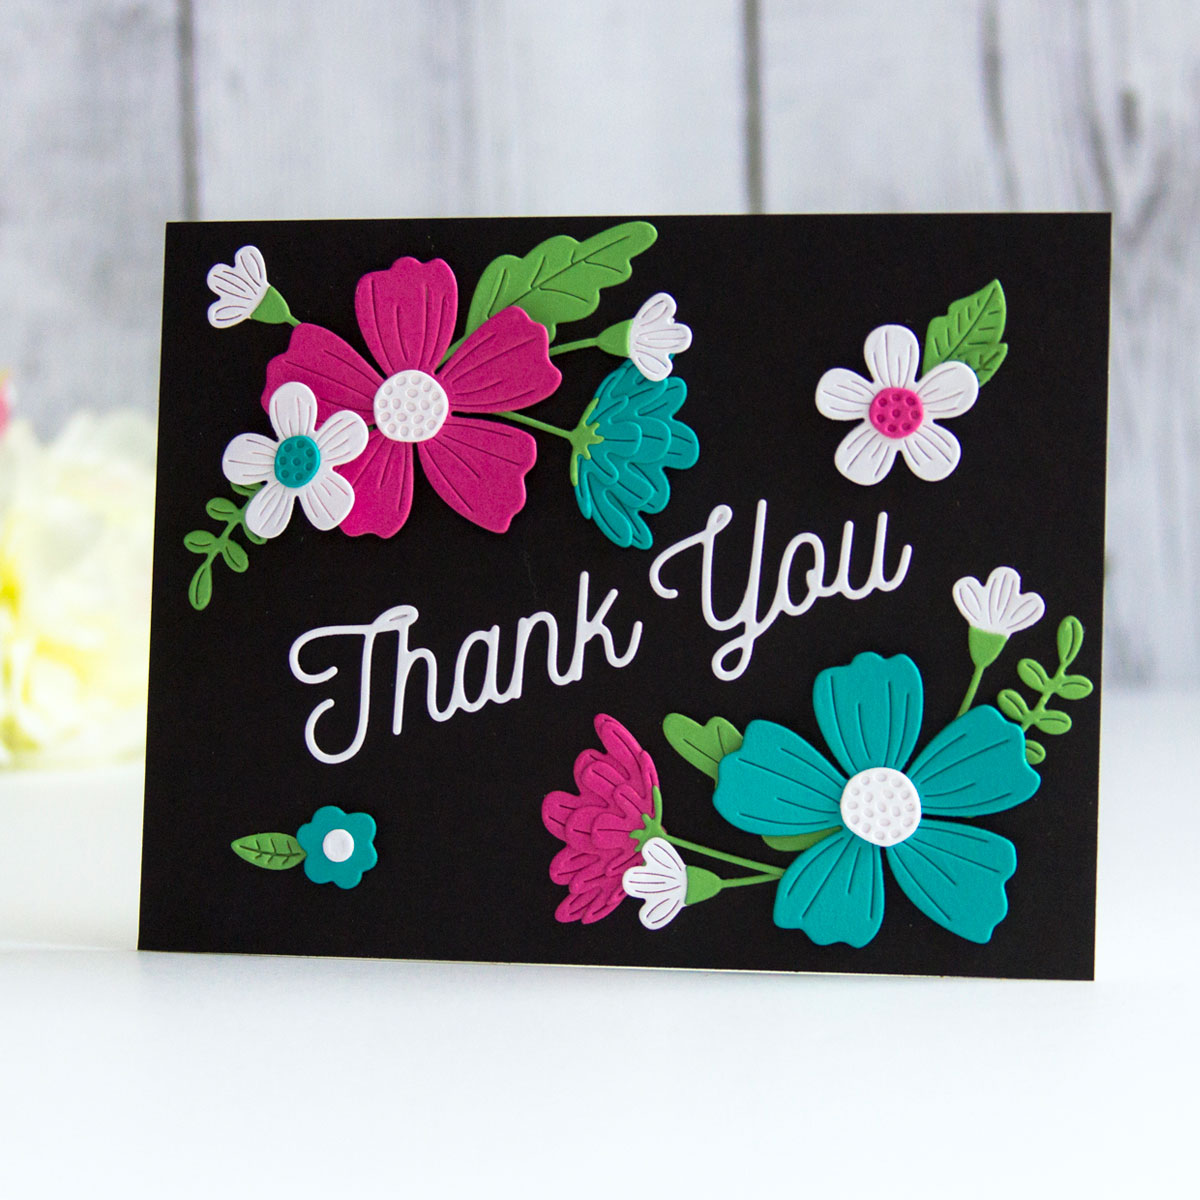
Note: I used the circle from the Be Bold Punctuation & More set (the exclamation and question mark dots) for a few of the flower centers. While my cards did not use the collection’s embossing folders, doing so would “step up” the designs.
Thanks so much for dropping by today. I hope you are inspired to take a playful approach in your own creations with the Be Bold Collection!
Spellbinders Supplies:

Other Supplies
Assorted colored cardstock; dimensional adhesive; glue
2 Comments
MaryH
What wonderful, bold color choices and this font is spectacular. I ordered it and cannot wait for it to arrive! Love all the cards and hope to see more from you. Love the snarky “How Old?” especially!
slangnv
I enjoyed reading your approach on how you came up with these 3 beautiful cards. Those lemons are a great die set and against the blue background is stunning. The person who gets that snarky “how old” will enjoy a beautiful card that makes them laugh!