
Be Bold Color Block Slimline Cards with Marie Nicole
Hey, crafty friends! It’s Marie here from Marie Nicole Designs. I always love sharing fun ways to use all the things from Spellbinders! In today’s post, I’ll be sharing three slimline cards that I made with the Be Bold Color Block dies. These are so much fun! You can use them just as they are for some bold cards, or switch them up a bit for alternative looks.
Bold Birthday!
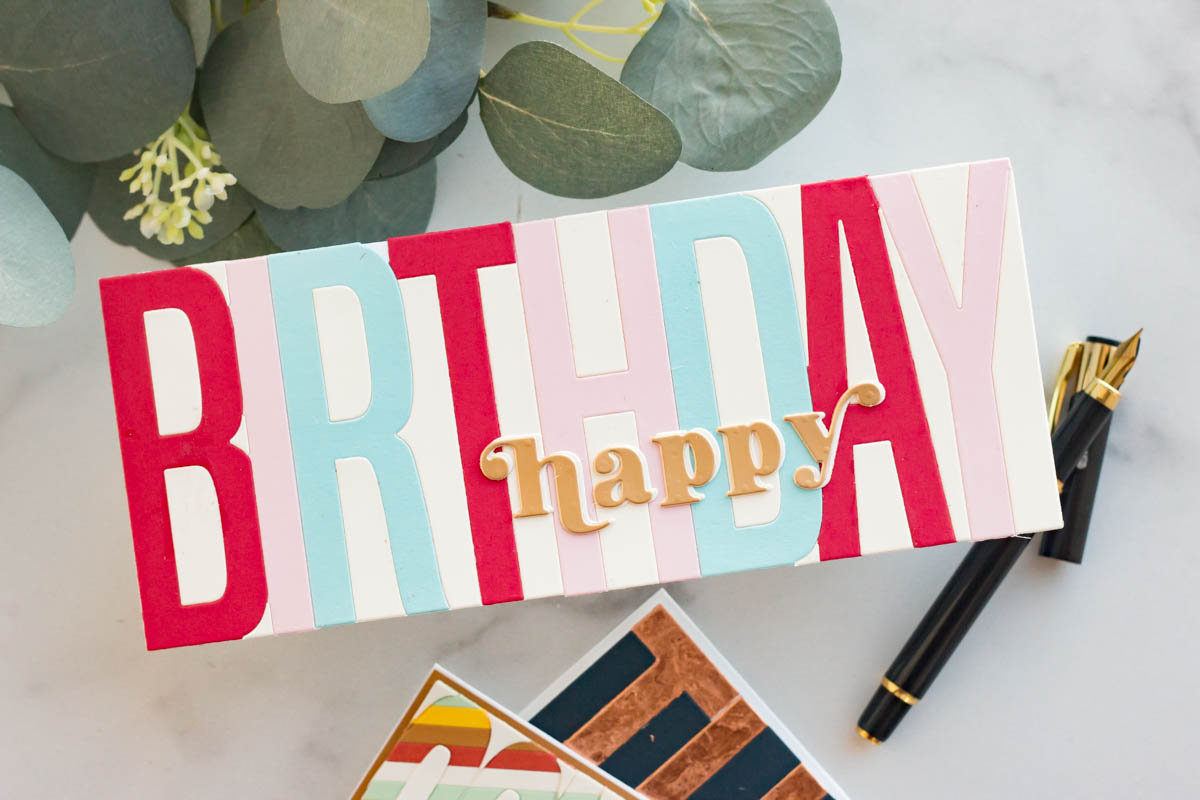
My first card features the Bold Birthday die. This cuts these really big letters and all the pieces that you can add right onto your slimline card base. I used this die and cut it out of several colors of cardstock, and then I pieced together all the letters and the pieces between the spaces and adhered them right down onto my card front. Then, I also cut the little “happy” sentiment from some gold cardstock and glued it onto the front.
I used the colors red, pink, and blue, but you can always switch up the colors to make your card more personalized for the person you are sending this to!
Big Thanks!

My next card is using the Bold Thank You die! For this one, I added a few extra steps to build my card. First, I added a sheet of double-sided adhesive to the back of some plain white cardstock. Then, I ran that cardstock through my die-cutting machine. This left me with pieces that had adhesive on the front. I peeled off the adhesive backing paper and then added some foiling flakes to my letters. You could also just cut out the letter with metallic cardstock, but I wanted a little texture on my letters.
After I got my letters decorated, I cut out the big Thanks again with some navy cardstock and pieced everything together onto a slimline card base. Now, this Thank You die is a bit shorter than the Birthday one, so I had some extra space on my card front. I just trimmed that down with my paper trimmer so I ended up with a slimline card that is a little shorter than the regular size. This will still be able to be mailed in a normal A10 envelope, though!
Bold Congrats!

My last card is a fun one, but also a bit tedious! If you like piecing together lots of cardstock pieces, this design is for you!
For this one, I cut a good number of cardstock strips in different colors and adhered them onto a piece of plain cardstock. Then, I ran my cardstock strips through my die machine with my die and cut out my letters. This took a little extra elbow grease with the extra layers of cardstock on my paper, but it still cut fine!
I then cut the “congrats” out of another piece of cardstock, this time an off-white. Then, I pieced together the letters and the negative spaces in between right onto my card layers. Once that was all done I added it to my slimline card base with foam adhesive. Again, like the Thank You die, this one is shorter than a slimline card base so I just trimmed off the excess to make it a bit shorter.
That’s it! Such fun dies and you can totally switch up the colors, methods, and themes of these cards.
Hope this gives you a bit of inspiration in your own crafting! Until next time,
Marie Nicole
Spellbinders Supplies:

Other supplies
Colored cardstock, double-sided adhesive, foam adhesive, scissors, paper trimmer
One Comment
MaryH
Love the color choices and what a great way to use up those scraps! Cards are striking!