Be Bold Collection – Card Inspiration with Annie Williams
Hi there, this is Annie Williams and I’m thrilled to be back on the blog today to share a couple of projects using the new Be Bold Collection from Spellbinders. The gorgeous embossing folders, pretty florals, and beautiful fonts in this collection inspired me to create three bright and cheery cards for different occasions.
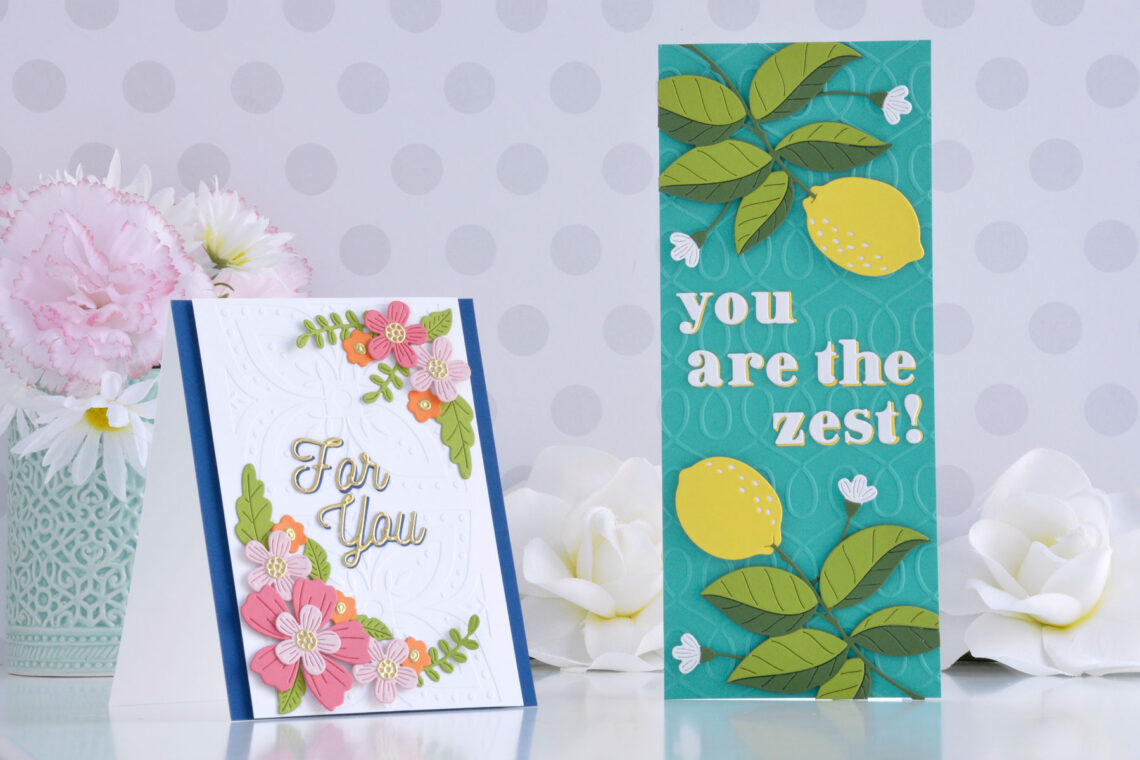
Mandala Flower Slimline Hello Card
The beautiful floral design on the Mandala Flower Embossing Folder caught my eye first. Here I added bright bouquets and golden sentiments for a cheerful slimline hello card.

- Trim a piece of white cardstock to 3.25” x 8.25 and emboss it using the Mandala Flower Embossing Folder.
- Mat the embossed panel with Mirror Gold Cardstock and adhere it to a side-folding white card base measuring 3.5” x 8.5”.
- Die-cut Pink Sand, Dahlia, Persimmon, Teal Topaz, Lagoon, Peridot, Rainforest, and Mirror Gold Cardstock using the Be Bold Blooms Die Set.
- Adhere the layers together with liquid glue.
- Arrange the flowers together into two bunches as shown and adhere down to the card front with liquid glue and foam adhesive for tons of dimension.
- Die-cut Gold Mirror and Lagoon Cardstock using the hello die from Smooth Lines Mix & Match Sentiments Die Set.
- Adhere the layers together, allowing the teal layer to show from behind like a shadow, and add to the card front in the center of the embossed flower.
- Apply Gold Hot Foil to white cardstock using one of the sentiments from the Mini Everyday Sentiments Foil Plate Set and the Glimmer Hot Foil Machine.
- Die-cut it out using the coordinating die and pop it up on the bottom of the card with foam adhesive.

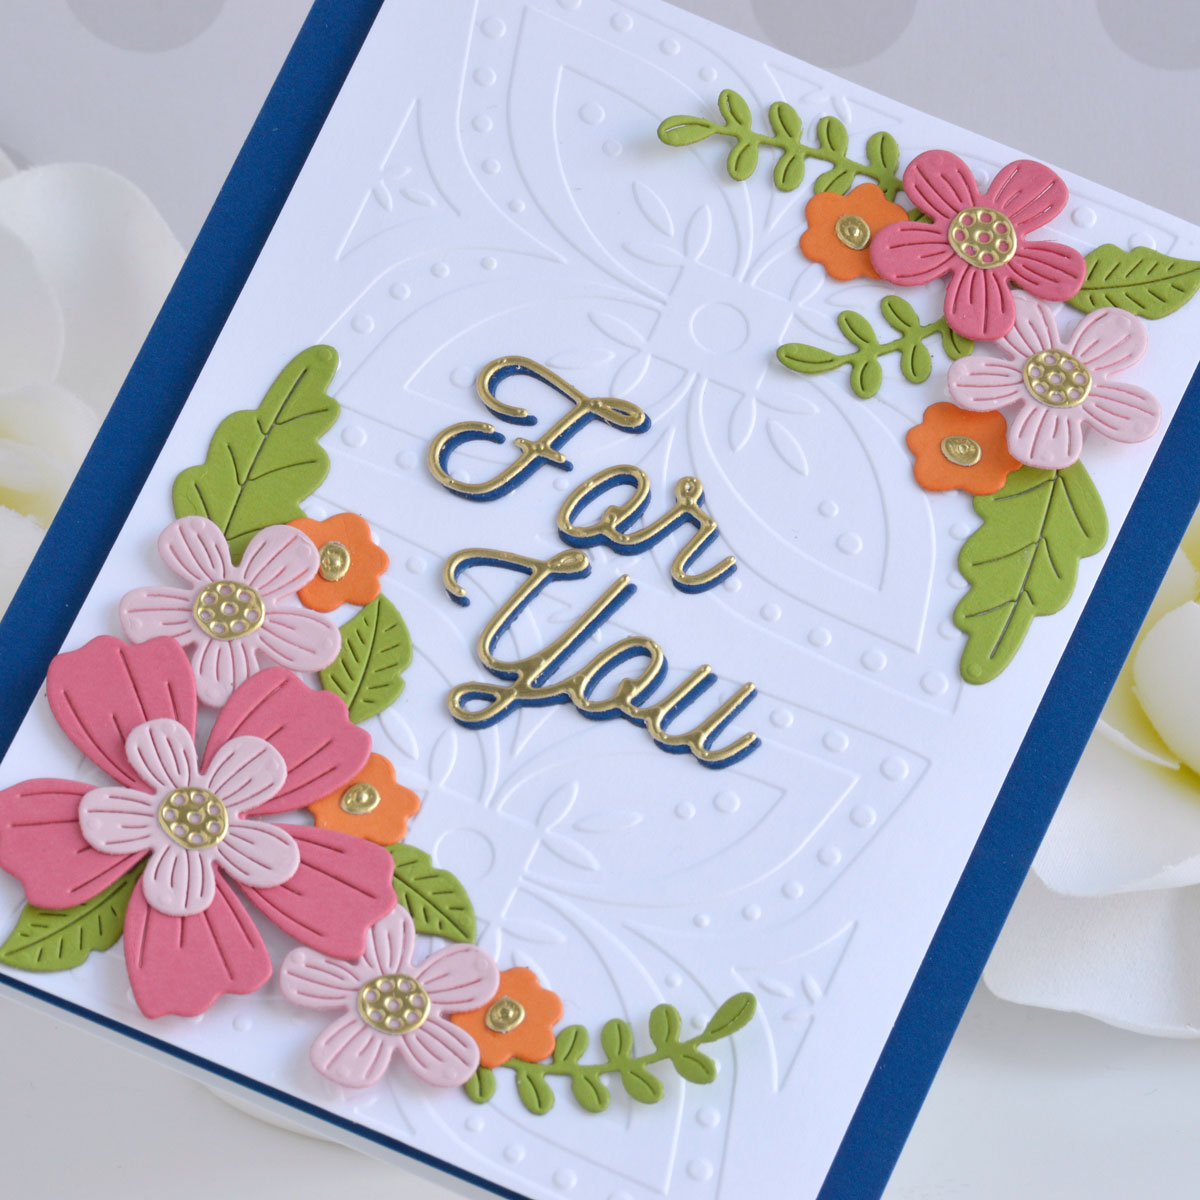
Carved Tile For You A2 Card
The Carved Tile Embossing Folder creates the most beautiful subtle background design for slimline cards, but is perfectly proportioned for mini slimline and A2-sized cards too! Here I trimmed off one of the three floral designs from the background and added it to an A2 card base to create this pretty card for a friend.
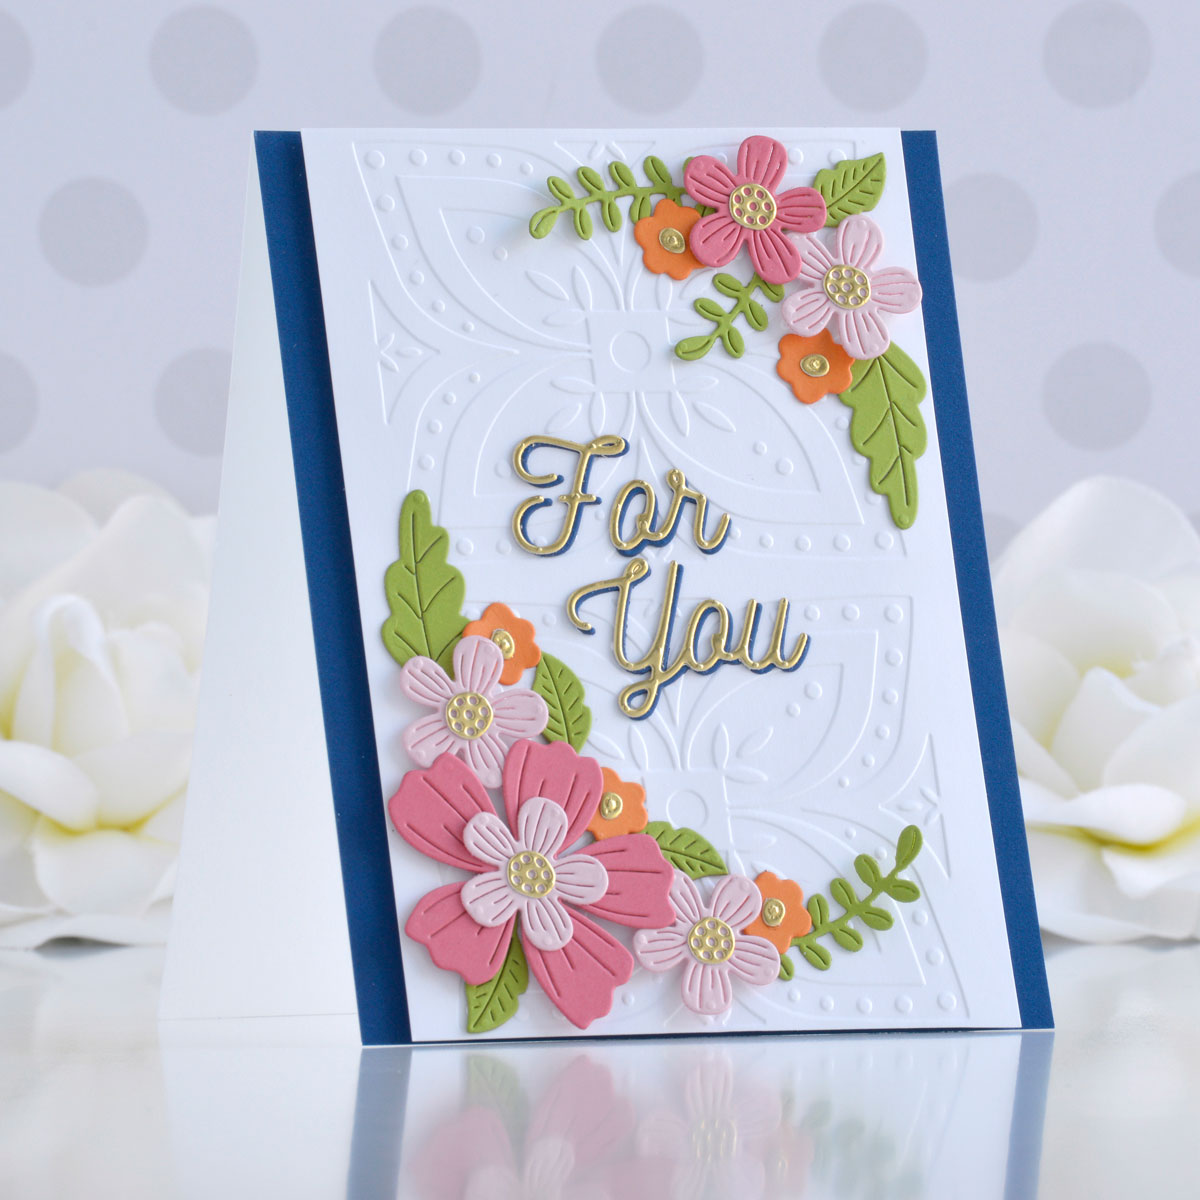
- Trim a piece of white cardstock to 3.75” x 5.5” and emboss it using the Carved Tile Embossing Folder, making sure to position it so that only two floral designs will appear.
- Trim a piece of Cosmic Sky Cardstock to 4.25” x 5.5” and adhere it to a top-folding A2-sized white card base with a tape runner.
- Add the embossed panel in the center of the card front with foam adhesive.
- Die-cut Pink Sand, Dahlia, Persimmon, Rainforest, and Mirror Gold Cardstock using the Be Bold Blooms Die Set.
- Adhere the layers together with liquid glue.
- Arrange the blooms in bouquets in opposite corners and adhere them down with liquid glue and foam adhesive for tons of dimensions.
- Die-cut Gold Mirror and Cosmic Sky Cardstock using the Smooth Lines Mix & Match Sentiments Die Set.
- Adhere the layers together, allowing the blue layer to show from behind like a shadow, and add to the card front in the center with liquid glue.
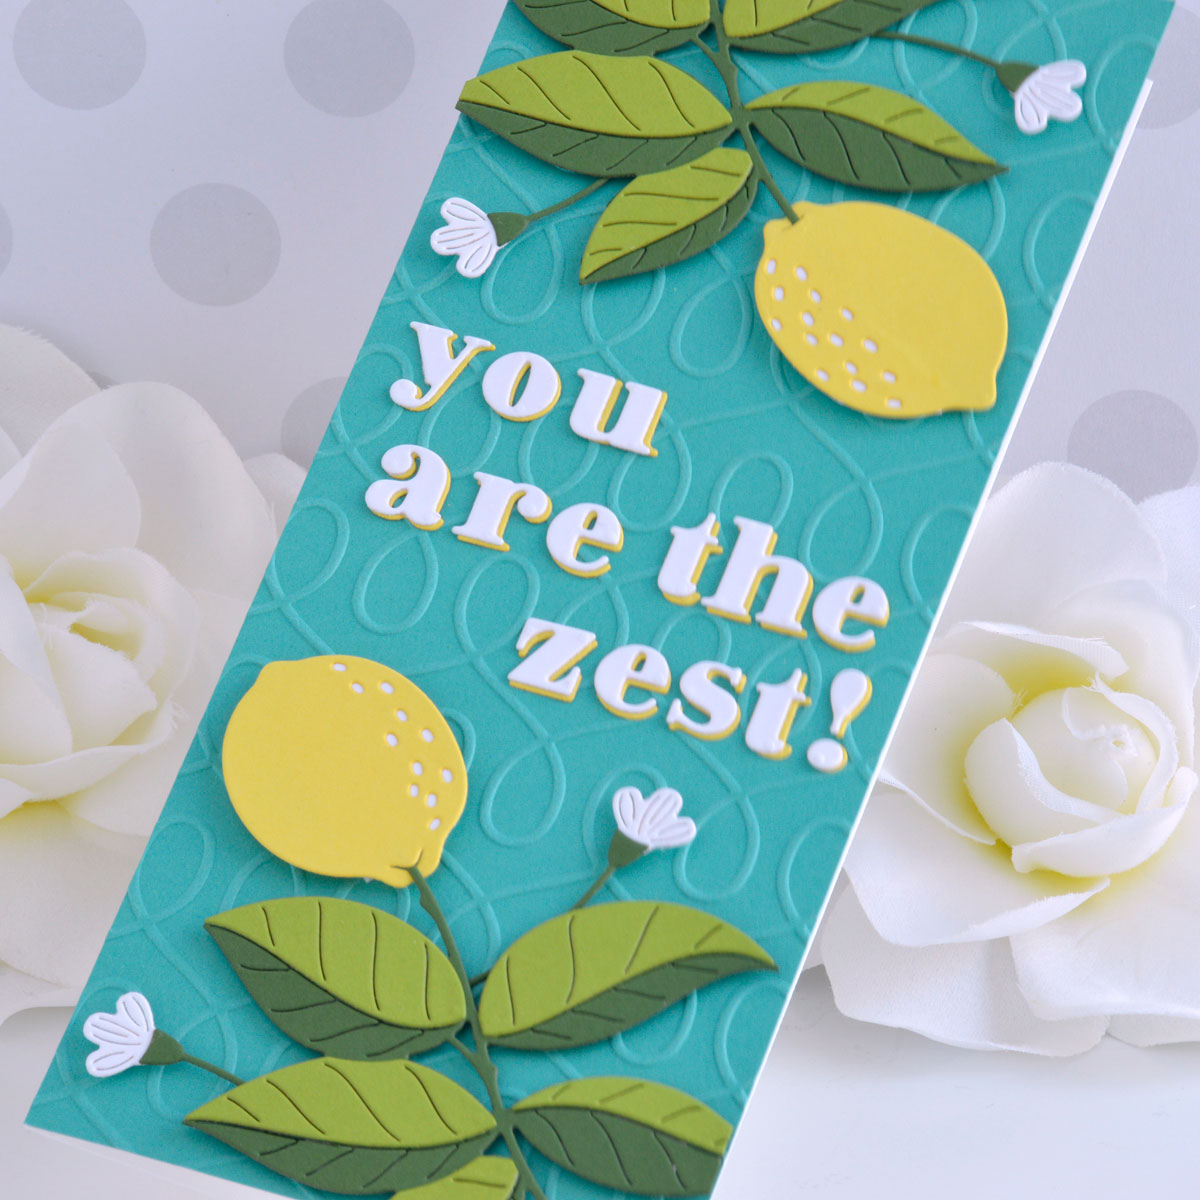
Lemon Zest Slimline Card
I thought the Lemon Zest Die Set was so unique that I had to create a big, bold slimline card with it. And with the help of the beautiful Be Bold Alphabet dies, I was able to add a fun custom sentiment!
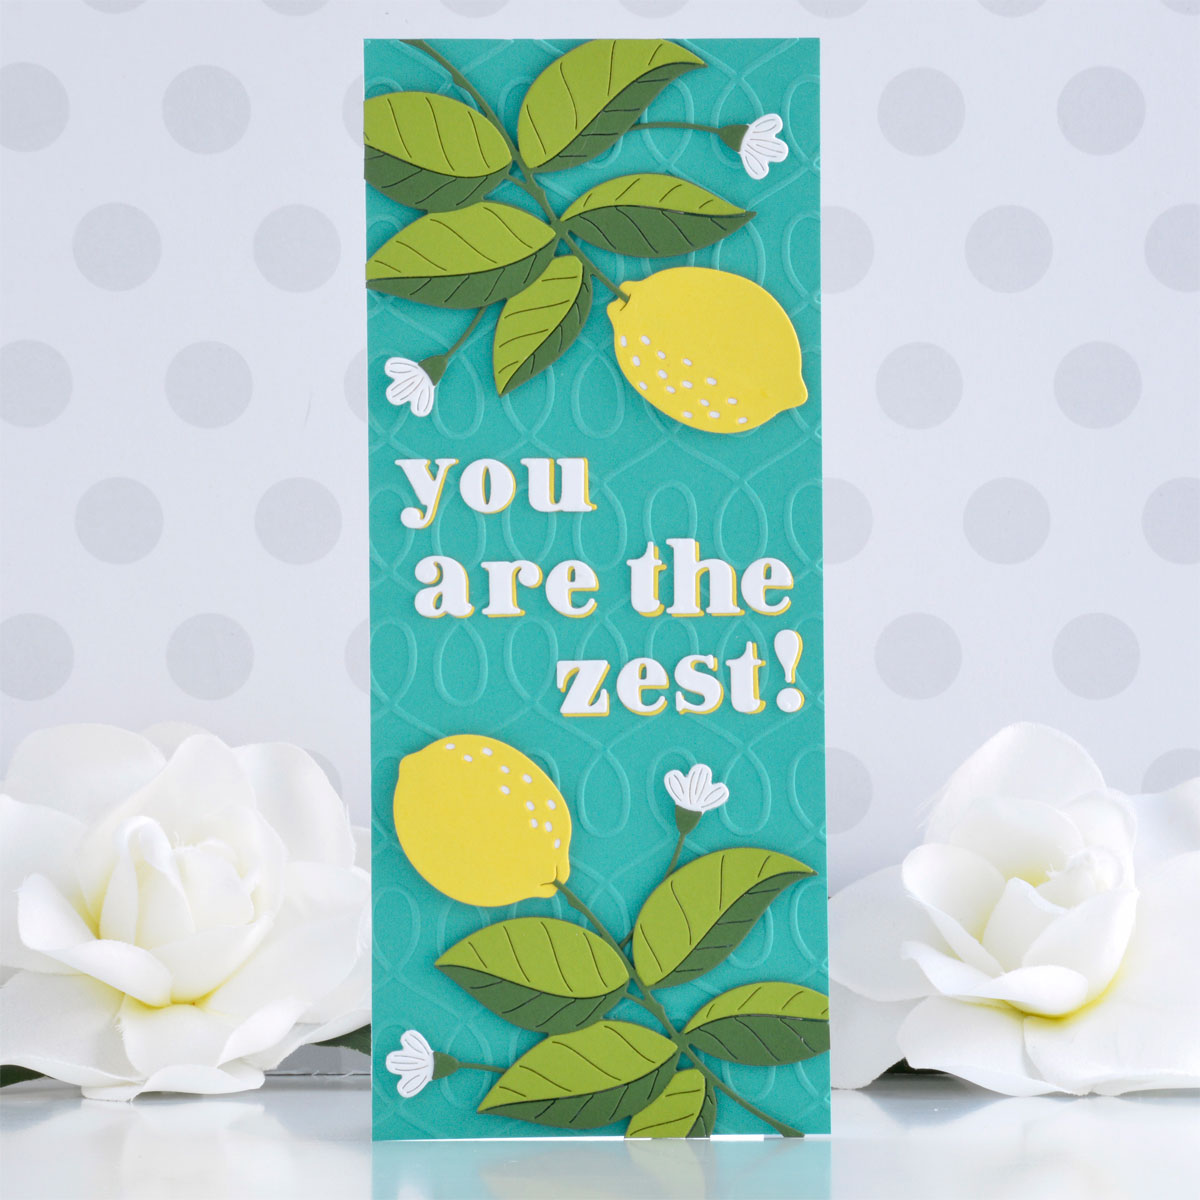
- Trim a piece of Teal Topaz Cardstock to 3.5” x 8.5” and emboss it using the Loops Embossing Folder.
- Adhere the embossed panel to a side-folding white card base measuring 3.5” x 8.5” with a tape runner.
- Die-cut white, yellow, Rainforest, and Fern Cardstock using the Lemon Zest Die Set until you have enough pieces to create two lemon bouquets.
- Adhere the layers together with liquid and add to the top and bottom of the card front with foam adhesive.
- Die-cut white and yellow cardstock with the Be Bold Lowercase Alphabet and Numbers Die Set and the Be Bold Punctuation & More Die Set.
- Adhere the yellow layer behind the white with liquid glue, allowing the yellow to peek out a bit like a shadow.
- Arrange the sentiment in the center of the card front and adhere it down with liquid glue.
Spellbinders Supplies:

Other supplies
White heavyweight cardstock, Stampin’ Up Pineapple Punch Cardstock, tape runner, foam adhesive.
I hope you enjoyed this trio of bright and cheery cards and thanks so much for stopping by today. You can find more inspiration over at my blog AnnieBWills.com.
Card Club Kit Extras! August 2019 Edition
Spellbinders Holiday 2019 Collection Introduction
