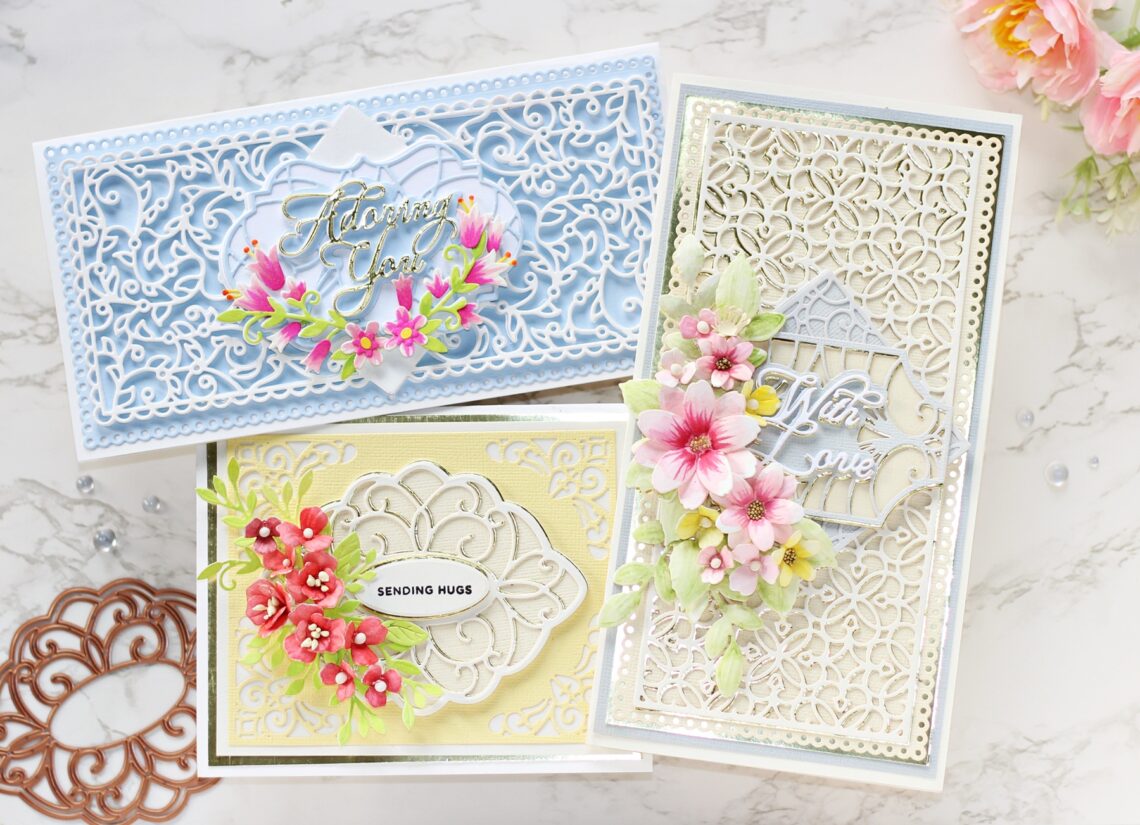
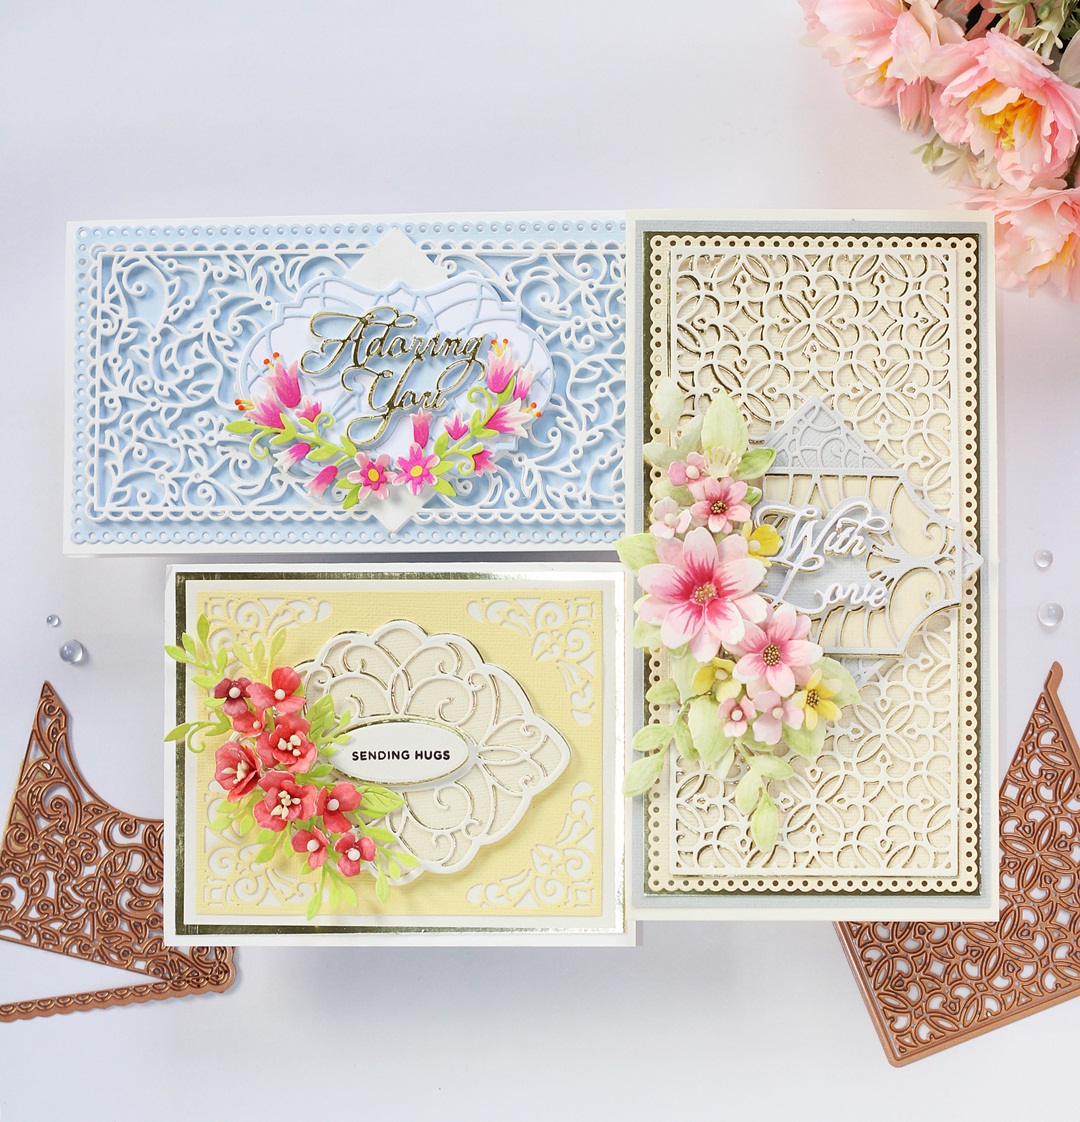
Layered Intricate Cards using Classically Becca Collection with Hussena
Hello everyone! This is Hussena from Quill and Punch Works, and I am so thrilled to be guest designing on the Spellbinders blog today. I have three projects to share, highlighting the NEW Classically Becca Collection by Becca Feeken of Amazing Paper Grace. This STUNNING Collection features an array of intricate and elegant motifs that Amazing Paper Grace by Becca Feeken is known for.
With Love Regalia Card Builder Slimline Card
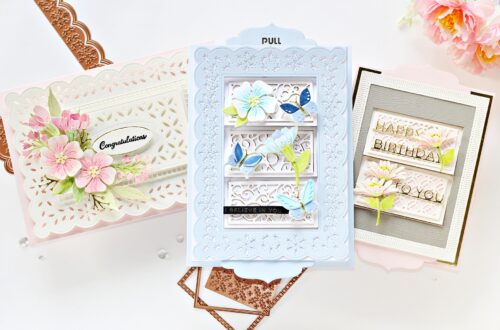
My first card features the With Love Regalia Card Builder Etched Dies, along with the Cinch and Go Blossoms Etched Dies, Circle Meets Square Etched Dies, and Scalloped Symphony Notecard Etched Dies. I simply love the intricate Card Builder Inserts included in the With Love Regalia Card Builder Etched Dies and had to create a tall Slimline Card using it. It looks so rich and elegant!
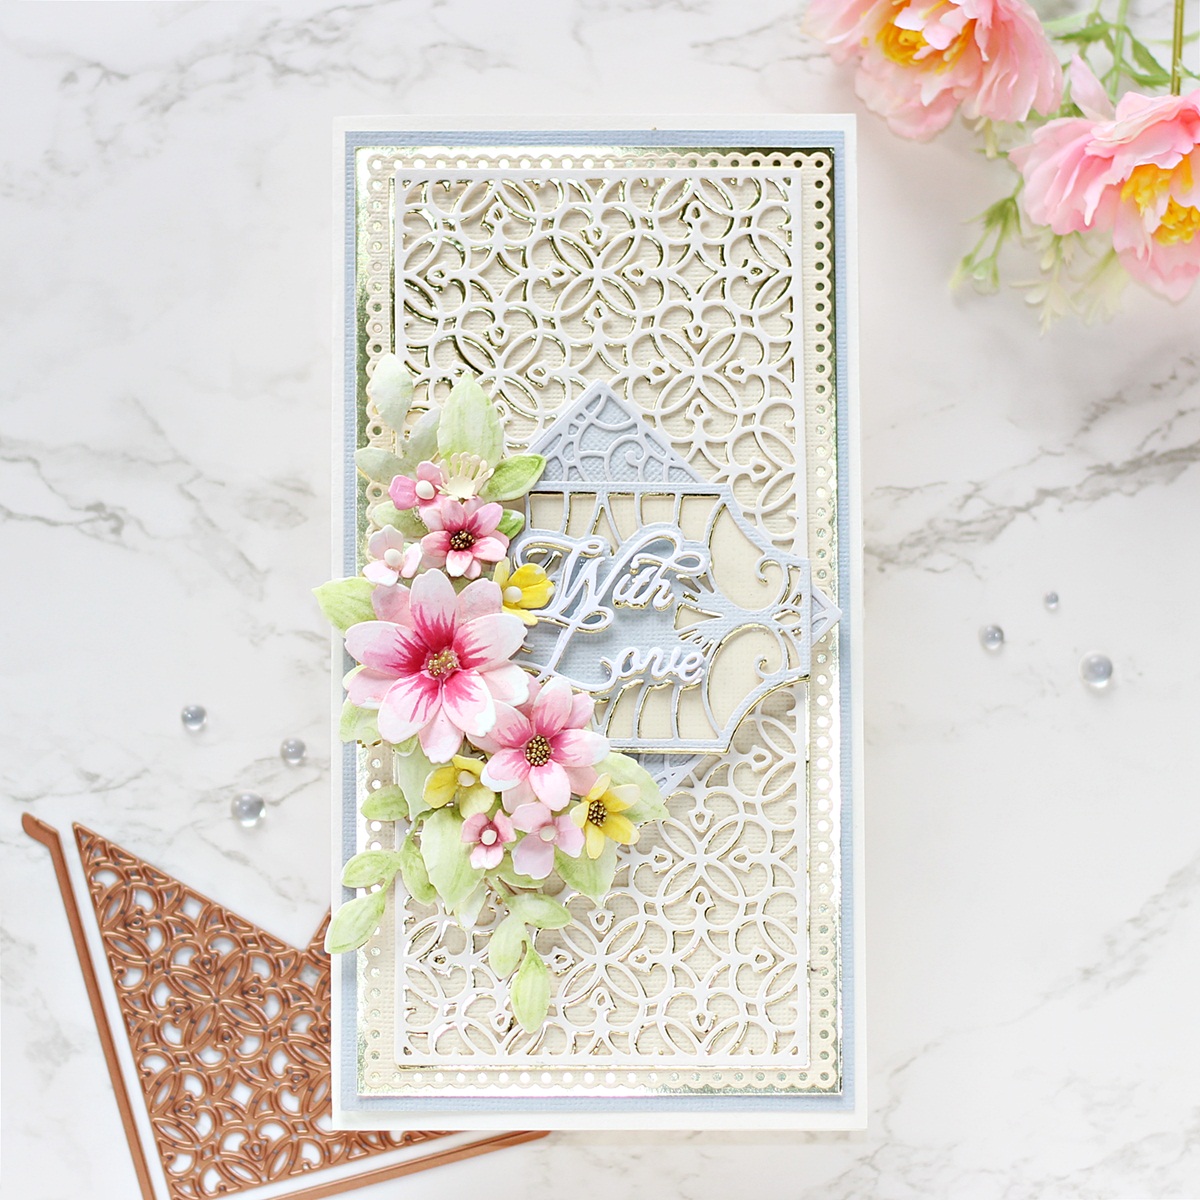
To create my card, I first die-cut Barely Peach Cardstock using the Scalloped Notecard Die included in the Scalloped Symphony Notecard Etched Dies. Next, I die-cut Snowdrift Cardstock and Mirror Gold Cardstock using the Card Builder Rims and Insert Die from the With Love Regalia Card Builder Etched Dies. I cut the die twice, on either edge of the panel, to create a continuous slimline background. Then, I adhered them together with the Bearly Art Original Precision Craft Glue, allowing the gold layer to peek out from behind the ivory layer a bit.

Next, I die cut Brushed Silver Cardstock using the Square Rim and Insert Die in the Circle Meets Square Etched Dies. I layered them together with Craft Glue, and then attached them to my panel using foam squares for a raised effect. Next, I die-cut Brushed Silver and Mirror Gold Cardstock using the Sentiment Rim and Insert Die included in the With Love Regalia Card Builder Etched Die Set and adhered it to the die-cut card panel with Craft Glue, slightly offsetting the die-cuts so that a gold shadow forms. Once that was done, I die cut Snowdrift Cardstock, Mirror Gold Cardstock, and White Foam using the ‘With Love’ die from the same die set. I adhered them together with liquid glue, allowing the gold layer to peek out from behind the white layer a bit.
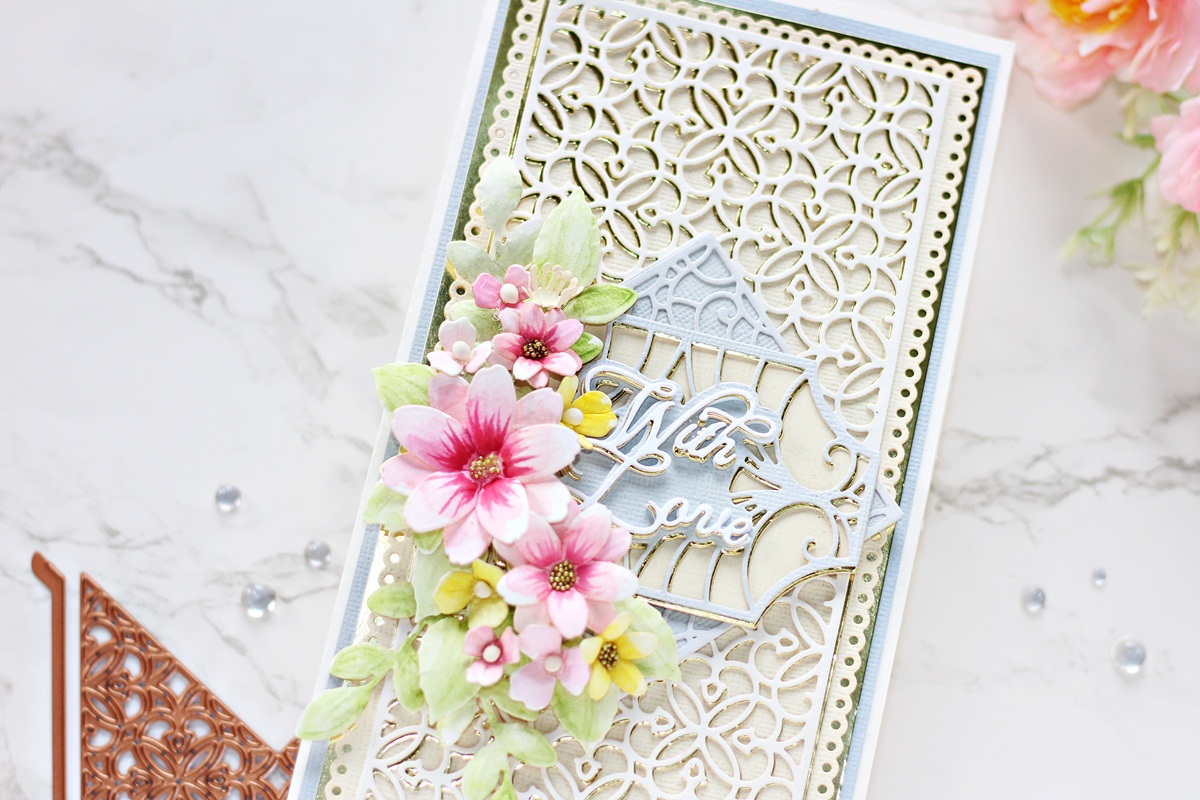
I die cut Snowdrift Cardstock using the flower and leaf dies in the Cinch and Go Blossoms Etched Die Set and Cinch and Go – III Die Set. I used Watercolor Pans to color the flowers and leaves and then used a dark pink Copic Marker to flick some color out from the center to add some quick color to the petals. Then, I embossed each petal and leaf with a Ball Stylus and added micro-fine gold glitter balls and white wire pollens to the flower centers for a bit of pizzazz.
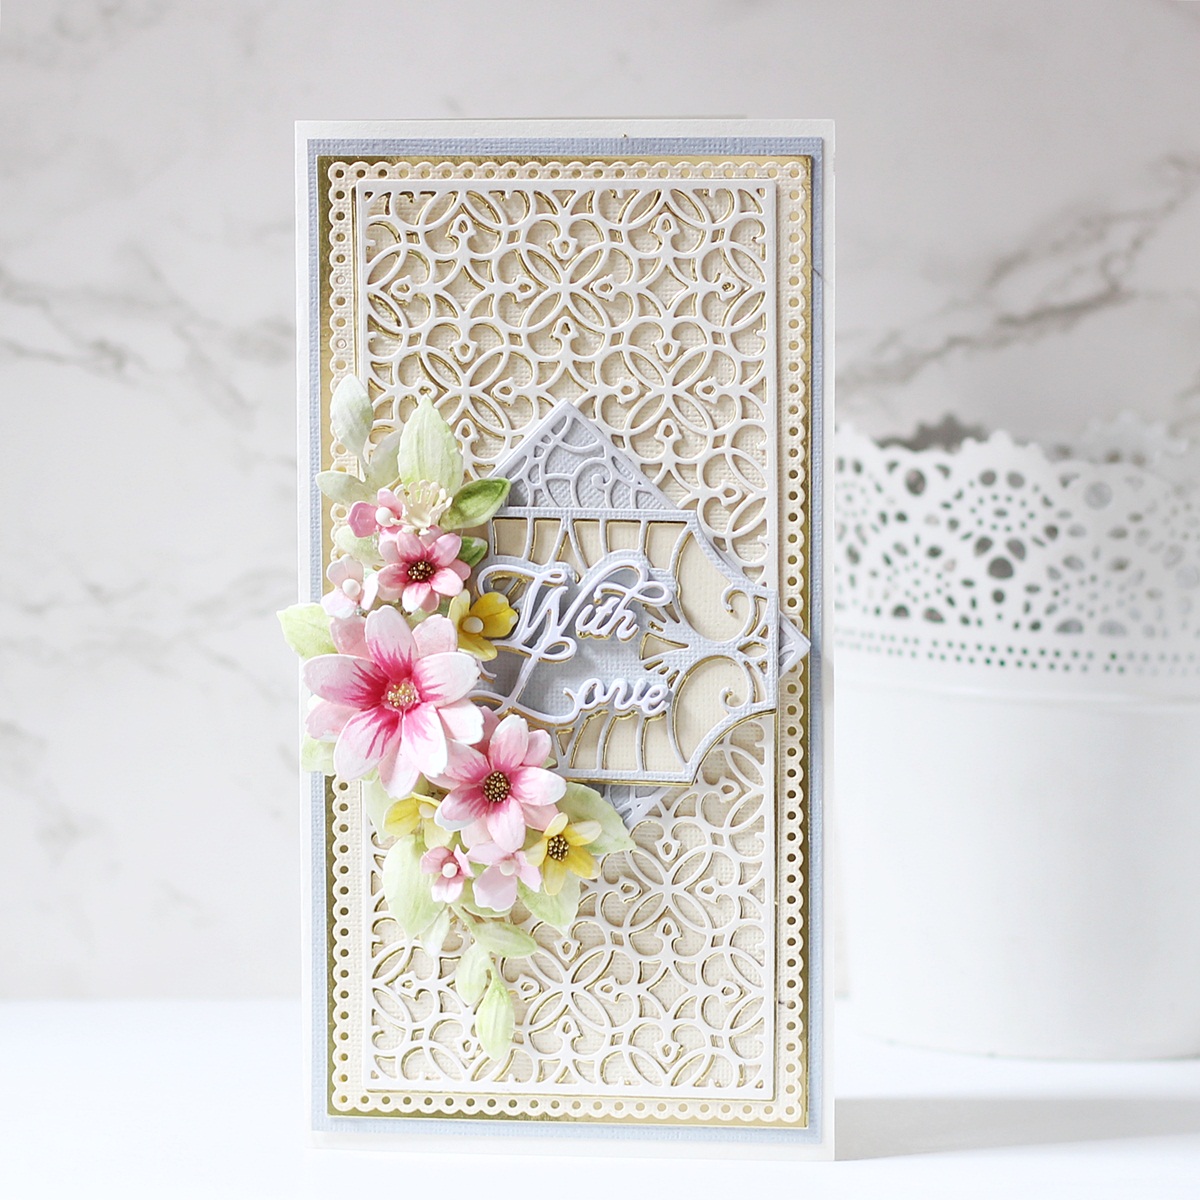
I then adhered the layers together with Craft Glue before arranging them around the sentiment panel. To finish, I matted the background panel with layers of Mirror Gold Cardstock and Brushed Silver Cardstock before adhering it to a side-folding 3.5” x 8.5” ivory card base. This was such a labor of love, but I truly enjoyed working on every bit of it!
Adoring Fleurette Card Builder Slimline Card
As you can tell, I am a fan of Slimline Cards and just can’t create enough of them. I used the Adoring Fleurette Card Builder Etched Dies for this card and paired it with the Scalloped Symphony Notecard Etched Dies to create a soft springtime card.
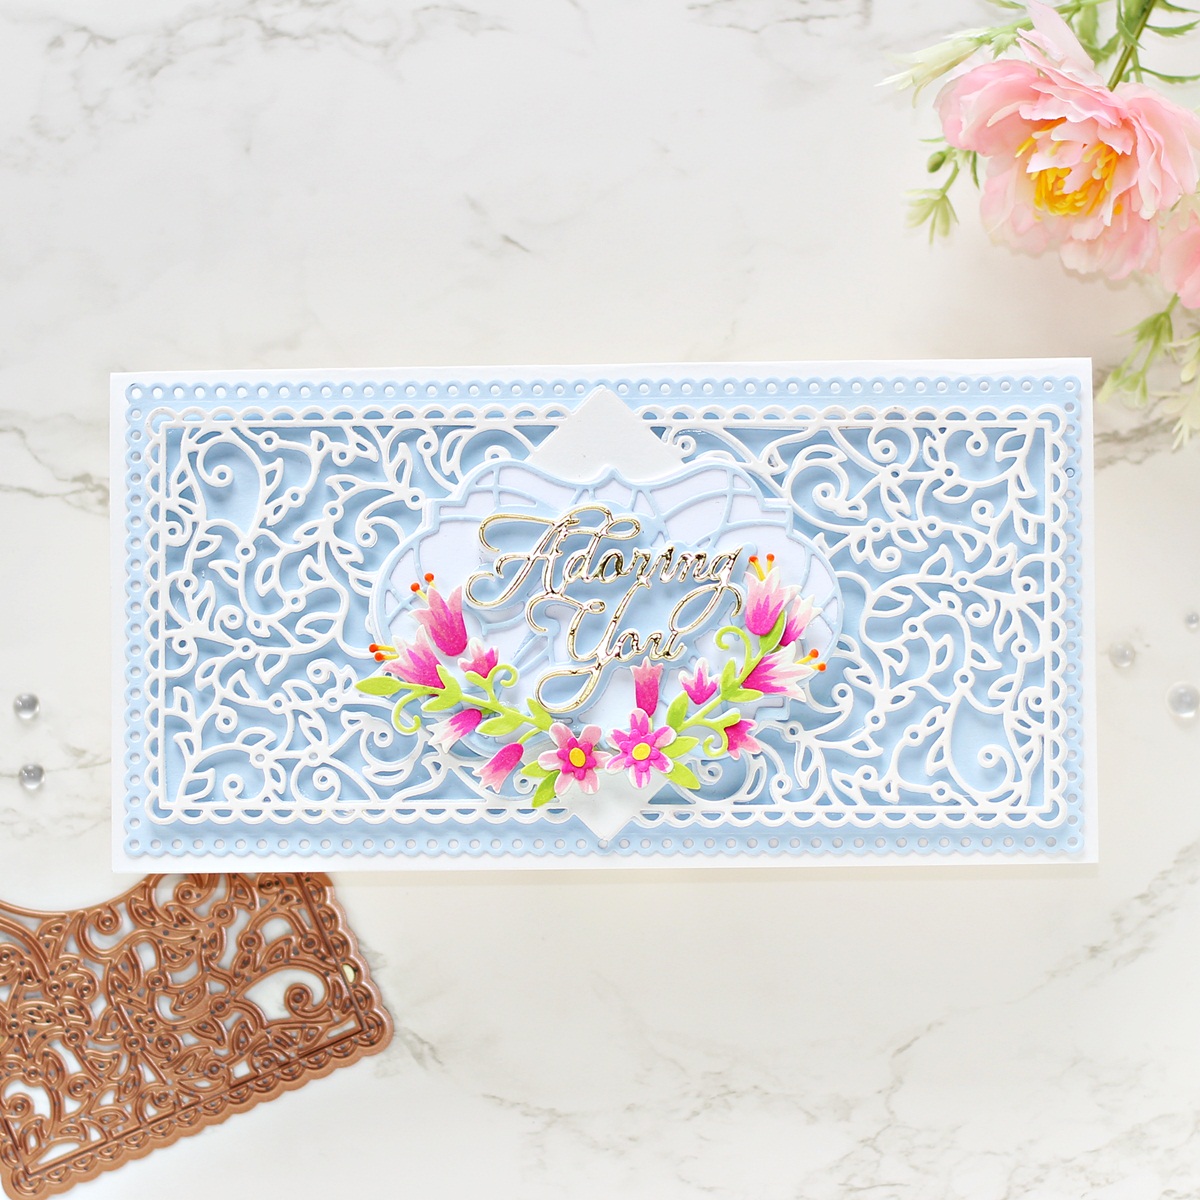
I started by die-cutting Raindrop Cardstock using the Scalloped Notecard Die included in the Scalloped Symphony Notecard Etched Dies. Next, I die-cut Snowdrift Cardstock and White Foam using the Card Builder Rims and Insert Dies from the Adoring Fleurette Card Builder Etched Dies. I cut the die twice, on either edge of the panel, to create a continuous slimline background. Then, I adhered them together with the Bearly Art Original Precision Craft Glue on my background panel.
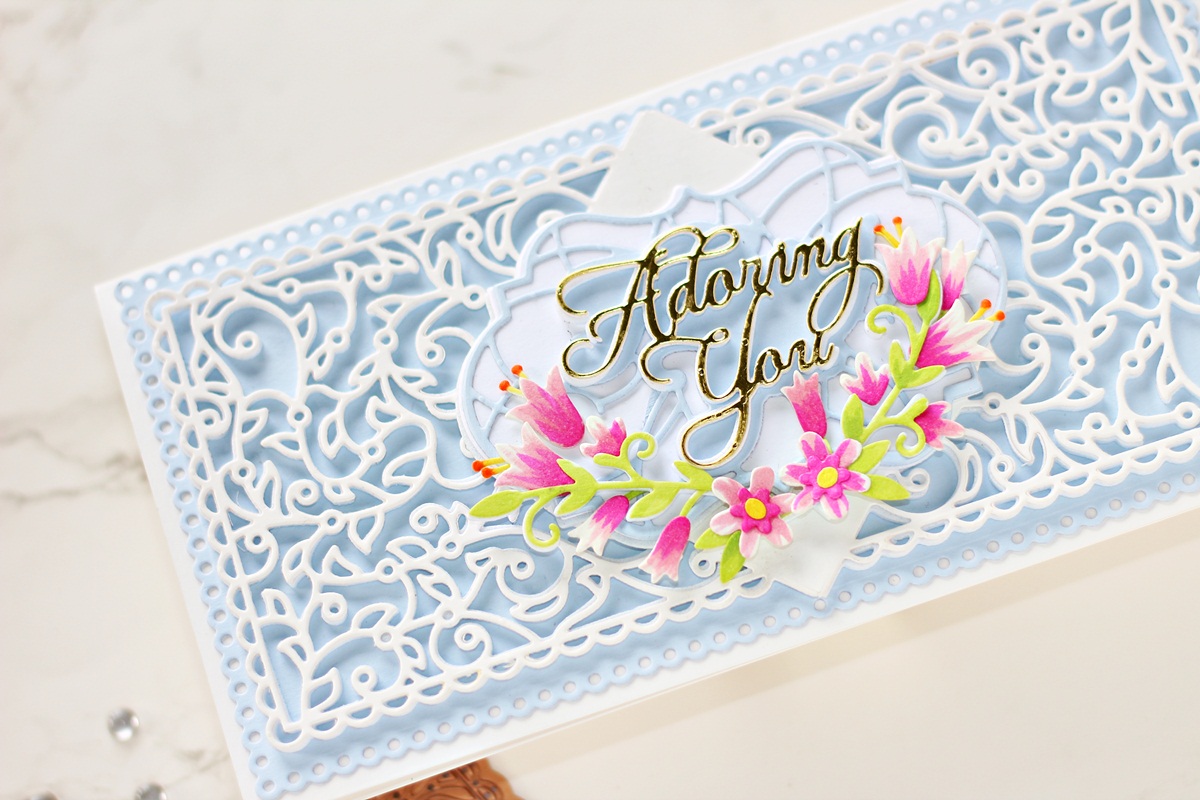
Next, I die-cut Snowdrift Cardstock and White Foam using the Square Rim Die included in the Circle Meets Square Etched Dies and adhered it down on my panel using Craft Glue. Then, I die-cut Raindrop, Snowdrift Cardstock, and White Foam using the Sentiment Rim and Insert Dies included in the Adoring Fleurette Card Builder Etched Dies and layered them together using liquid glue. Next, I die-cut Mirror Gold Cardstock using the ‘Adoring You’ die from the set and adhered it down on my panel using Craft Glue.
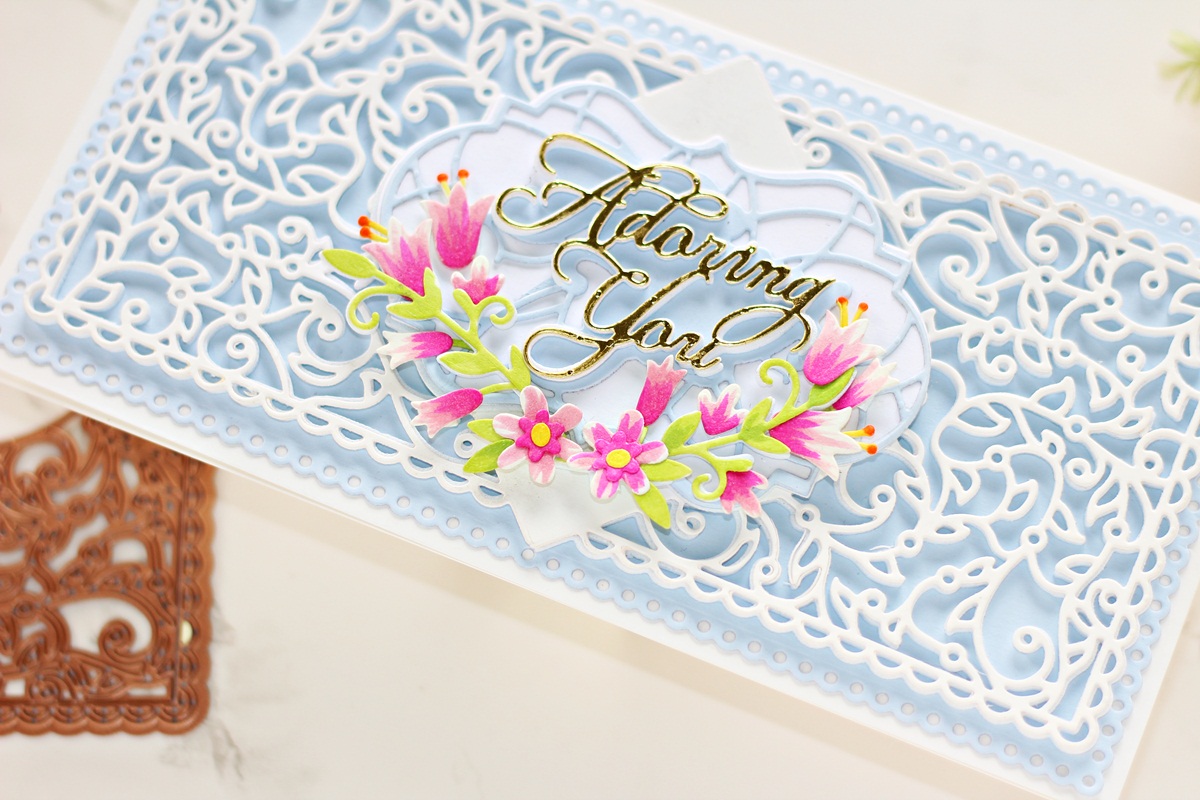
Once that was done, I die-cut Snowdrift Cardstock using the flower and stem dies in the Adoring Fleurette Card Builder Etched Die Set. I did some quick coloring on the die-cut pieces using Copic Markers and then arranged them around my sentiment panel using Craft Glue. I also flicked some colors with a medium pink Copic marker out from the center to add some highlights to the flower die-cuts.
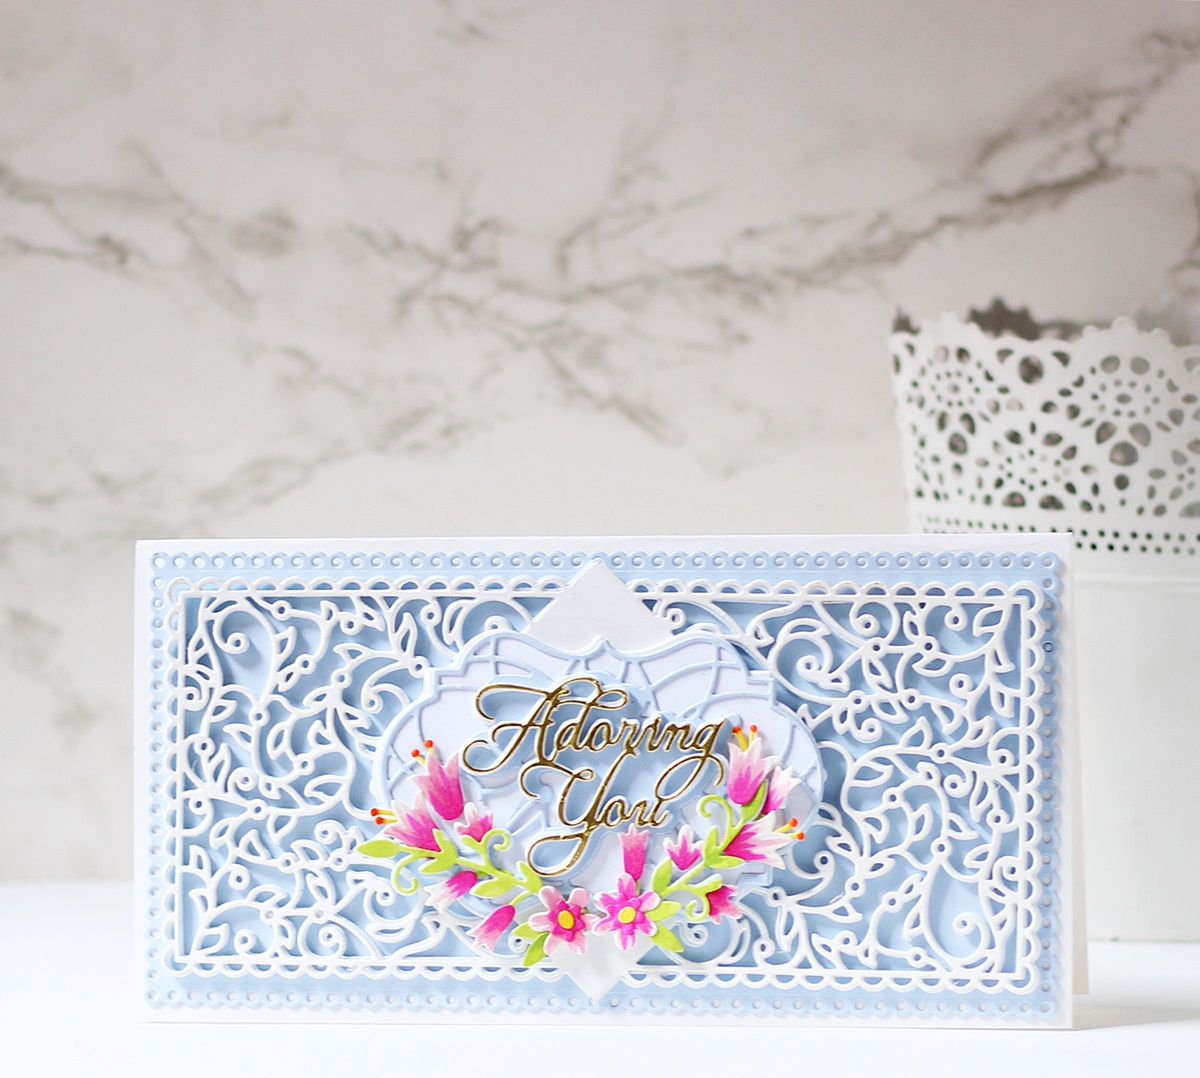
Then, to complete, I adhered the background panel to a top-folding 3.5” x 8.5” white card base made out of Snowdrift Cardstock using a tape runner. I love how simple and easy this card was to put together. The elegant die-cut pieces did all the work for me!
Filigree Marquis Sending Hugs Card
I loved the large Corner Frame in the A2 Filigree Marquis Etched Dies and thought it would be the perfect background to pair with the flowers in the Cinch and Go Blossoms Etched Die Set and Adoring Fleurette Card Builder Etched Dies for this A2-sized friendship card.
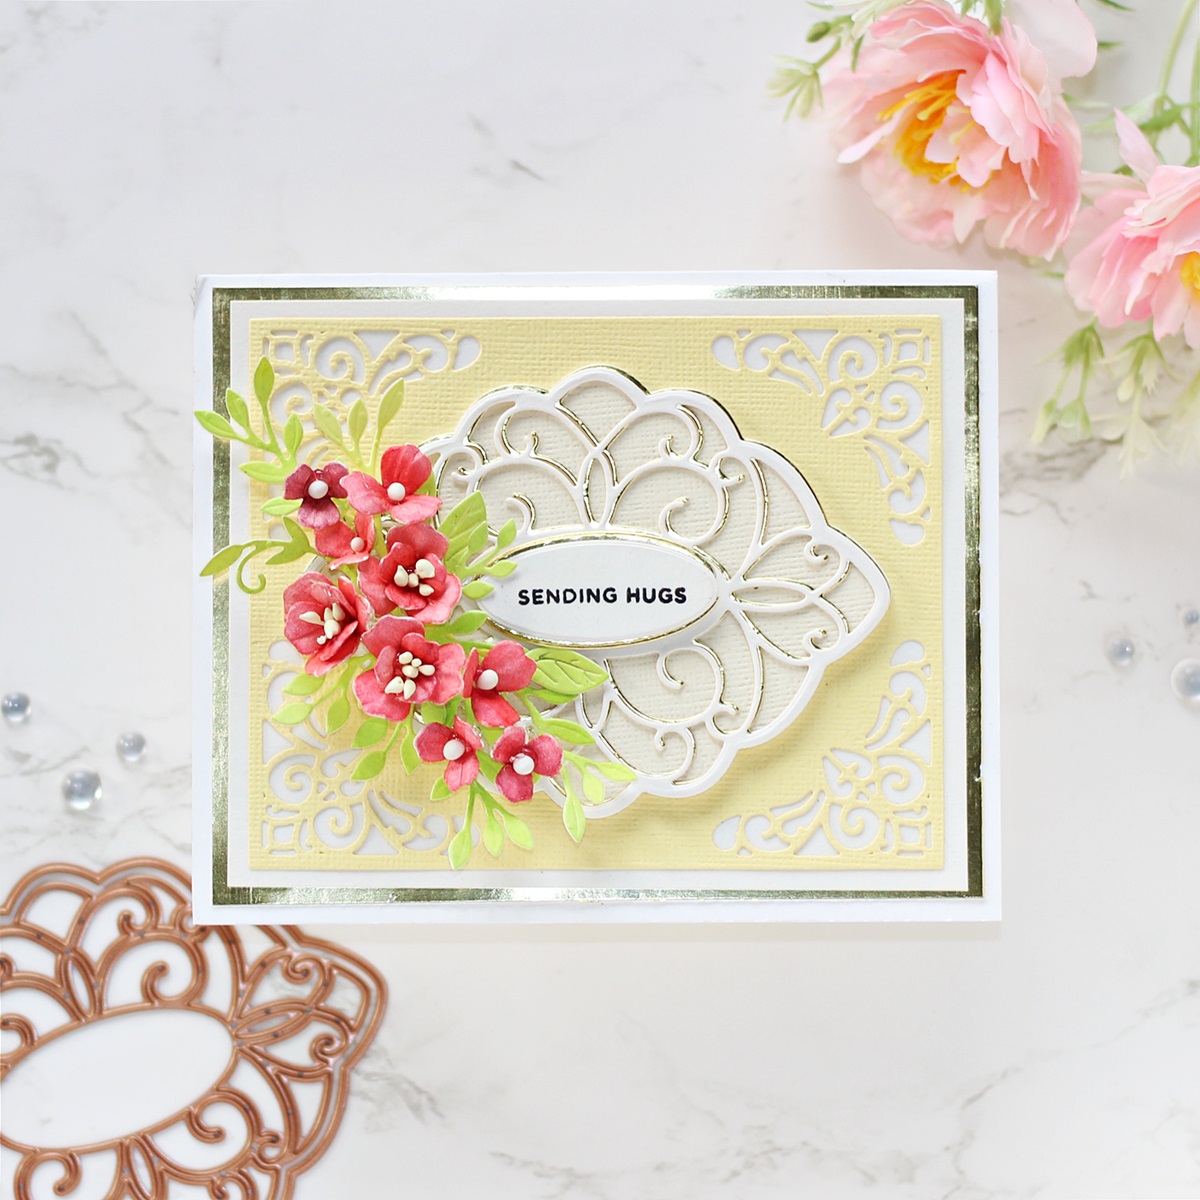
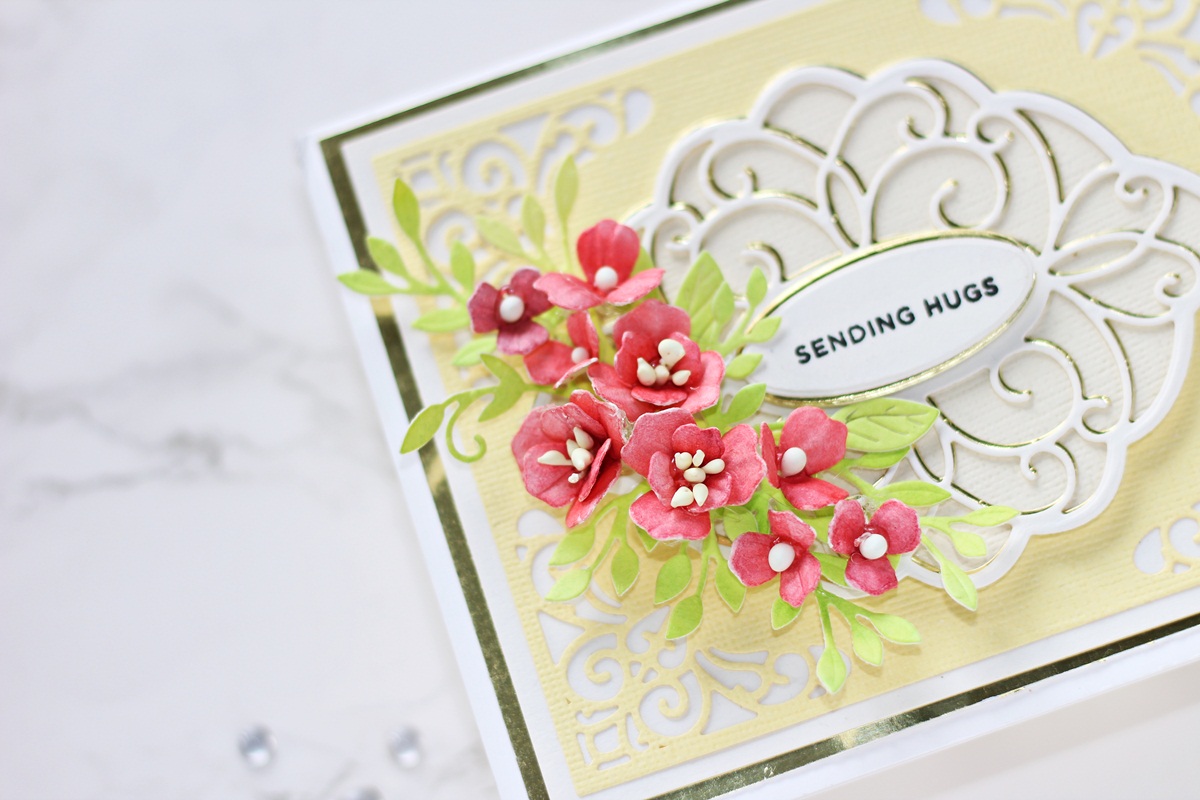
To create my card, I started by die-cutting Beeswax Cardstock and White Foam using the Large Corner Frame Insert and Insert Rim Dies in the A2 Filigree Marquis Etched Dies. Next, I die cut Barely Peach Cardstock using the Filigree Oval Outline Die from the same set. Once that was done, I die cut Snowdrift Cardstock and Mirror Gold Cardstock using the Filigree Oval Insert Die and layered the pieces together using liquid glue, slightly offsetting the die-cuts so that a gold shadow forms. Then, I die-cut Snowdrift Cardstock and Mirror Gold Cardstock using the Oval Inner Rim Die from the same set. I stamped a sentiment from the I’m Here for You Sentiments Clear Stamp in the center of the die-cut piece using Versafine Onyx Black ink and adhered the layers together using liquid glue, allowing a bit of the gold to show as a shadow. I then popped it on the die-cut panel using foam adhesive for dimension.
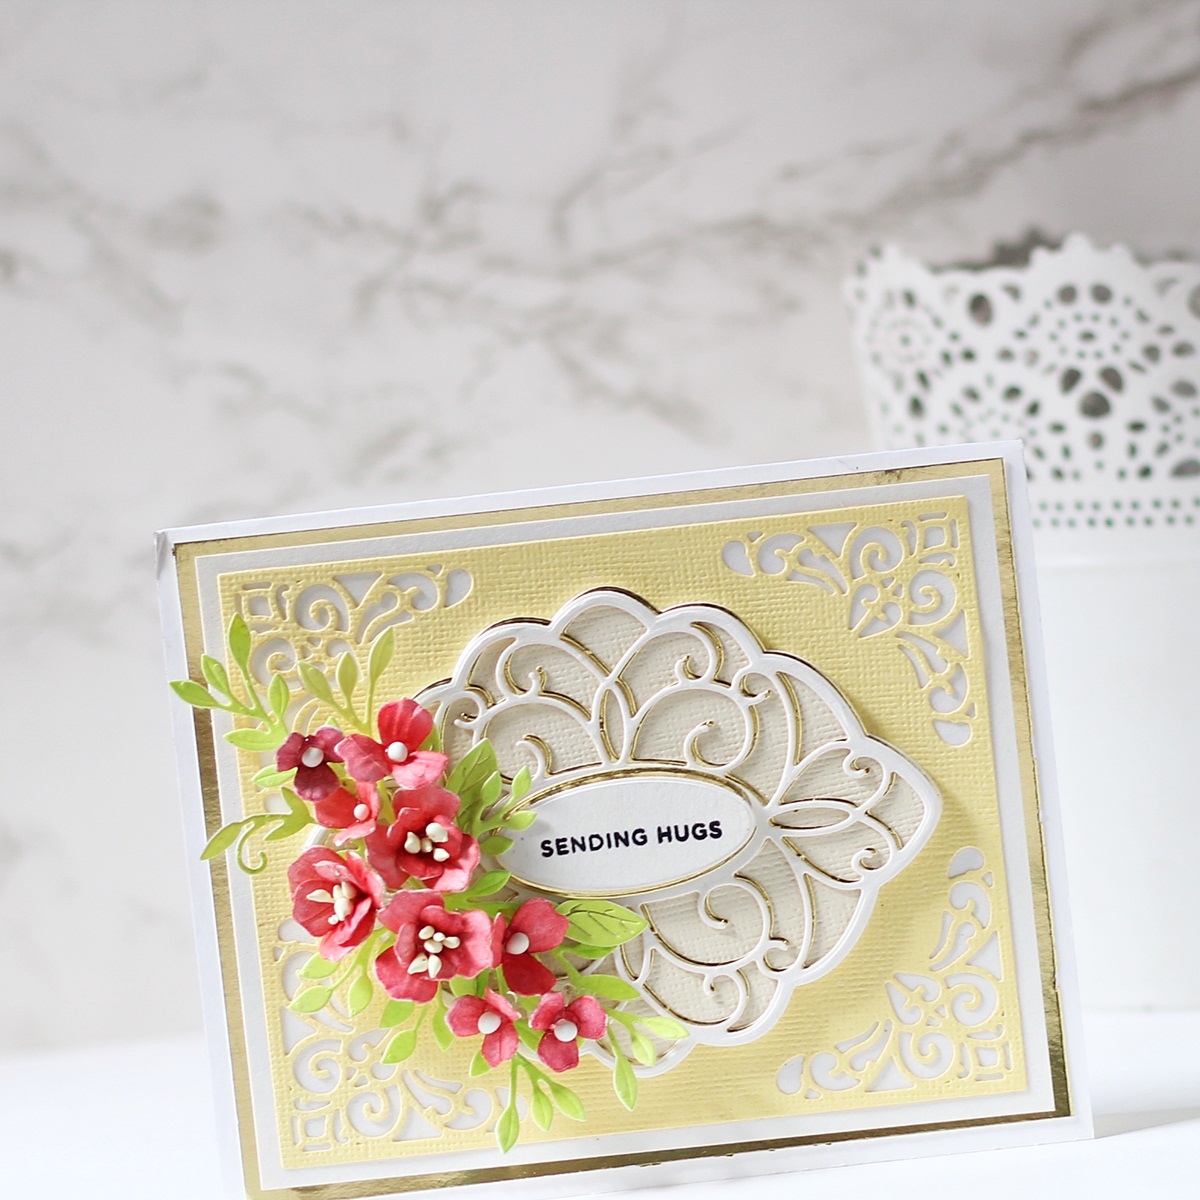
I die cut Snowdrift Cardstock using the flower and vine dies from the Cinch and Go Blossoms Etched Die Set and Adoring Fleurette Card Builder Etched Dies and colored the pieces using Watercolor half-pans. Once the flower die cuts had dried, I used a Red Copic Marker to add some highlights to the pieces. Then, I embossed each petal and leaf with a Ball Stylus and added ivory thread pollens to the flower centers for interest. I then adhered the layers together with Craft Glue before arranging them around the sentiment panel. To finish, I matted the background panel with layers of Snowdrift Cardstock and Mirror Gold Cardstock before adhering it to a top-folding A2 white card base with a tape runner. I love how each die set contains all the elements and layers required to complete a design from start to finish.
Spellbinders Supplies:

Other supplies
Neenah Solar White Cardstock, Copic Markers, Versafine Onyx Black Ink, Heat Tool, MISTI Stamping Tool, Gold Glitter Balls, Ivory Thread Pollens, Groove Golf Tools, Tape Runner.
I hope you enjoyed this set of layered floral cards and have been inspired to create with these gorgeous dies from the Classically Becca Collection. Thank you so much for stopping by!
You can find more inspiration over at my Instagram page.
Hussena Calcuttawala
'Hello! My name is Hussena, and I live in Kolkata, India. I am a stay at home mum of two kids and have been crafting for over five years now. I started my creative journey with paper quilling and since then have dabbled in various paper crafting forms like punch craft, die cutting, and more recently stamping. I am an ardent floral fan and you will find me using florals on almost all my creations. I love working with dies, especially floral and intricate ones, as they offer me various possibilities. I also love to create my own handmade flowers, and this is one of the reasons why I am drawn to Spellbinders dies. You can find my work on my blog: Quill and Punch Works

One Comment
MaryH
I always admire your flowers and layouts. It is always such fun and inspiring to see your makes!