NEW Cardmaker Inspiration with Cheryl
Hello, crafty friends! Cheryl Espie here from Cheryl Espie Creates and I am thrilled to be a guest designer on the Spellbinders blog in the month February! Today, I am sharing 3 projects using stamps from the brand-new Cardmaker release…Eeek, how exciting is that?!
If you love crafty card inspiration then come and visit my blog at www.cherylespiecreates.com. Also, I have a ton of inspiration for you on my Instagram page @cherylespiecreates.
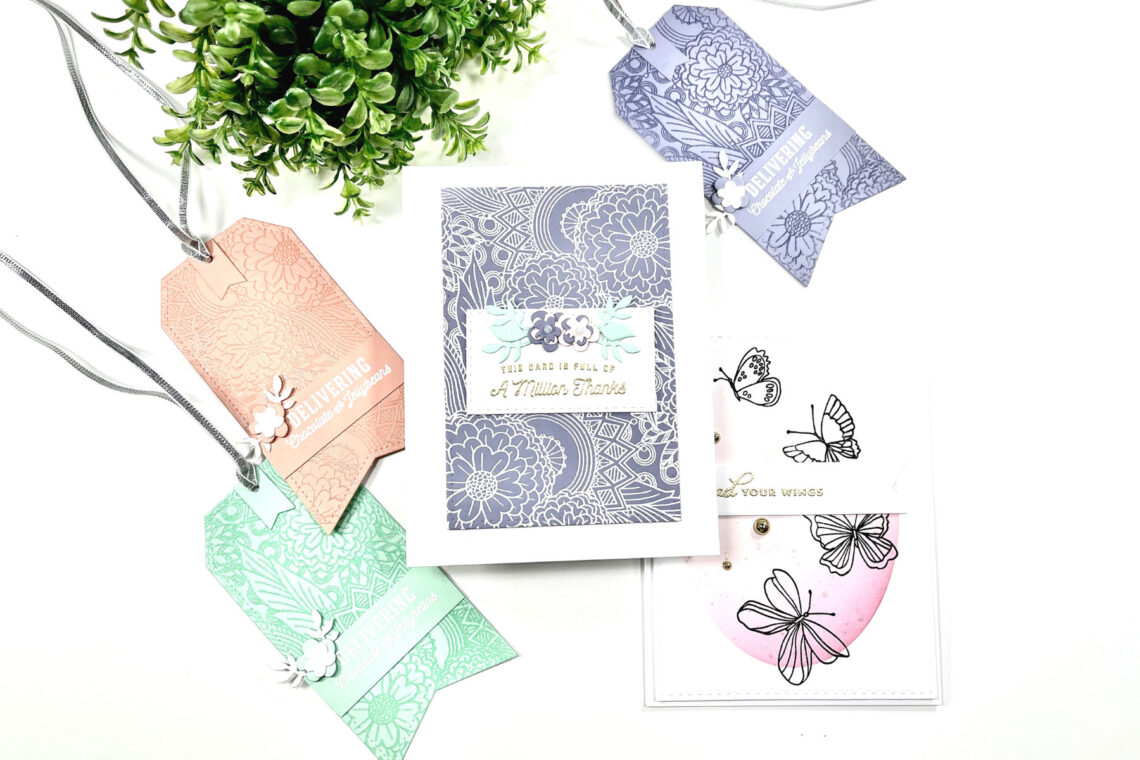
So, let’s talk about the projects that I made just for you guys to get inspired for this release. This is a matching collection of a card and complimentary tags, so two projects really! I loved the In Bloom background stamp as soon as I saw it and immediately thought-heat embossing! For the card, I heat embossed a lilac card base panel with white embossing powder. It looked wonderful and just popped straight off the cardstock when drying.
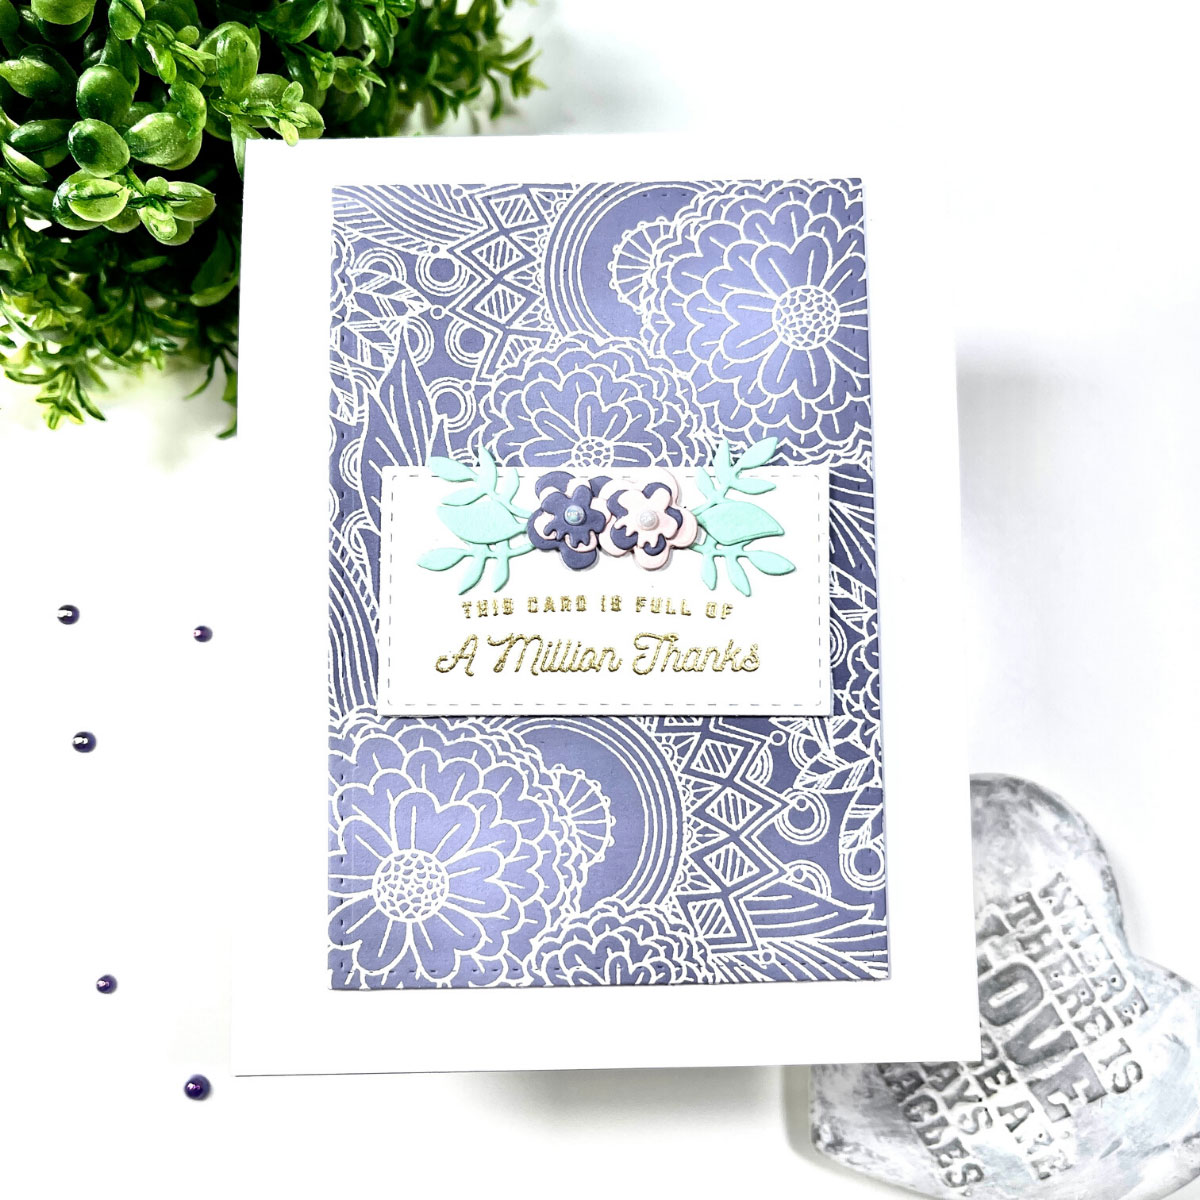
I then heat embossed a sentiment in gold from a previously released stamp set called Sunday Drive. After die cutting this down and centered it on the embossed panel, I added some Spellbinders die cut florals in three different colours. These would eventually match the gift tags I planned to make.
Let’s talk gift tags…how lovely would it be to receive a handmade card, but then also receive a matching/complimentary gift tag on the gift?
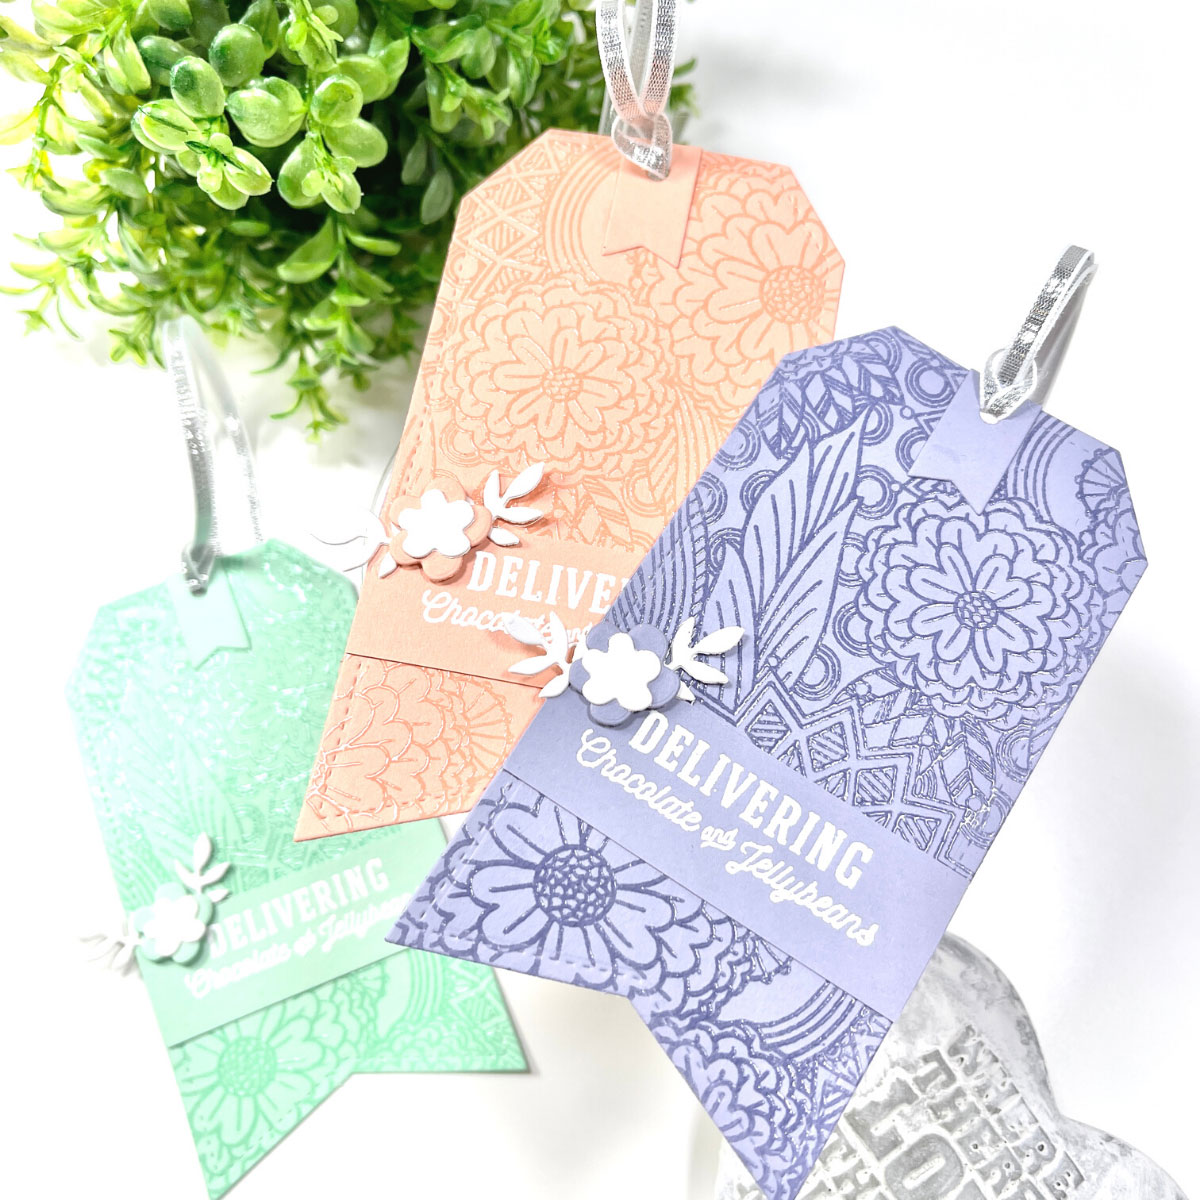
Matching items can be so appealing, so that’s what I did for my second project. You remember the three colours used for the florals on the card? Well, I used the same colours and heat embossed the new In Bloom stamp on each of these colours. This time though, I heat embossed with clear embossing powder. The effect this technique gives is amazing! I then cut out the tags using a die from my stash.
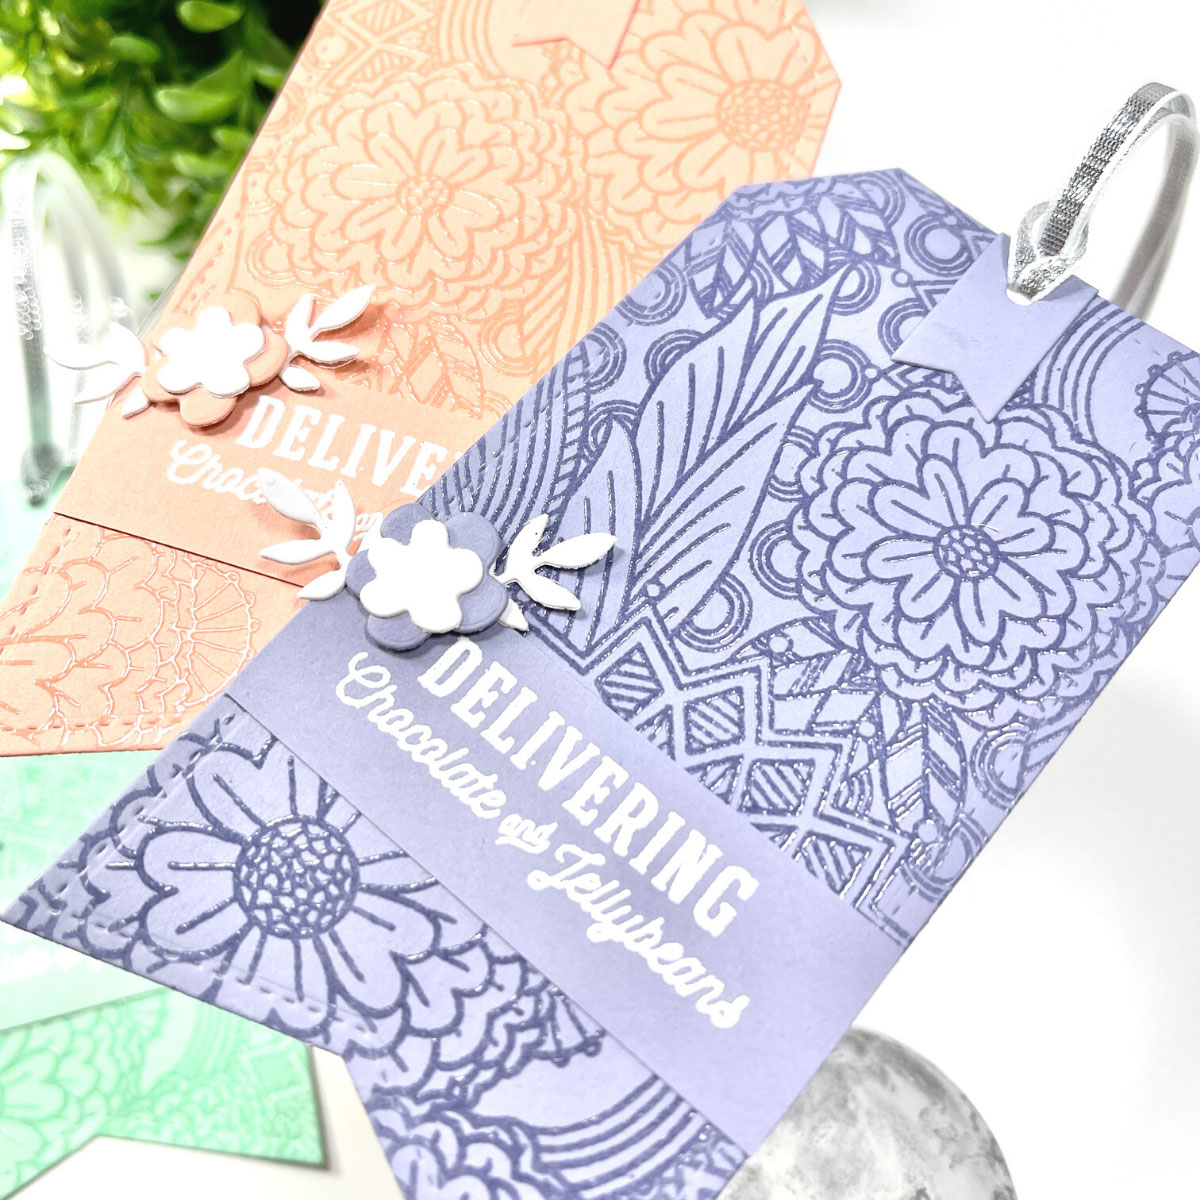
Again, I heat embossed the sentiment from the Sunday Drive stamp set, but this time in white to help it stand out from the background. I then added some more die cut Spellbinder’s florals and some silver ribbon to finish the project.
My third project is a clean and simple card with lots of white space. To begin with I cut out an oval shape from masking paper and placed it on my card base. Using some distress oxides, I ink blended the inner oval space. I used the darker pink first at the bottom, then faded out to a lighter pink as I moved up the oval. While the masking tape was still applied, I splattered gold across it.

Once dried, I removed the masking tape and stamped images from the Whimsical Butterflies set. I heat embossed a sentiment in gold which is also from the stamp set and added this on a flag cut banner. To finish, gold bling seemed appropriate.
Well friends, thank you for stopping by the Spellbinders blog today and taking time to see my projects. I hope they have inspired you with this wonderful new release and you will pop by again!
Spellbinders Supplies:

2 Comments
Katherine DeLozier
Your cards are so beautiful. The butterfly one would have multiple uses – even a lovely sympathy card. Thank you for sharing your creativity with us.
Carol Knor
These projects are so beautiful and so easy to do. I love them all! Thank you for sharing them.