NEW Cardmaker Collection Inspiration – Cards with Junie
Hello, crafty friends! My name is Junie Heo and I’m here with my first ever blog post for Spellbinders featuring the NEW Cardmaker Collection! It was so much fun creating three cards with these beautiful stamp sets that I will be sharing with you today, and I hope they inspire you to create wonderful projects for your needs as well.
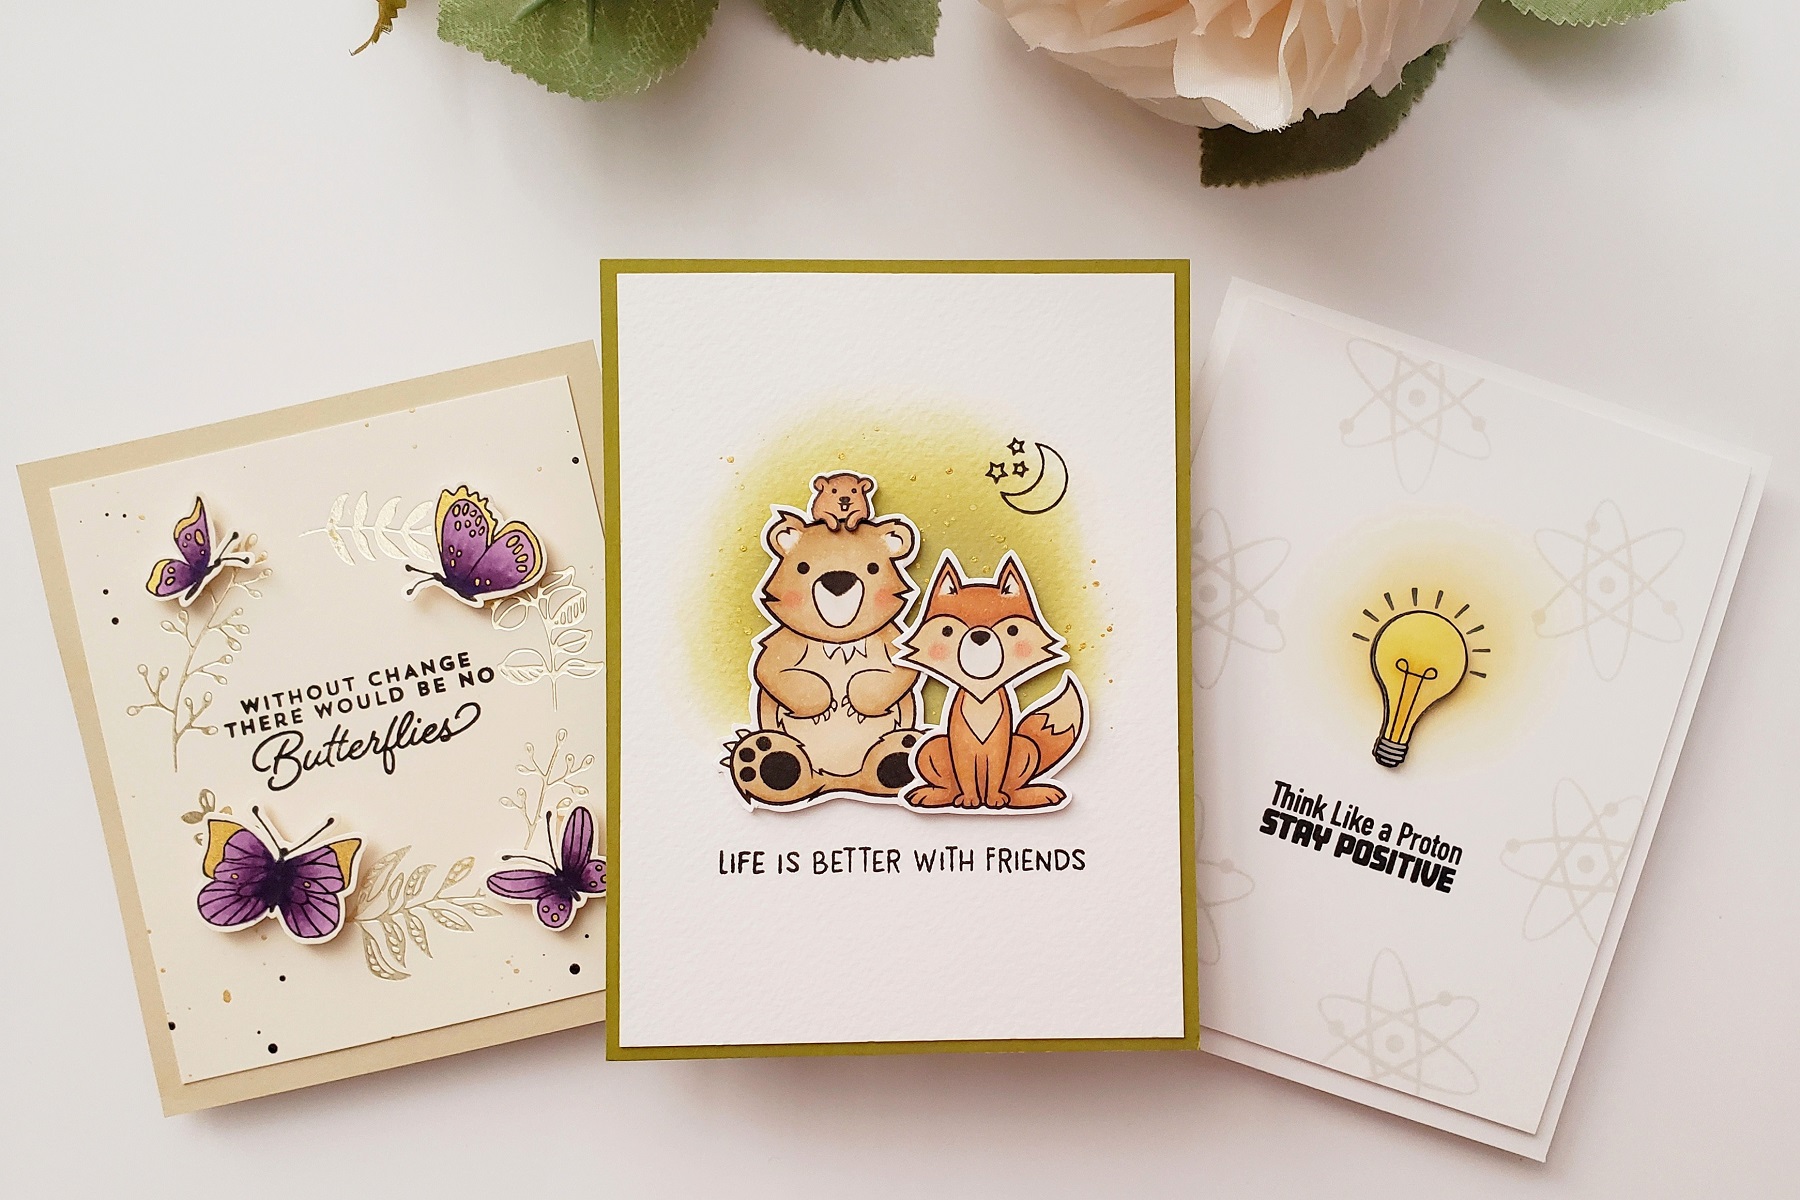
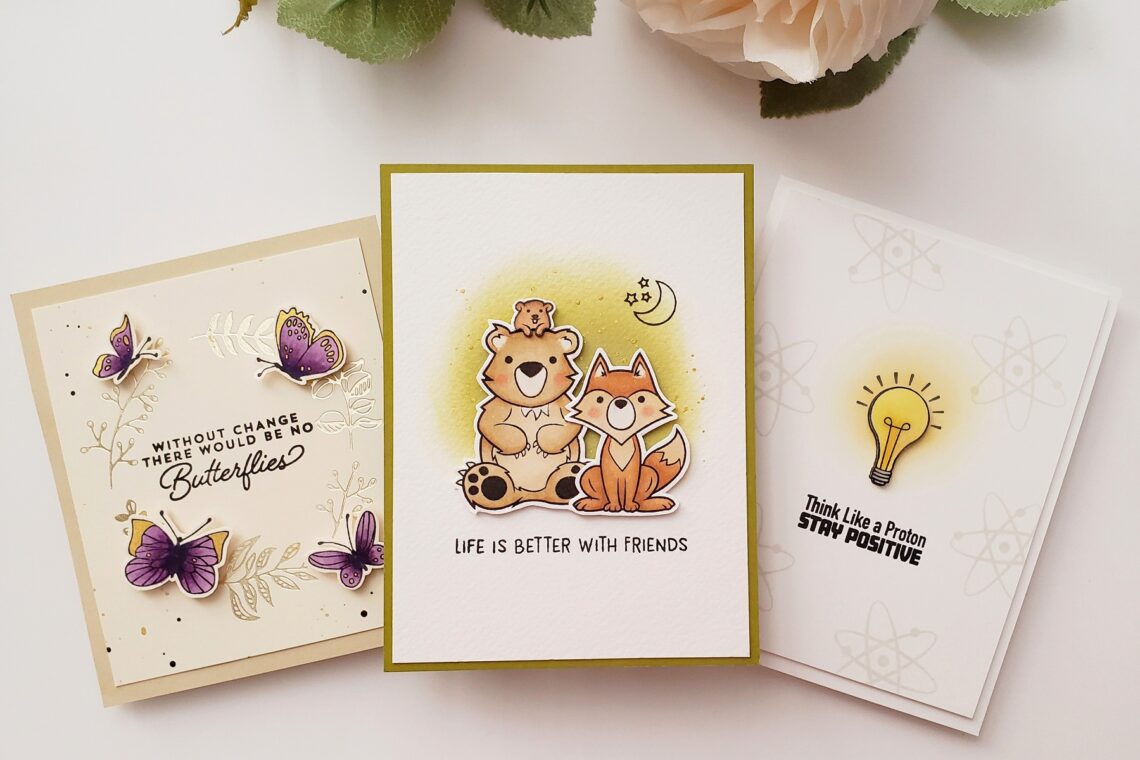
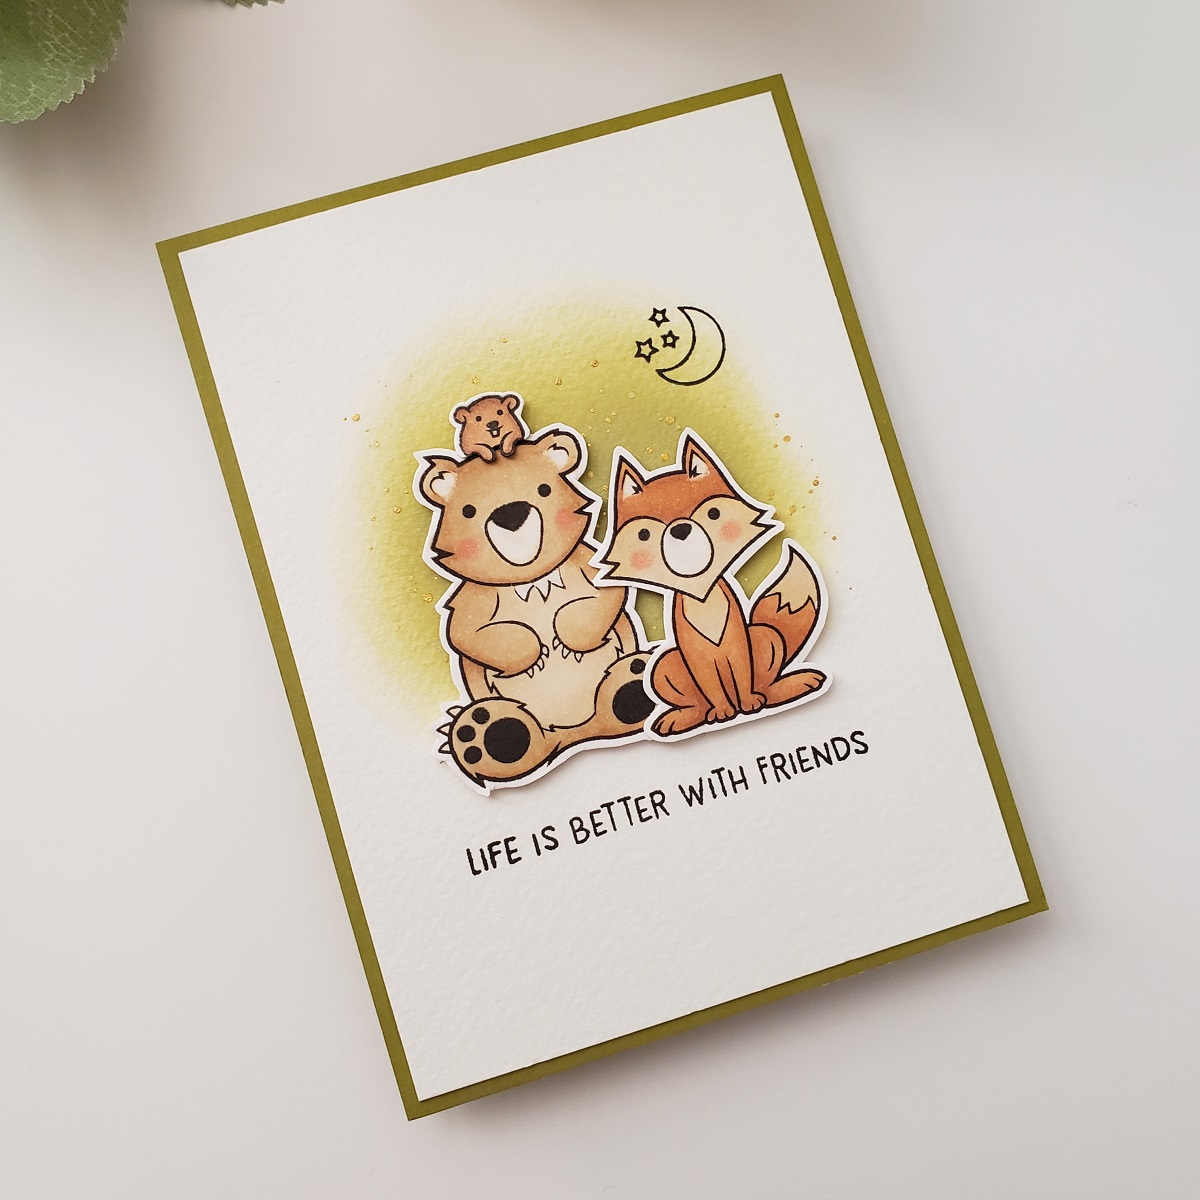
When I saw these adorable critters in the Campfire Critters set, I knew I wanted to include them all in my card! I went for a simple design but thought it would be cute to cut out the tiny groundhog and place him on top of the bear’s head for some added fun. I also felt it went well with the sentiment, “Life is Better with Friends.”
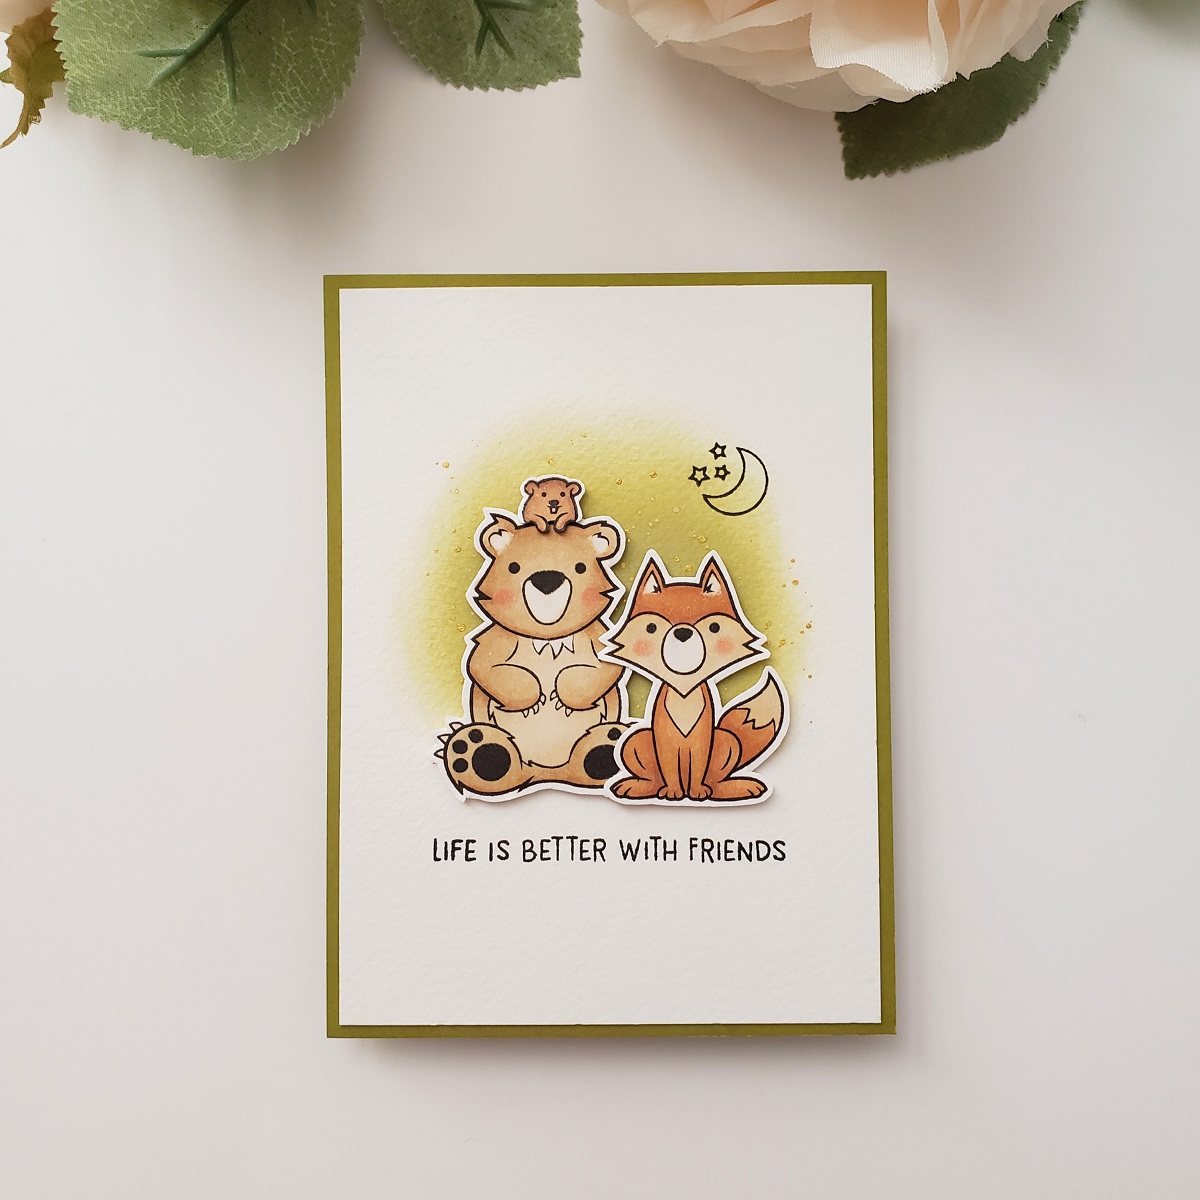
To create this card, I first stamped the critters onto white cardstock using the Gina K. Designs Jet Black Amalgam Ink and colored them in with Ohuhu alcohol markers. I then fussy-cut them out with a pair of scissors. Next, I trimmed a piece of white cardstock about 4″x5.25″ in size and ink-blended a circular area in the center of the cardstock for what would be the background using the Peeled Paint Distress Oxide Ink and a blending tool.

Using a wet brush, I added gold paint splatters to the ink-blended area in order to create a starry look that would complement the moon+stars image that I stamped on the upper right side. Then, I stamped the sentiment and placed the critters in the center using foam adhesives. To finish the card, I glued the completed panel to an olive green A2 card base.

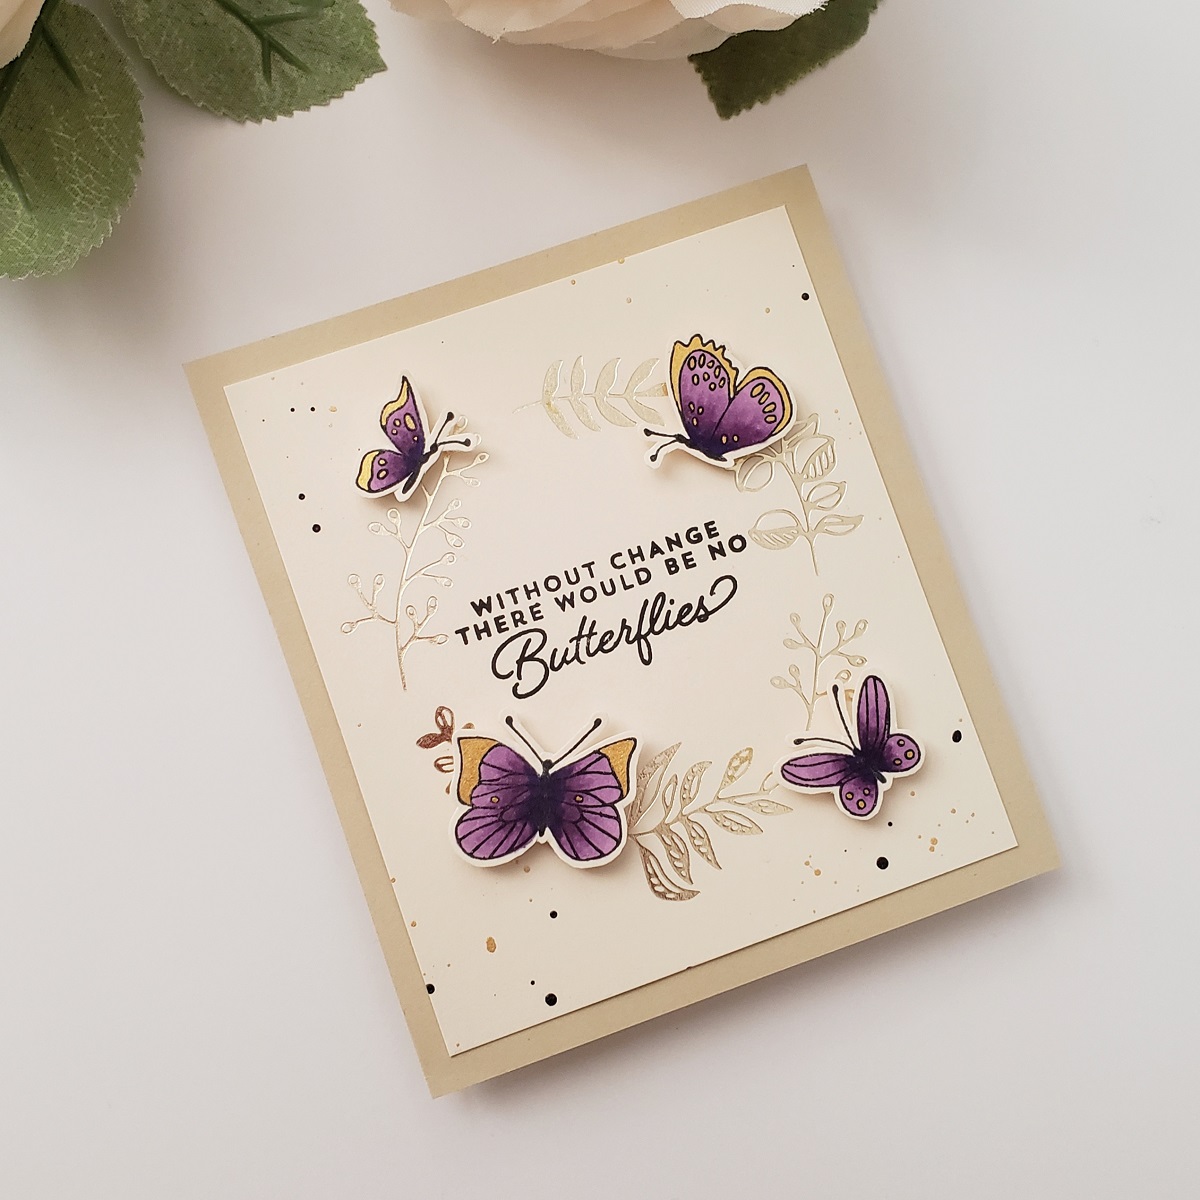
For my next card, I used the Whimsical Butterfly stamp set and decided to add some foiling elements to create a more elegant look. Out of the nine beautiful butterfly images in this set, I decided to pick out four of them for my card. I stamped the four images onto a beige cardstock with Gina K. Designs Jet Black Amalgam Ink and colored them all in with Ohuhu alcohol markers except for the small circular patterns within the butterfly wings and the edges lining the wings. For these areas, I painted them in with a brush using the no. 903 paint of the Kuretake Gansai Tambi Watercolor Set. After they dried, I fussy-cut the butterflies out with a pair of scissors.
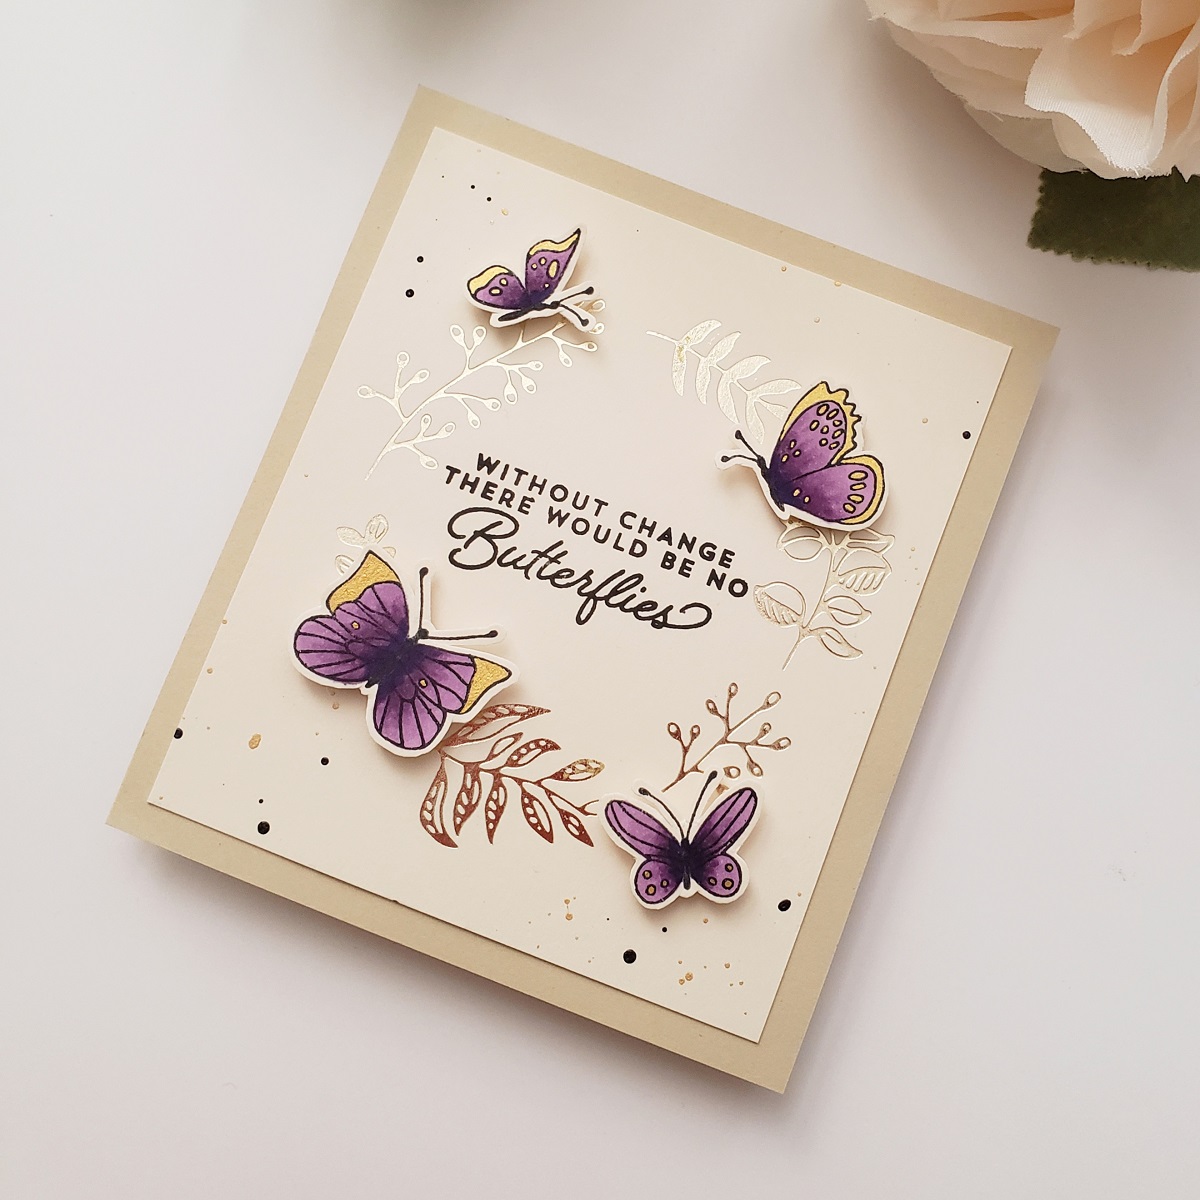
Next, using Glimmer Hot Foil System and Champagne Hot Foil I foiled all six foliage pieces in the Organic Foliage set in a circular form onto a 3.875″x4.5″ beige cardstock. To add interest to the background, I used a brush to create light paint splatters around the outside of the foliage circle. Then, I stamped the sentiment on the inside of the foliage circle and placed the butterflies using foam adhesives. Lastly, I glued the finished panel to a darker beige card base.
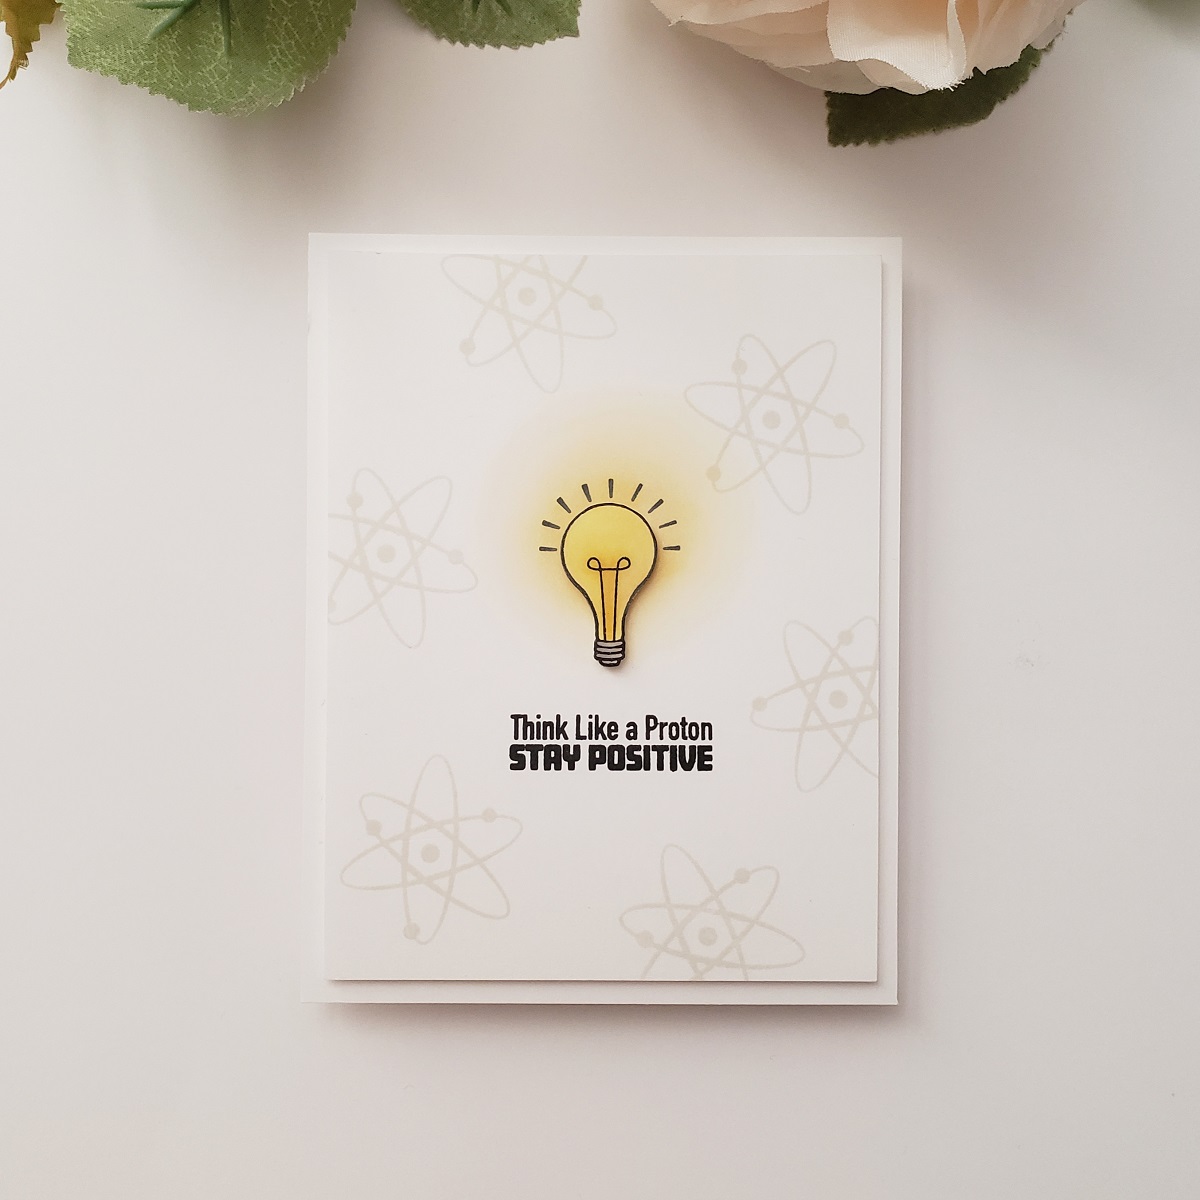
Last but not least, here’s the final card I created using the All Geek stamp set. I think this is such a funny and clever set! My personal favorite sentiment is “Think Like a Proton STAY POSITIVE” because I know I really have to work on staying positive sometimes! So with that in mind, I started by taking the proton image and stamping it all over a 4″x5.25″ white cardstock with gray ink, making sure to avoid stamping the center area. Then, I took the light bulb image and the sentiment and stamped them in the center with Gina K. Designs Jet Black Amalgam Ink.

To create the yellow illumination effect around the light bulb, I used Antique Linen and Mustard Seed Distress Oxide Inks with blending tools. Next, I stamped another light bulb image, colored it with Ohuhu markers, and fussy-cut it out with a pair of scissors without leaving a white border. Using foam adhesives, I placed this piece on top of the first light bulb image I had directly stamped onto the cardstock earlier. Doing so will add a little dimension to the light bulb. Finally, I finished the card by adhering the completed panel to a white A2 card base using foam adhesives.

Spellbinders Supplies:

Other supplies
Beige cardstocks, White cardstock, olive green cardstock, Gina K. Designs Jet Black Amalgam Ink, gray ink, Ohuhu alcohol markers, blending tool, Kuretake Gansai Tambi Watercolor Set, brush, scissors, foam adhesives, glue
Thank you so very much for stopping by! I really hope you enjoyed the featured Cardmaker III Collection stamp sets in this post. If you’re curious about my other crafty works, please stop by my Instagram page @cottoncandycards. Hope to see you there!

One Comment
Marianne Chpaman
Hi Junie,
I am never up to date on blogs so this comment is late. I just saw the butterfly card you made in March and love it! I just bought the supplies I didn’t have to make it. Thanks!