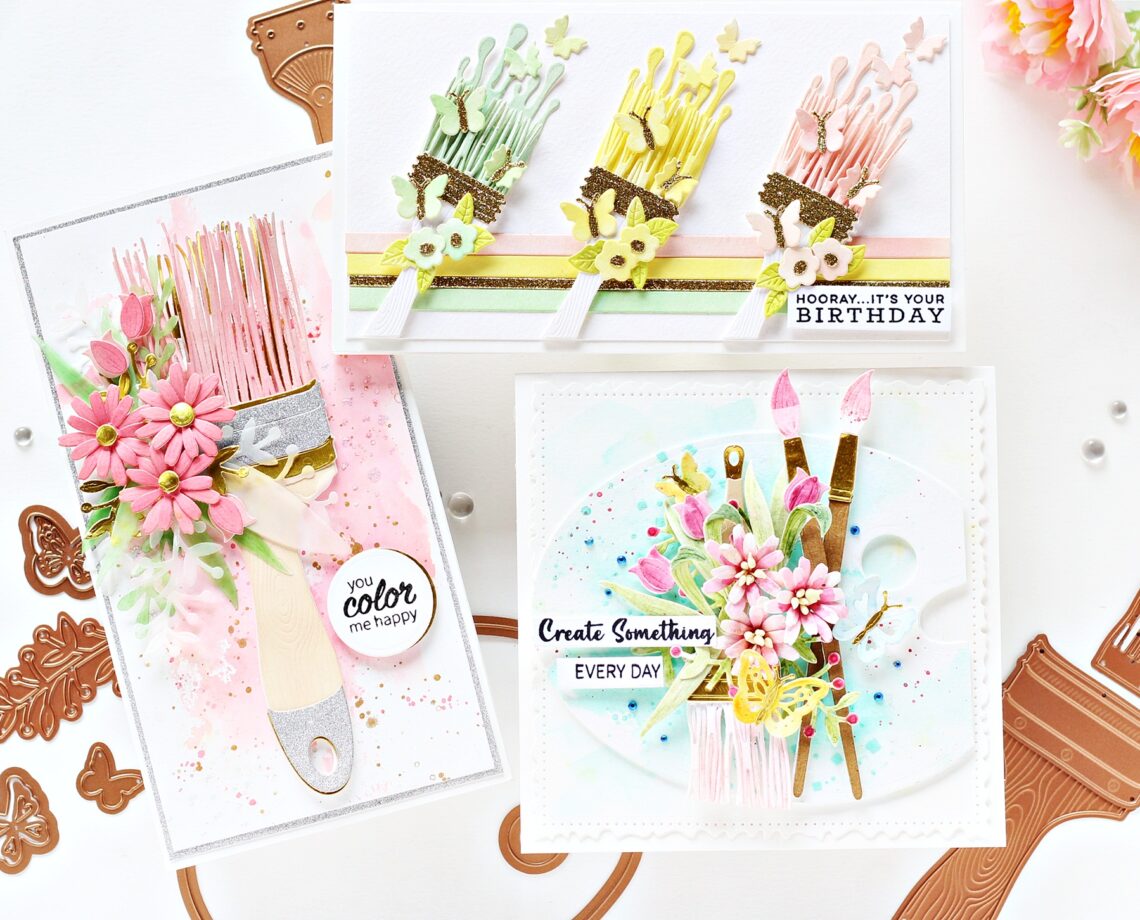
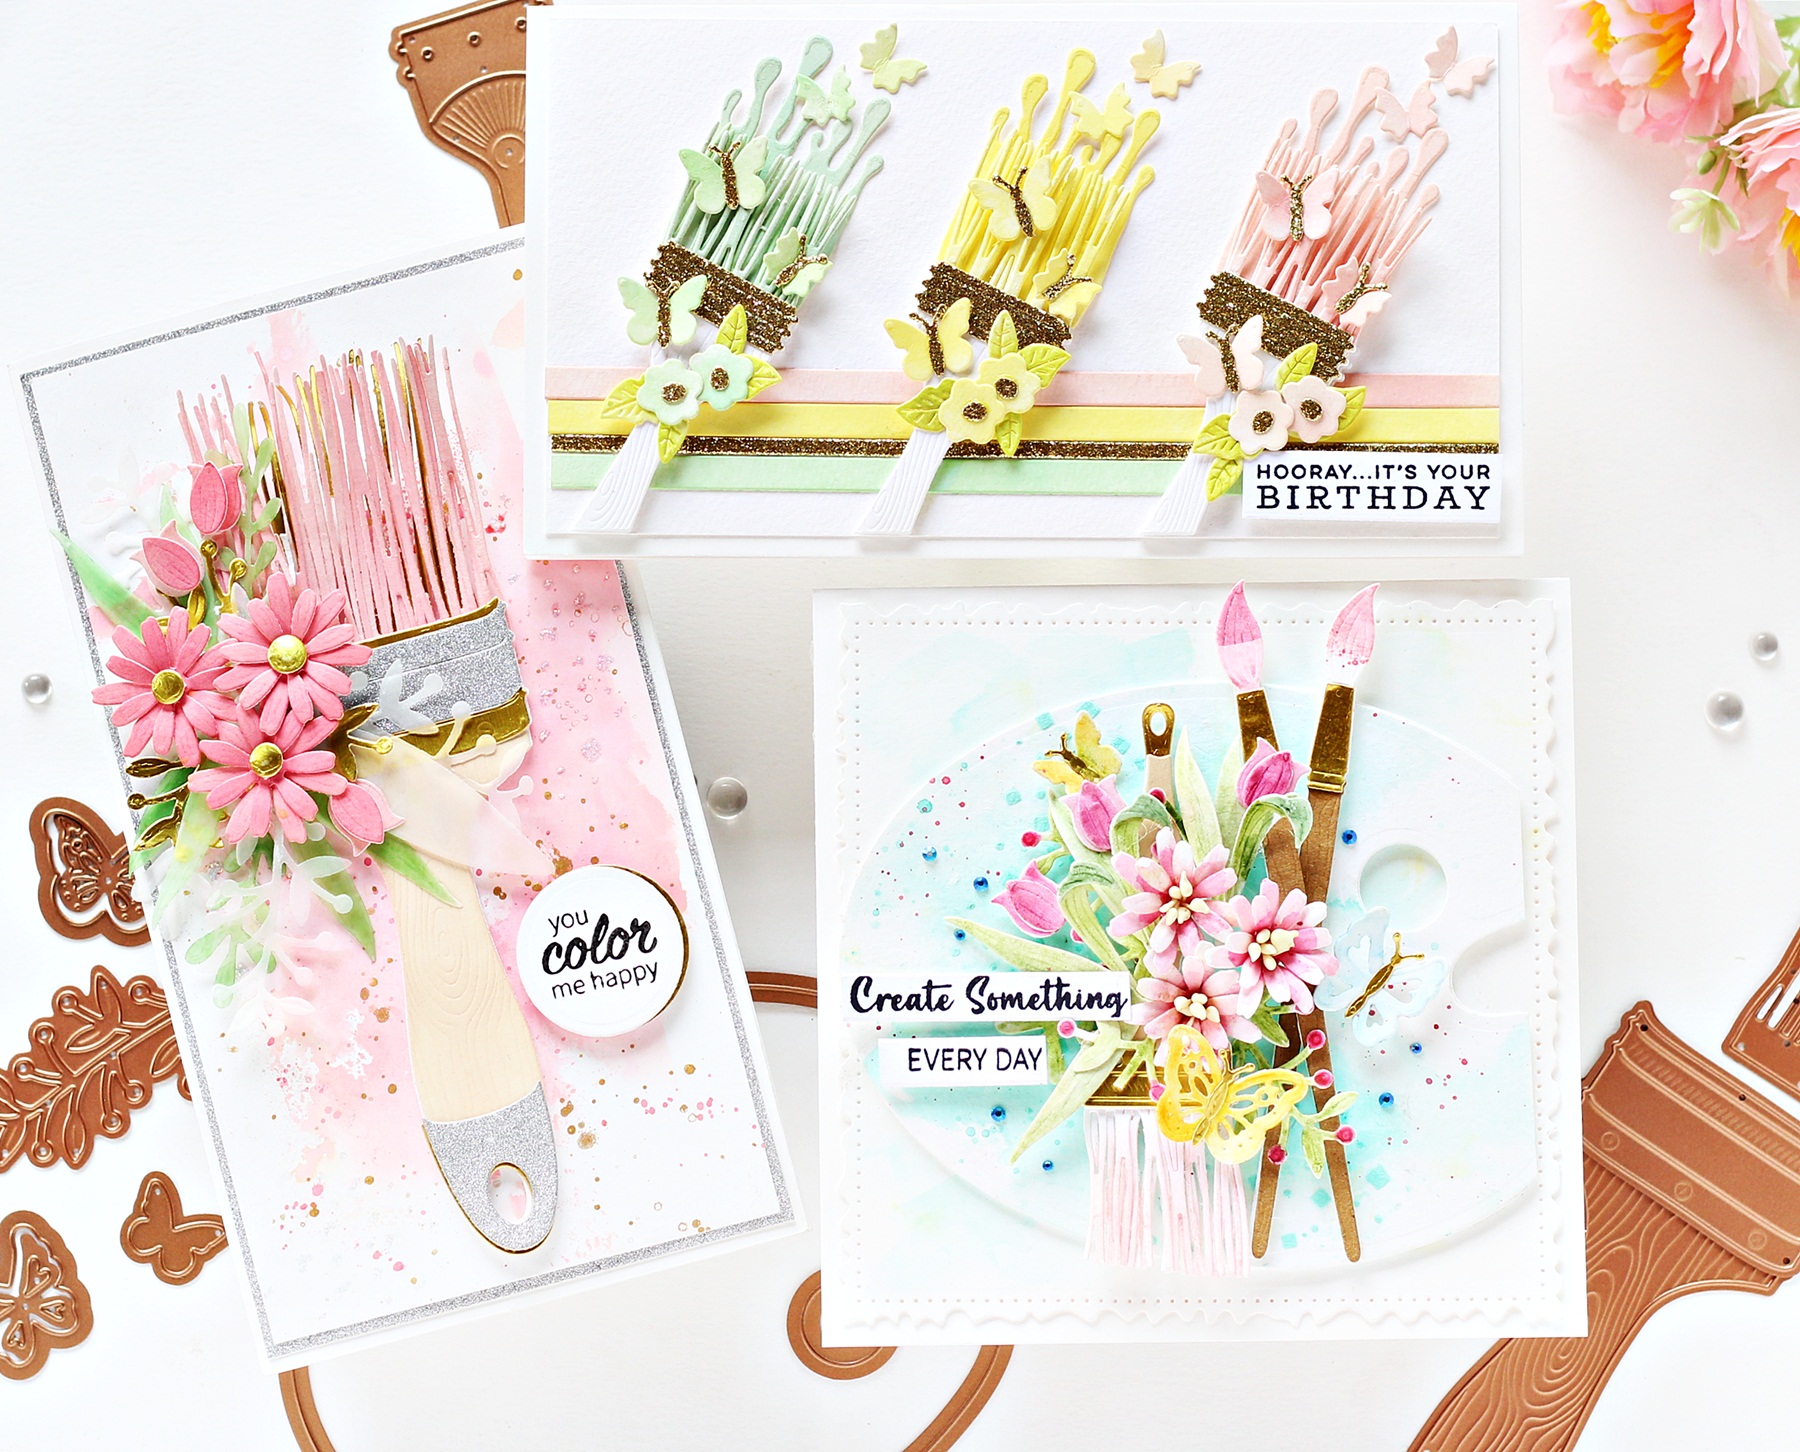
Handmade Paintbrush Cards with Hussena Calcuttawala
Hello everyone! This is Hussena from Quill and Punch Works and I am so excited and honored to be guest designing on the Spellbinders blog today highlighting the NEW Paint Your World Collection by Vicky Papaioannou is a whimsical ode to paintbrushes. The whimsical and fun paintbrush-themed designs, palettes, natural elements, and the set of clear stamps included in the collection are just perfect for creating a wide variety of projects for artists and crafters alike!
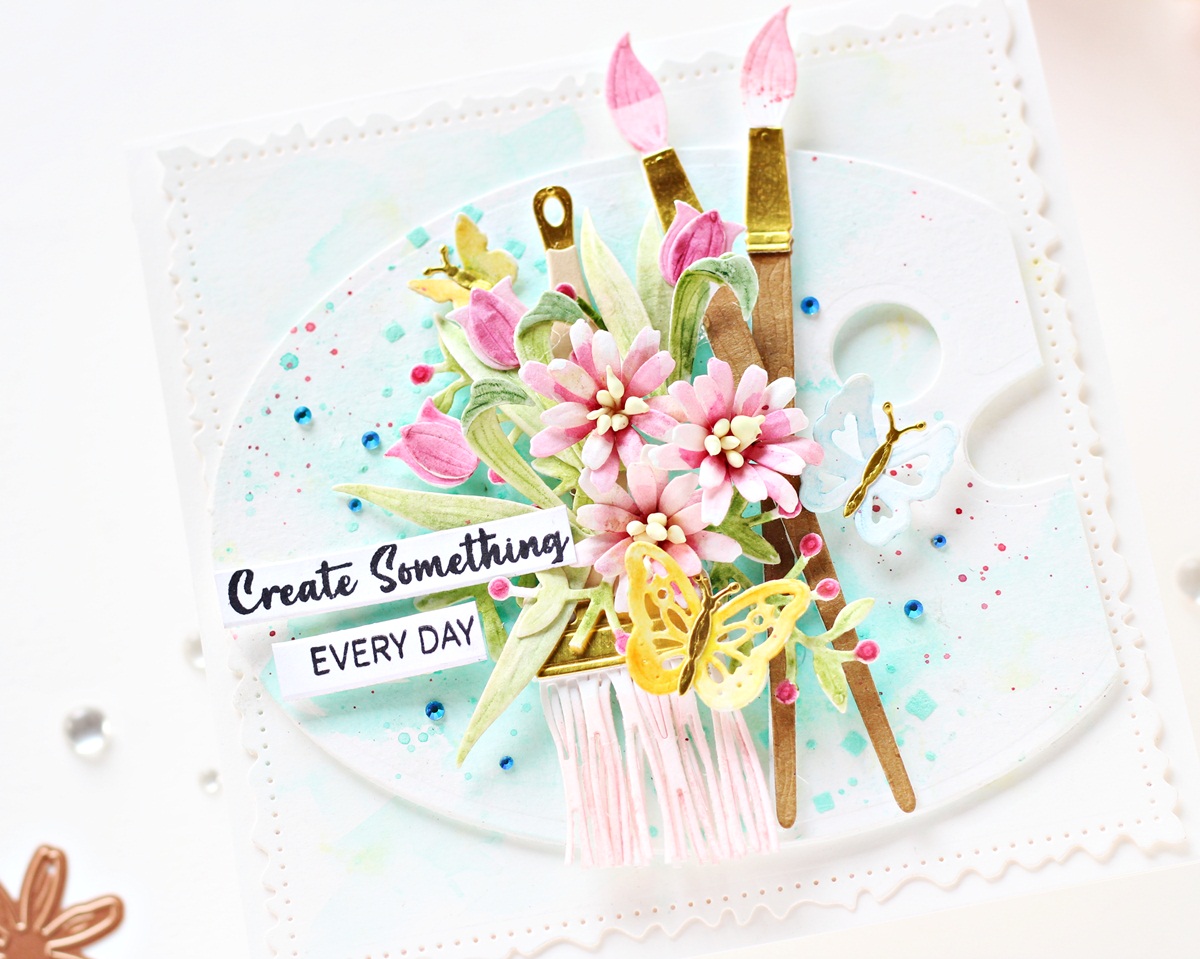
Painted Blooms Paintbrush Card
My first card features the Painted Blooms Etched Dies and the Paint Your World Sentiments Clear Stamp Set. I made the card in 3.5″ x 8.5″, so as to not crowd the oversized brush in the Painted Blooms Etched Dies. I added a watercolored background and layers of flower to this slimline card, perfect for sending to an artist friend or crafter.
I started by wetting a piece of Snowdrift Cardstock with clean water in the rough shape of what I wanted the final watercolor background to look like. Then, I applied color from the Worn Lipstick Distress Oxide Ink and Tattered Rose Distress Oxide Ink to the wet area with a large brush, allowing the colors to mix slightly. Once I was happy with the way it looked, I dried it using a Heat Tool. I then flicked some gold metallic paint and black acrylic paint on my panel using a paintbrush for a fun splatter effect. I then flicked some gold metallic paint and pink acrylic paint on my panel using a paintbrush for a fun splatter effect.
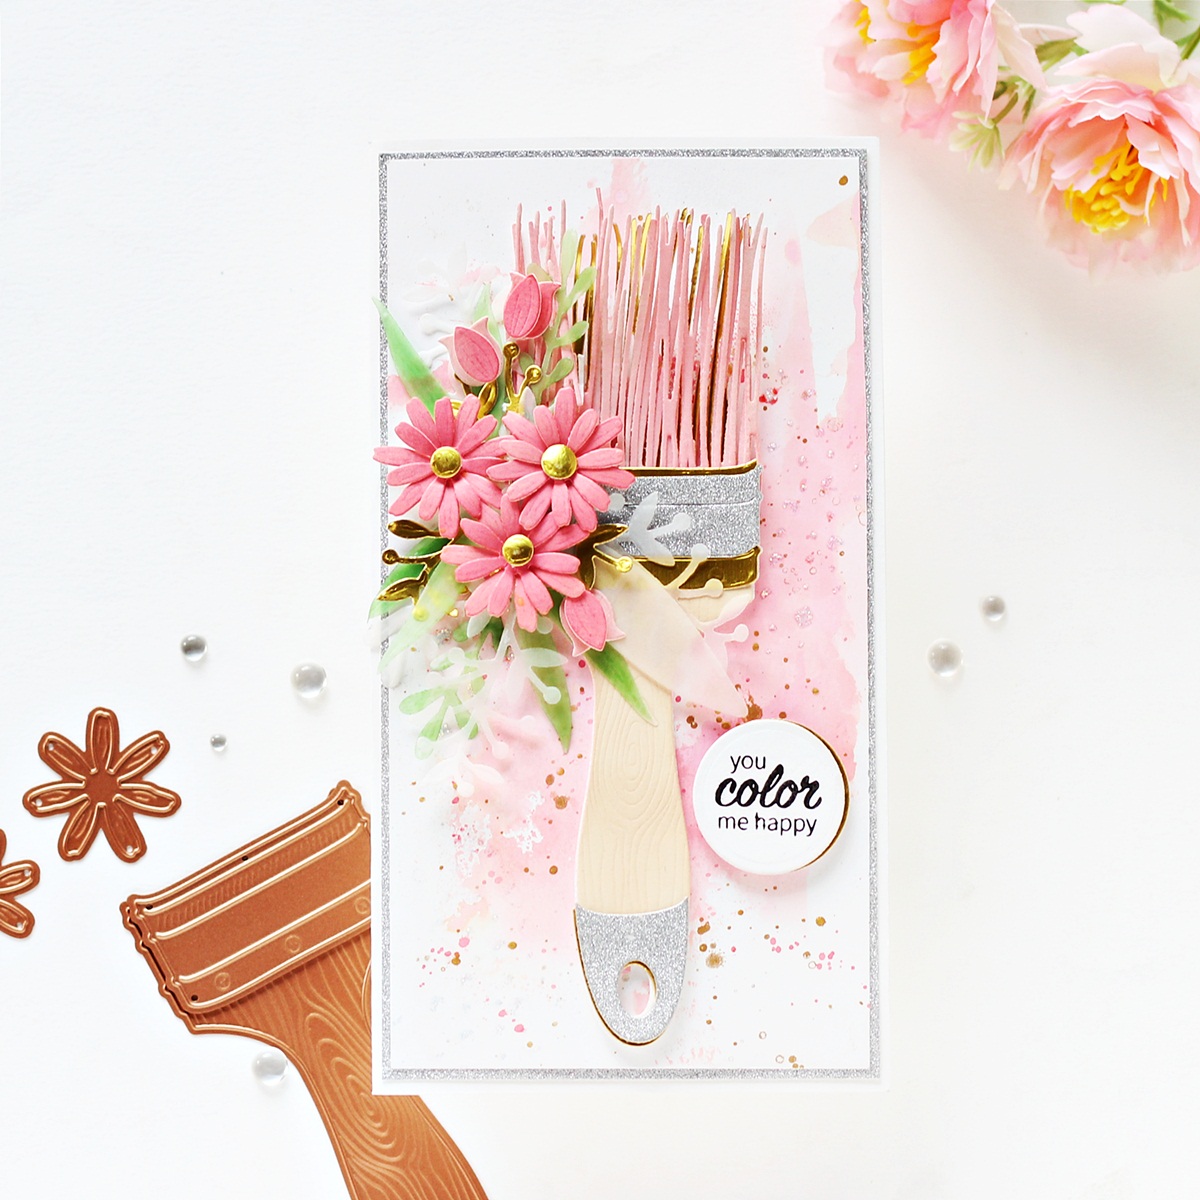
Next, I die-cut the handle of the brush from the Artful Brush Etched Dies and the Painted Blooms Etched Dies out of Snowdrift Cardstock, Silver Glitter Cardstock, Mirror Gold Cardstock, and White Foam and the bristles out of Snowdrift Cardstock and Mirror Gold Cardstock. I blended Scattered Straw Distress Oxide Ink on the handle and Worn Lipstick Distress Oxide Ink and Tattered Rose Distress Oxide Ink on the bristles. Next, I assembled the different parts of the brush with Craft Glue.

Once that was done, I die-cut Dahlia, Vellum, and Mirror Gold Cardstock using the flower and leaf dies from the Painted Blooms Etched Dies and the Artful Tulip Etched Dies. I lightly embossed the petals using the small ball tip in Susan’s Garden Ultimate Tool Kit and adhered the layers together with liquid glue. Next, I assembled the flowers, arranged them on my card, and adhered them down with both Craft Glue and foam squares.

Next, I stamped a sentiment from the Paint Your World Sentiments Clear Stamp Set onto Snowdrift Cardstock and cut it out using the Circle #2 Die from the Nestabilities Large Standard Circles Die Set. Then, I die-cut Mirror Gold Cardstock using the Circle #2 Die and I adhered the pieces together using Craft Glue, offsetting the gold mirror die cut to create a shadow, before adding it to my card front using foam squares. I then mat the card panel with layers of Silver Glitter Cardstock before adhering it to a top-folding white card base using a tape runner. I finished the design with Icicle Stickles Glitter Glue for some sparkle and shine.
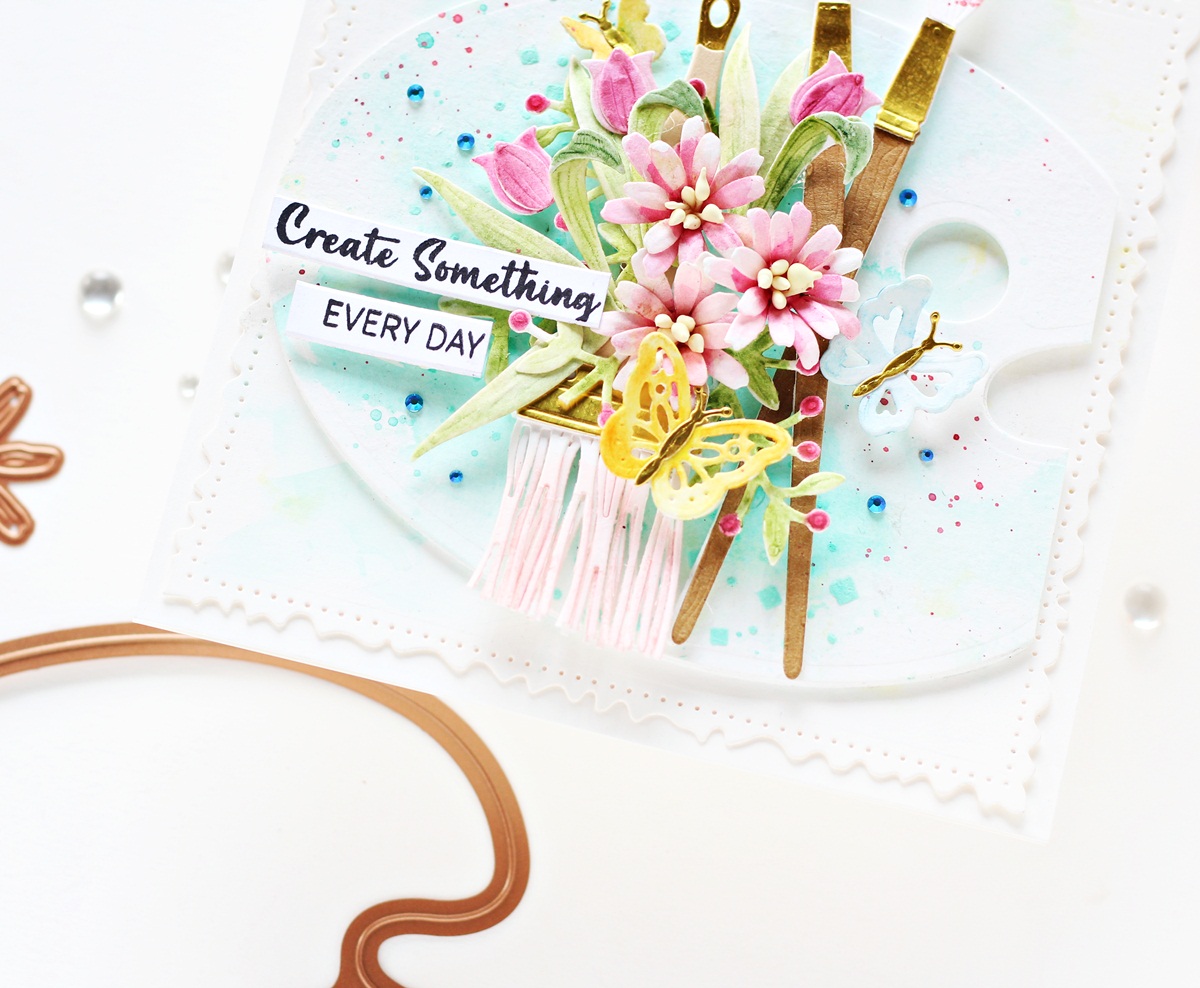
Painter’s Palette Card
My next card features the Painter’s Palette Etched Dies and the Butterfly Burst Etched Dies. I love the oversized paint palette in the set and wanted to use it to create the look of an upcycled mixed media palette on my card. I used spring colors along with the fun art supplies in this set to create a card for a friend.
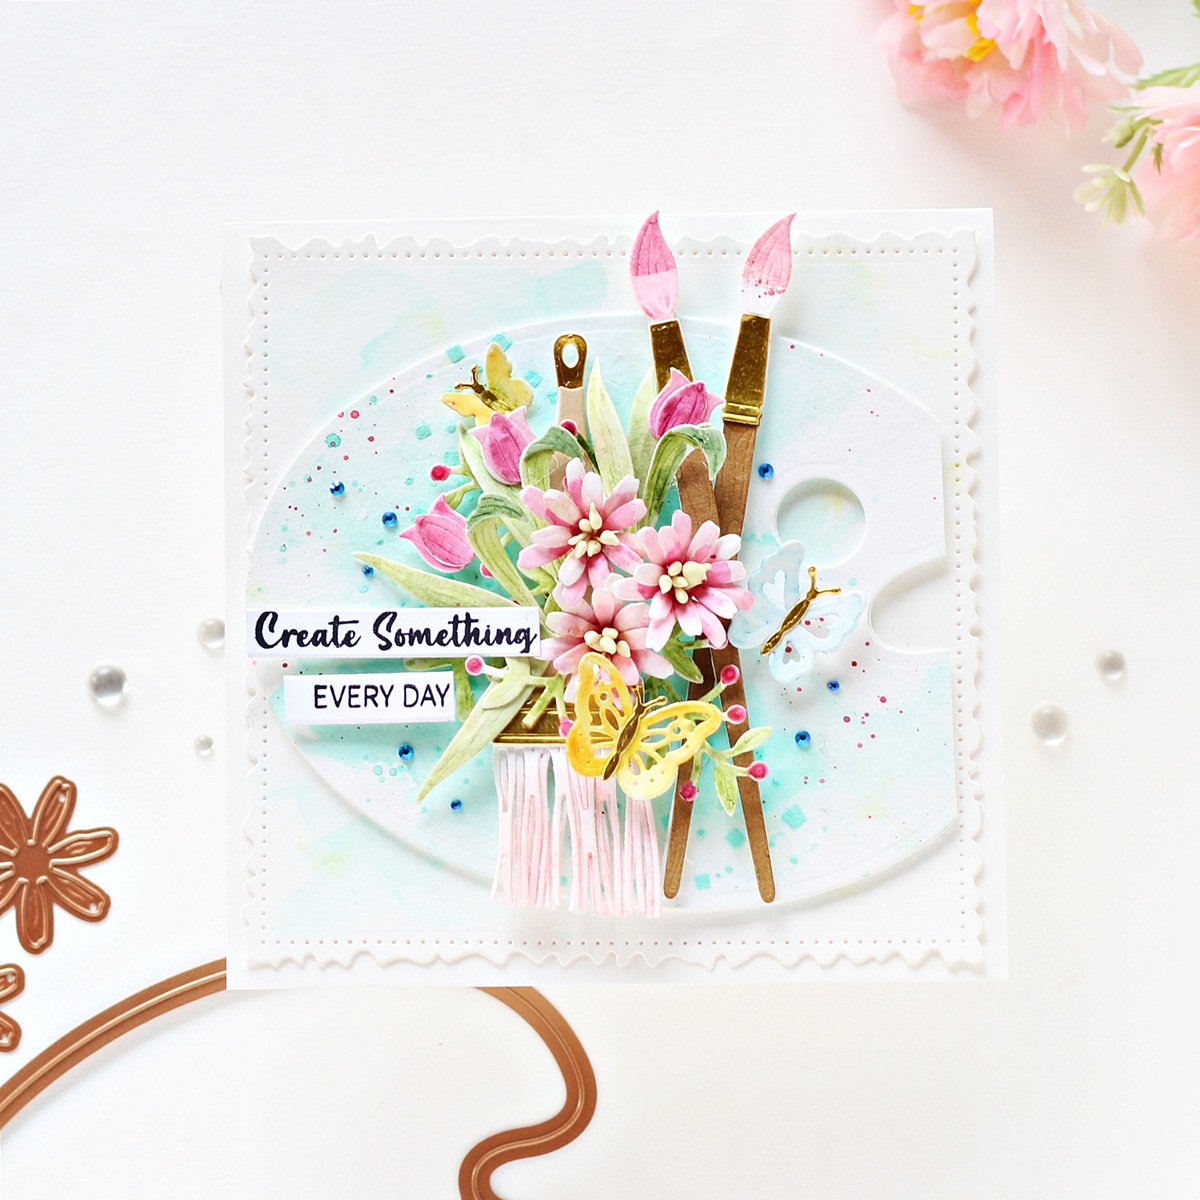
To start, I die-cut Snowdrift Cardstock using the palette die from the Painter’s Palette Etched Dies and lay the Geometric Butterfly Stencil on top using the Best Ever Craft Tape. I then applied Modelling paste mixed with Cool Pool True Color Fusion Re-Inker on top to create a geometric stenciled background pattern. Next, I added washes of Broken China Distress Oxide Ink around the stenciled pattern to add some interest to the design. I then flicked some red and blue paint on my panel using a paintbrush for a fun splatter effect.
Then, I die-cut Snowdrift Cardstock, Mirror Gold Cardstock, Timber Cardstock, and White Foam using the paintbrush die in The Painter’s Palette Etched Die Set. Next, I added washes of Worn Lipstick Distress Oxide Ink to the die-cut pieces with a Water Brush. Once that was done, I die-cut Snowdrift Cardstock using the flower and leaf dies from the Painted Blooms Etched Dies and the Artful Tulip Etched Dies. I lightly embossed the pieces using the small ball stylus tip in Susan’s Garden Ultimate Tool Kit and watercolored the petals and the foliage using Jane Davenport Mermaid Markers. I also added some thread pollens to the flower centers to give them more fuller look.
I also die-cut Snowdrift Cardstock and Mirror Gold Cardstock using the paintbrush and butterfly dies in the Butterfly Burst Etched Dies. I blended Tattered Rose Distress Oxide Ink on the bristles using a blending brush and adhered it down on the panel using Craft Glue. The butterflies were again colored using the Jane Davenport Mermaid Markers and I adhered down the bodies to the pieces using liquid adhesive.
I assembled the different elements of the card together and adhered them down on the palette using foam squares. Next, I stamped a sentiment from the Paint Your World Sentiments Clear Stamp Set onto Snowdrift Cardstock and trimmed it down to adhere over the panel. Then, to finish, I die-cut Snowdrift Cardstock using the largest square die in the Vintage Stitched Squares Etched Die Set and added a light watercolor wash of Broken China Distress Oxide Ink around the left-hand side of the card. Finally, to complete, I adhered the panel to a top-folding 6″ X 6” white card base using a tape runner. Then, as a finishing touch, I adhered a few Teal Color Essentials Gems around my paint palette. I love the beautiful sparkle of the gems!
Artful Brush Card
My third and final card for today features the Artful Brush Etched Dies, the Butterfly Burst Etched Dies, and the Mini Blooms and Sprigs Etched Dies. I made this into a Slimline Card so as not to crowd the three colorful and airy paintbrushes.
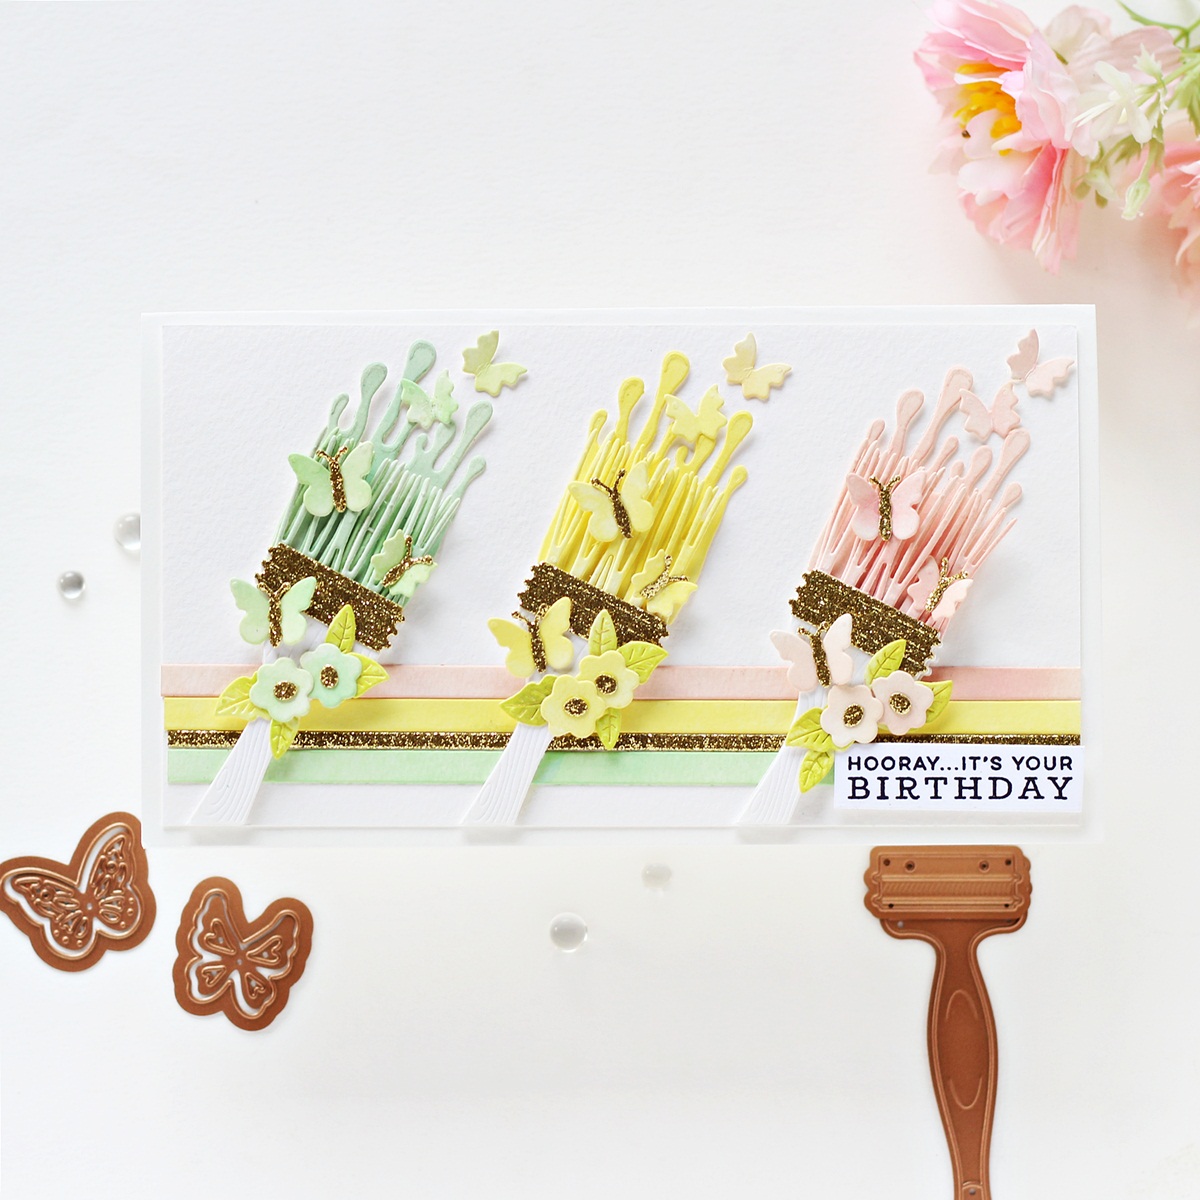
I began with die-cutting Snowdrift Cardstock and White Foam using the paintbrush and handles dies in the Artful Brush Etched Dies. Once I had all the paintbrush pieces die-cut and assembled, I die-cut Citrine Cardstock using the brush ferrule die in the Artful Brush Etched Die Set and adhered them to the paintbrushes using Craft Glue. Then, I die cut the bristle and paint blob dies out of Snowdrift Cardstock and blended Cracked Pistachio, Squeezed Lemonade, and Worn Lipstick Distress Oxide Inks on the respective pieces using a sponge dauber. I adhered the bristles near to the ferrule of the brush first, then the paint blobs to the back. Once that was done, I trimmed off the handle of the paintbrushes so that they could fit on my card panel.
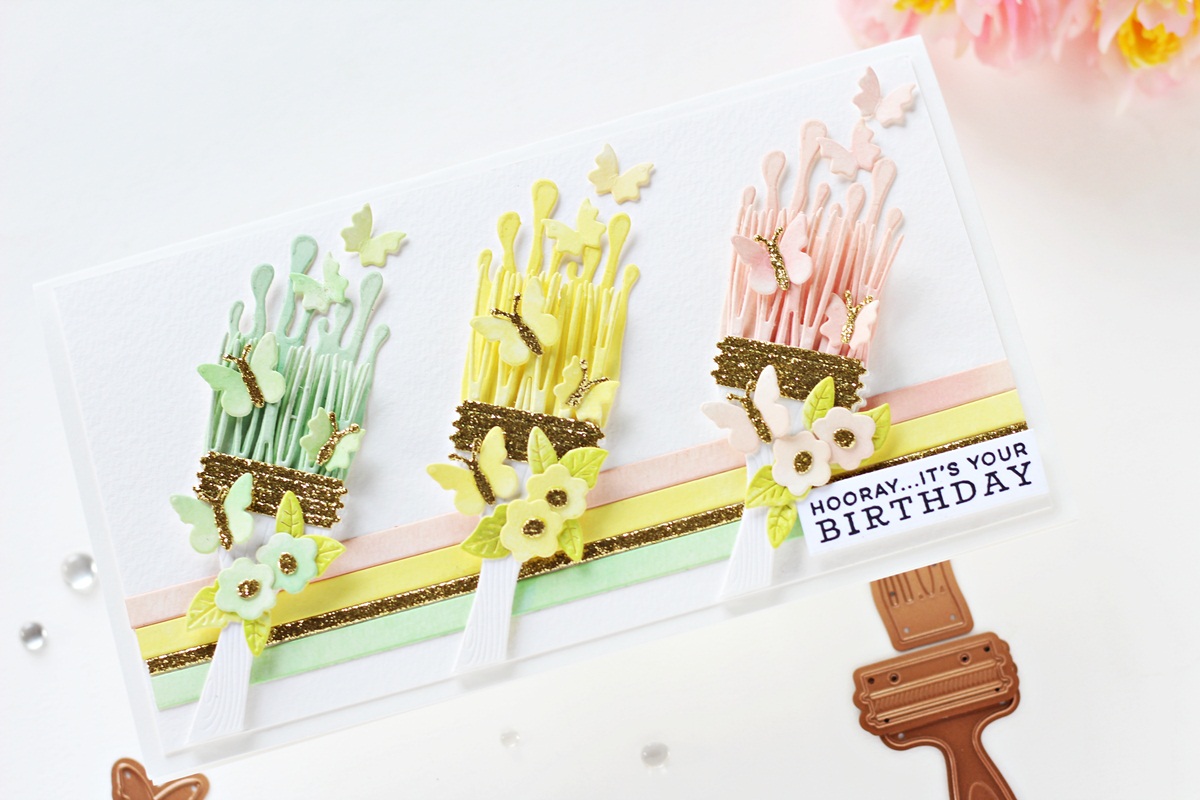
Next, I die-cut Snowdrift Cardstock using the butterfly and flower dies in the Butterfly Burst Etched Dies and the Mini Blooms and Sprigs Etched Dies and blended a little Cracked Pistachio, Squeezed Lemonade, and Worn Lipstick Distress Oxide Inks on the pieces with a blending brush. Next, I die-cut the tiny leaves from the Mini Blooms and Sprigs Etched Dies out of Snowdrift Cardstock and colored them using Twisted Citron Distress Oxide Ink. Once that was done, I die-cut the body of the butterflies and the flower centers out of Citrine Cardstock and adhered them to my pieces using Craft Glue.
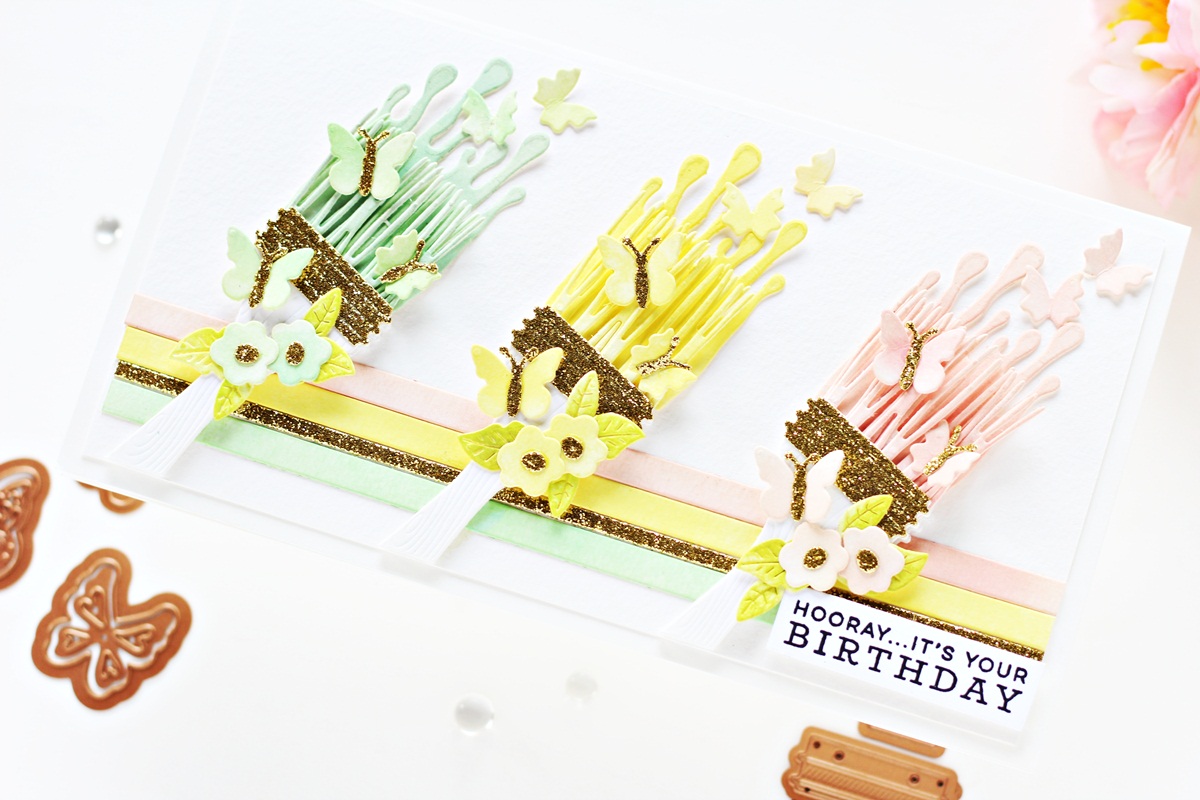
Then, I cut three long strips out of Snowdrift Cardstock and layered them on top of a piece of Snowdrift Cardstock to create the background panel of the card. I also trimmed a thin strip of Citrine Cardstock to adhere in between the pieces. The pieces were again colored using the same combination of inks – Cracked Pistachio, Squeezed Lemonade, and Worn Lipstick Distress Oxide Inks.
It was now time to assemble everything together – I adhered the paintbrushes to my card front using foam adhesive and then adhered the mini blooms and butterflies to the panel to create a splash of color using Craft Glue. Next, I stamped a sentiment from the Paint Your World Sentiments Clear Stamp Set onto Snowdrift Cardstock and trimmed it down to adhere over the panel using foam squares. Finally, to complete, I adhered the panel to a top-folding 3.5″ x 8.5″ white card base using a tape runner.
Spellbinders Supplies:

Other supplies
Neenah Solar White Cardstock, Canson Montval Watercolor Paper, Citrine Glitter Cardstock, Cracked Pistachio, Squeezed Lemonade Distress Oxide inks, Versafine Onyx Black Ink, Heat Tool, MISTI Stamping Tool, Black and Blue Acrylic Paints, Heidi Swapp Gold Lame Mist, Tape Runner.
That’s it for today’s post! I hope you enjoyed it and have been inspired to create with these stunning dies and stamp from the Paint Your World Collection. Thank you so much for stopping by!
Hussena Calcuttawala
'Hello! My name is Hussena, and I live in Kolkata, India. I am a stay at home mum of two kids and have been crafting for over five years now. I started my creative journey with paper quilling and since then have dabbled in various paper crafting forms like punch craft, die cutting, and more recently stamping. I am an ardent floral fan and you will find me using florals on almost all my creations. I love working with dies, especially floral and intricate ones, as they offer me various possibilities. I also love to create my own handmade flowers, and this is one of the reasons why I am drawn to Spellbinders dies. You can find my work on my blog: Quill and Punch Works
2 Comments
Delia Wilkes
Absolutely beautiful creations. I can’t wait to get my hands on this collection. Just waiting for it to arrive in the UK. Thank you for this amazing host of inspiration ❤️
MaryH
Love your flowers! You always create such interesting layouts filled with gorgeous colors.