Through The Garden Gate Collection – Card Inspiration with Annie Williams
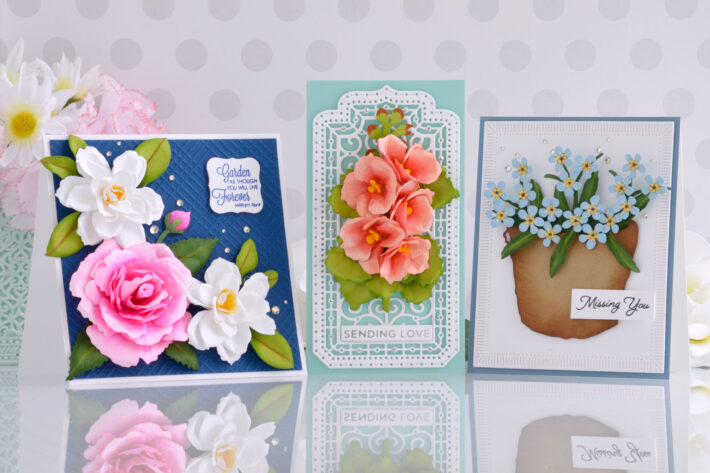
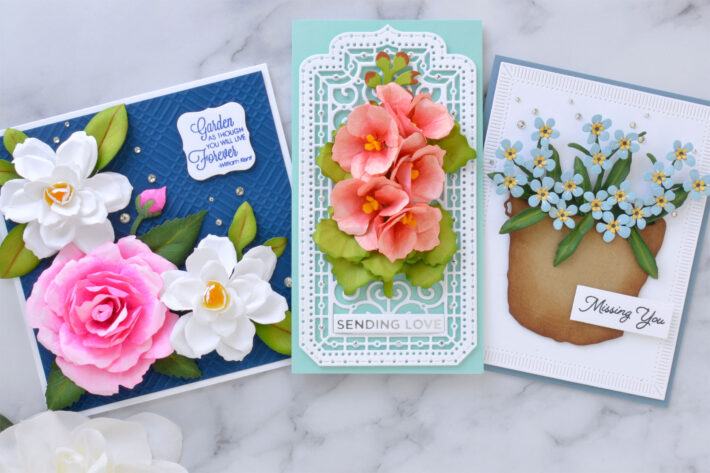
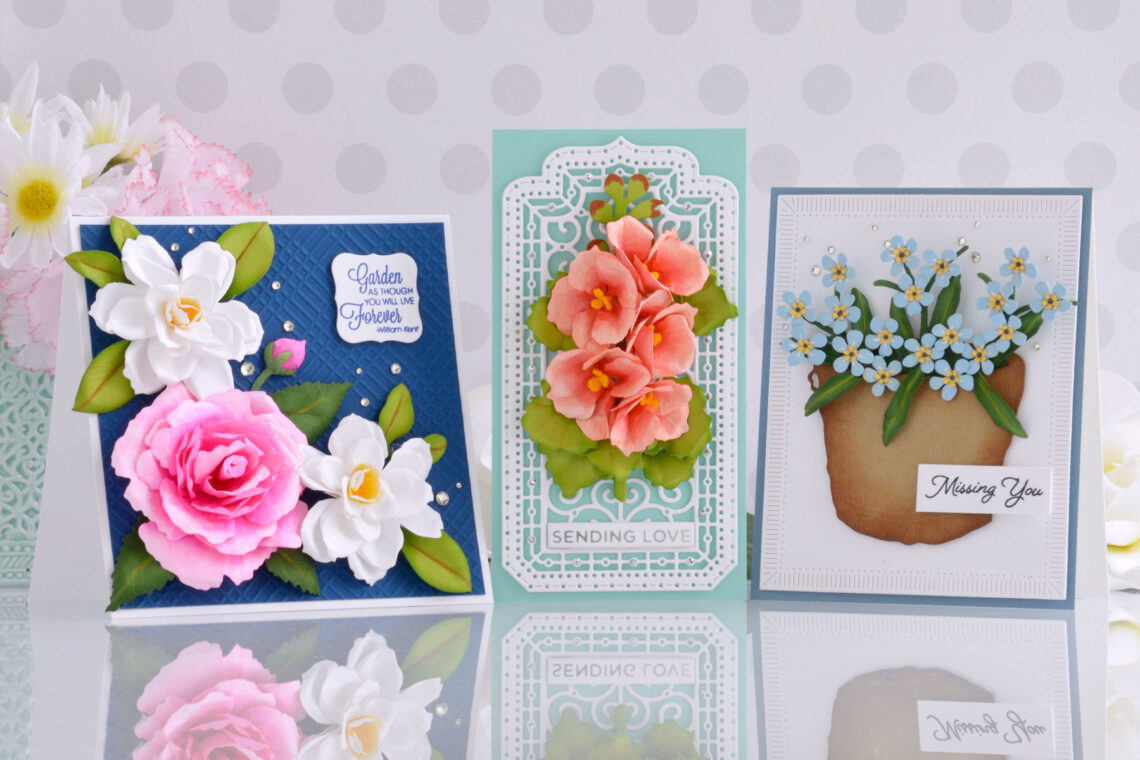
Hi there! This is Annie Williams and I’m thrilled to be back on the blog today to share a couple of projects using the new Through The Garden Gate Collection by Susan Tierney-Cockburn. The gorgeous new flower dies and beautiful sentiments in this collection inspired me to create three bright floral cards with realistic blooms that pop right off the page.
Hollyhock Card
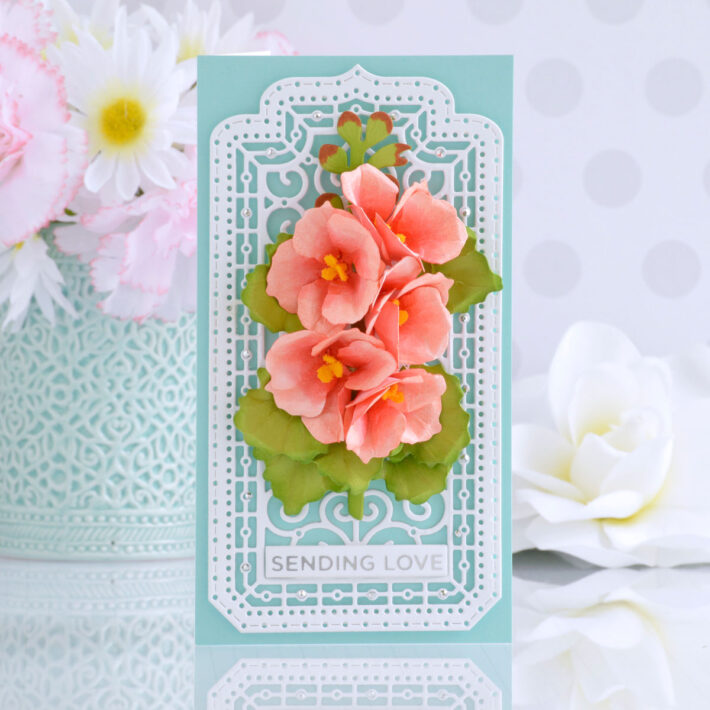
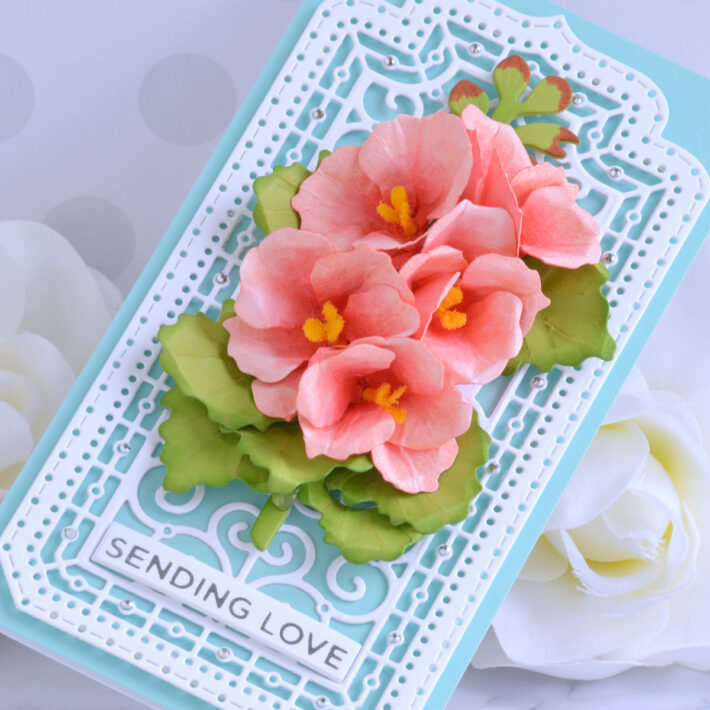
The Hollyhock Die Set creates such a beautiful stalk of bright blooms that is perfect for slimline and mini slimline cards. Here I added a single stalk of coral hollyhocks to a pretty trellis-like background for a bold and bright love card.
- Die-cut Susan’s Garden Specialty Cardstock using the petal and stamen dies from the Hollyhock Die Set. Color them with Copic markers and shape the flowers using a loop tool and tweezers.
- Roll the stamens up with liquid glue and add yellow pollen to the tips. Assemble each bloom with liquid glue.
- Die-cut Rainforest Cardstock using the stalk and leaf dies from the Hollyhock Die Set. Add a little coral to the tips of the buds with a Copic marker and shade the leaves and stalk with Mowed Lawn Distress Ink using a sponge dauber.
- Shape the leaves using the leaf tool and loop tool.
- Die-cut white cardstock using the layers dies in the Decorative Mini Slimline Card Creator Die Set.
- Adhere a piece of Waterfall Cardstock to a side-folding white card base measuring 3.5” x 6.5” using a tape runner. Add the die-cut background on top with foam adhesive.
- Apply Silver Hot Foil to white cardstock using one of the sentiments from the Everyday Sentiments II Plate Set and the Glimmer Hot Foil System. Cut it out with the coordinating die into a small strip.
- Add the flower stalk to the card front with foam adhesive and then adhere the flowers and leaves on top using hot glue.
- Pop the foiled sentiment up on the bottom of the card with foam adhesive.
- Embellish with Silver Mix Gems.
Floribunda Rose Card
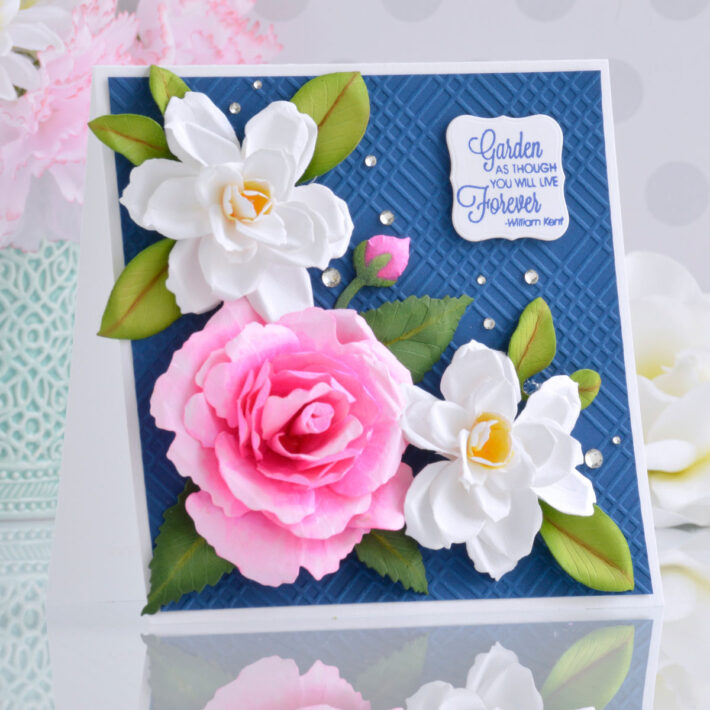
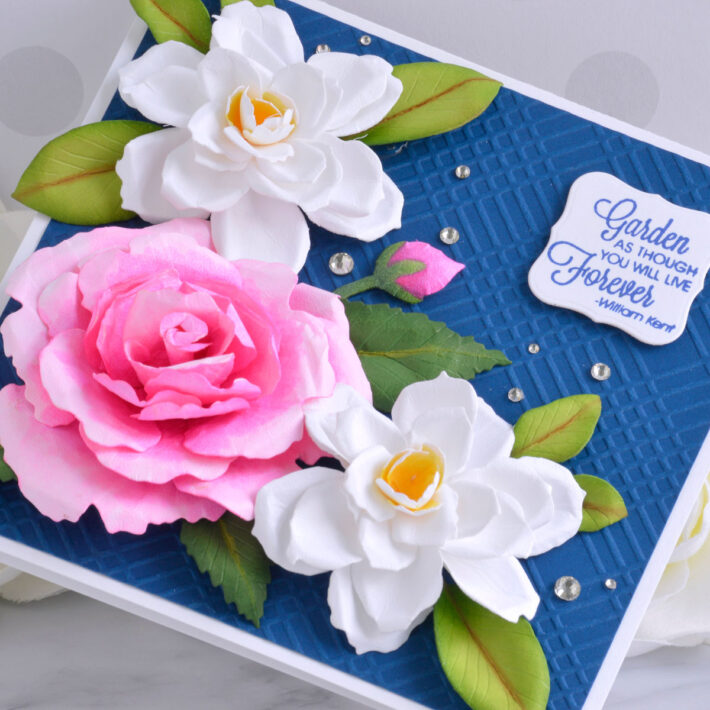
Next, I wanted to combine a couple of different flowers from the collection to create an oversized bouquet for this pretty square card for a friend.
- Die-cut Susan’s Garden Specialty Cardstock using the petal and bud dies from the Floribunda Rose Die Set and color them with Copic markers. Shape the petal layers with the loop tool and tweezers and assemble with liquid glue.
- Die-cut Fern Cardstock using the leaf dies from the Floribunda Rose Die Set and apply Rustic Wilderness Distress Ink around the edges with a sponge dauber. Shape them with the leaf tool and small ball stylus.
- Die-cut Susan’s Garden Specialty Cardstock using the petal dies from the Gardenia Die Set and color the smallest two layers yellow with Copic markers. Shape the petal layers with the loop tool and tweezers and assemble with liquid glue.
- Die-cut Rainforest Cardstock using the leaf dies from the Gardenia Die Set and apply Mowed Lawn Distress Ink around the edges with a sponge dauber. Shape the leaves using the leaf tool and small ball stylus.
- Trim a piece of Cosmic Sky Cardstock to 5.25” x 5.25” and emboss it using the Diamond Plaid Embossing Folder.
- Adhere the embossed panel to a top-folding white card base measuring 5.5” square with a tape runner.
- Stamp a sentiment from the Through The Garden Gate Sentiments Stamp Set onto white cardstock using blue ink and cut it out using the smallest layer from the Essential Classic Label Die Set.
- Arrange the flowers and leaves in the lower-left corner of the card front and adhere them down with hot glue.
- Pop the sentiment up in the top right corner using foam adhesive.
- Embellish with Silver Mix Gems.
Forget-Me-Not Card
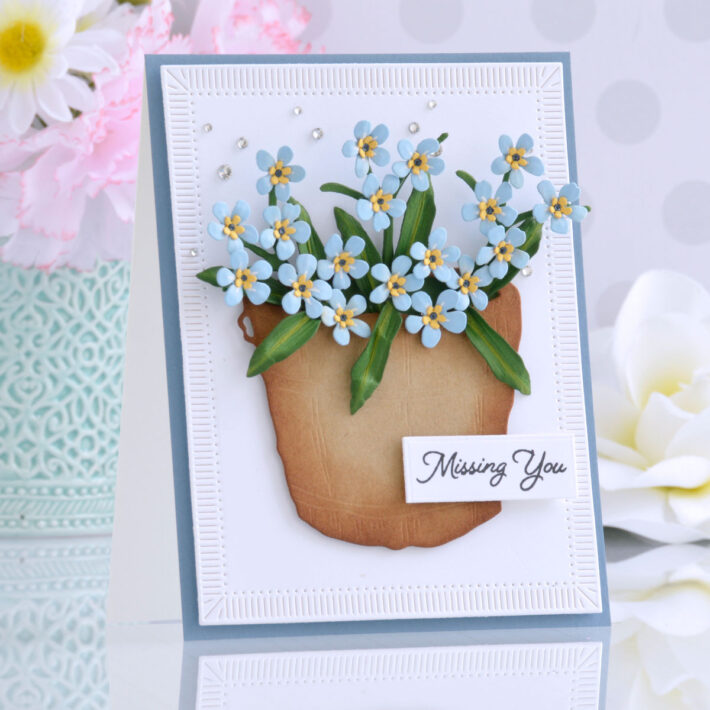
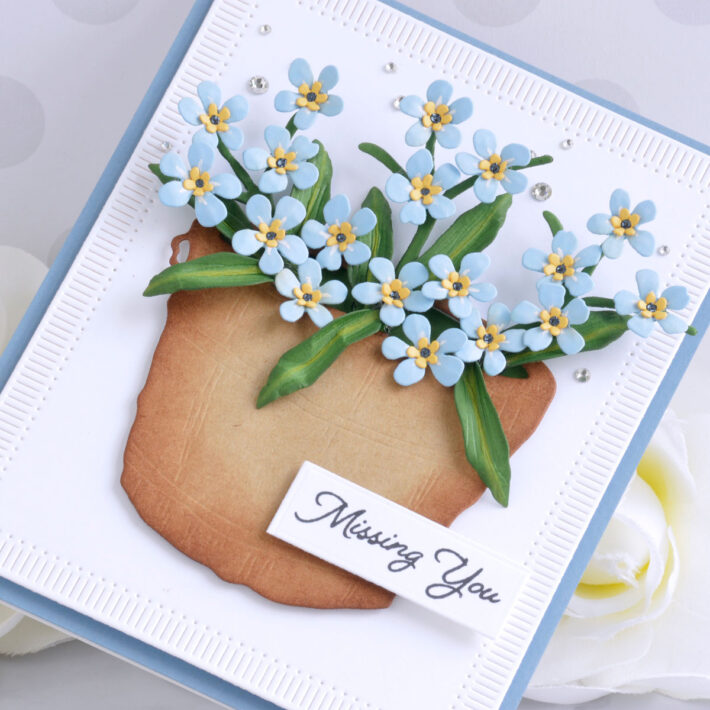
Forget-Me-Nots are such sweet and pretty flowers that I couldn’t help but play with these next. Here I added them to a simple container and background for this easy missing you card.
- Die-cut Raindrop, Beeswax, and Fern Cardstock using the flower, stem, and leaf dies from the Forget-Me-Not And LadyBugs Die Set.
- Add a bit of white to the center of the petals on the blue flower layer with a gel pen and shape the petals with a small ball stylus. Adhere the yellow inner flower layer to each blue layer with liquid glue and add a small drop of blue liquid pearls to the very center.
- Apply Rustic Wildnerness Distress Ink to the edges of the leaves with a sponge dauber and shape them with the leaf tool and small ball stylus.
- Die-cut kraft cardstock using the bucket bail die from the Gernanium and Antique Wooden Bucket Die Set and apply Vintage Photo Distress Ink around the edges of the bucket with a sponge dauber.
- Stamp a sentiment from the Through The Garden Gate Sentiments Stamp Set onto white cardstock using black ink and trim out into a small strip.
- Die-cut white cardstock using the largest rim and insert dies from the Fluted Classics Rectangle Die Set.
- Adhere a piece of Partly Cloudy Cardstock to a top-folding white card base measuring 4.5” x 5.75” with a tape runner.
- Add the die-cut background panel to the card front with foam adhesive.
- Pop the bucket up on top with more foam adhesive and adhere the flowers and leaves around it with hot glue.
- Add the sentiment to the bottom right corner with foam adhesive.
- Embellish with Silver Mix Gems.
Spellbinders Supplies:

Other supplies
White heavyweight cardstock, kraft cardstock, Nocturne Versafine Clair Ink, Blue Belle Versafine Clair Ink, Rustic Wilderness, Mowed Lawn and Vintage Photo Distress Inks, sponge dauber, Slate Liquid Pearls, hot glue gun, tape runner, foam adhesive, Copic markers.
I hope you enjoyed these bright floral cards and thanks so much for stopping by today. You can find more inspiration over at my blog AnnieBWills.com.

