Stitched Alphabet Collection – Personalized Cards & Gifts with Annie Williams
Hi there, this is Annie Williams and I’m thrilled to be back on the blog today to share a couple of projects using the new Stitched Alphabet Collection from Spellbinders. The fun stitch-able letters and beautiful foiled sentiments in this collection inspired me to create two custom cards and a monogrammed gift bag perfect for a variety of occasions.
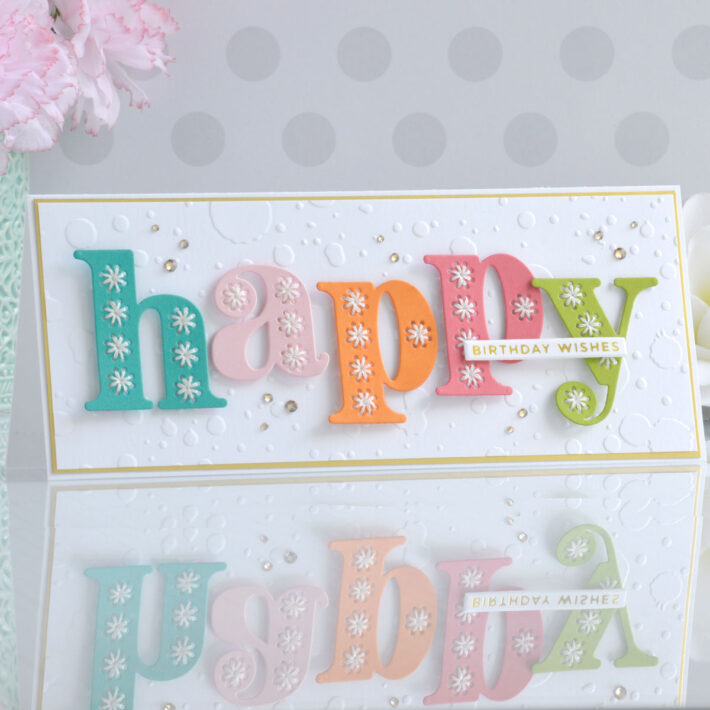
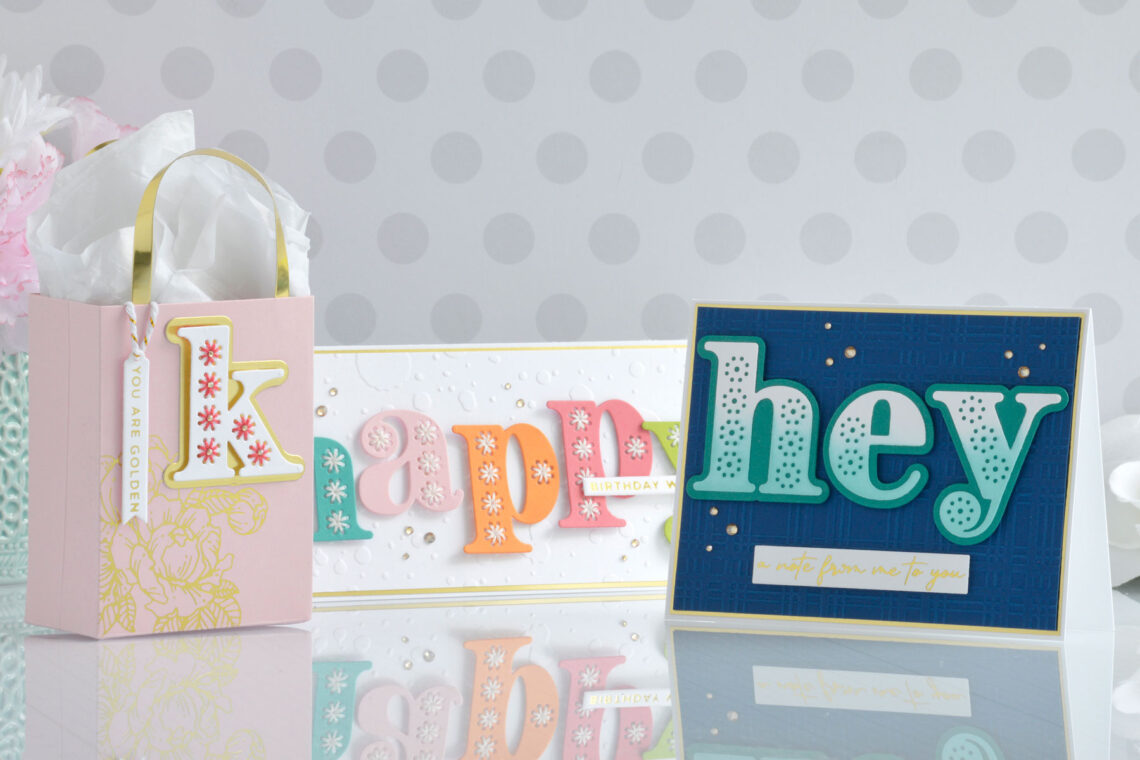
Stitched “Happy” Card
When you can cut out any word you want, why not start with happy? Here I stitched white florets onto brightly-colored letters for fun slimline birthday card.
- Die-cut Teal Topaz, Pink Sand, Persimmon, Dahlia, and Rainforest Cardstock using the letter dies from the Stitched H, A, P, and Y Die Sets.
- Stitch all of the letters using white embroidery floss (although I normally stitch dies using 2 strands, here I used three to make the florets even more pronounced).
- Apply Gold Hot Foil to white cardstock using one of the sentiment dies from the Mini Everyday Sentiments Foil Plate Set and the Glimmer Hot Foil Machine.
- Cut the sentiment out with the coordinating die, trimming off the “sending” so that it only reads “birthday wishes”.
- Trim a piece of white cardstock to 3.25” x 8.25” and emboss it using the Splatter Embossing Folder.
- Mat the embossed background panel with Mirror Gold Cardstock and adhere it to a top-folding white card base measuring 3.5” x 8.5”.
- Stagger the stitched letters on top of the card front and adhere down with foam adhesive.
- Add the foiled sentiment with more foam adhesive.
- Embellish with Gold Mix Gems.
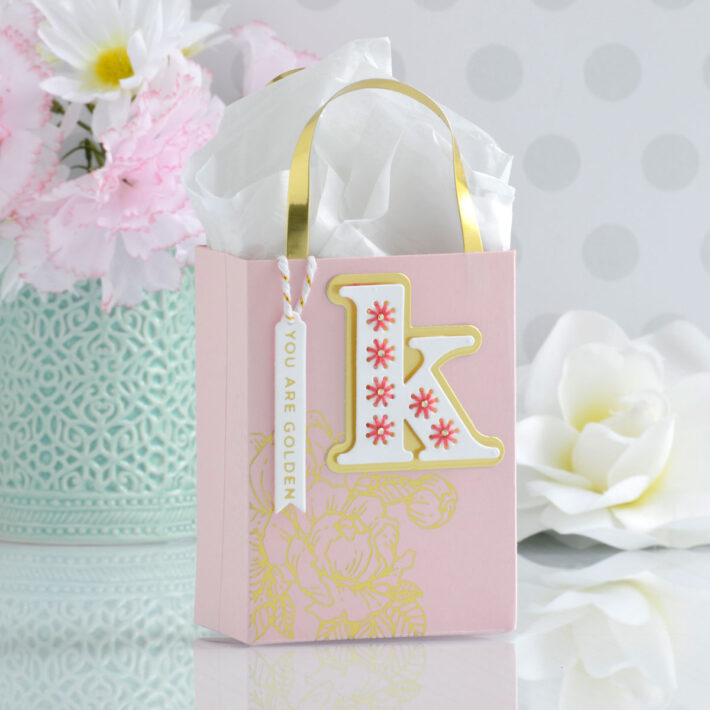
Stitched Monogrammed Gift Bag
Next, I thought it would be fun to create a monogrammed gift bag perfect for a milestone birthday.
- Die-cut Pink Sand and Mirror Gold Cardstock using the Gift Bag Die Set.
- Apply Gold Hot Foil to the front panel of the gift bag using the Glimmering Peony Foil Plate Set.
- Assemble the bag using strong liquid glue.
- Die-cut white and Mirror Gold Cardstock using the letter and outline dies from the Stitched K Die Set.
- Stitch the florets with dark pink embroidery thread and add Gold Mix Gems to each center.
- Adhere the letter die-cut on top of its outline with foam adhesive.
- Apply Gold Hot Foil to white cardstock using a sentiment from the Stitched Alphabet Glimmer Descriptors Foil Plate Set.
- Cut it out using the Swallowtail Tags Die Set and add it to the handle of the bag with a little gold metallic baker’s twine.
- Add the initial to the front of the bag with liquid glue.
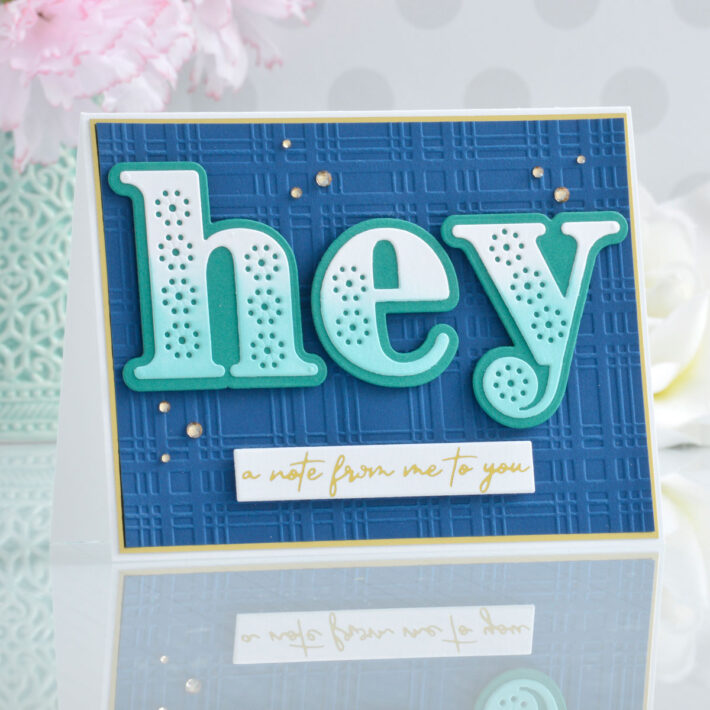
Masculine Hey Card
Lastly, I wanted to create a simpler, more masculine card without stitching the letters…and they look great that way too!
- Trim a piece of Cosmic Sky cardstock to 4” x 5.25” and emboss it using the Plaid Company Embossing Folder.
- Mat the embossed panel with Mirror Gold Cardstock and adhere to a top-folding A2-sized white card base with a tape runner.
- Die-cut white and Lagoon Cardstock using the letter and outline dies from the Stitched H, E, and Y Die Sets.
- Blend a little Salvaged Patina Distress Ink onto the bottom half of the letters and adhere to the outline layer with liquid glue.
- Apply Gold Hot Foil to white cardstock using one of the sentiments from the Stitched Alphabet Note Sentiments Foil Plate Set and trim out into a small strip.
- Adhere the letters and sentiment strip to the card front using foam adhesive.
- Embellish with Gold Mix Gems.
Spellbinders Supplies:

Other Supplies
White heavyweight cardstock, tape runner, foam adhesive, Salvaged Patina Distress Ink, blending brush, white embroidery thread, pink embroidery thread, gold metallic baker’s twine
I hope you enjoyed these fun personalized cards and gifts and thanks so much for stopping by today. You can find more inspiration over at my blog AnnieBWills.com.

