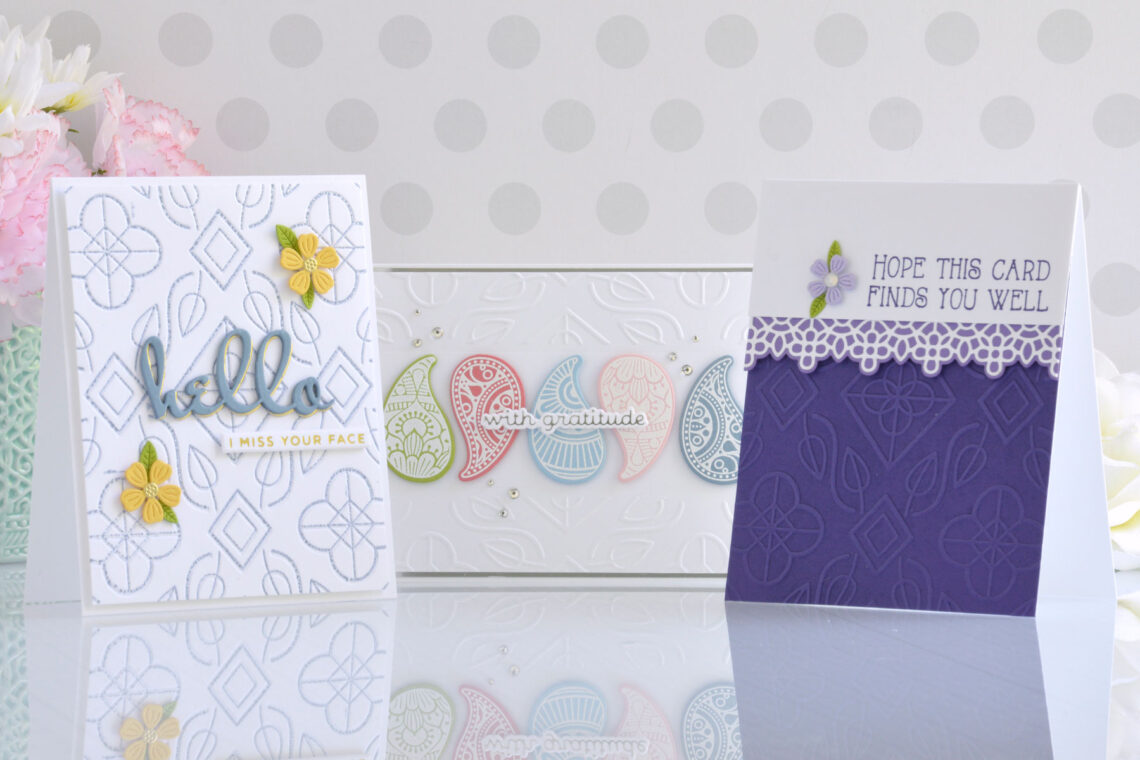
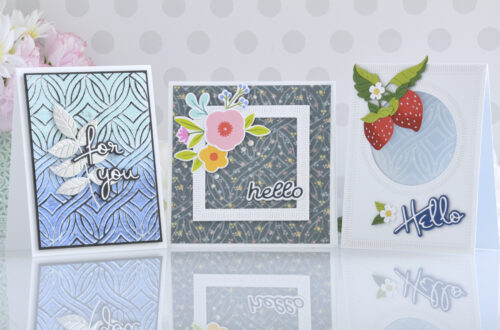
Embossing Folder of the Month Kit – Card Inspiration with Annie Williams
Hi there, this is Annie Williams and I’m excited to be back on the blog today to share a couple of projects using the June Embossing Folder of the Month Kit from Spellbinders. The simple and pretty pattern of the Botanical Diamond Embossing Folder makes it super versatile and perfect for all kinds of card projects.
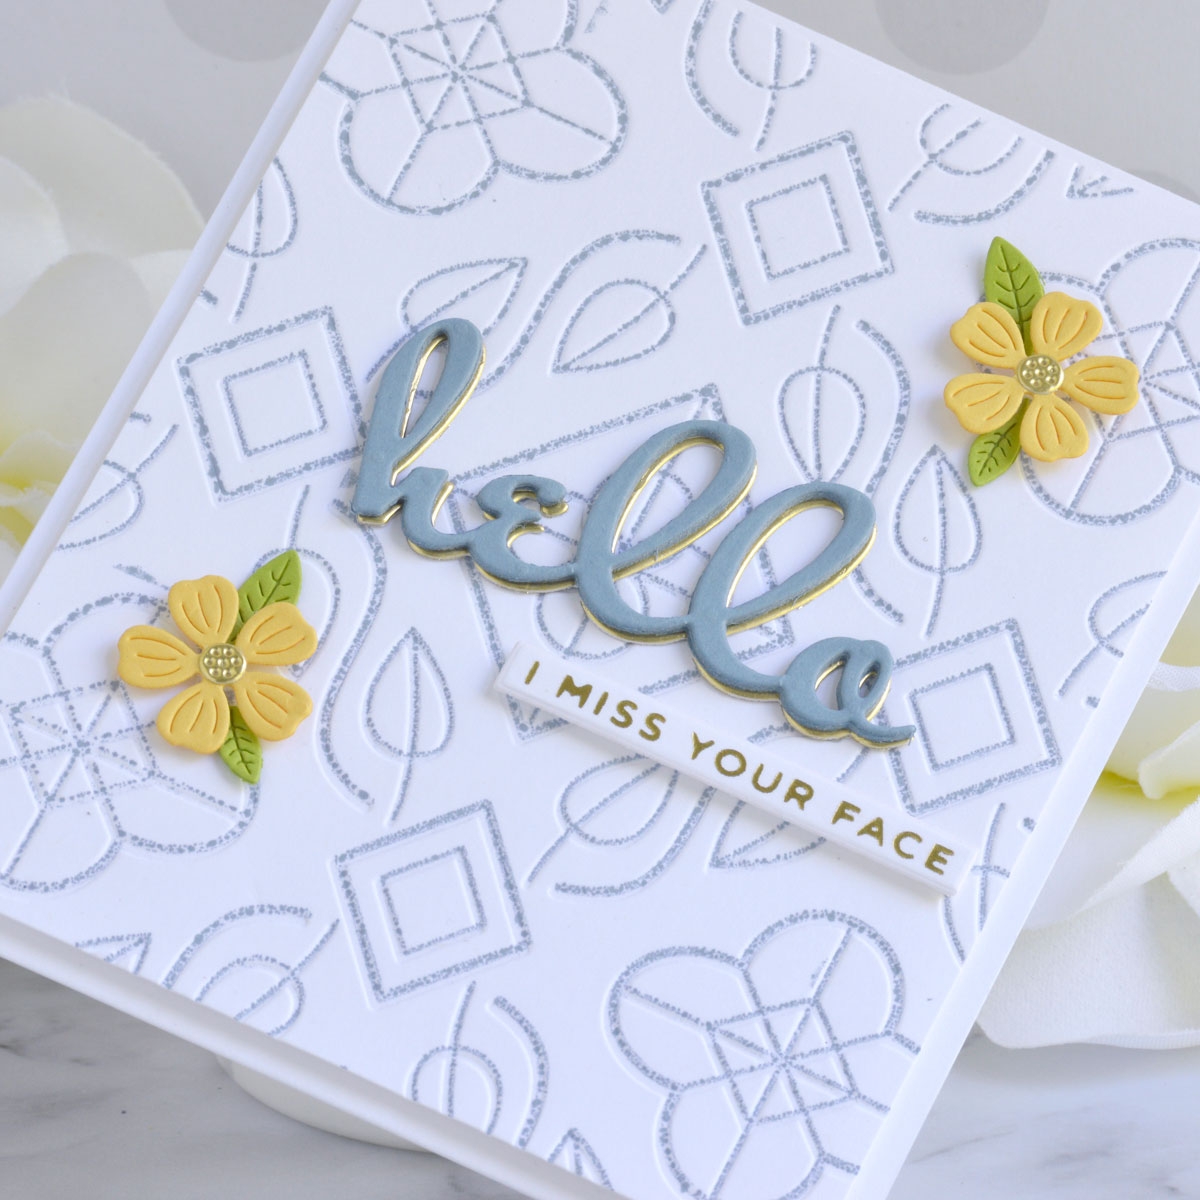
Faux Antique Tiles Look
The beautiful patterns in the Botanical Diamond Embossing Folder reminded me of antique tiles, so I wanted to try to create a card inspired by that first. Here I used ink to create a distressed letterpress look to use as a background for this pretty spring hello card.
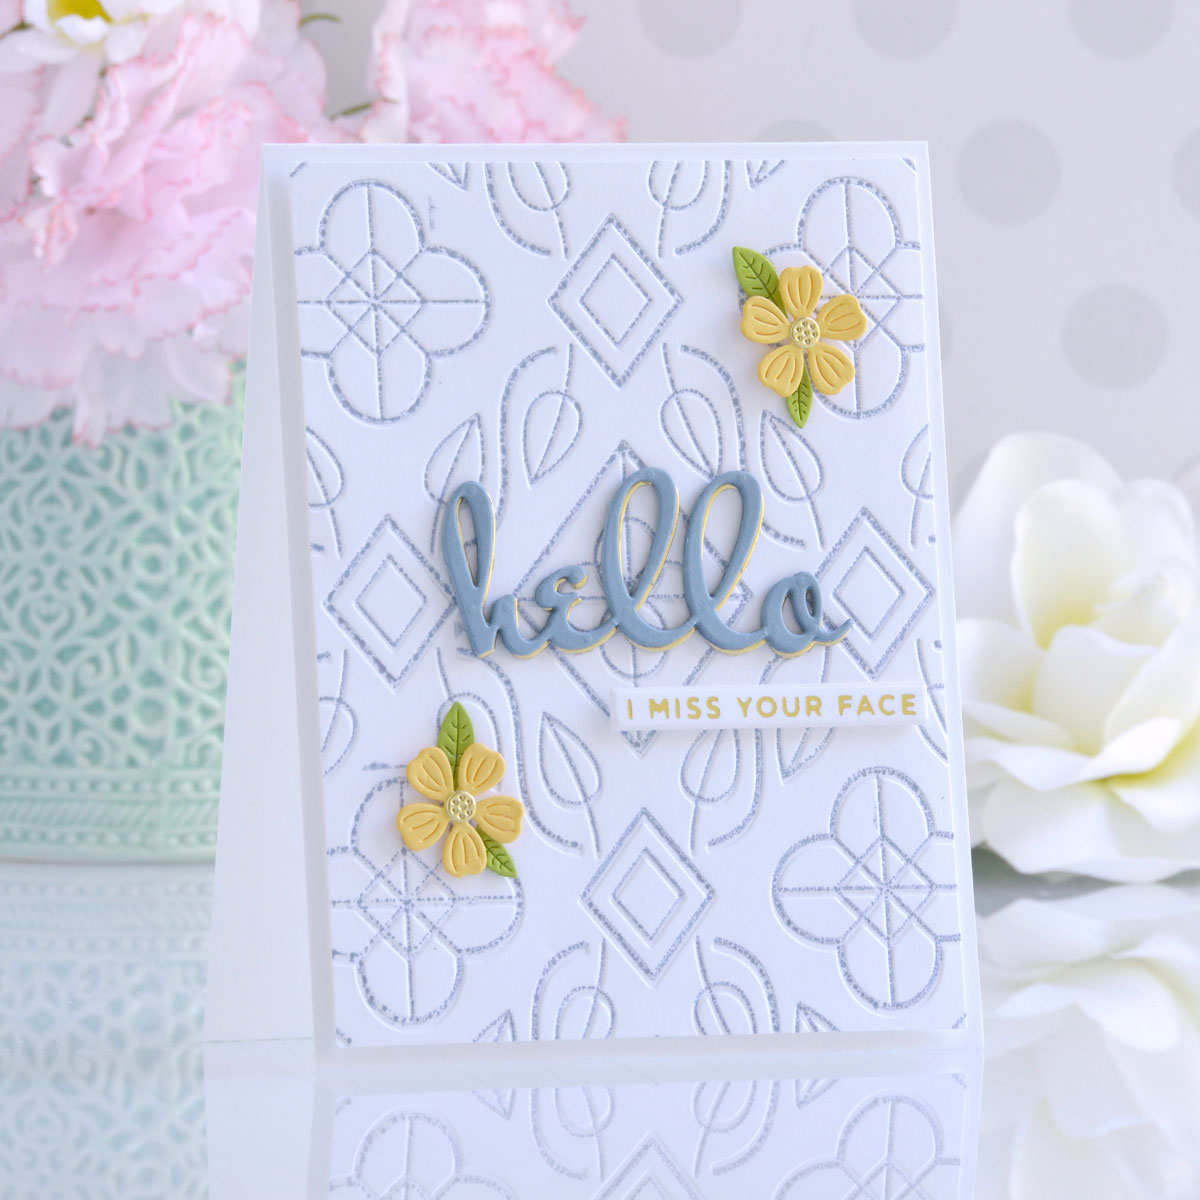
- Trim a piece of white cardstock to 4” x 5.25”.
- Apply Stormy Sky Distress Oxide Ink to the raised side of the Botanical Diamond Embossing Folder with a brayer and emboss the white panel.
- Mount the background panel onto a top-folding A2-sized white card base with foam adhesive.
- Apply Gold Hot Foil to white cardstock using one of the sentiments from the Mini Sincere Sentiments Plate Set and the Glimmer Hot Foil Machine.
- Cut the sentiment out using the coordinating die.
- Die-cut Partly Cloudy and Mirror Gold Cardstock using the sentiment die from the Paisley Dreams Die Set.
- Adhere together with liquid glue, allowing the gold layer to peek out like a shadow.
- Die-cut Beeswax, Rainforest, and Mirror Gold Cardstock with the Mini Blooms & Sprigs Die Set and assemble the flowers with liquid glue.
- Add the die-cut sentiment to the center of the card with liquid glue and pop the foiled sentiment up beneath it with foam adhesive.
- Embellish with flowers and leaves.
Rich Texture Background
Next, I wanted to create a rich textured background for this simple and pretty card for a friend.
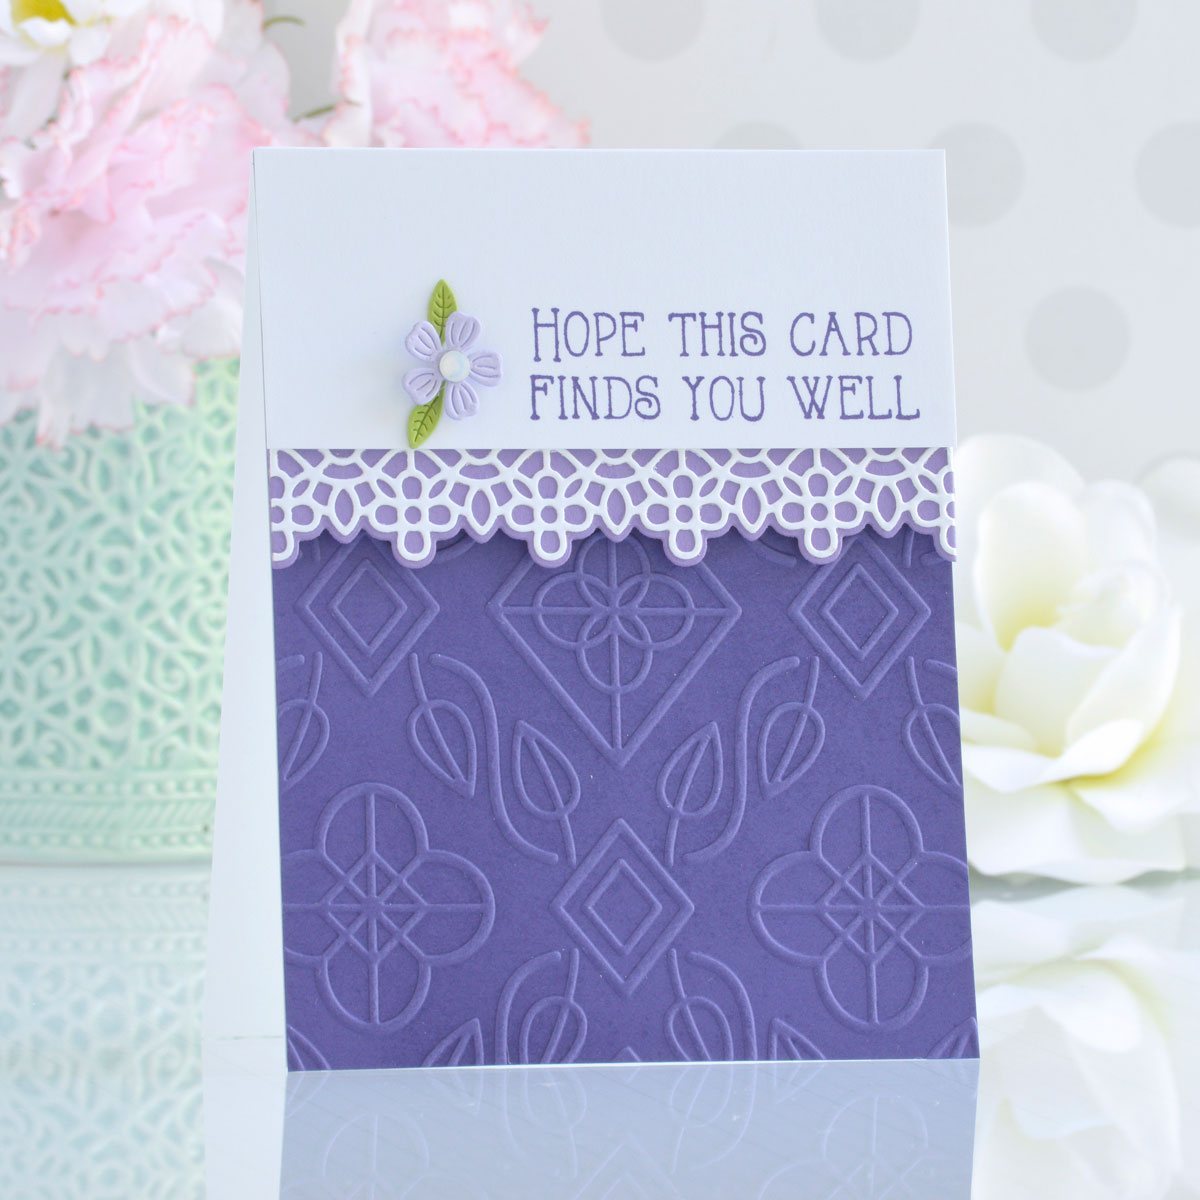
- Trim a piece of Royal Amethyst cardstock to 4.25” x 5.5” and emboss it with the Botanical Diamond Embossing Folder.
- Adhere the embossed panel to a top-folding A2-sized white card base with a tape runner.
- Die-cut white cardstock using one of the border dies from the Stylized Border Trio Die Set.
- Trim a piece of Lilac Blossom Cardstock to about 2.5” x 4.25” and die cut the bottom edge using the coordinating edge die.
- Adhere the white border die-cut on top of the purple die-cut panel with liquid glue.
- Trim a piece of white cardstock to about 1.75” x 4.25” and stamp a sentiment from the Paisley Bouquet Stamp Set onto it using purple ink.
- Adhere the border panel behind the sentiment panel using a tape runner.
- Pop the layered panel up on the top of the card front using foam adhesive.
- Die-cut Purple Mist and Rainforest Cardstock using the Mini Blooms & Sprigs Die Set. Assemble the flower with liquid glue, add it to the card front with foam adhesive, and embellish with a Crystal Mix Gem.

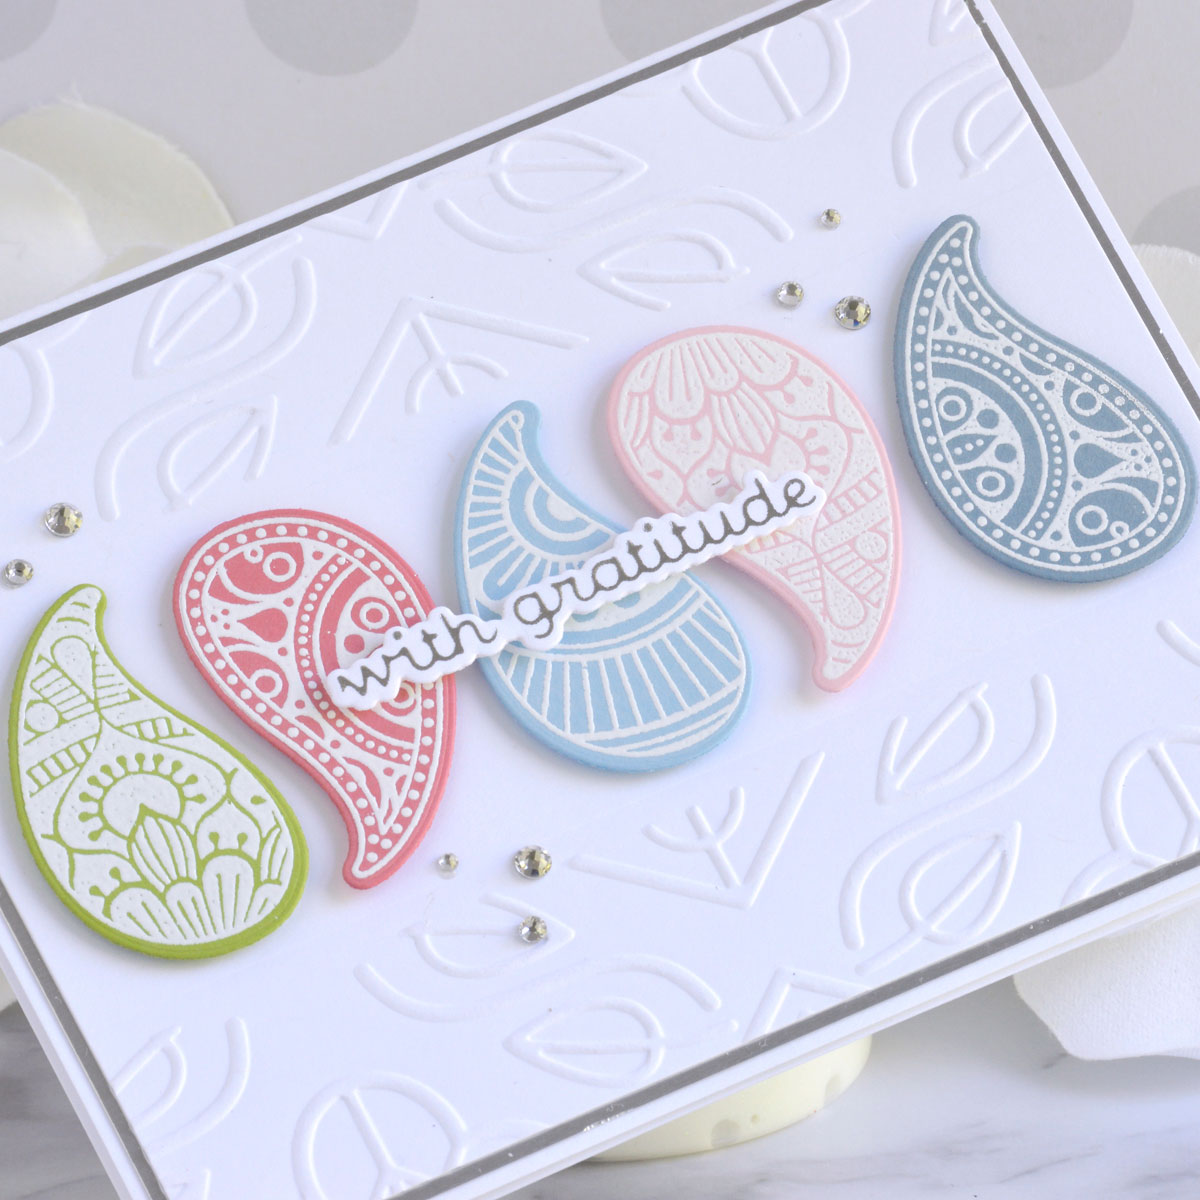
Partial Embossing
Lastly, I decided to do some partial embossing so that my background wouldn’t compete with my focal images on this soft and pretty thank you card.
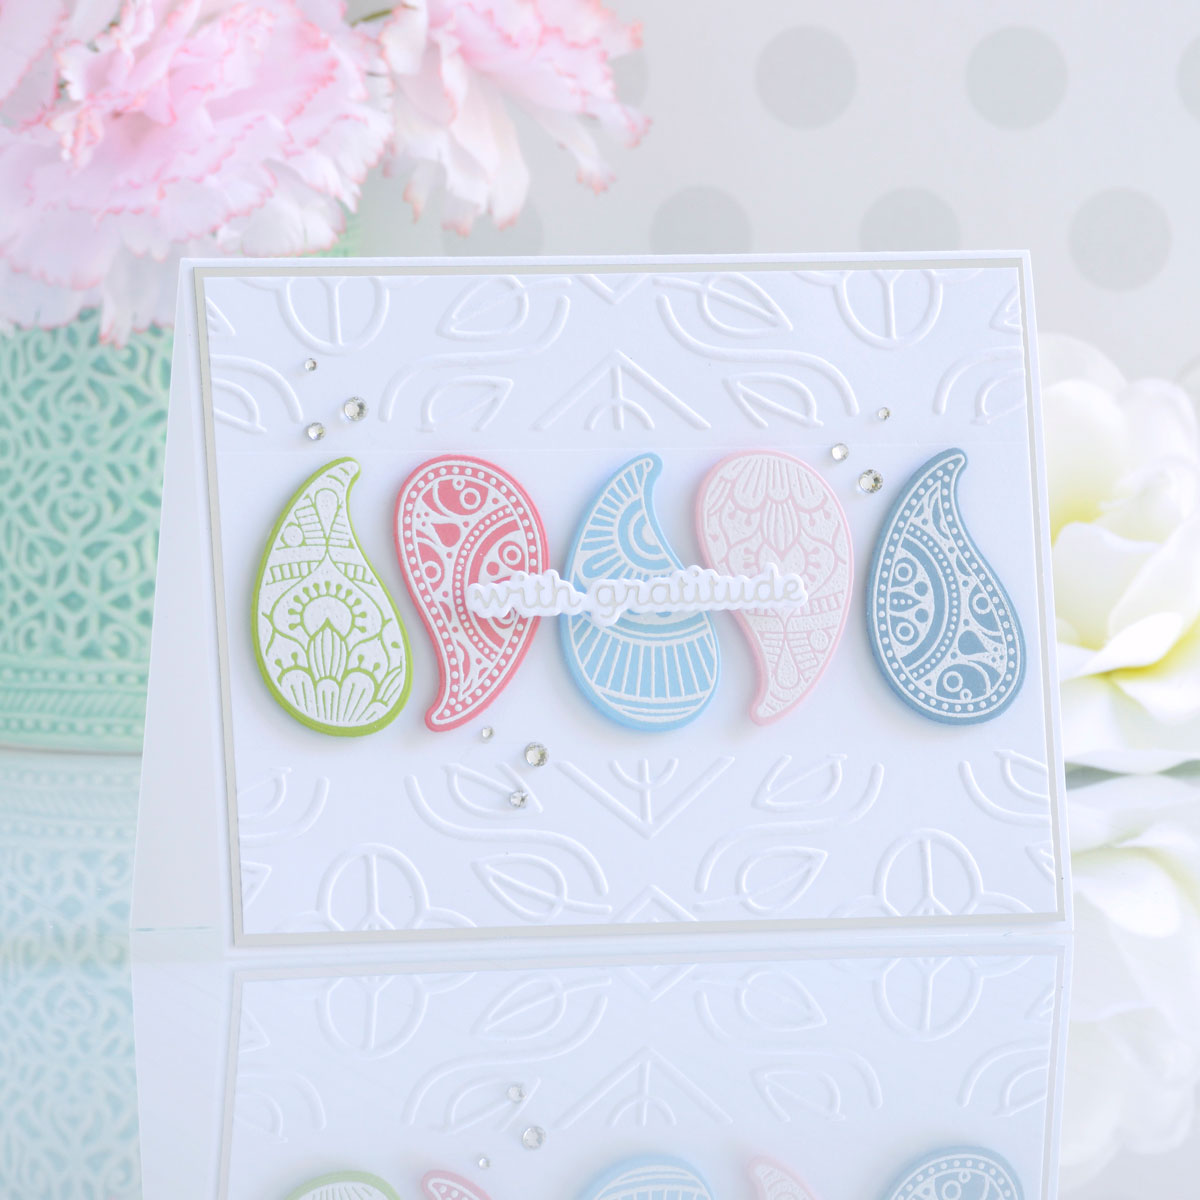
- Trim a piece of white cardstock to 4” x 5.25” and emboss only the top and bottom inch of the panel by inserting each end separately in the Botanical Diamond Embossing Folder before running it through your die-cutting machine.
- Mat the embossed panel with Mirror Silver Cardstock and adhere it to a top-folding A2-sized white card base with a tape runner.
- Stamp images from the Paisley Bouquet Stamp Set in Versamark Ink onto Rainforest, Dahlia, Raindrop, Pink Sand, and Partly Cloudy Cardstock, add white embossing powder and melt with a heat tool.
- Cut the images out using the coordinating die from the Paisley Bouquet Die Set.
- Apply Silver Hot Foil to white cardstock using one of the sentiments from the Paisley Glimmer Plate & Die Set and cut it out with the coordinating die
- Add the stamped paisley die-cuts across the center of the card front with foam adhesive.
- Pop the foiled sentiment up in the center with more foam adhesive.
- Embellish with Silver Mix Gems.
Spellbinders Supplies:

Other supplies
White heavyweight cardstock, tape runner, foam adhesive, Stormy Sky Distress Oxide Ink, brayer, Versafine Clair Fantasia Ink.
I hope you enjoyed this trio of simple and pretty embossed cards and thanks so much for stopping by today. You can find more inspiration over at my blog AnnieBWills.com.
One Comment
LAURA CASSELMAN
I love this! Where is the hello die? I can’t find it.