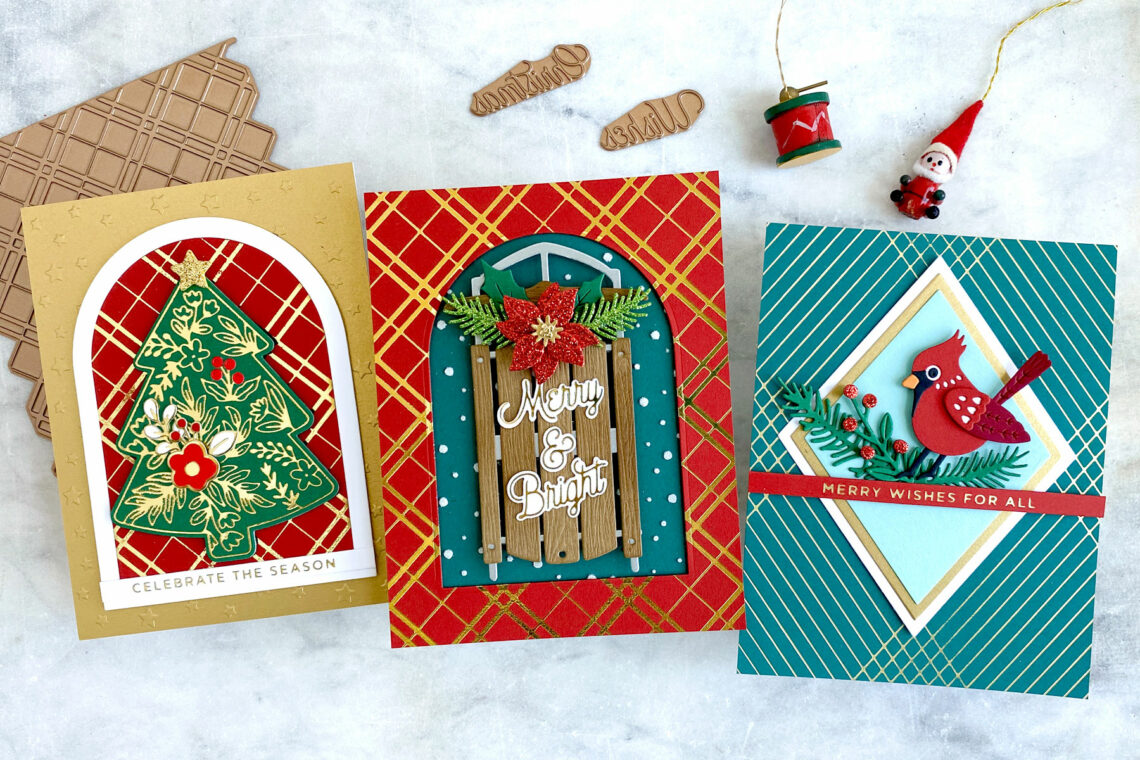
Shiny & Bright Holiday Greetings with Jean Manis
Hello crafters! Jean here sharing holiday-themed cards that feature products from the Glimmer Greetings Collection at Spellbinders, which is jam-packed with glimmer plates and dies. Let’s take a look at the shiny and bright holiday cards I designed with the collection.
Mat a focal object with nested diamonds on a foiled background
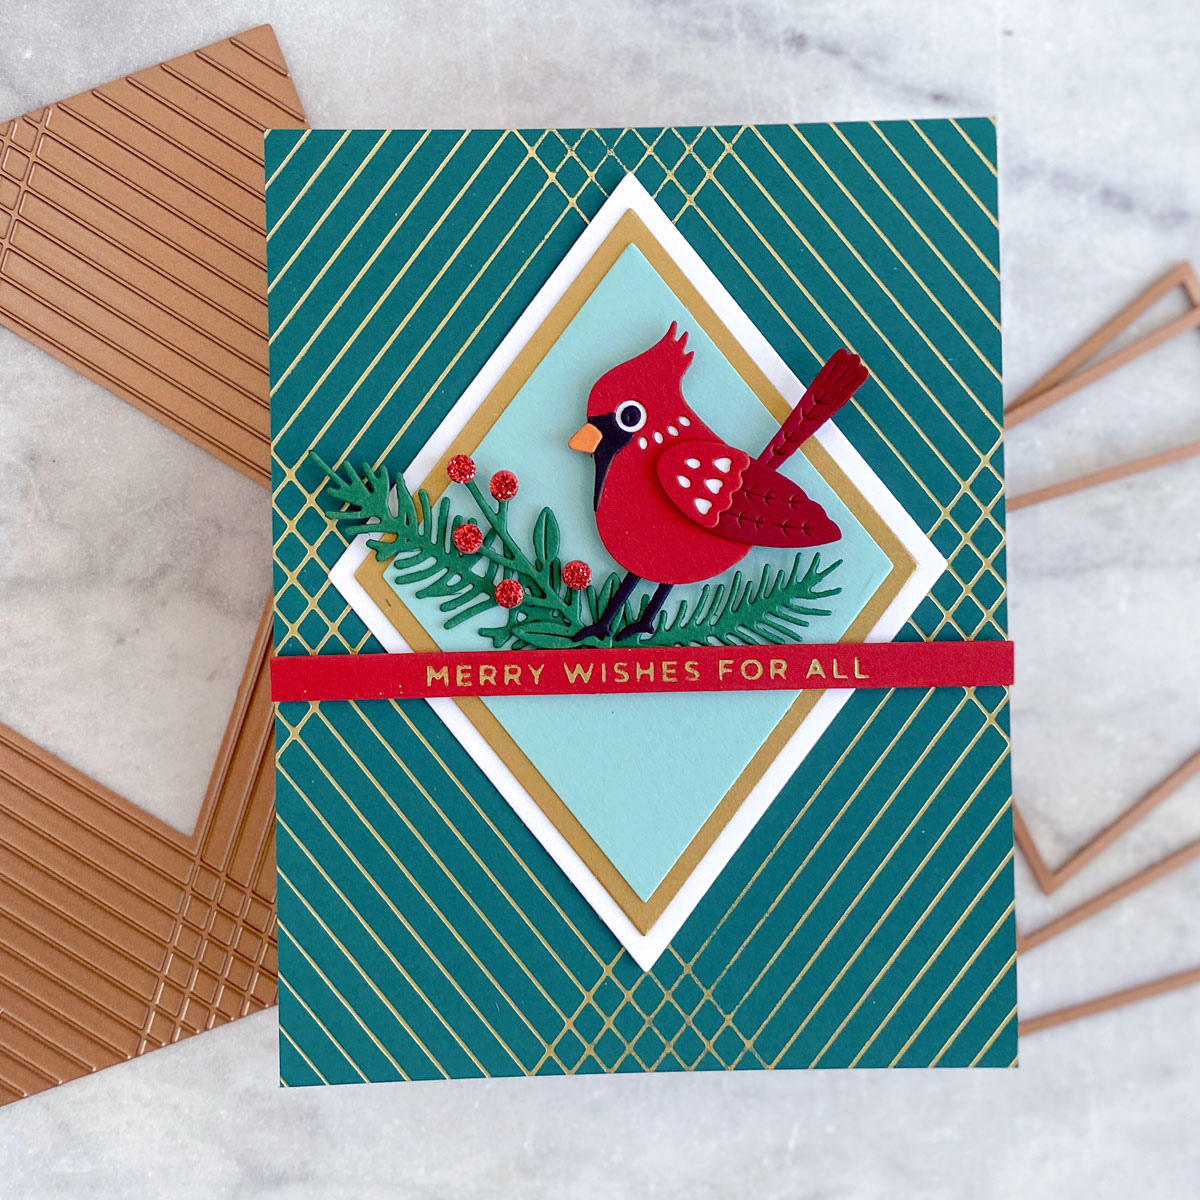
- Glimmer foil Crossed Lines Cardfront (without sentiment) in Matte Gold on dark teal cardstock panel. Trim to A2-size and add to card base.
- With dies in the Essential Diamonds set, create a set of mats by cutting diamonds from Brushed Gold, Snowdrift, and light teal cardstock. Add to the card front.
- Glimmer foil sentiment in Glitter Wishes set in Matte Gold on red cardstock. Cut with coordinating die. Trim to width of the card front.
- Cut Tweet Cardinal from red, dark red, orange, and Onyx Back open holes in body and wing with Snowdrift cardstock. Assemble.
- Cut greenery from green cardstock with dies in the Parcel & Post Christmas Decorations and Winter Welcome Sled. Cut Red Glitter Foam for berries and glue to branch.
- Adhere sentiment strip below midpoint with foam adhesive. Add cardinal with foam adhesive. Glue greenery to the card front, tucking the ends below the sentiment strip.
Showcase a focal object with the illusion of an arch window
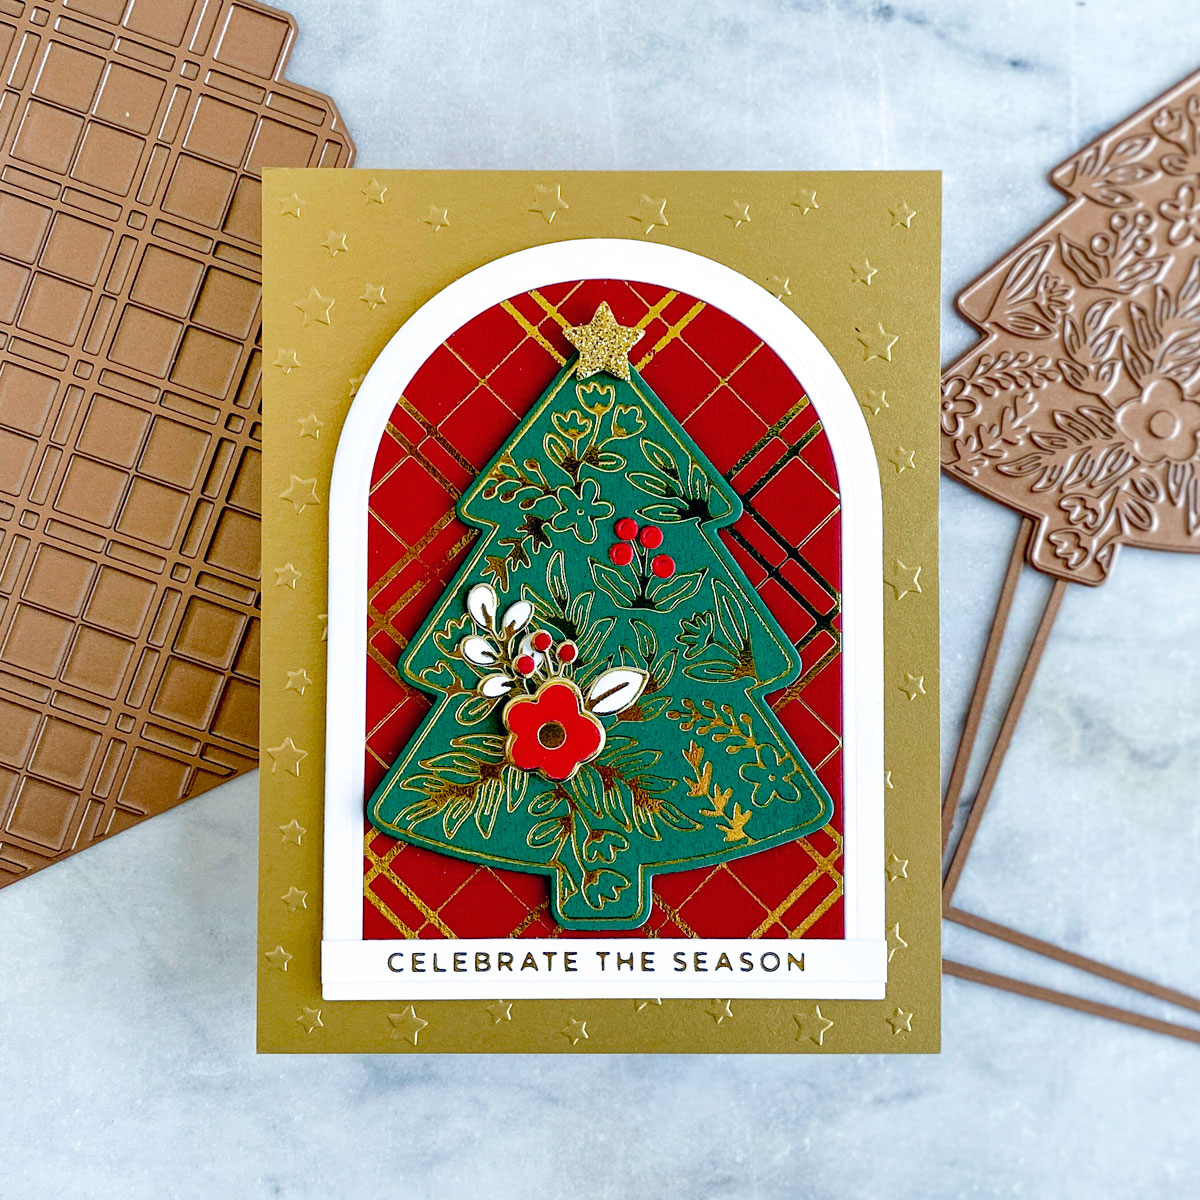
- Dry emboss A2-size Brushed Gold cardstock with Stargazer embossing folder.
- Glimmer foil Plaid Tidings background in Gold on red cardstock.
- Cut foiled panel with die in the Essential Arches (Save panel with arch cutout for next project.)
- Cut a frame with two of the nested dies in Essential Arches from Snowdrift Add to foiled Plaid Tidings arch. Add the assembly to the card base.
- Glimmer foil sentiment with a plate in the Glitter Wishes set in Gold on Snowdrift Cut sentiment with die in the set, trim, and attach to arch.
- Glimmer foil Blooming Tree plates in Gold on Snowdrift and dark green cardstock. Cut tree with coordinating die. (Designer Tip: Save foil used for the tree. The foil can be used with the Solid Arch plate to foil another tree.) Color flower and berries with markers. Cut pieces with coordinating dies and add to tree. Color Snowdrift cardstock with marker and cut small berries with die in the Parcel & Post Christmas Decorations Adhere berries to tree.
- Attach tree to arch background with foam adhesive. Embellish with a star cut using a die in the Holiday Decorations set from Gold Glitter (A similarly sized star die is included in the Parcel & Post Christmas Decorations set).
Frame a focal object with a “window” cut from a foiled background

Note: If using a leftover piece from the previous card, skip to the third bullet point.
- Glimmer foil Plaid Tidings background in Gold on red cardstock. Trim to A2-size.
- With a die in the Essential Arches set, cut a window from the foiled plaid panel.
- Apply embossing paste to dark teal cardstock through the Layered Christmas Tree Stencil. Sprinkle with Sparkle Dust Glitter and set aside to dry. Once dry, add to the back of the foiled window panel. Add assembly to an A2-size card base.
- Cut Winter Welcome Sled from woodgrain cardstock and Brushed Silver cardstock; assemble. Decorate sled with foliage cut from Brushed Gold, gold foil, Red Glitter Foam, and Bright Green Glitter Foam using dies in the Winter Welcome Sled
- Foil sentiment in Gold on Snowdrift cardstock with plates in the Merry Glimmer Sentiments set and cut with coordinating dies. Adhere to sled assembly.
- Add sled assembly to card front with foam adhesive.
Spellbinders Supplies:

Other Supplies
Colored cardstock, woodgrain cardstock, foam adhesive, adhesive.
Thank you for stopping by the blog today. I hope you’re inspired to create your own shiny and bright holiday cards with the Glimmer Greetings Collection at Spellbinders!

Spellbinders Slimline Collection – Timeless Elegance with Jean
August 2020 Small Die of the Month is Here – Sitting Pretty