The Winter Garden – Card Inspiration with Annie Williams
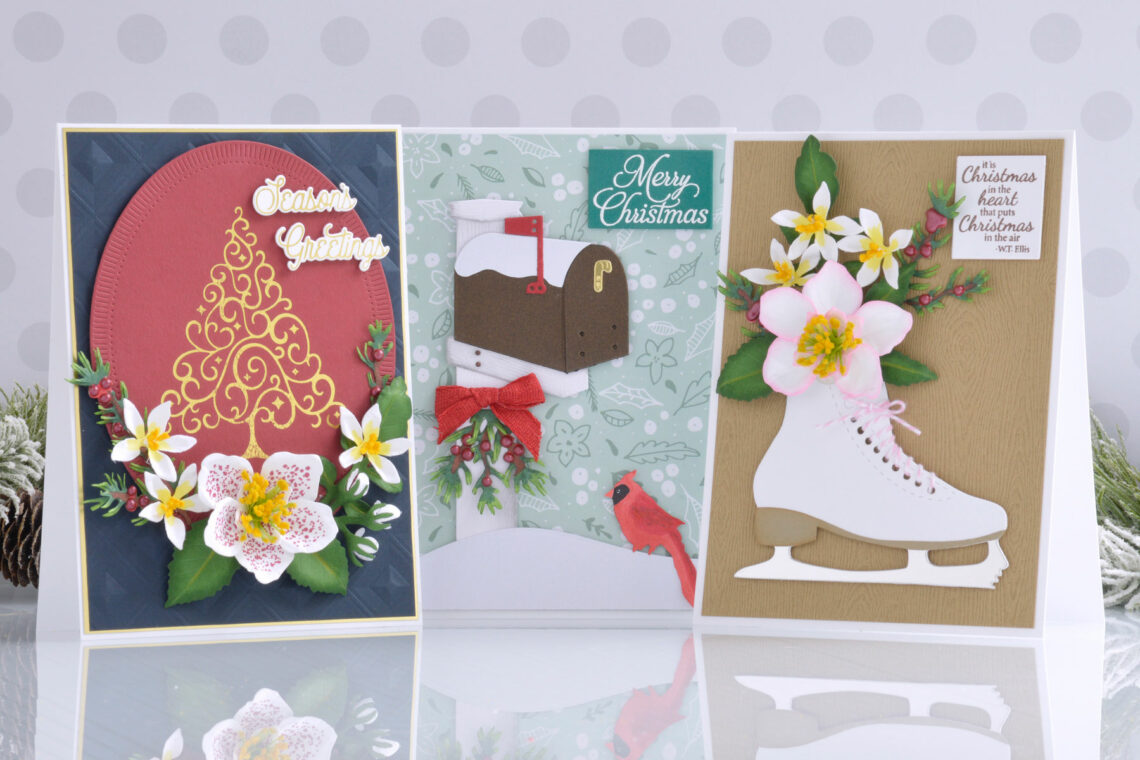
Hi there, this is Annie Williams and I’m excited to be back on the blog today to share a couple of projects using the new Winter Garden Collection by Susan Tierney-Cockburn. The gorgeous new florals and beautiful winter elements in this collection inspired me to create three pretty holiday cards with tons of dimension.
Ice Skates Card
I couldn’t get over all of the fun details in the Ice Skate Die Set, so I reached for this one first. Paired with some of the new floral designs in soft colors, I love how this pretty Christmas card turned out!
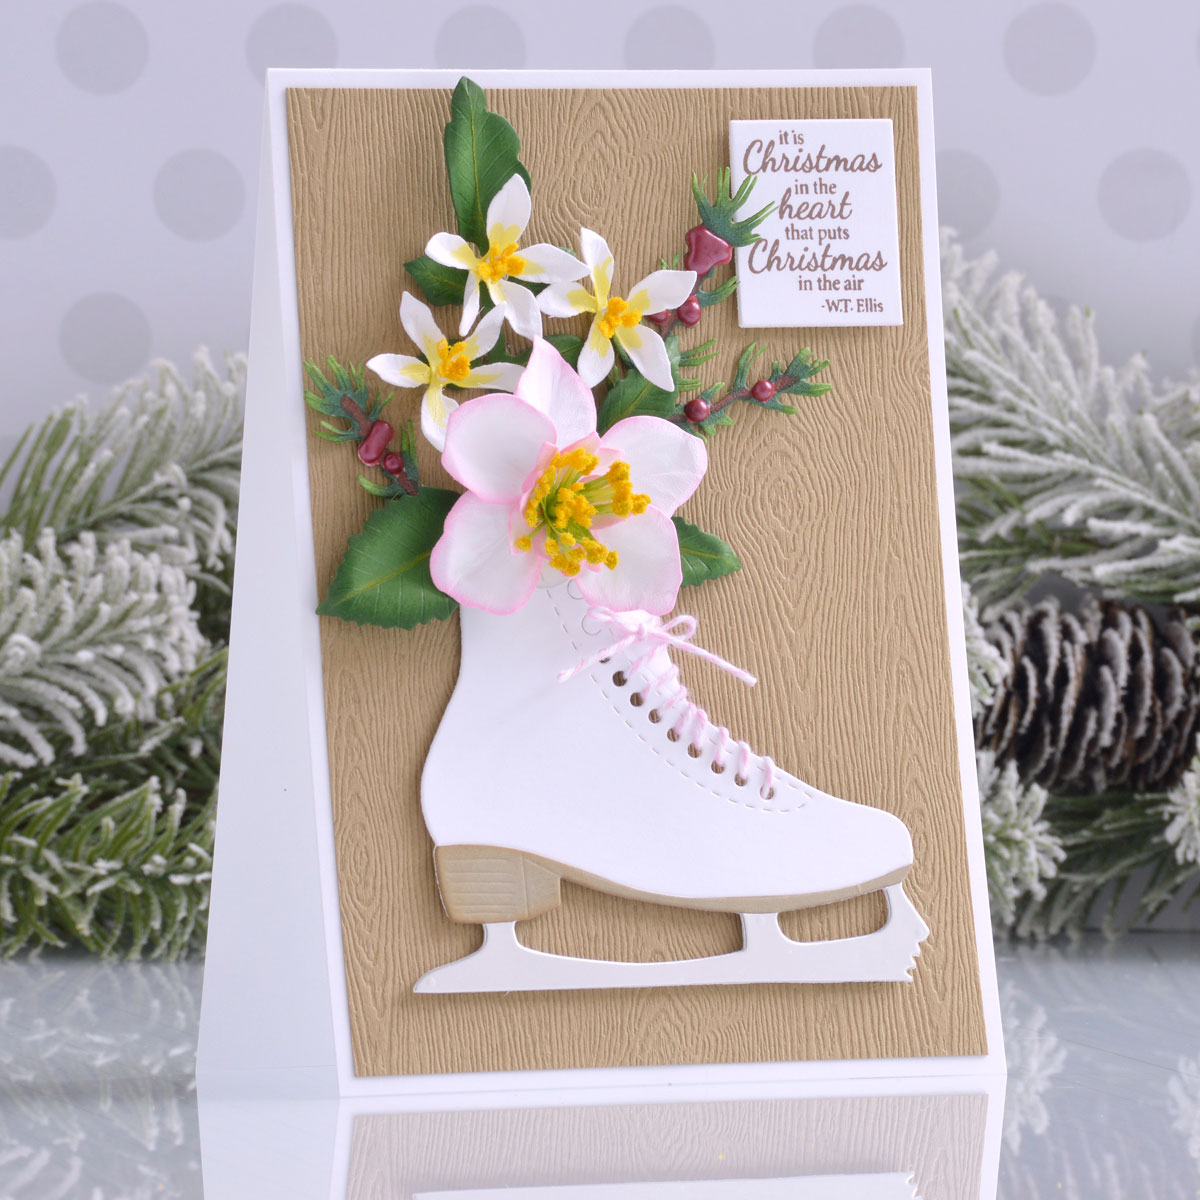
- Die cut white, Portobello, and Mirror Silver Cardstock using the Ice Skate Die Set. Trim off the heel from the Portobello die-cut, the blade from the Mirror Silver die-cut, and assemble the layered skate with liquid glue.
- Lace-up the skate using pink baker’s twine for a little soft color.
- Die cut Susan’s Garden Specialty Cardstock with the petal layers from the Helleborus and Jasmine die sets, and Juniper Sprig from the Winter Evergreen Foliage Die Set.
- Color the Jasmine petals and Juniper Sprig with Copic markers and ink the edges of the Helleborus petals with Kitsch Flamingo Distress Ink.
- Add red berries to the Juniper Sprig with Autumn Red Nuvo Crystal Drops.
- Shape the petals using the loop tool and small ball stylus.
- Die cut Fern Cardstock using the leaf dies from the Helleborus and Jasmine Die Sets, apply Rustic Wilderness Distress Ink to the edges, and shape them using the leaf tool and small ball stylus.
- Roll or cup the stamens for the Helleborus and Jasmine Flowers and add yellow pollen to the tips.
- Assemble the flowers using liquid glue.
- Stamp a sentiment from The Winter Garden Sentiments Stamp Set in brown ink onto white cardstock and trim it out.
- Trim a piece of kraft woodgrain cardstock to 4.75” x 6.75” and adhere it to a top-folding A7-sized white card base.
- Pop the ice skate and sentiment up on top of the card front with foam adhesive.
- Arrange the flowers and leaves in the ice skate and adhere them down with hot glue or strong liquid glue.
Christmas Letterbox Card
The Letterbox Die Set creates such a fun dimensional design that is perfect for cards all year round. Here I added a few pine branches and some snow to the mailbox for a pretty and peaceful Christmas scene.

- Die cut white woodgrain, bronze shimmer, Phone Booth, and Mirror Gold Cardstock using the Letterbox Die Set, shade the post using Pumice Stone Distress Ink, and assemble with liquid glue.
- Die cut the letterbox again from white shimmer cardstock and trim it to look like a snowy mound with scissors. Adhere to the top of the mailbox with liquid glue.
- Die cut Susan’s Garden Specialty Cardstock with the Juniper Sprig from the Winter Evergreen Foliage Die Set, color it with Copic markers, and add Autumn Red Nuvo Crystal Drops to look like red berries. Snip the branches apart to create a small three-branch swag.
- Die cut Susan’s Garden Specialty Cardstock using the cardinal die from the Woodland Wreath and Feather Friends Die Set and color it with Copic markers.
- Stamp a sentiment from The Winter Garden Sentiments Stamp Set onto Blue Spruce Cardstock using Versamark Ink, add white embossing powder, and melt with a heat tool. Trim or die cut the sentiment out.
- Die cut white shimmer cardstock using the Color Block Scenic Scape Die Set and trim to 4.75” wide.
- Trim a piece of patterned paper to 4.75” x 6.75” and adhere to a top-folding A7-sized white card base with a tape runner.
- Pop the mailbox, snowy hill, sentiment, and cardinal up on top of the card front with foam adhesive.
- Add the pine sprigs to the post with liquid glue.
- Tie a small bow with red ribbon and adhere above the pine sprigs with hot glue.
Flourished Christmas Tree Card
Lastly, I wanted to add some beautiful lifelike flowers to the pretty Flourished Tree Glimmer design for this bold holiday card.
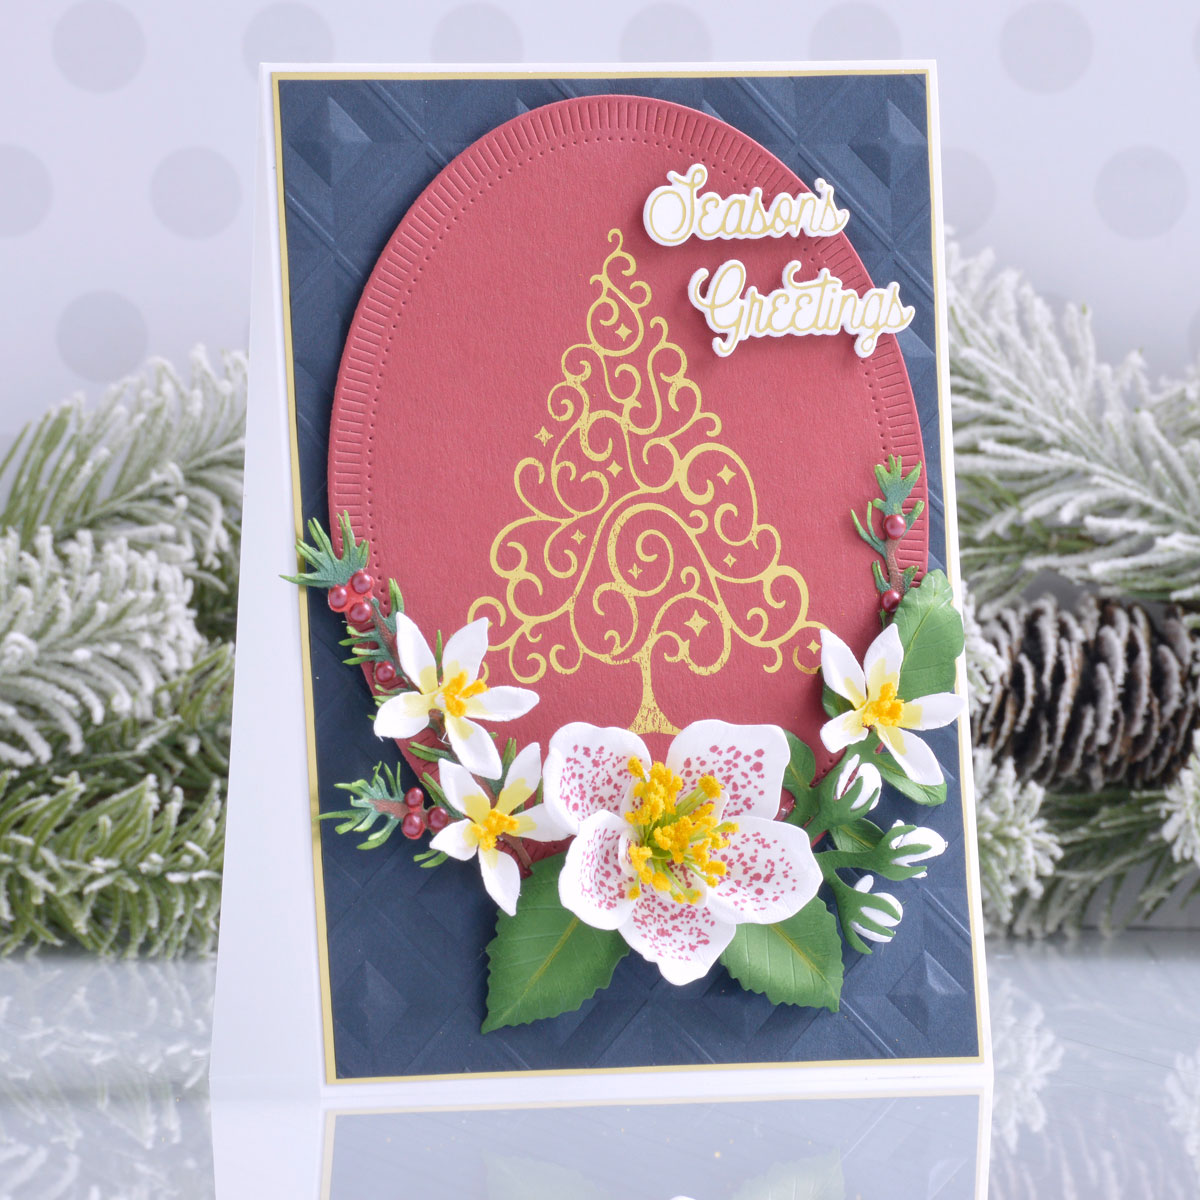
- Apply Gold Hot Foil to Crimson Cardstock using the Flourished Tree Glimmer Plate and the Glimmer Hot Foil System.
- Die cut the design out using the Large Oval Outer Rim and Insert dies from the Fluted Classics Ovals Die Set.
- Apply Gold Hot Foil to white cardstock using one of the greetings from the Merry Glimmer Sentiments Plate Set and cut it out with the coordinating dies.
- Create the Juniper Sprigs, Jasmine flowers, Helleborus flowers, and leaves as detailed above. This time add maroon speckles to the Helleborus petals with a Copic marker instead of inking the edges before shaping and assembling.
- Trim a piece of Indigo Cardstock to 4.75” x 6.75” and emboss it using the Beveled Diamonds 3D Embossing Folder.
- Mat the embossed panel with Mirror Gold Cardstock and adhere it to a top-folding A7-sized white card base with a tape runner.
- Add the oval layer and sentiment to the front of the card with foam adhesive.
- Arrange the flowers and leaves around the bottom of the oval and adhere them down with hot glue.
Spellbinders Supplies:

Other supplies
White heavyweight cardstock, Copic markers, Autumn Red Nuvo Crystal Drops, Rustic Wilderness Distress Ink, sponge dauber, hot glue gun, tape runner, foam adhesive, kraft woodgrain cardstock, Kitsch Flamingo Distress Ink, Versafine Clair Pinecone Ink, pink baker’s twine, white woodgrain, bronze shimmer, and white shimmer cardstock, Pumice Stone Distress Inks, Versamark ink, white embossing powder, red ribbon, Peppermint Patterned Paper Pad from Scrapbookcom.
I hope you enjoyed these pretty floral holiday cards and thanks so much for stopping by today. You can find more inspiration over at my blog AnnieBWills.com.


One Comment
Marjorie E
I love your cards. They’re all so beautiful. The mailbox card really caught my eye. Thanks for sharing.