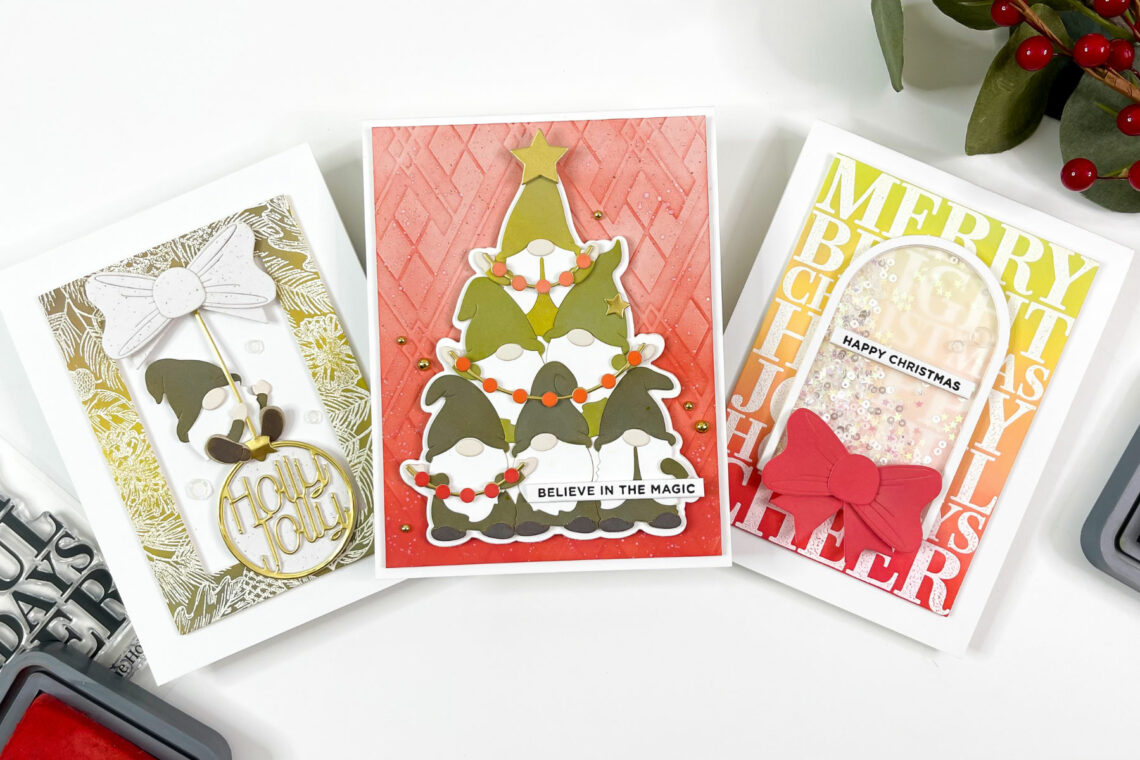
Believe in the Magic cards with Babi
Hello crafty friends! This is Babi and I am so excited to share with you my first Guest Design projects featuring the Gnome for Christmas collection.
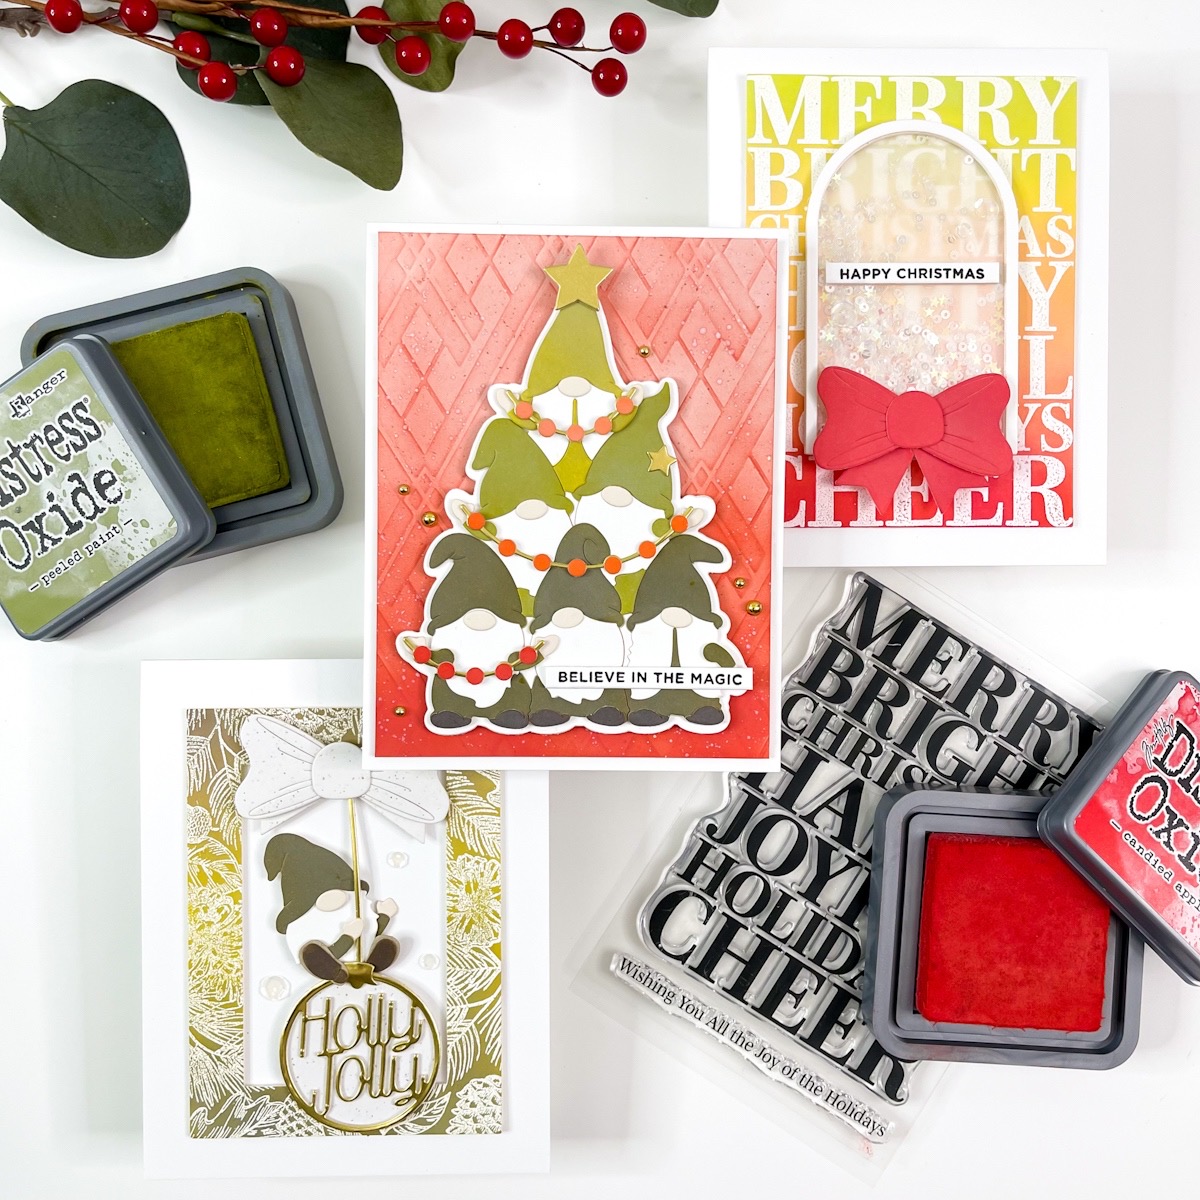
For the first project, I used Argyle Socks embossing folder and Gnome Tree dies to create a card in traditional Christmas colors.

- Trim white cardstock to 4×5.25” to create the main panel.
- Blend Candied Apple and Festive Berries Distress Oxide over the panel.
- Once the ink dries, emboss the panel using Argyle Socks embossing folder.
- Die cut Gnome Tree in white cardstock.
- Blend Forest Moss, Peeled Paint, and Twisted Citron Distress Oxide onto the gnome clothes. Blend Ground Express onto the shoes and Tattered Rose Distress Oxide on the Gnome’s nose and hands.
- Die Cut the garland in white cardstock. Then, blend Candied Apple, Ripe Persimmon, and Spiced Marmalade to color the pieces.
- Die Cut the stars in gold cardstock.
- Adhere the layers together with glue.
- Stamp a sentiment from Mini Christmas Greetings set. Set onto white cardstock in black ink and add it to the gnome tree.
- Add sparkles to embellish.
- Glue the panel onto a 4.25×5.5” card base.
For my second card, I decided to create a background with Joyful Words stamp and a shaker card featuring Essential Arches dies.

- Trim white cardstock to 3.75 x 5” to create the main panel.
- Stamp Joyful Words with an embossing pad and heat emboss in white embossing powder.
- Blend Candied Apple, Peeled Paint, and Twisted Citron over the panel.
- Die Cut two dies from Essential Arches set together to create a frame.
- Add foam tape and acetate frame to the front of the frame to create a
- Sprinkle mini sequins and confetti.
- Back the window with vellum paper.
- Glue the shaker window on the panel
- Die cut the bow from Holly Jolly Gnome die set.
- Blend the bow pieces with Candied Apple Distress Oxide. Glue the pieces together and add them to the frame.
- Stamp a sentiment from Mini Christmas Greetings set. Set onto white cardstock in black ink and glue it in the center of the shaker frame.
- Glue the panel onto a 4.25×5.5” card base.
For my last project, I created a card in green and beige using Holly Jolly Gnome die and Pretty Pine Background.
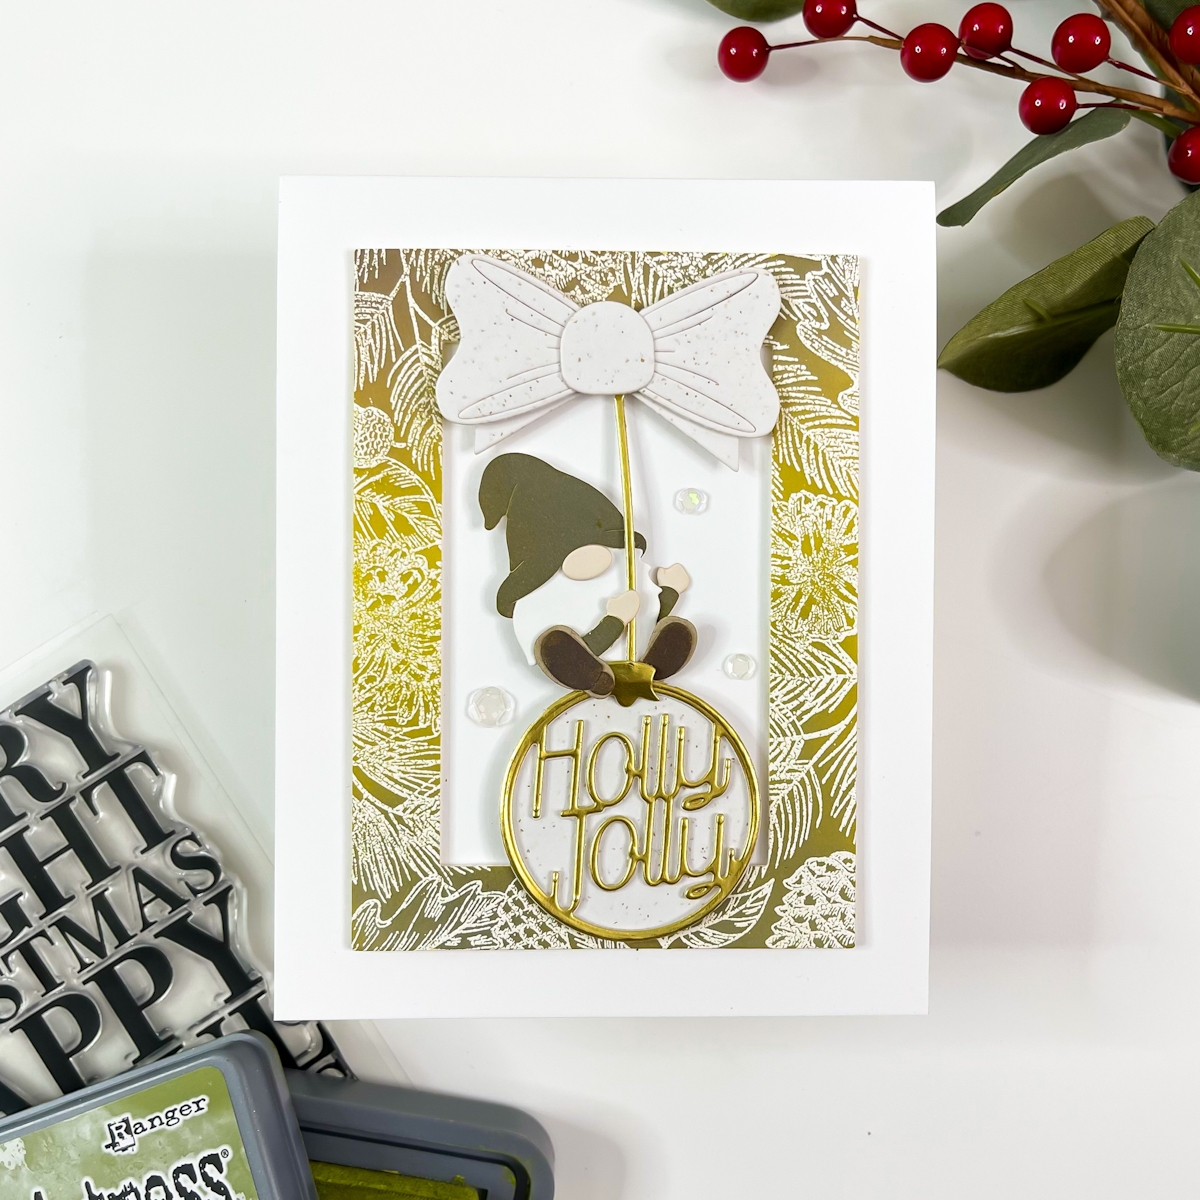
- Trim white cardstock to a 3.5 x 4.75” size to create the main panel.
- Stamp Pretty Pine Background with an embossing pad and heat emboss in white embossing powder.
- Blend Forest Moss, Peeled Paint, Crushed Olive over the
- Use one rectangle die from Precision Layering A2 B set to create a frame.
- Die Cut Holly Jolly Gnome in white cardstock.
- Blend Forest Moss Distress Oxide onto the gnome clothes. Blend Ground Express onto the shoes and Tattered Rose Distress Oxide on the Gnome’s nose and hands. Glue the gnome parts together.
- Cut the Holly Jolly ornament in gold cardstock and back it with a beige cardstock.
- Cut the bow in beige cardstock and assemble the pieces.
- Glue the frame onto a 4.25×5.5” card base.
- Glue the gnome, bow and ornament with a foam stamp in the center of the frame.
- Finish it with sequins.
Thanks for stopping by. I hope you feel inspired to create beautiful Christmas projects using this amazing collection. Hope to see you soon!
Spellbinders Supplies:

Babi


6 Comments
Teresa
Very cute Ideas. I love the gnomes.
Márcia Kamano
Wow! Beautiful cards!
Love the colors!
Márcia
Renata
Congratulations, Babi. How beautiful!!! Your art is truly an inspiration. Ah… I fell in love with the gnome on top of the ball. Very cute!
Carmen Regina de Paula
Wow!!!! Very beautiful!!! Congrats Babi
Regina
Amazing cards! Babi Kind, congratulations! I loved it.
Cristiane Juliani
Lindo trabalho Babi! Adoro seus trabalho e adoro tudo da Spellbinders… Então, parceria perfeita!
Adoro