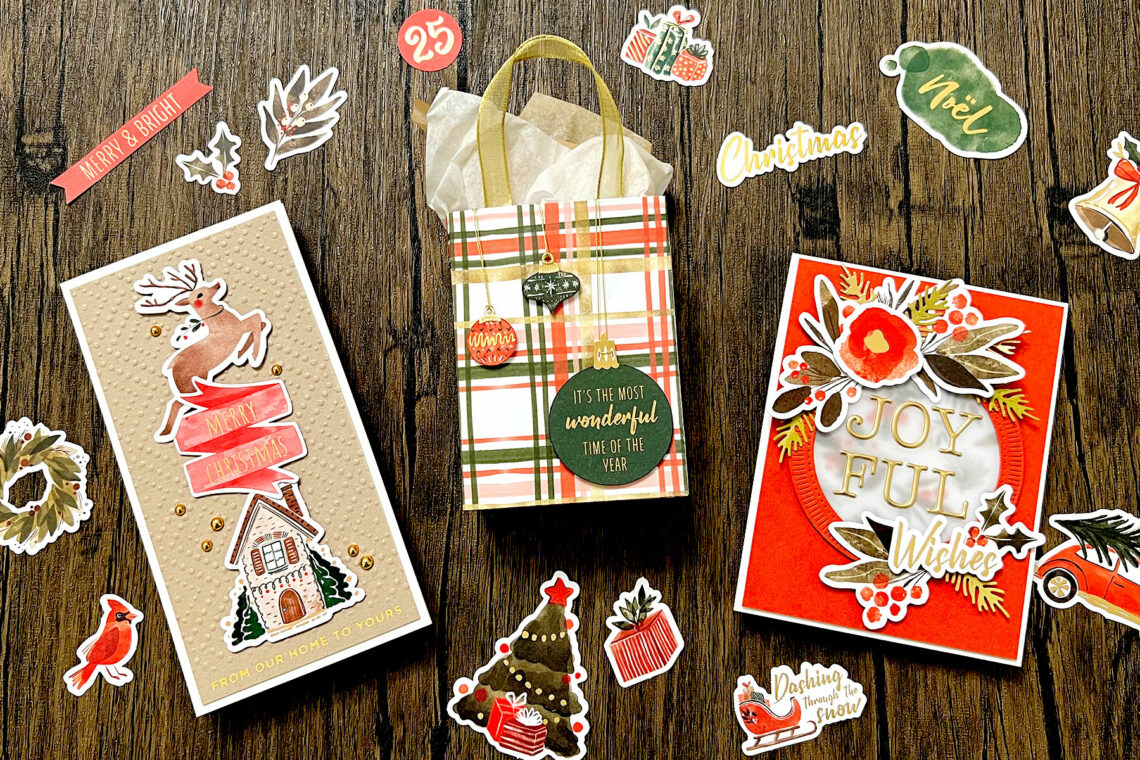
Winter Wonderland Inspiration With Allison Frazier
Hello, crafty friends! This is Allison Frazier, and I am beyond thrilled to be guest designing on the Spellbinders blog today. I have several projects to share with you featuring the fabulous Winter Wonderland Collection. This collection has everything you need to make cards, tags, scrapbook layouts, gift packaging – the possibilities are endless!
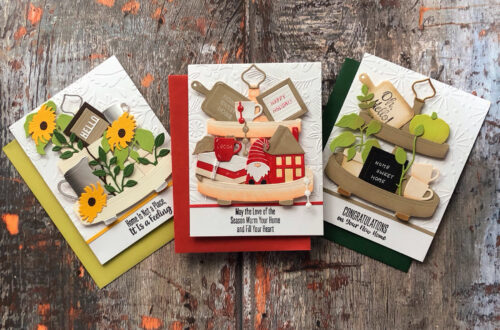
Joyful Wishes
The different products in this collection mix and match so well with each other. Some of my favorites include the patterned paper with leaves and berries and the matching Printed Die Cuts. I wanted to use these together on one card, but I wanted to tone it down a bit. I did that by using vellum.
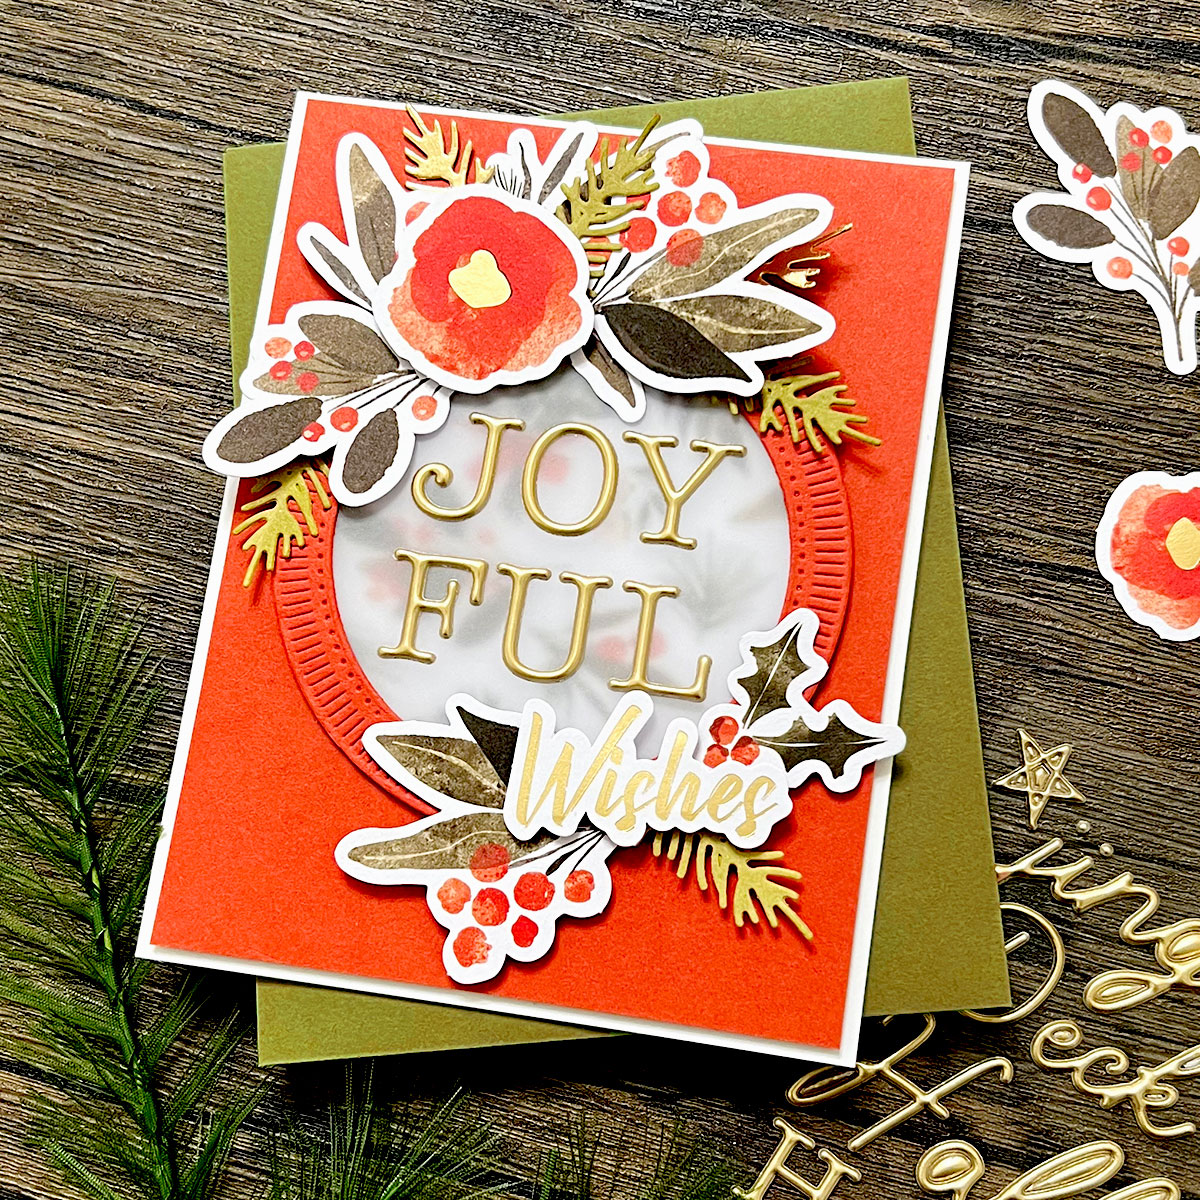
First, I cut a piece of vellum using one of the circle dies from the Fluted Classics Circles set. I then cut a fluted frame from a red piece of card stock using the same die set. I adhered the vellum circle to the back of this frame.
I took a white A2 card base and glued a piece of patterned paper to the middle of the card. I trimmed a piece of red card stock to 4” x 5.25” and then cut a circle in the middle. I adhered this red panel on top of the card base so that the patterned paper showed through the circle. I then lined my red circle frame on top of the red panel and adhered it with foam tape. I took the “Joyful” letters from the Christmas Glitter Sentiment Sticker set and arranged them on the vellum circle, separating the word onto two lines. After that, it was just a matter of arranging all of the beautiful Printed Die Cuts around the circle. I also added the “Wishes” from the Printed Die Cut Sentiments set, as well as some die cut pine branches that I made using the Christmas Blooms die set. I love how this card turned out!
Whimsical Mini Slimline
For my second card, I wanted to create something a bit more whimsical looking. There are a lot of options with the Printed Die Cut set, from snowmen to gingerbread houses. When I saw the reindeer die cut, I immediately pictured it flying over a house, and that’s how I came up with this mini slimline design.
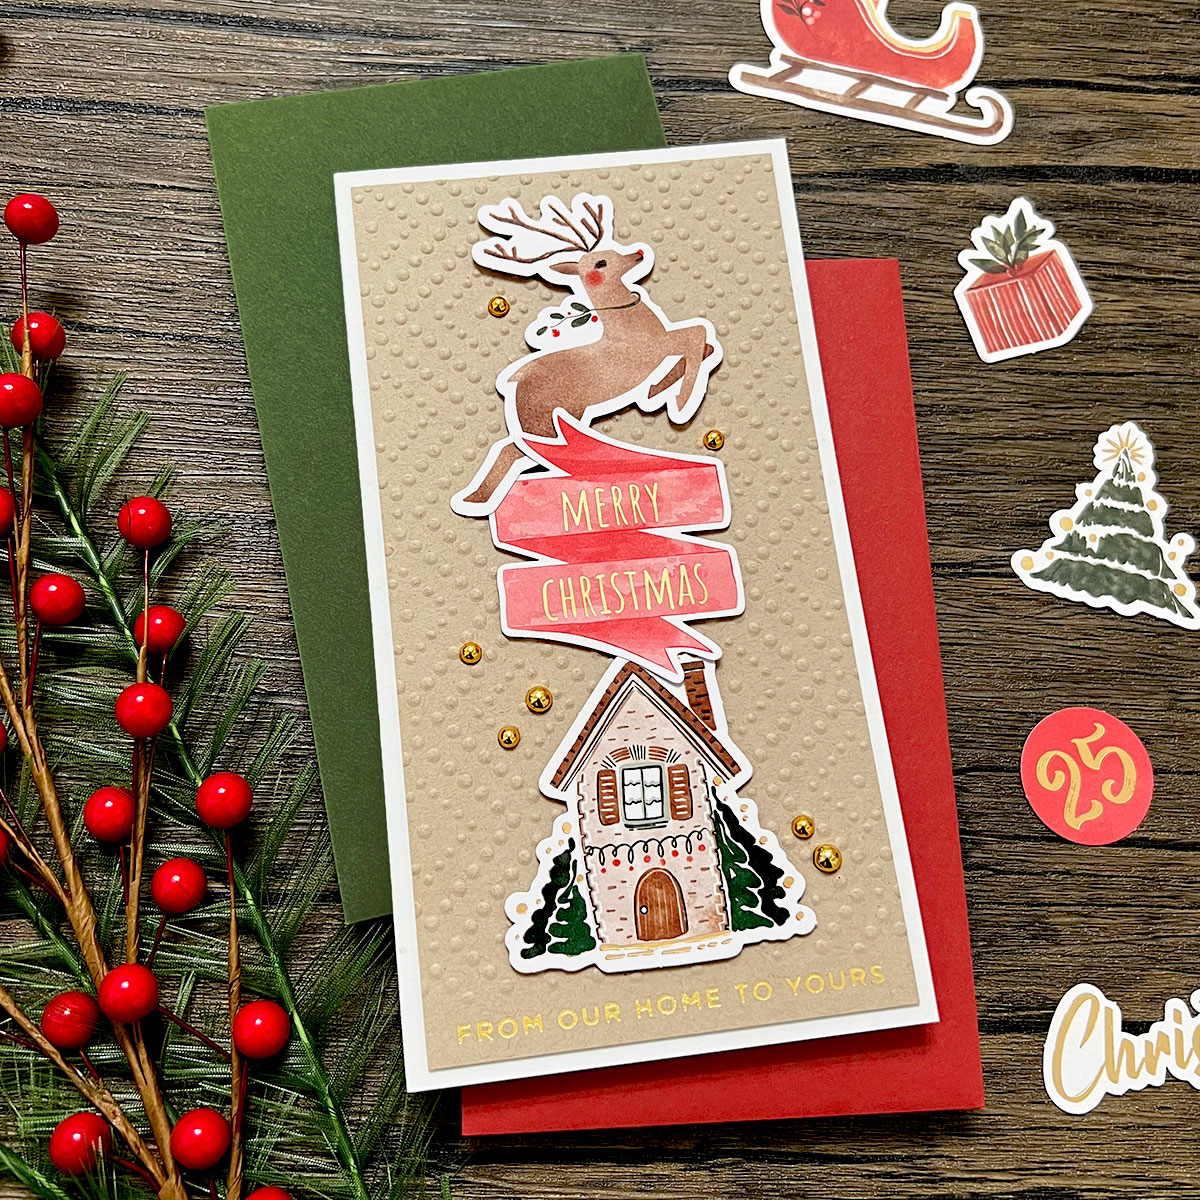
I trimmed a piece of kraft card stock to 3.5” x 6.5” and foiled the “From Our Home to Yours” sentiment towards the bottom with Matte Gold Foil. This sentiment comes from the Mini Christmas Sentiments Strips Glimmer Hot Foil & Die Set. Once I finished foiling the sentiment, I remembered a really cool technique that I had seen Yana Smakula demonstrate recently – partial embossing of a panel. You can see here how she did this using some of Spellbinders’ new 3D embossing folders. I figured that it would work just as well with a regular embossing folder, so I tried it with the new Dazzling Dots Embossing Folder. It worked great! I adhered the card panel to a white card base, and then I popped the die-cut elements up on foam tape. I finished the card with some Fashion Gold Embellishments.
Plaid Gift Bag
I love holiday wrapping paper and gift bags, and I’m always drawn to plaid designs. So, I knew I had to make something with this beautiful plaid paper. The great thing about this Winter Wonderland Paper Pad is that one sheet is just big enough to fit the Gift Bag die. You do need to cut it twice, and I tried to make sure that I cut both pieces the same way so that my pattern would match up on the sides. I was pretty successful!

There is a great tutorial for putting together the gift bag – just watch the video for tips. This patterned paper is thinner than regular card stock, so I was able to use double-sided tape for the bottom of the bag instead of hot glue. And while the paper may be thinner, it is thick enough for the bag to feel solid and secure. The other difference between my bag and the video tutorial is that I used a wired ribbon for my handles.
To decorate my bag, I used the large green ornament from the Printed Die Cut Sentiments set, along with two small ornaments from the Printed Die Cuts set. To make the small ornaments look more consistent with the large one, I trimmed off the white border around the die cuts. I also ran a matching Copic marker around the edges of all three ornaments to eliminate the white edge that you would see from the side. I cut ornament caps for the small ornaments from gold card stock using dies from the Holiday Express die set and the Holiday Decorations die set. To finish the bag, I looped some gold thread through the ornament caps and taped the thread to the inside of the bag. I did adhere the ornaments to the bag with foam tape to keep them secure.
Spellbinders Supplies:

Other Supplies
Vellum, red card stock, heavyweight white card stock, kraft card stock, gold card stock, gold ribbon, foam tape, double-sided tape.
Thank you so much for joining me today on the Spellbinders blog. I hope these cards inspire you and put a smile on your face. To see more inspiration from me, you can find me on Instagram as well as my blog.
2 Comments
chrystalwycoff
Absolutely Adorable Cards.
Joan Bardee
love each of these!!