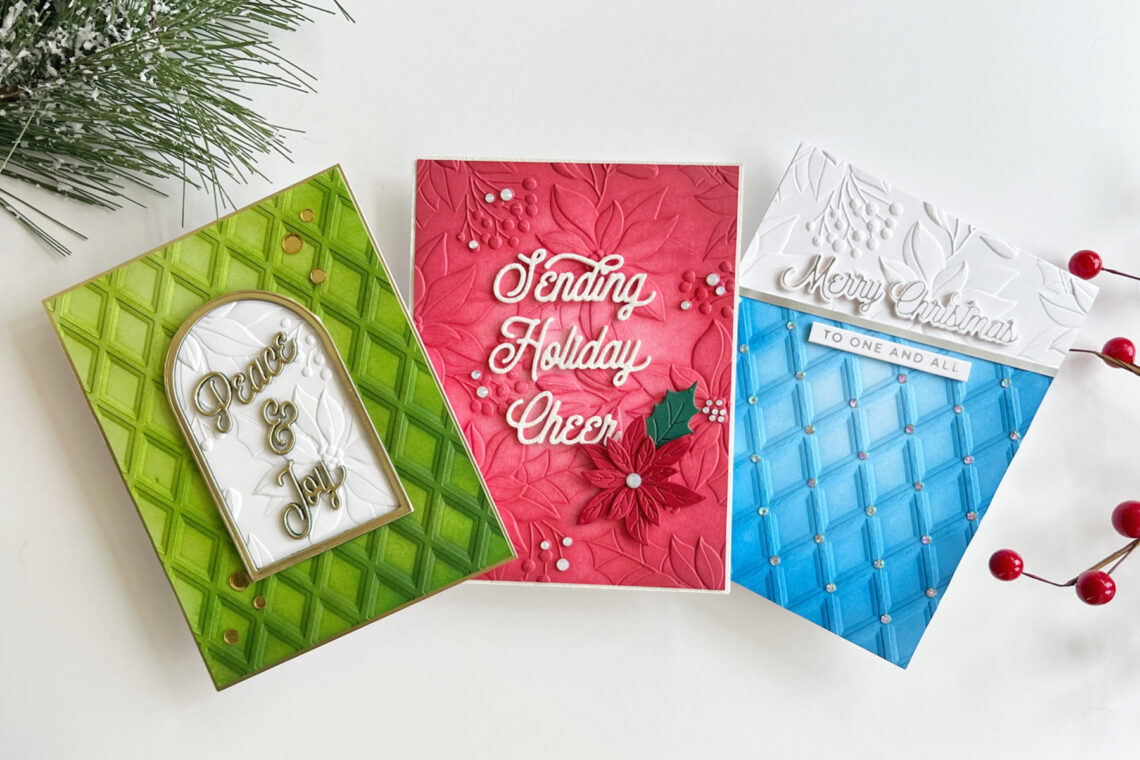
Ink Blending Over Holiday 3D Folders with Jennifer Kotas
Hello! I’m Jen Kotas from whostolemyglitter.com and I’m happy to be here today to share three cards featuring ink blending over the new Holiday 3D Folders. There are two 3D folders in the collection that feature such wonderful texture and dimension.
I ran white cardstock and the Holiday 3D Folders through my Platinum 6 Die Cutting Machine before adding ink. I love the way the ink settles into all the layers and grooves of a 3D embossed design.

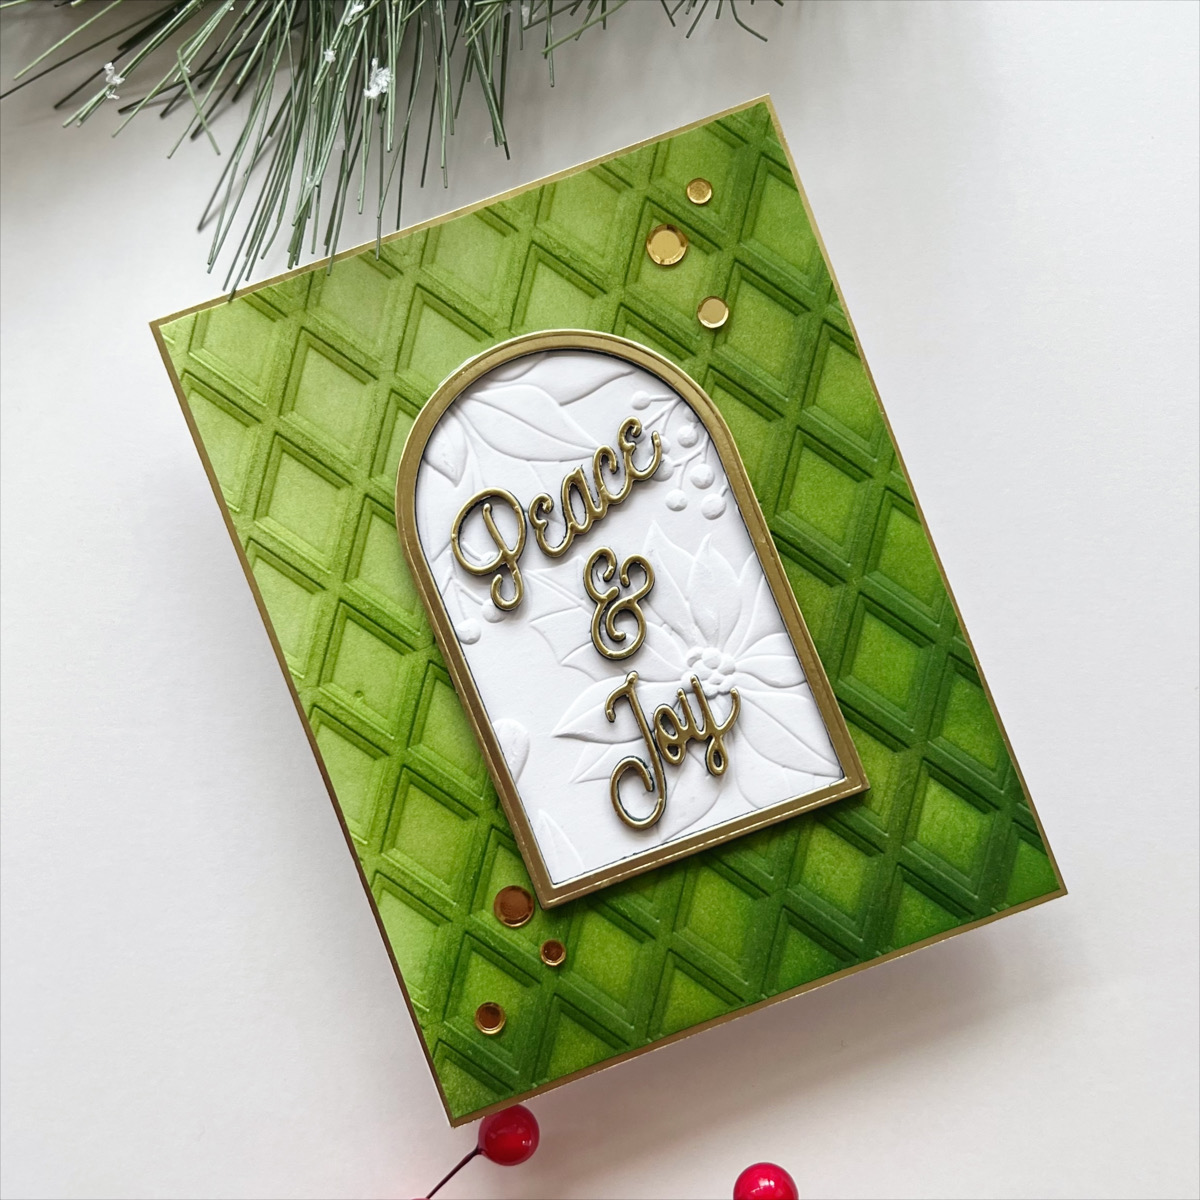
- Die cut white cardstock with largest Precision Layering A2 A Etched Die then run through Platinum 6 Machine with Scenic Poinsettia 3D Folder.
- Blend a light red dye ink over the entire panel, then a medium ink almost to the center and a dark ink only on corners and edges. This creates a glow in the center.
- Die cut the sentiment from Mix and Match Holiday Greetings Etched Dies out of white glitter cardstock once and white cardstock three times. Adhere together with liquid glue and place on the panel.
- Die cut the poinsettia and leaf from Holiday Blooms Etched Dies out of red and green cardstock and place on a panel with liquid glue, adding a small foam square to pop up the leaf.
- Add Color Essentials Gems in Opal to the die-cut poinsettia, the background poinsettias, and over some of the berries.
- Add white glitter cardstock to an A2 Top Fold Card then add a panel.
- Die cut white cardstock with largest Precision Layering A2 A Etched Die and run through Platinum 6 Machine with Dimensional Diamonds 3D Folder.
- Blend a light green dye ink over the entire panel, then a medium ink diagonally across most of the panel and a dark ink only at the bottom right corner and edges.
- Die cut two Essential Arches Etched Dies together once out of Gold Mirror Cardstock and three times from green cardstock. Adhere together with liquid glue.
- Die cut the larger arch only out of white cardstock once and emboss it with Scenic Poinsettia 3D Folder. Adhere behind the frame and then to the panel.
- Die cut the sentiment from Mix and Match Holiday Greetings Etched Dies out of Gold Mirror Cardstock once and white cardstock three times. Adhere inside the frame.
- Add Gold Mirror Cardstock to an A2 Top Fold Card then add a panel.
- Place Gold Smooth Discs Color Essential Sequins across the card with liquid glue.
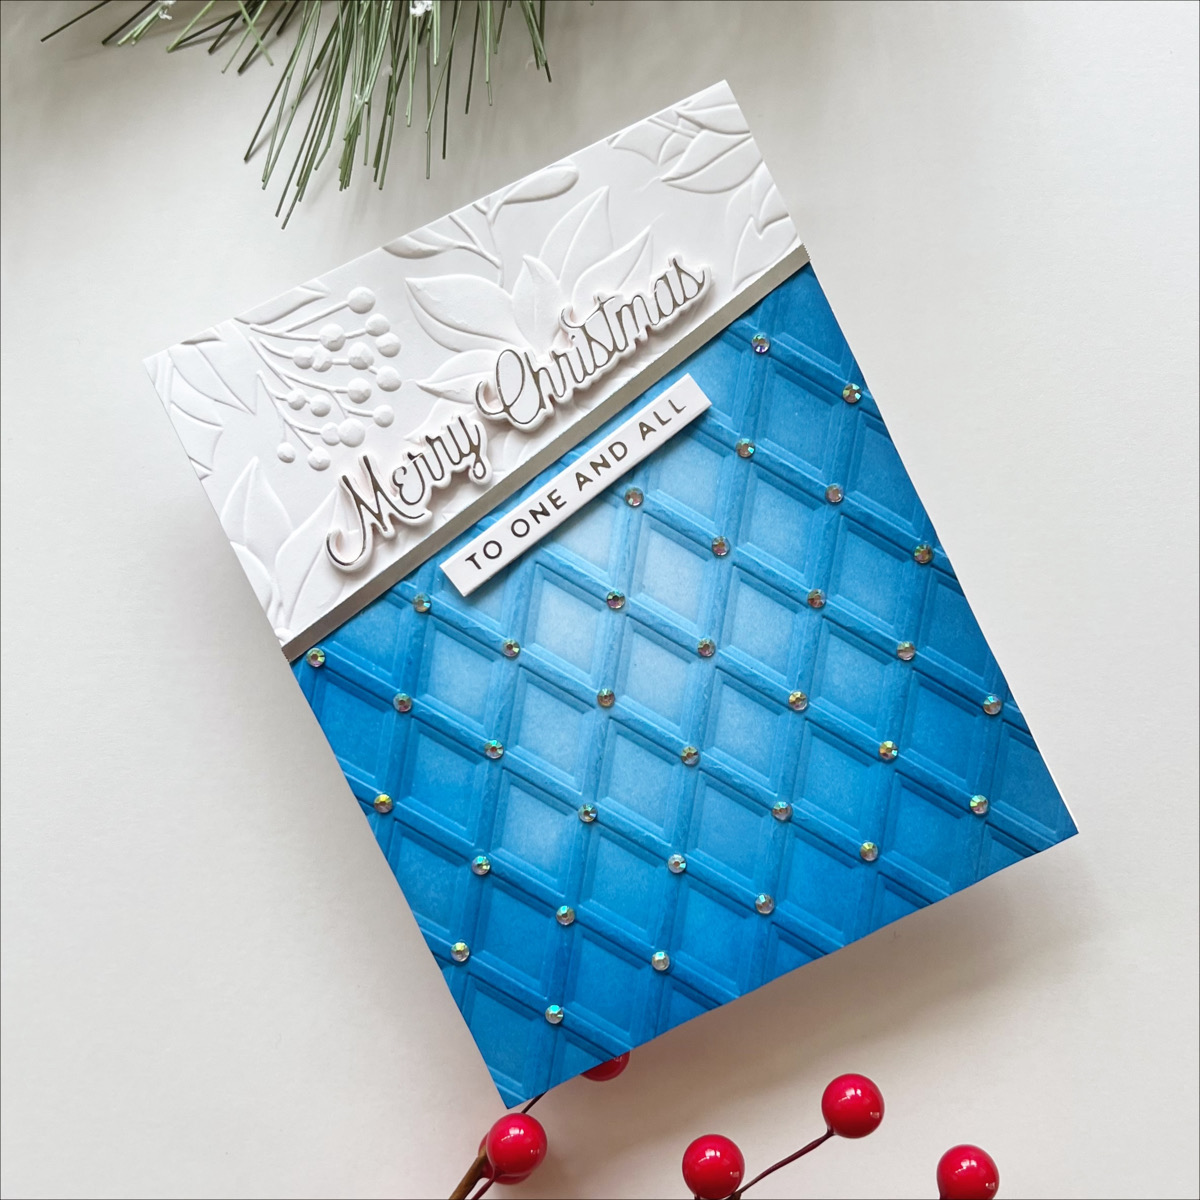
- Die cut two pieces of white cardstock with the largest Precision Layering A2 A Etched Die and emboss one with Dimensional Diamonds 3D Holiday Folder and the other piece with the Scenic Poinsettia 3D Holiday Folder.
- Add a light blue dye ink over the entire diamond embossed panel, then a medium ink almost to the center and dark ink only on corners and edges. This creates a glow in the center.
- Cut the top portion of the diamond panel off at an angle and adhere to poinsettia panel. Place a very thin strip of Silver Mirror Cardstock where they meet. Add panel to an A2 Top Fold Card.
- Hot foil the sentiments from Merry Glimmer Sentiments and Glimmer Wishes Glimmer Hot Foil Plate and Die Sets with Silver Hot Foil Roll. Die cut with coordinating dies and sentiment strip die for the small one. Cut three blanks of each and attach behind hot foiled die cuts for dimension.
- Adhere sentiments to the card and place small jewels at each intersection on the embossed panel.
Spellbinders Supplies:

Other Supplies
Neenah Solar White Cardstock, Hero Arts Core Inks, Hero Arts Cranberry Cardstock, Hero Arts Pine Cardstock, Bearly Art Precision Glue, Sunny Studios Stamps jewels, blending brushes, thin foam square
I loved combining the two different Holiday 3D Folders on one card. You can see more card-making tutorials on my blog, Who Stole My Glitter or visit my Instagram page for more inspiration. Thanks for visiting!
Reverse Foiling Ideas with Michelle Short and Essential Glimmer Solid Shapes Collection
Mix Your Wax Seals with Glitter!