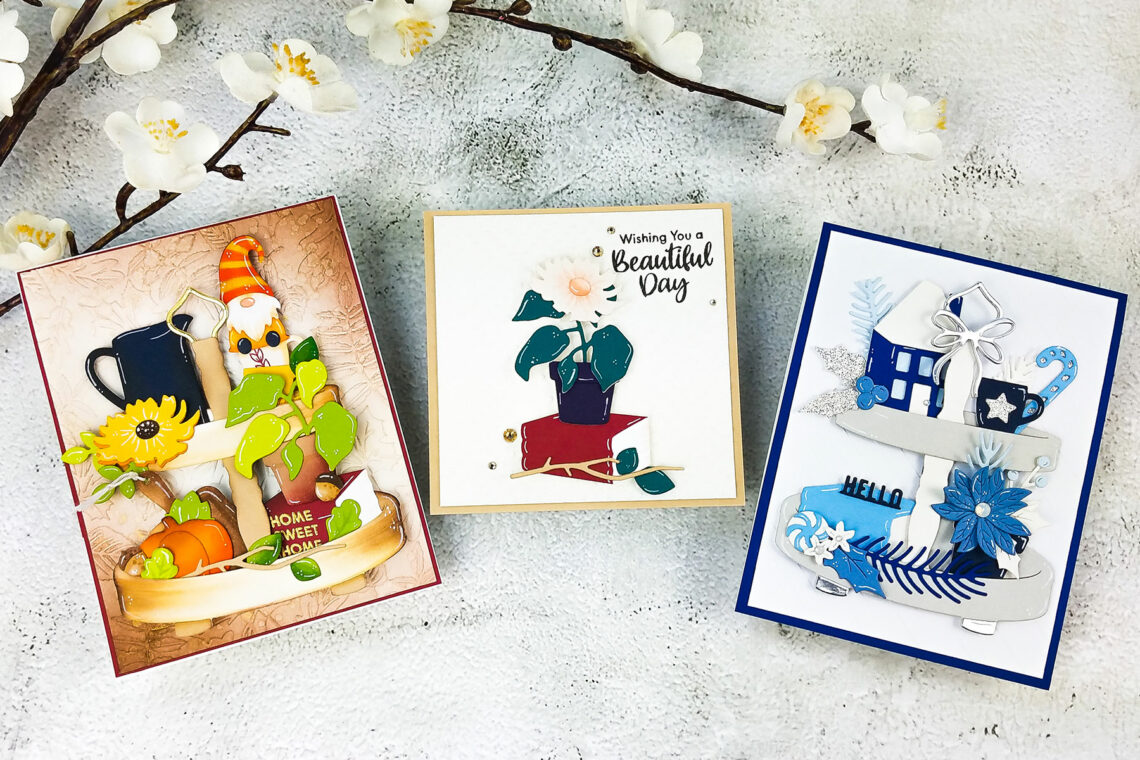
Tiered Tray Collection Inspiration with Tiffany Pryce Russom
Hi crafty friends! I’m Tiffany Pryce Russom, and I am so excited to be guesting on the Spellbinders blog! Today, I am featuring the Tiered Tray Collection by Becky Roberts. The collection is so creative and gives you the opportunity to try out this popular home decor trend on paper. This set mixes and matches with many items in your Spellbinders stash so it is easy to personalize for all of your loved ones. I took inspiration from my two favorite cardmaking seasons – Autumn and Christmas – to create my inspiration.
Card 1: Autumn-Inspired Tray
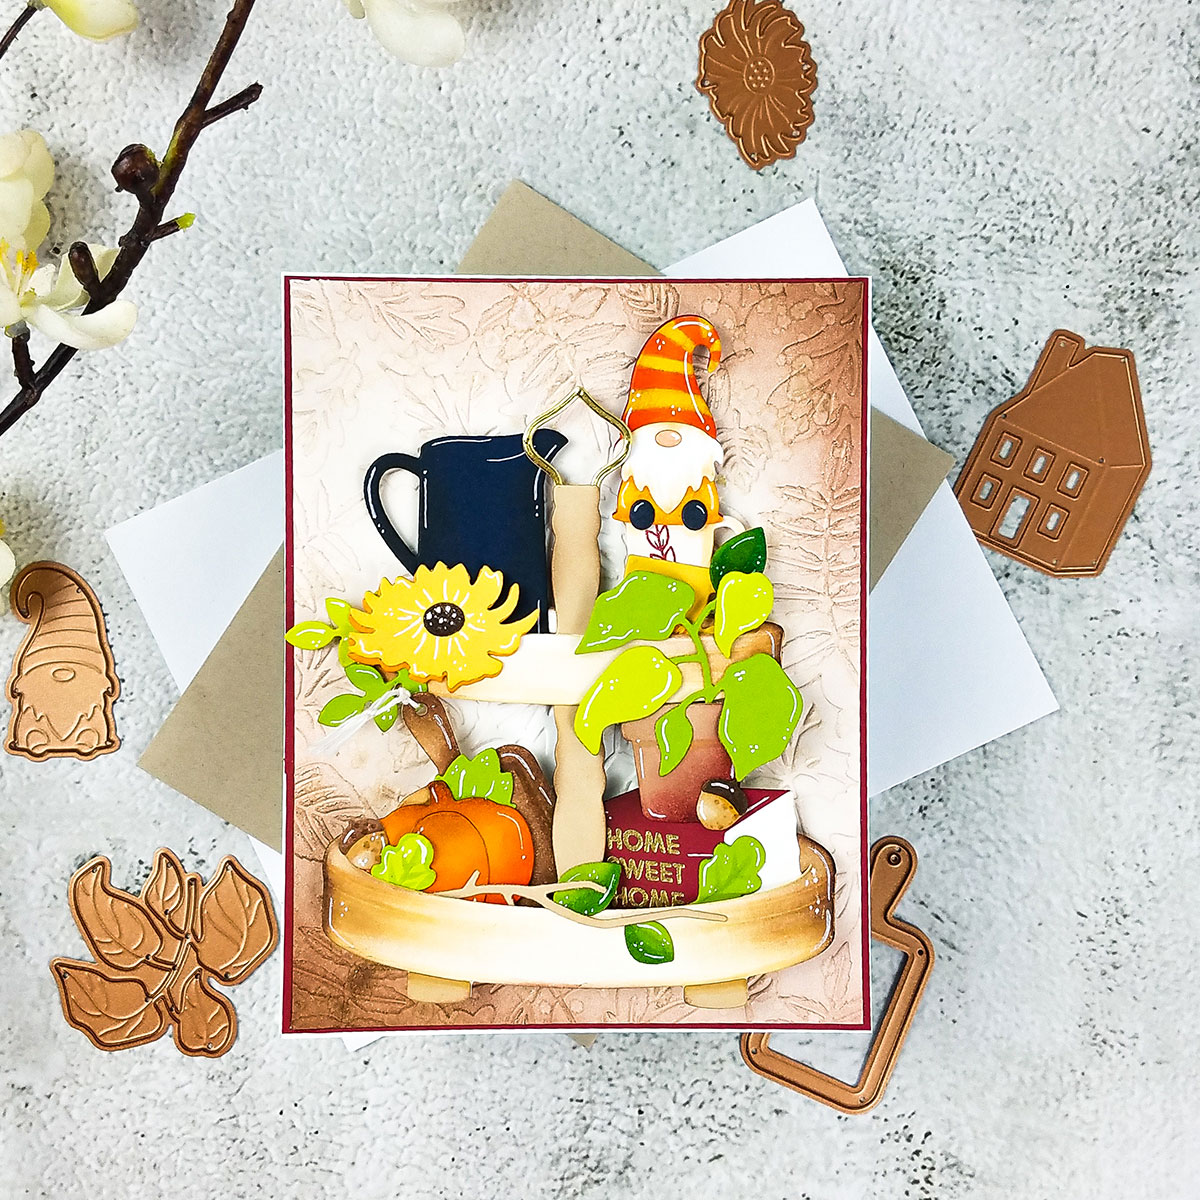
To start, create an A2 card base measuring 4.25 x 5.5 inches from heavyweight, white cardstock. Adhere a panel of Crimson cardstock trimmed to be slightly smaller on top. Then using the Falling Leaves embossing folder, emboss a panel of Cream cardstock. Lightly ink blend brown dye ink on the edges and splatter with gold metallic watercolor. Adhere to the card front.

Next, die-cut all of the pieces for the tiered tray from various colors of cardstock. I added dimension and details to each item with ink blending, Copic markers, and a white gel pen. The card is easy to assemble; the die cutting and detail work take the longest. After arranging all of the die cuts and adhering the tray together with liquid glue, I added Pop-Up Foam for added dimension. I recommend using liquid glue to give yourself some wiggle room when adhering each element.

One way to add additional detail is to create your own layering dies. Use the embossed detail lines as guides for where to cut. For example, on the pumpkin, I die-cut two pumpkins and cut out the middle section on one pumpkin to layer on the other. For the book, I separated the cover from the pages to create a more dimensional book. I also cut the potted plant leaves from two greens and mixed the leaves for color variation.

I decided to leave off the sentiment for now. I will add it in the future when an occasion arises. The sentiment stamp set included in the collection contains a wide variety of sentiments from happy birthday to season’s greetings.
Card 2: Holiday-Inspired Tray

To start, create an A2 card base from heavyweight, white cardstock. Adhere a panel of Cosmic Sky cardstock on top. Next, emboss a panel of white cardstock with a diagonal stripe embossing folder. I used a now-retired Spellbinders embossing folder, but there are other products in the shop that are similar.
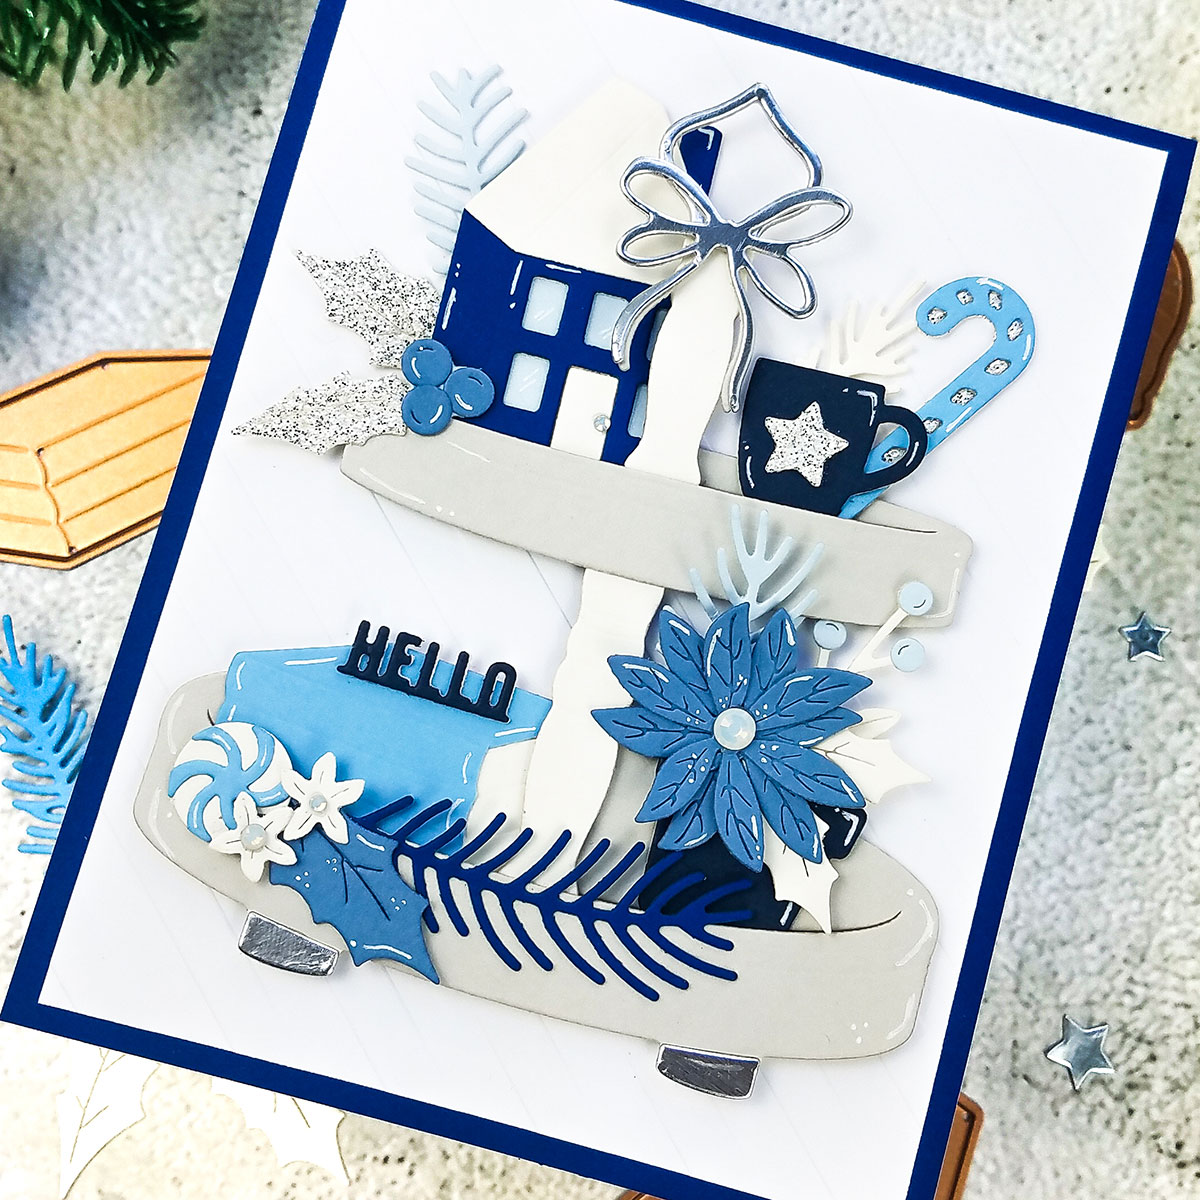
Similar to the last card, die cut all of the pieces for the tray from various cardstock. I used a monochromatic color palette to give an icy, wintery look. I mixed several holiday products in my stash with the Tiered Tray collection to create a fun, holiday-inspired tier. I added a little detail with a white gel pen and embellished it with Color Essential Gems.
Card 3: Not a Tray!

For my last card, I wanted to create a clean and simple design using only the decor items. Even without the tray, these dies can create adorable card designs. On a 4.25 inch square card base, adhere a panel of Dune cardstock. On Cream cardstock trimmed to 4×4 inches, stamp a sentiment from the Tiered Tray Sentiments Clear Stamp Set in dark brown ink. Emboss the panel with the Dazzling Dots embossing folder and adhere to the card front.

Next, die-cut all of the pieces for the book, potted plant, and branch from various colors of cardstock. Add slight shading with Copic markers and detail lines with a white gel pen. Pop the image up with foam tape for added dimension. Lastly, embellish with gold gems. I think this sweet card is a quick way to brighten up someone’s day.
Spellbinders Supplies:

Other supplies
Catherine Pooler dye inks, various Copic markers, white gel pen, Gansai Tambi Starry Colors metallic watercolor, white twine, WOW metallic gold-rich embossing powder, The Stamp Market diamond glitter cardstock
Thank you so much for stopping by the blog today. As you can see, the sky’s the limit with this unique collection, and I hope I’ve inspired you to make it your own. For lots more inspiration, please stop by my blog or Instagram. I love making new friends, so please follow and reach out and say hello! Have a wonderful day!

August 2019 Small Die of the Month is Here – Pack It Up

Sealed by Spellbinders with Marie Heiderscheit