Sealed by Spellbinders with Marie Heiderscheit
Hello, friends! It is Marie here again from Marie Nicole Designs. I am sharing the new Sealed Collection with you. I’m so excited about this! This collection is full of everything you need to get started with wax seals. I have been a lover of wax seals ever since I was in high school, and I have a small collection of seals already. A few vintage-style seals are in my collection which were gifted to me from my parents and those have helped to kicked off my love of papercraft in general.
When I saw that Spellbinders was releasing their own wax seals I could not be more excited, and they have done an absolutely fabulous job with these! Let me show you a few projects I made with a Christmas flair to them.
ENVELOPES, OBVIOUSLY
Wax seals have traditionally been used to seal envelopes, packages, and letters. If you want to take your cardmaking to the next level, this is definitely the way to do it!
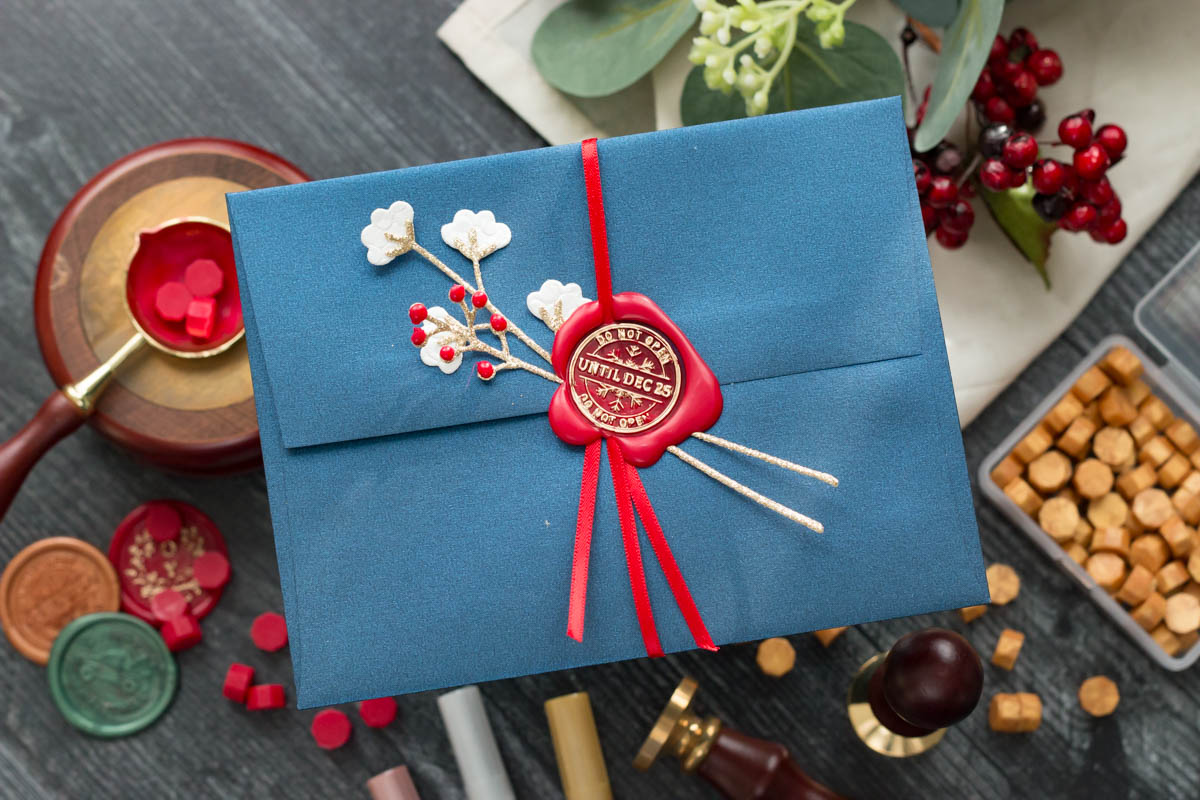
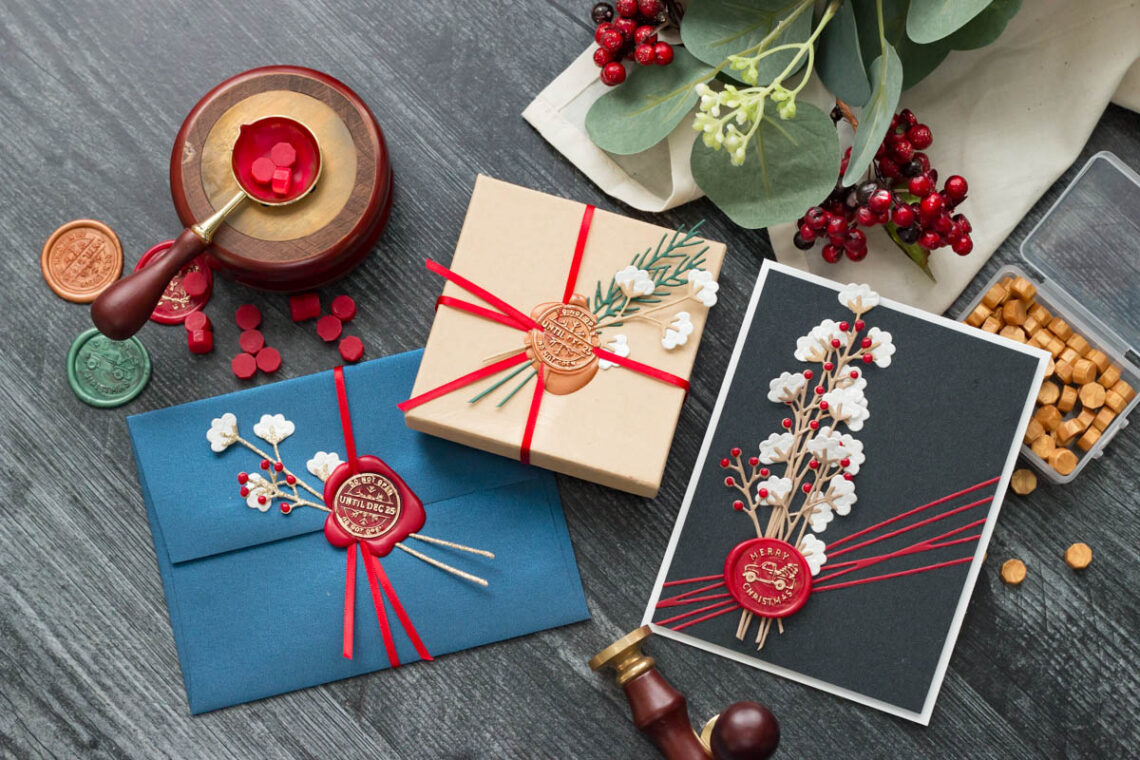
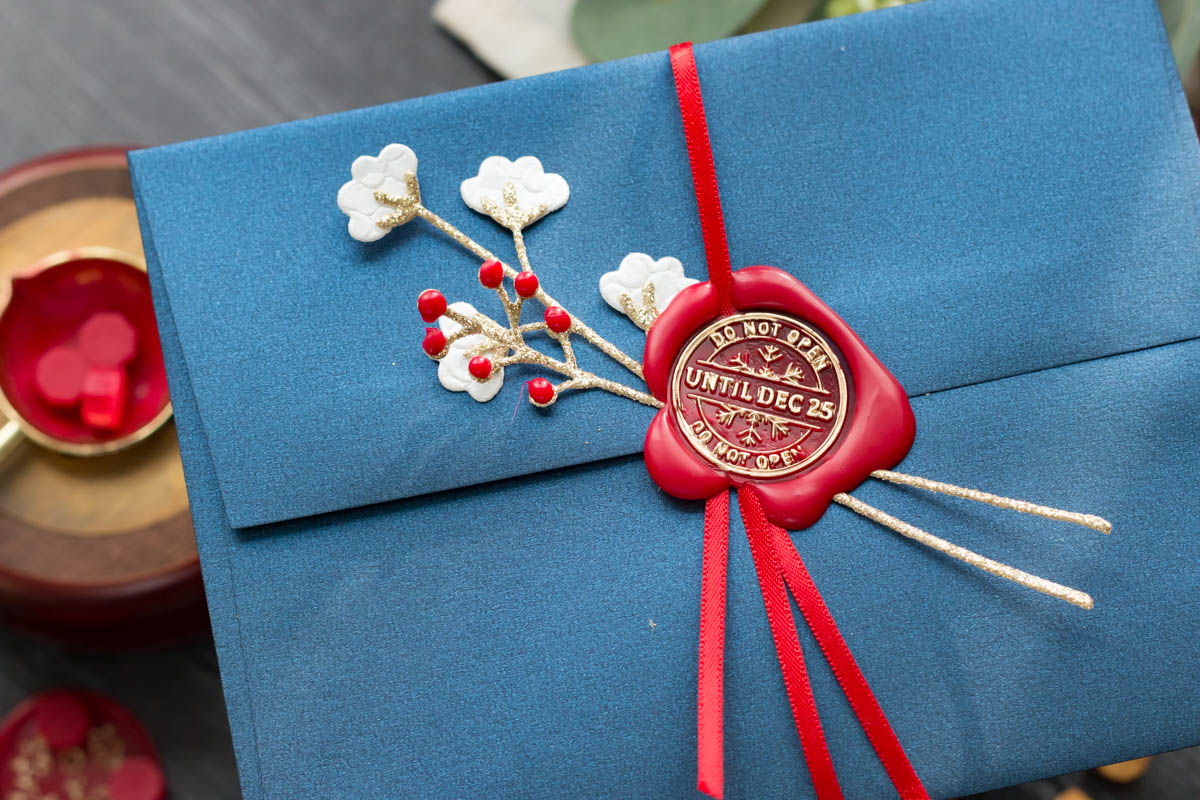
The first project I’m sharing with you today is simply adding a wax seal to an envelope. I used this blue shimmery envelope from Spellbinders and then tied a red ribbon around it. Underneath the ribbon, I slipped in a few die-cut branches that are from a die set also included in
Spellbinders’ new Sealed collection.
On the branch with the red berries, those berries are also drops of hot wax! So not only can you use the wax for seals, but you can add little drops as embellishments. Once I had all my pieces in place, I just added my wax over them and pressed my stamp into the wax.
Here are a few tips and tricks to remember when working with hot wax seals:
- You will be working with a candle flame so be sure your work area is clear of anything flammable and having a well-ventilated area is ideal.
- The spoon that holds the hot wax gets HOT. Please be cautious!
- The wax itself is hot!
- The temperature of your wax CAN make a difference. You want your wax beads to be melted, but if it is bubbling that can indicate that your wax is TOO hot. Remove it from the flame and let it cool for a little bit. If you pour the wax when it is overheated, it could warp your paper and you won’t get as smooth results.
- It does take a few tries to get the hang of pouring your wax seals. You will learn to adjust the number of beads needed depending on how big of a stamp you are working with. The Spellbinders stamps seem to work well with 3 wax beads.
- If you are pouring wax over bulky items like ribbon or flowers, you may need to add an extra wax bead or two.
- You can place your wax seal stamp onto an ice pack until you are ready to place it into your wax. This helps speed up the hardening of the wax and may even give smoother results. Just make sure you wipe any moisture from your stamp before placing it into your wax.
- You can pour the wax directly onto your envelope or paper to seal, OR you can pour them onto a non-stick surface so you can remove the wax seal and use it later as an embellishment with adhesive.
- Once your seal is hardened and completely cool, you can use paint pens to color over the stamped design to make it stand out even more.
PACKAGES, TIED UP WITH STRING
I just love the idea of sealing Christmas gifts using wax seals and this adorable wax stamp from Spellbinders. The stamp says, “Do Not Open Until Dec 25”. For this little gift box, I used a kraft box that I’d saved and I tied it shut with a bit of ribbon. Then, I again added some of the die-cut branches from Spellbinders, and poured wax over the ribbon and the die cuts. You can see with this wax seal, I have a few bits of the edges missing.
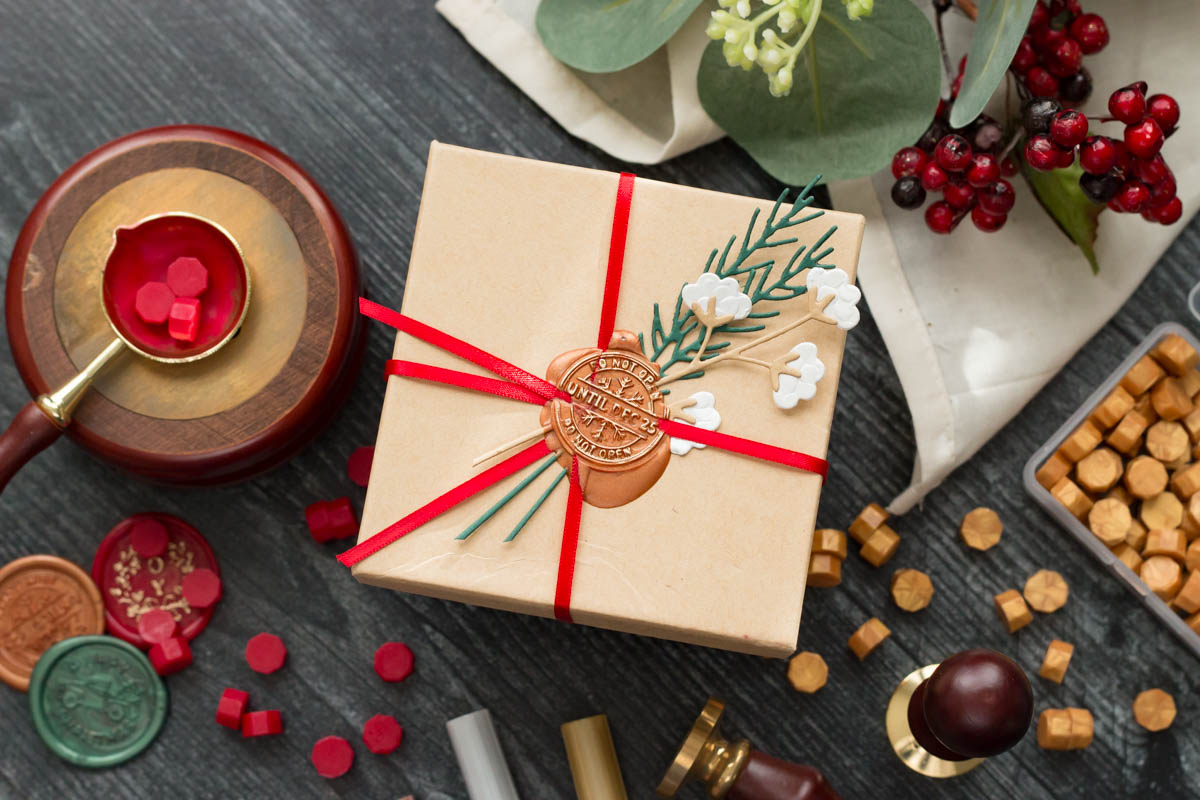
To have more of a crisp stamp, one more wax bead would’ve helped. It’s ok to do a bit of trial and error when working with your seals!
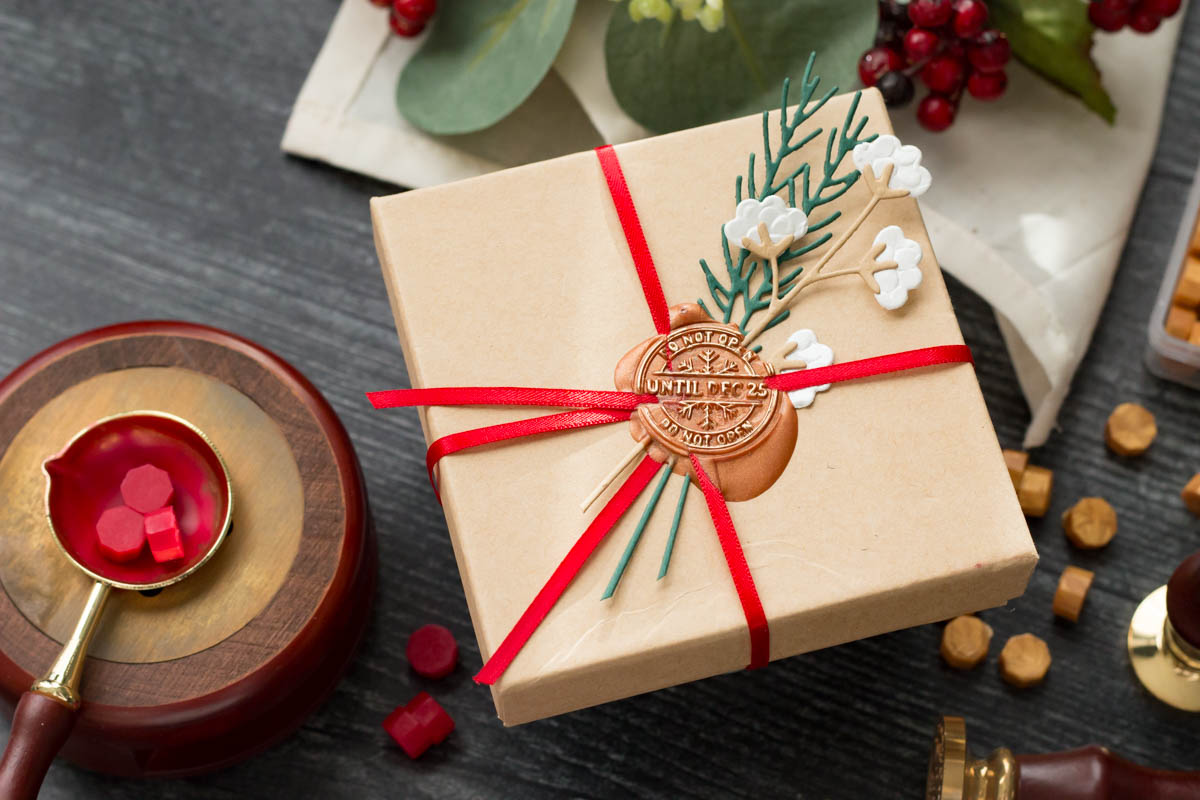
However, even though the edges look a bit rough, this pretty little package still looks stunning with that wax seal on there. I added some gold paint to the seal using one of the paint pens that coordinates with the Sealed collection from Spellbinders. This helps the lettering on the stamp stand out even more!
CARDS, OF COURSE
Last, but not least, you can add these wax seals onto cards. I kept this card fairly simple so that the seal would definitely be the star of the show. I used some of the black, shimmery cardstock from Spellbinders and then added the die-cut strings on an angle across the front. Then, I added all the branches that were die-cut into a cluster on the front. The berries on the branches are again some drops of red wax.
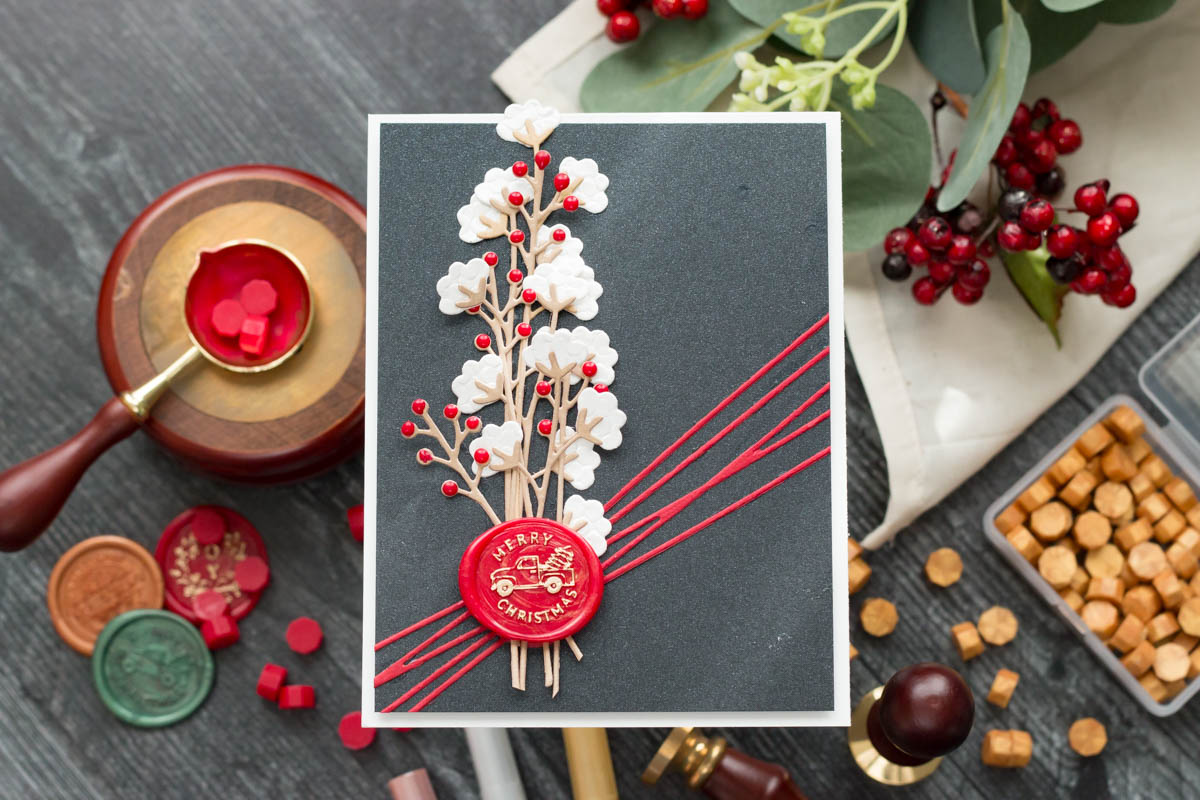
Once all my die-cut pieces were glued down, I added the seal with some foam adhesive. I love making a number of seals and then keeping them on hand to quickly add to projects with adhesive.
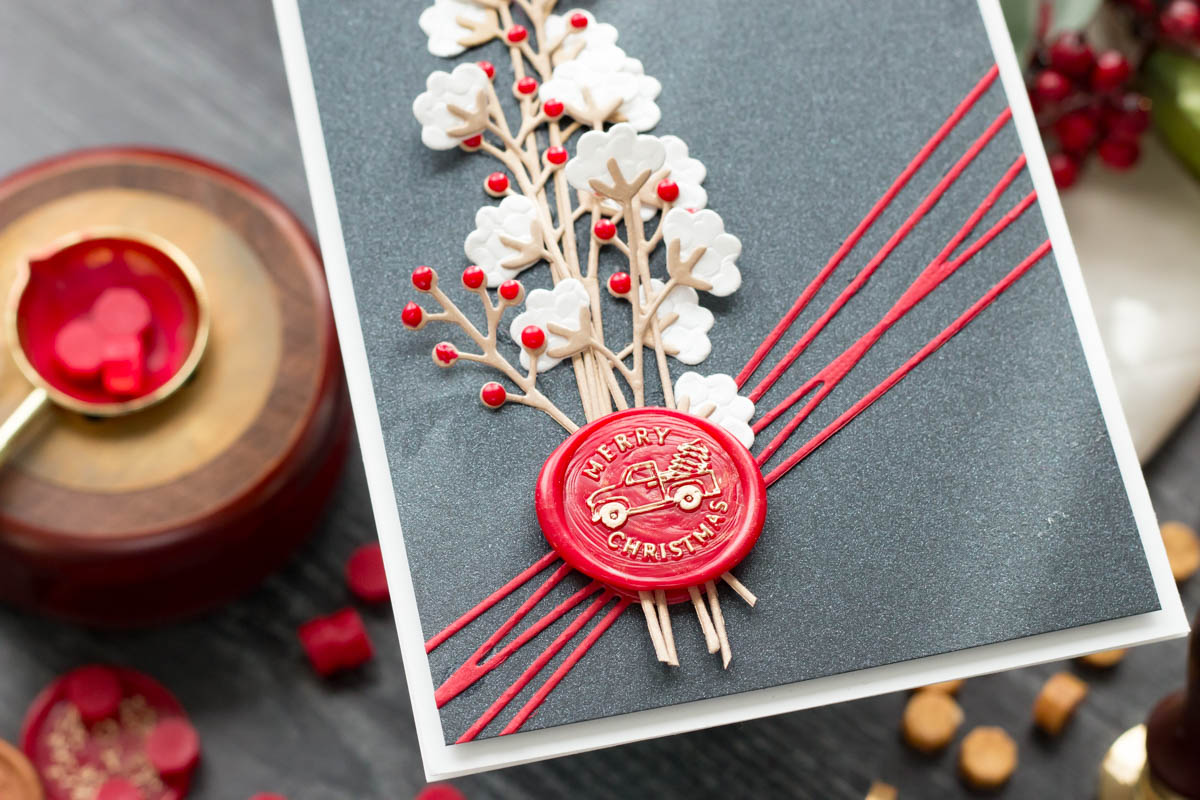
Finally, I added some gold paint to the image on the seal to make it all stand out and be easier to read. So simply stunning!
I hope you enjoyed a look at the Sealed Collection from Spellbinders! I had so much fun creating with these wax seals and I know you will, too.
Until next time,
Marie Nicole
Spellbinders Supplies:

Other supplies
Scissors, adhesive, paper trimmer, ribbon.
2 Comments
Heidi Myers
Ooh, love using wax seals on a present.
chrystalwycoff
Very beautiful. I love all of your envelopes and your cards too. These hot wax seals are very tempting. I want to try them but I can’t get over the fire part because I am afraid that I will burn myself.