
Playing with Postage Edge Shapes
Hello crafty friends! It’s Angela Tombari here, from I Need Confetti, and today I would like to show you what I created with the new Postage Edge Shapes dies by Becca Feeken. I focused on the different shapes of postage dies and created three projects: a DIY ornament and two cards, plus a bonus one that I’ll show you at the end of the post, so keep on reading.
DIY Christmas Ornament
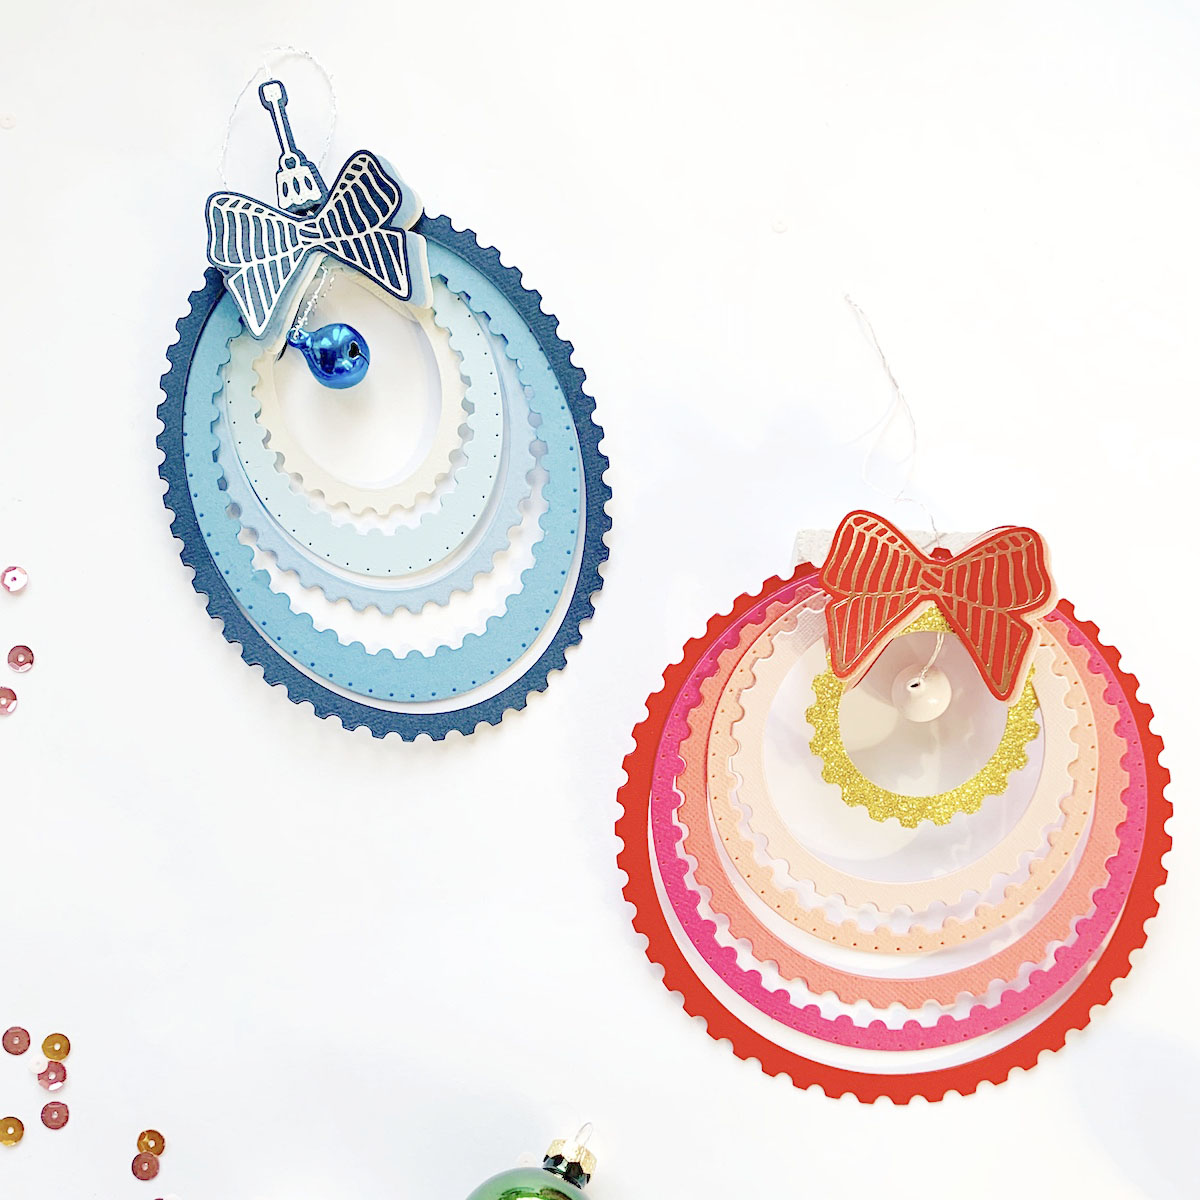
The first project I would like to share is a fun one and very easy to make: a Christmas ornament made with Postage Edge Circles dies.
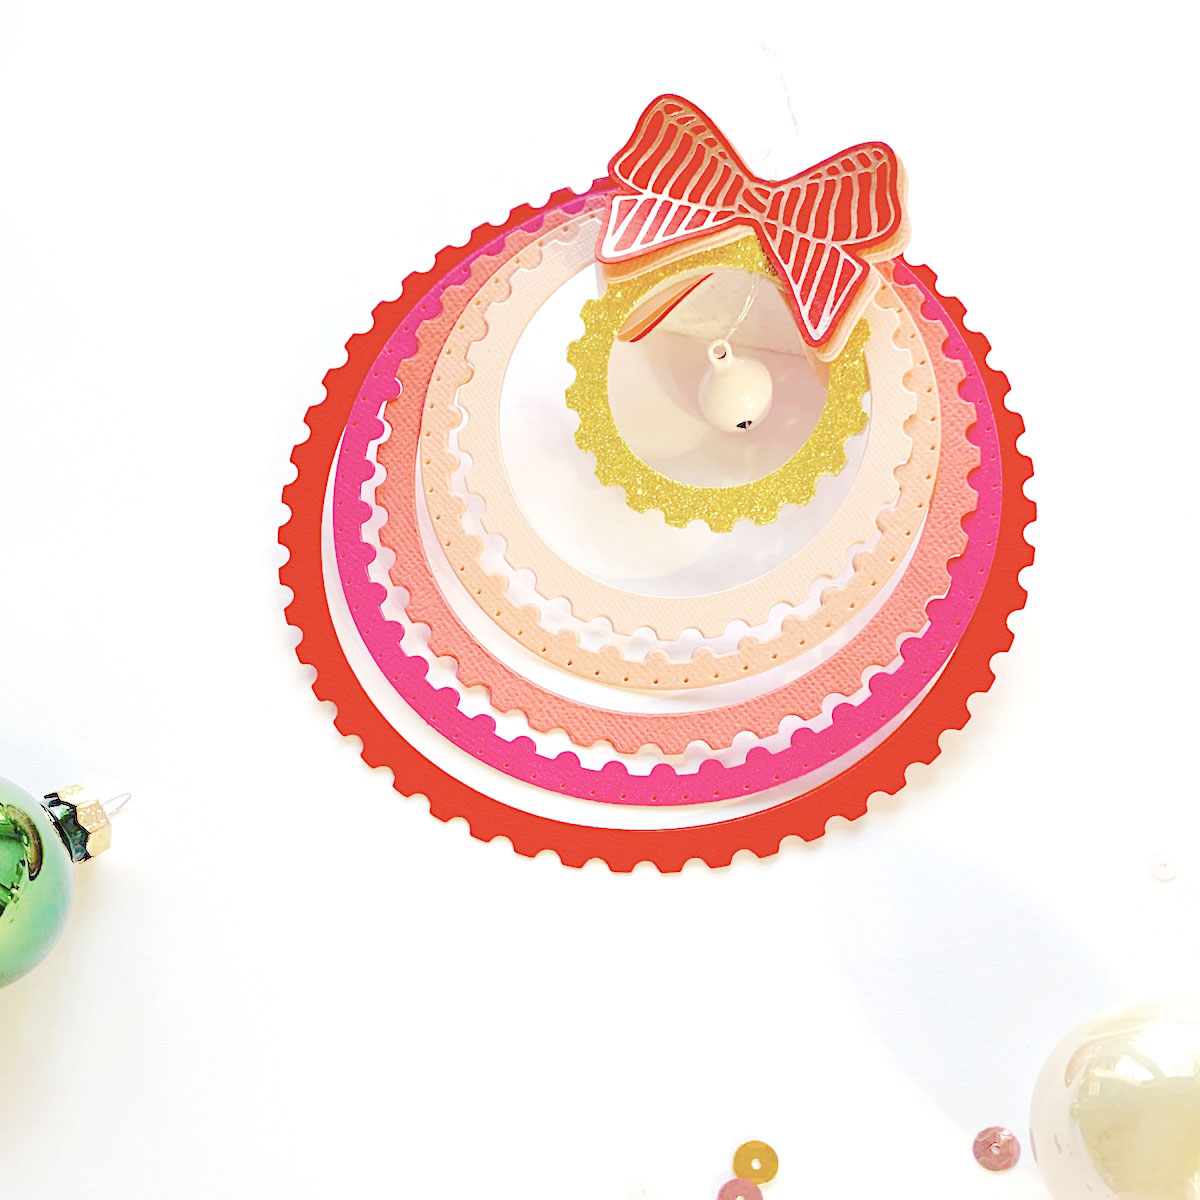
I cut 6 different sizes of card-stock circles, alternating the circle dies. I started with the biggest die and the second larger die to cut the first circle in red card stock. Then, for the second circle, I used the second larger die and the third one, and so on. I cut each circle in a different cardstock color, from red to light pink and I ended up with a gold glitter cardstock for the smallest circle.
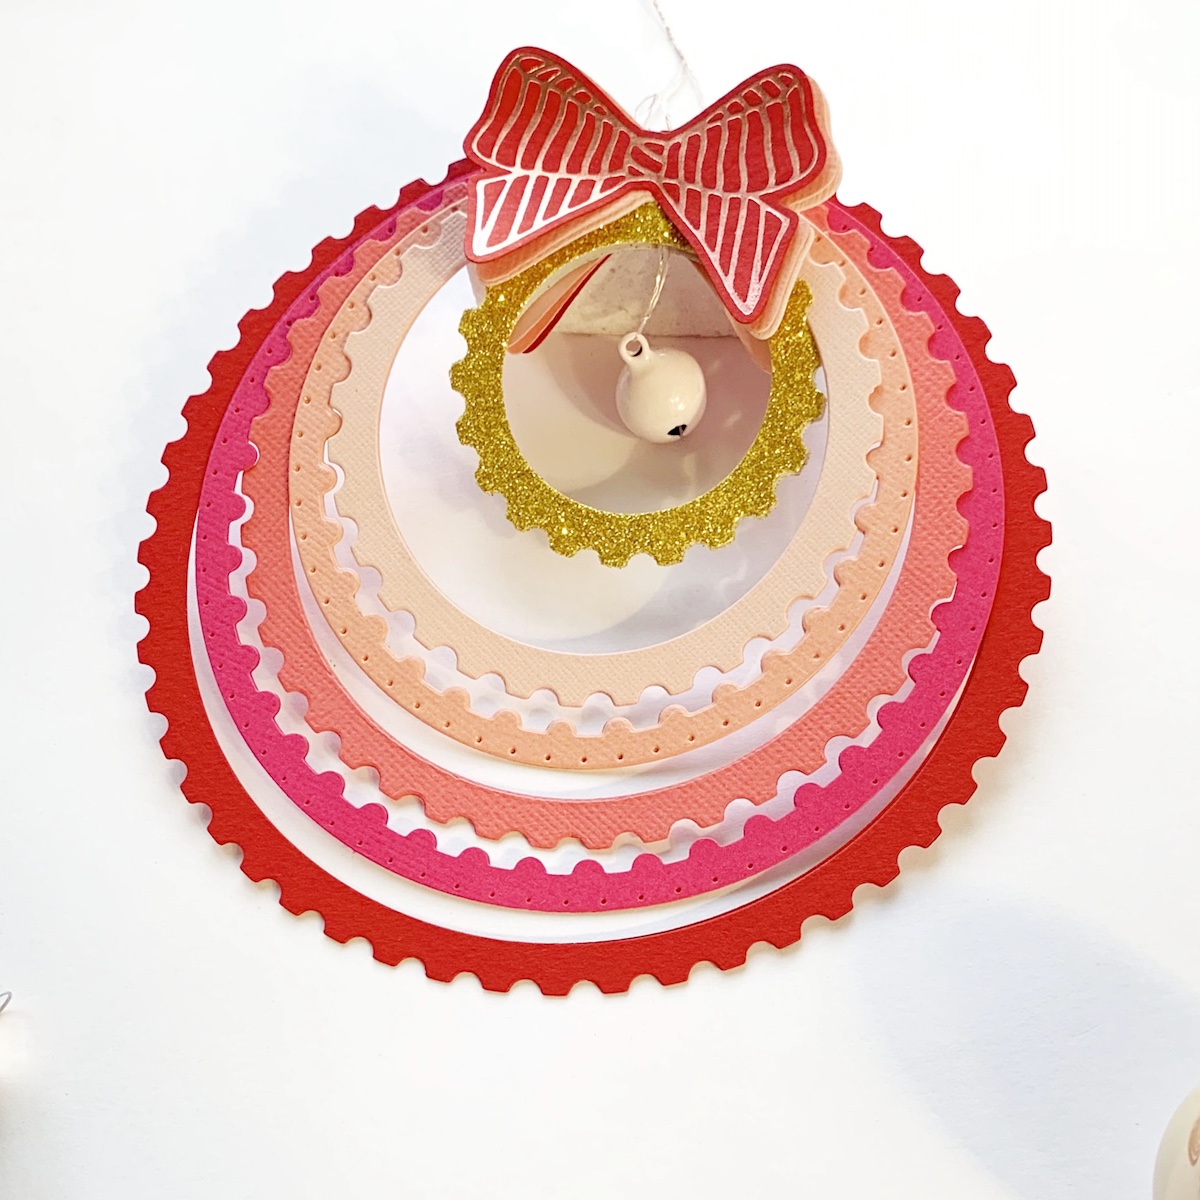
To embellish the decoration, I added a beautiful card-stock bow on top of each side of the ornament and a real bell as a pendant in the center. The bow is made up of three layers of cardstock of three different colors: red, pink, and light pink. I glued the bows one on top of the other slightly offset, to give dimension. The topmost bow, the red one, has got Rose Gold foil details and was made with Blooming Ornaments Glimmer Foil plates and dies.
I wanted to try also a second version of the ornament, using Postage Edge Ovals. This time I went for blue card-stock shades and Silver Hot Foil details.
The ornament is so simple and fast to create that would be a perfect activity idea to make with our children during the holidays and a cute DIY to gift to friends.

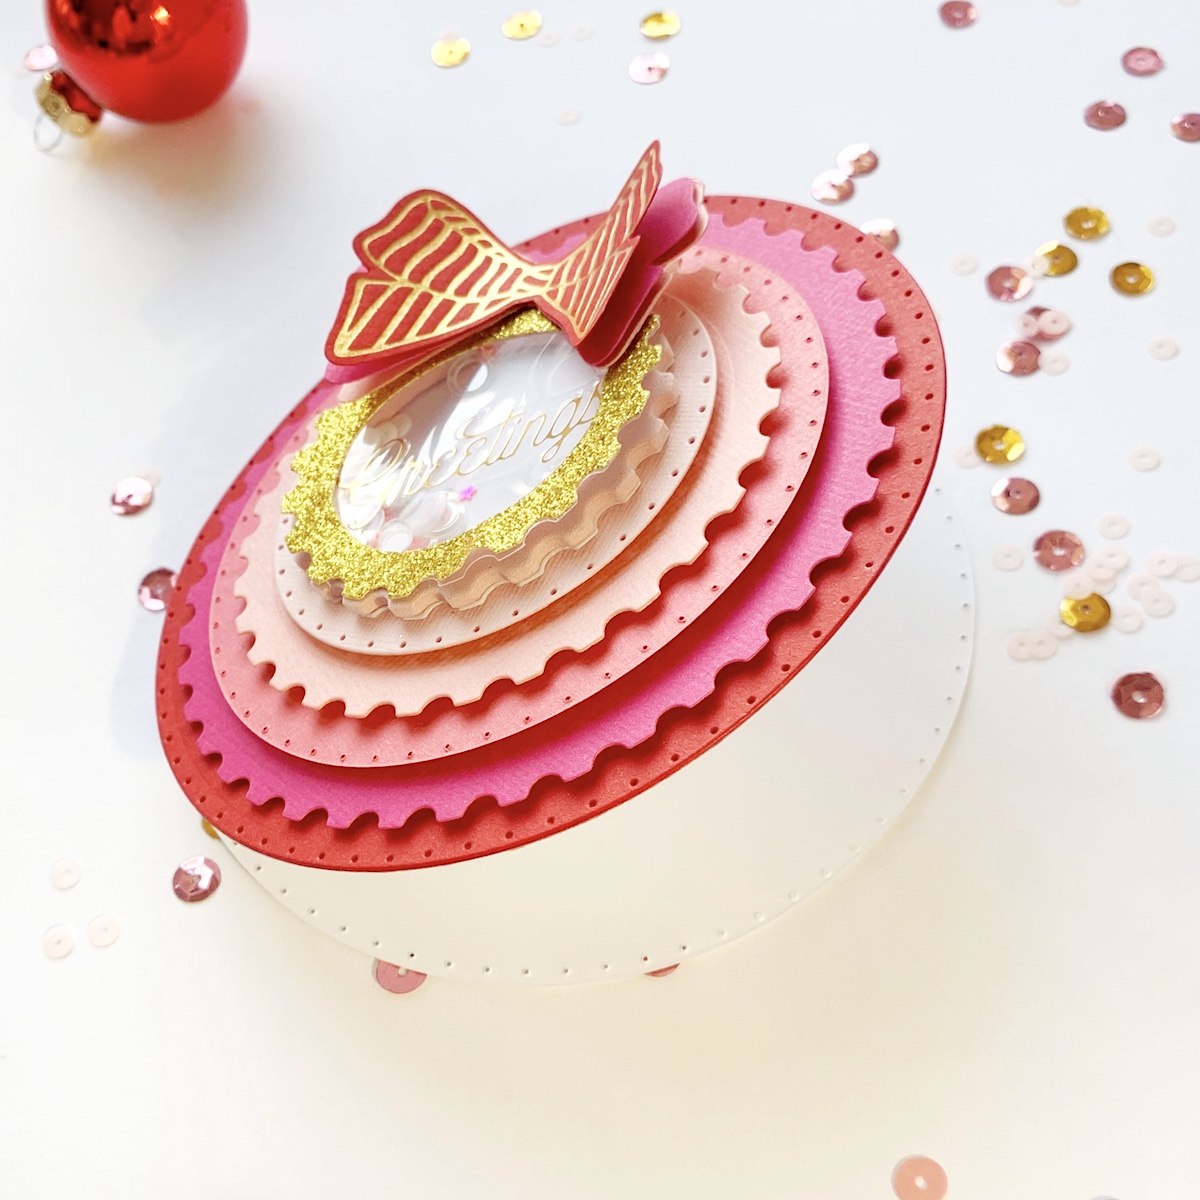
Pyramid Shaker Card
Now, I had a lot of leftovers from the ornament projects and it was a pity not to use them. So, I piled them up and created a fun pyramid shaker card.
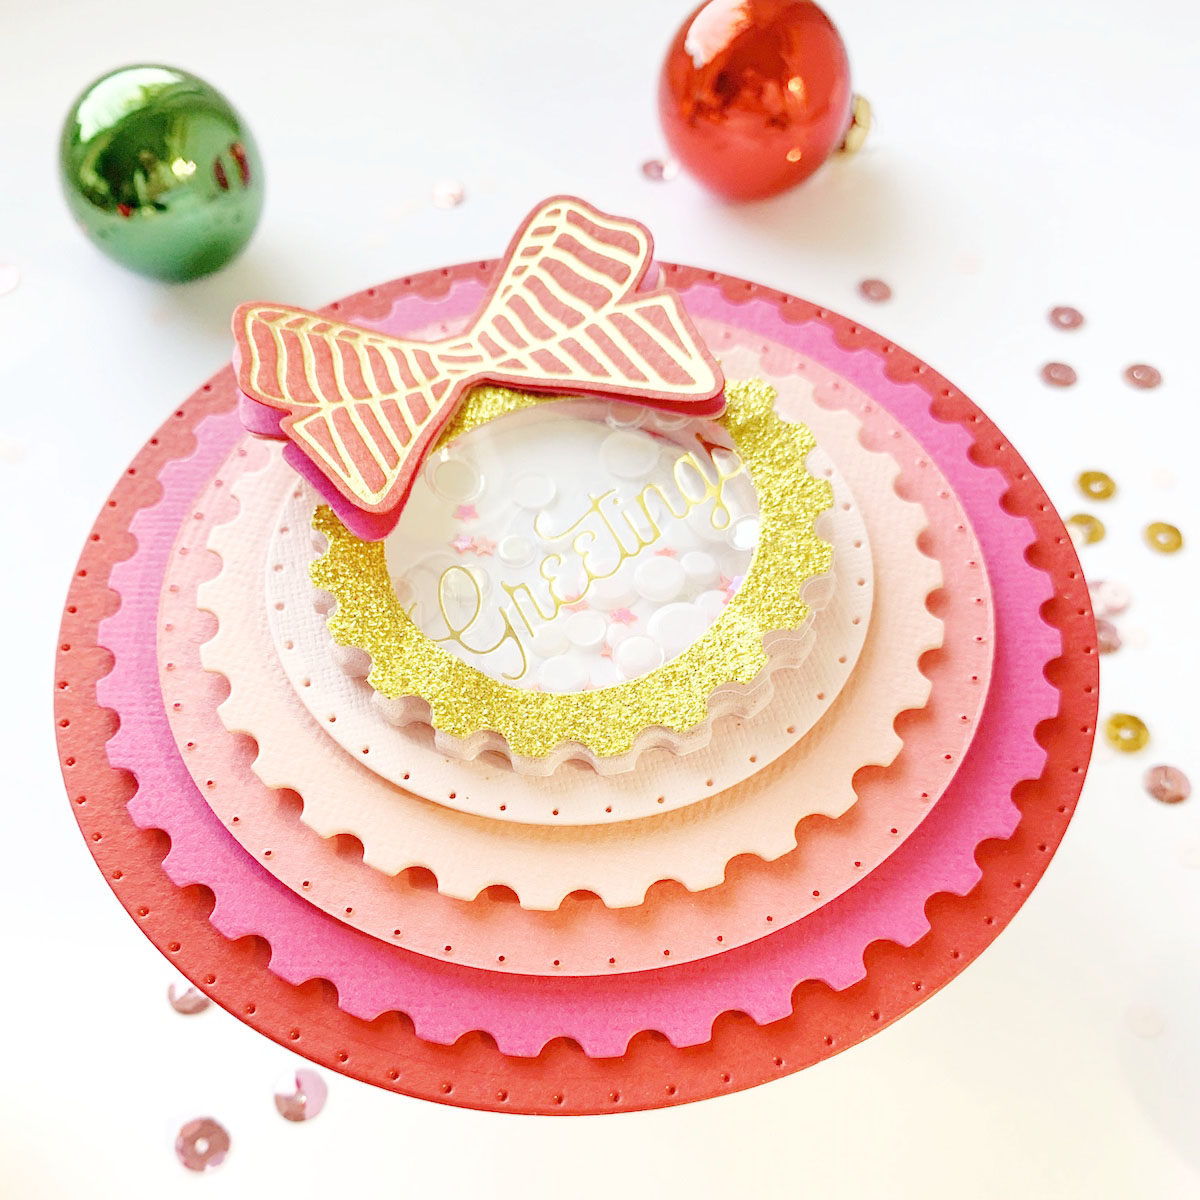
To pair the card with the decoration, I added the same bow with the same layering technique. I only changed the color of the foil details. I used Gold Glimmer Foil instead of Rose Gold.
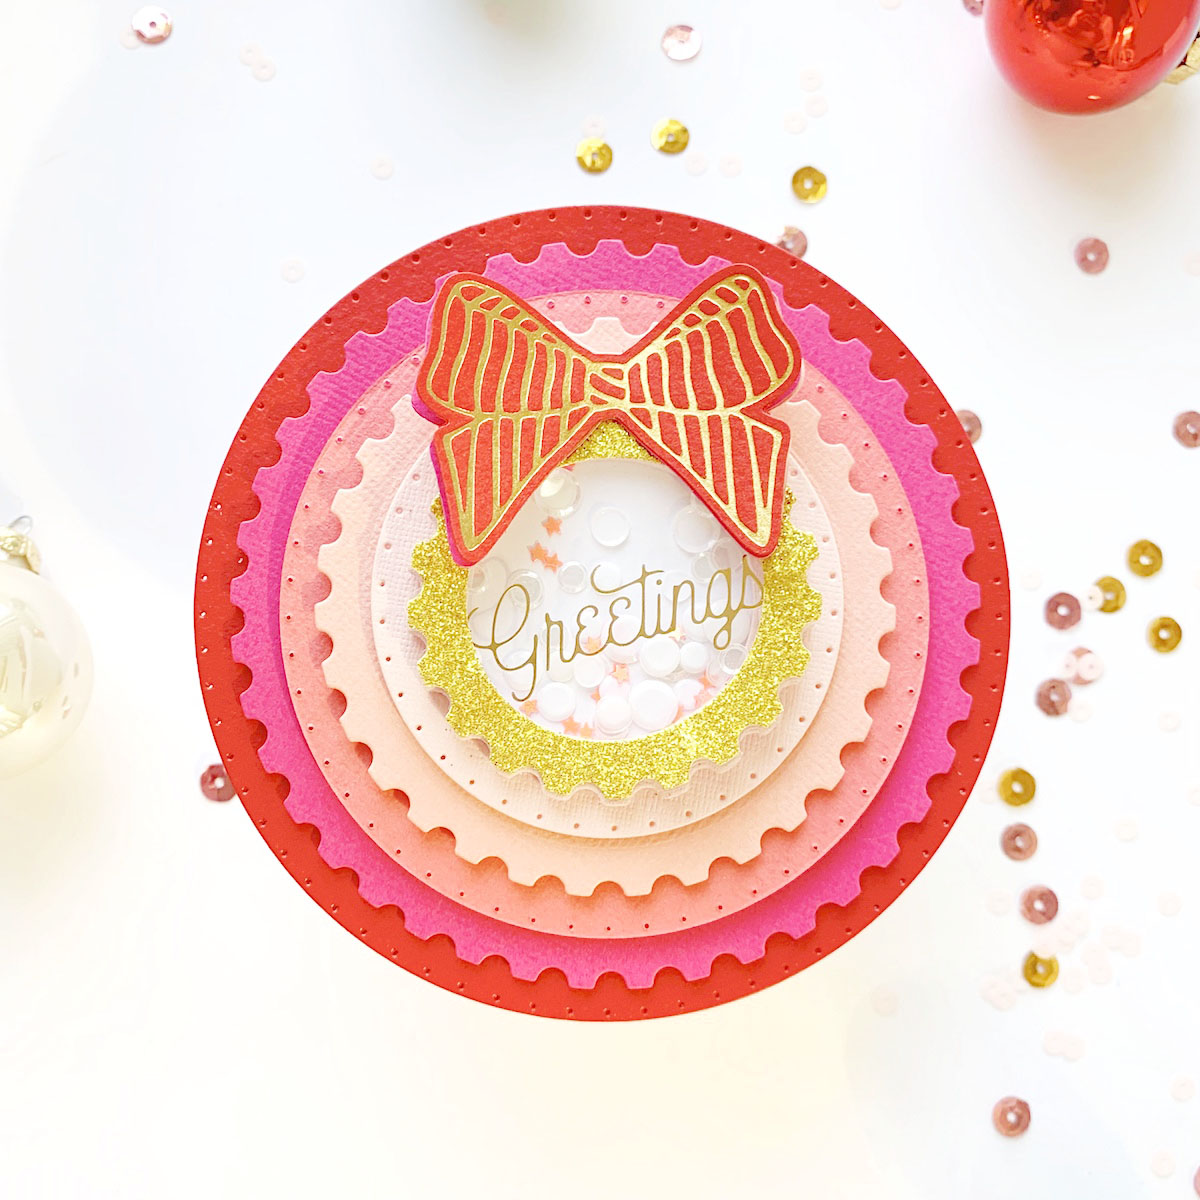
I adhered the card-stock circles with foam adhesive to give a pyramid look and glued the bow on top. The sentiment is from Merry Glimmer Sentiments Hot Foil Glimmer Plates and is foiled in Gold Glimmer Foil on a piece of heat-resistant acetate. The acetate closes the shaker filled in with white sequins and tiny pink stars.

I ended up the card gluing the pyramid shaker on a white card base. To create the round card base I folded in half a piece of card stock and placed the Round Postage Edge die on top, leaving part of the folding inside the cutting edge of the circle. I run it through the cutting machine. This way, part of the folding remained intact, creating the opening of the card.
Modern Geometric Card
With other round shapes, I made a second card with a modern geometric look with a romantic twist.
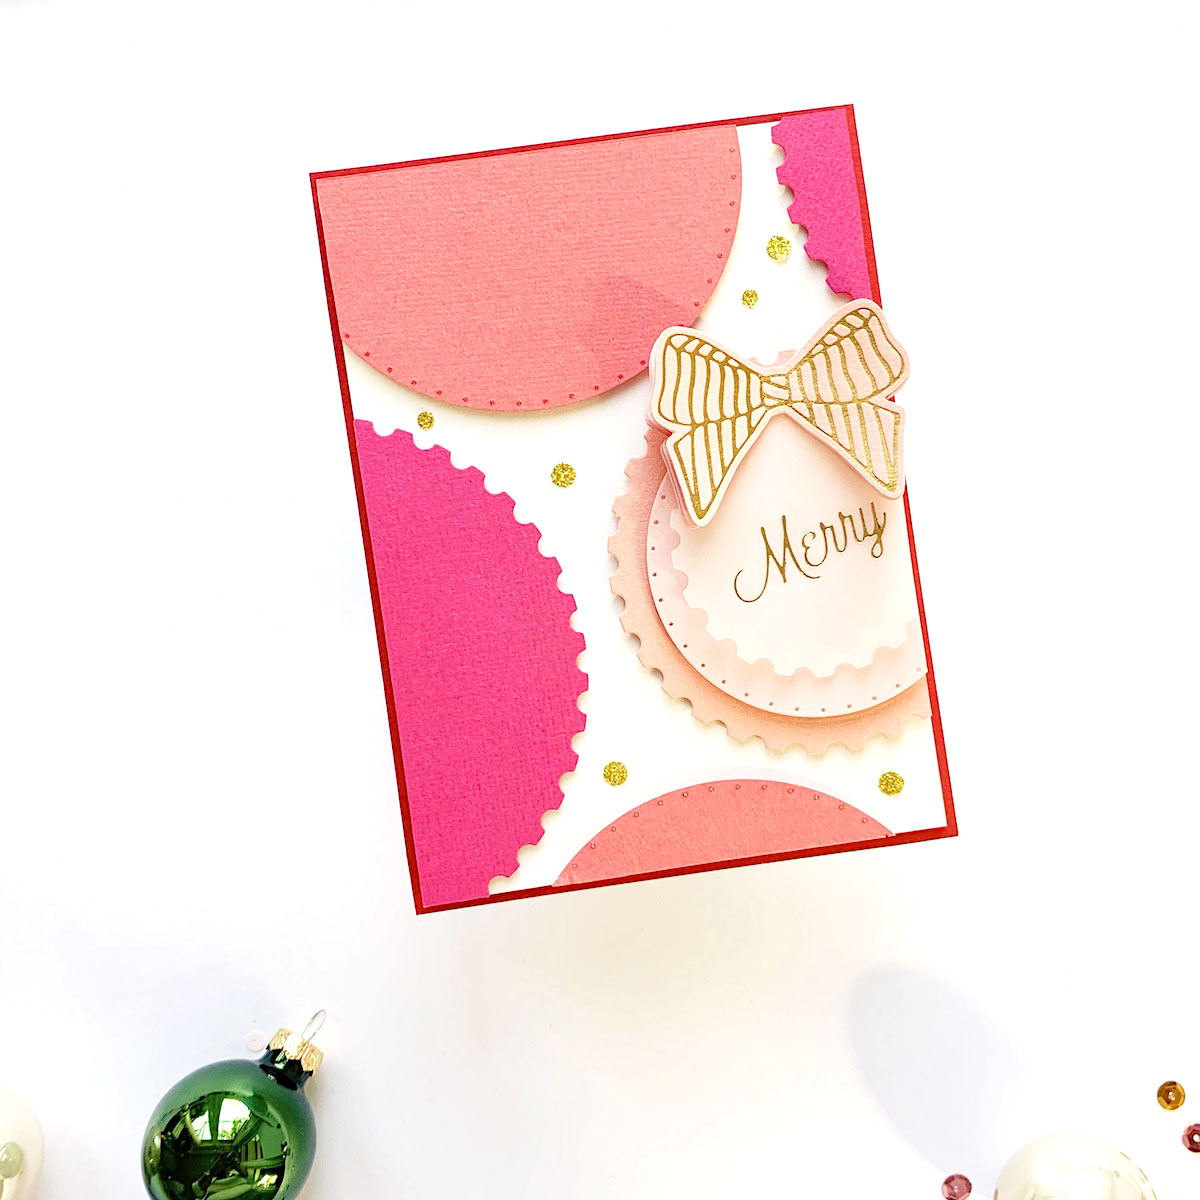
On the white front panel, I adhered a few partial circles of different sizes. On one of the circles, I layered a second partial circle, adhered with foam adhesive. Then, I accommodate a third circle made in vellum on top. Here is where I placed the sentiment: Merry. The word is foiled in Gold and is always from Merry Glimmer Sentiments Foil Plates
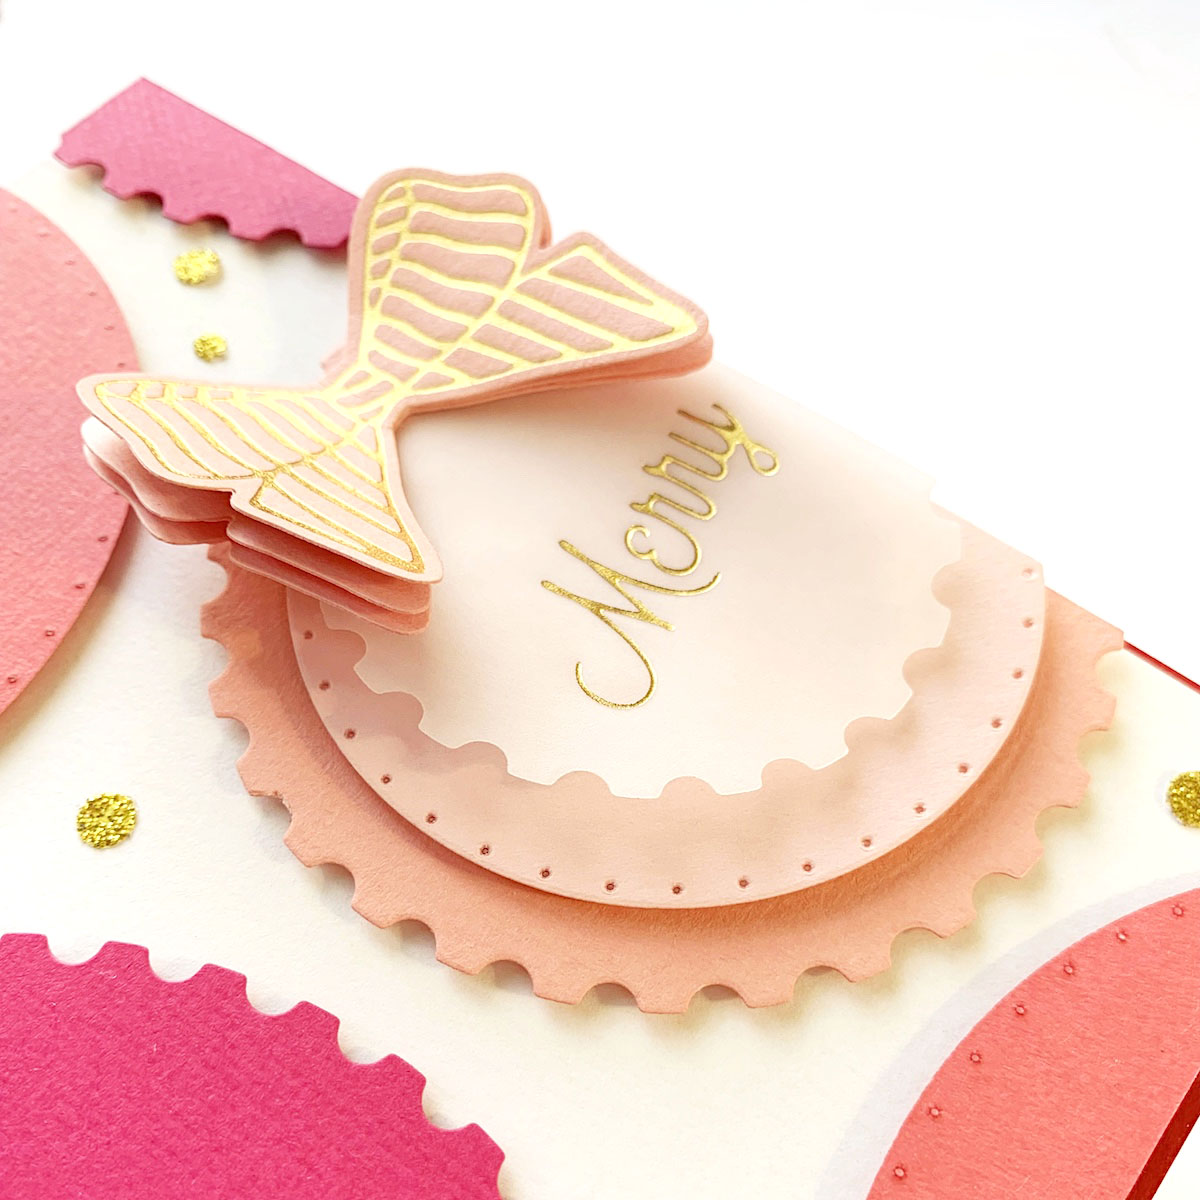
For a fun look, I added a few gold glitter confetti here and there. I finished up the card by gluing the panel on a red rectangle slightly bigger and then on a white card base.
Bonus Project!
Last, the bonus card idea I mentioned before. I am a big fan of shapes. I love playing with different shapes and sizes to create fun geometric designs. So, in my final card, I tried to reproduce the sketch of a letter or postcard.
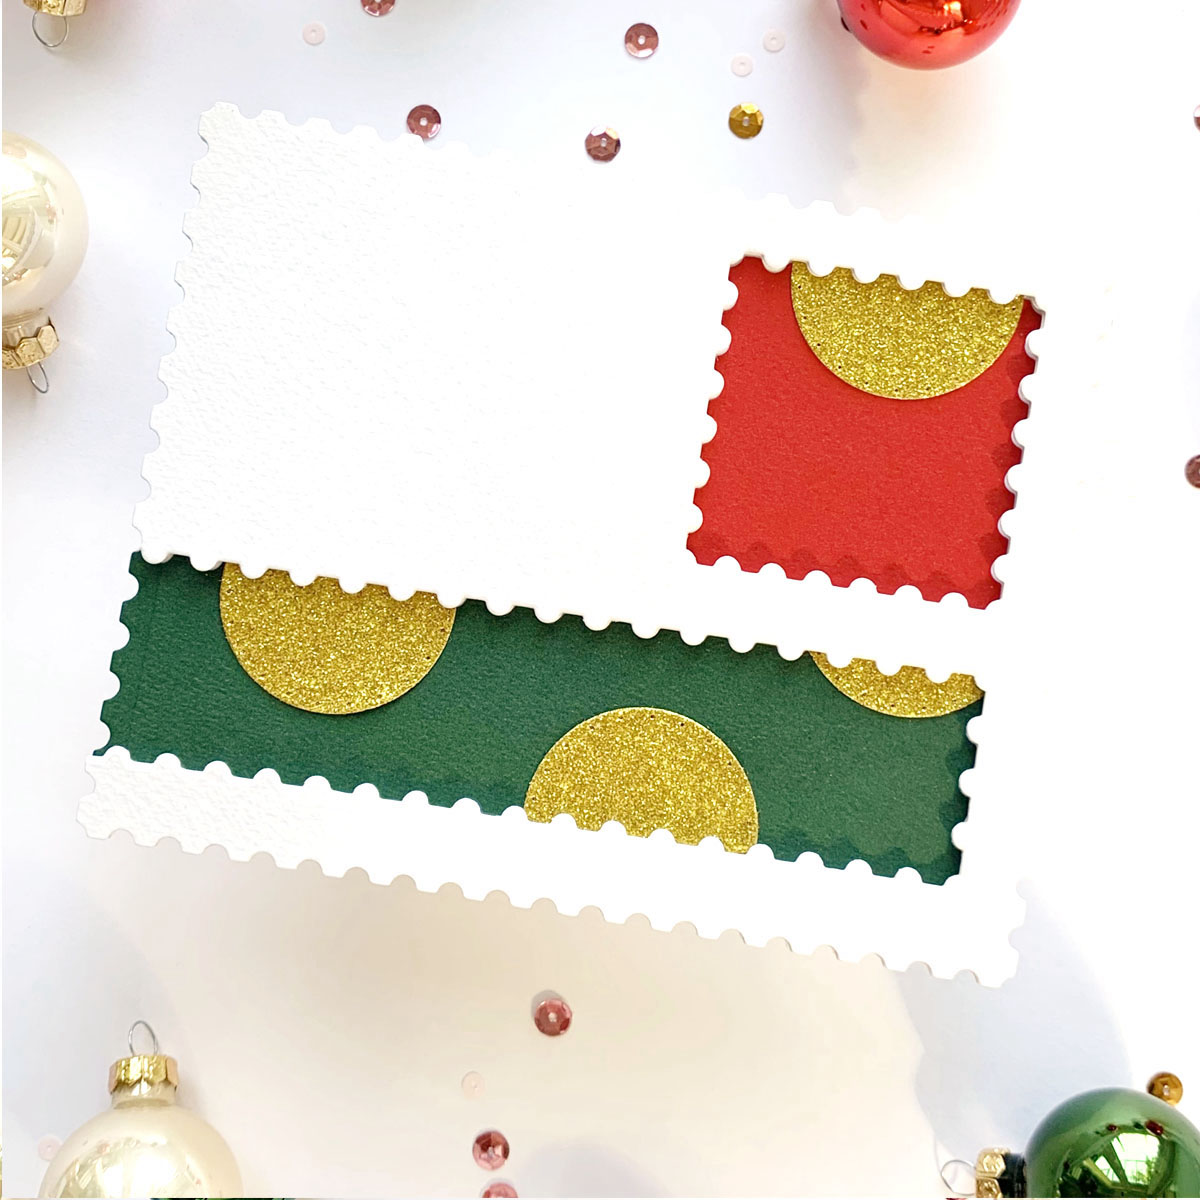
I used the bigger Postage Edge Rectangles die for the card base, the smaller Postage Edge Squares die to mimic the stamp, and last the smaller Postage Edge Slimlines die to simulate the addressee spot. I repeated the process other 4 times, so to have 5 layers of white card stock, to obtain some depth. You can avoid this part if you have white foam, but unfortunately, I run out so I made it work this way.
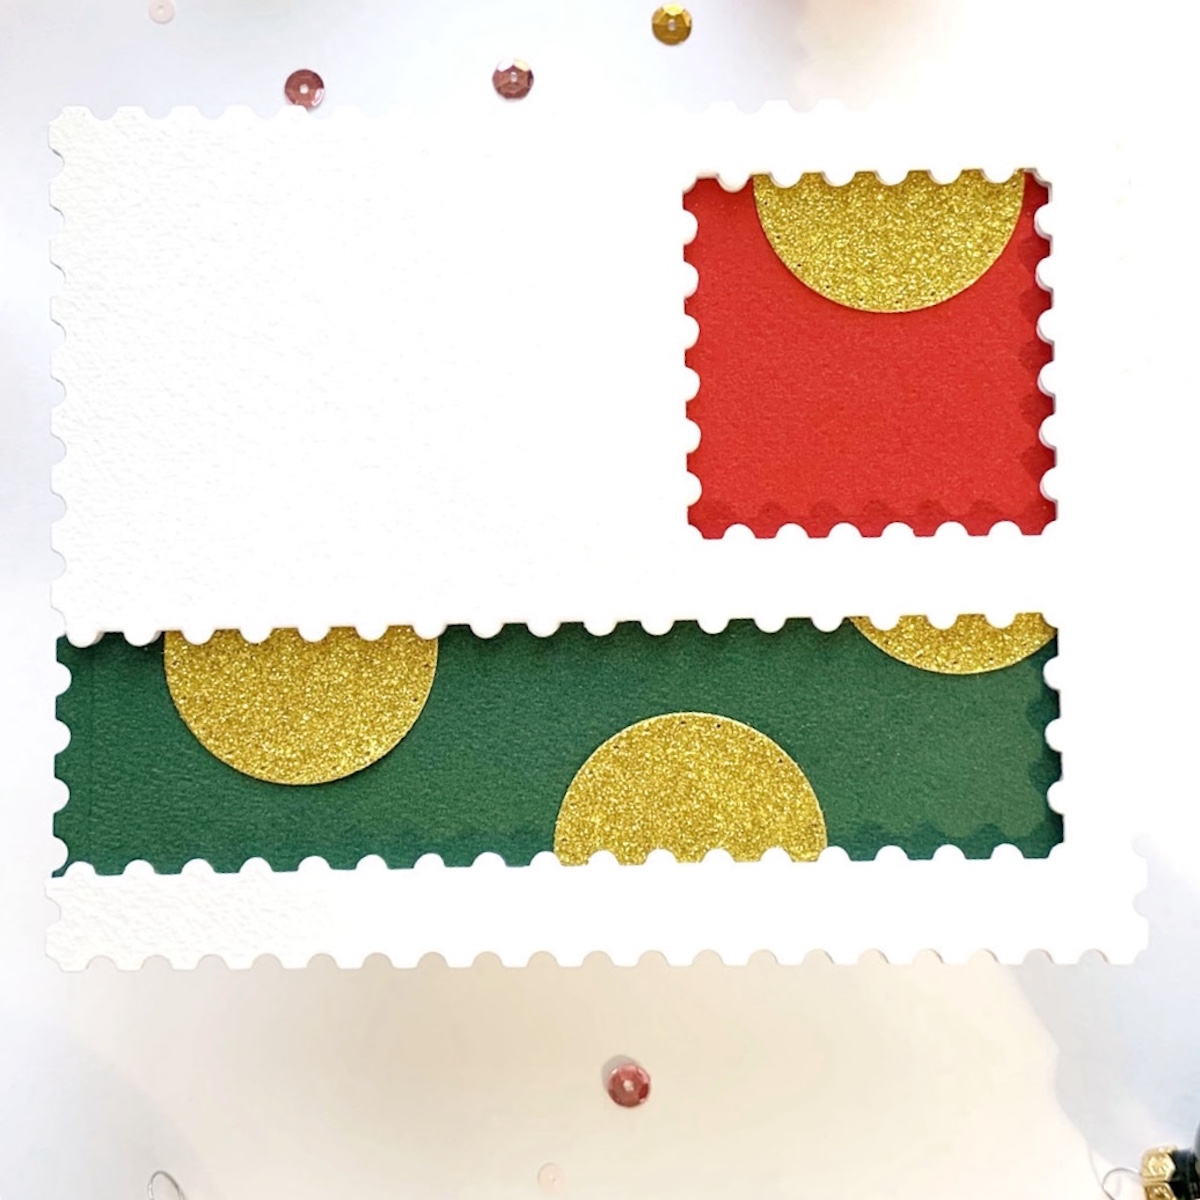
I filled in the stamp spot with red card stock and the address space with free. Then, I added a touch of gold using Postage Edge Circles die to cut 3 gold glitter card-stock circles.
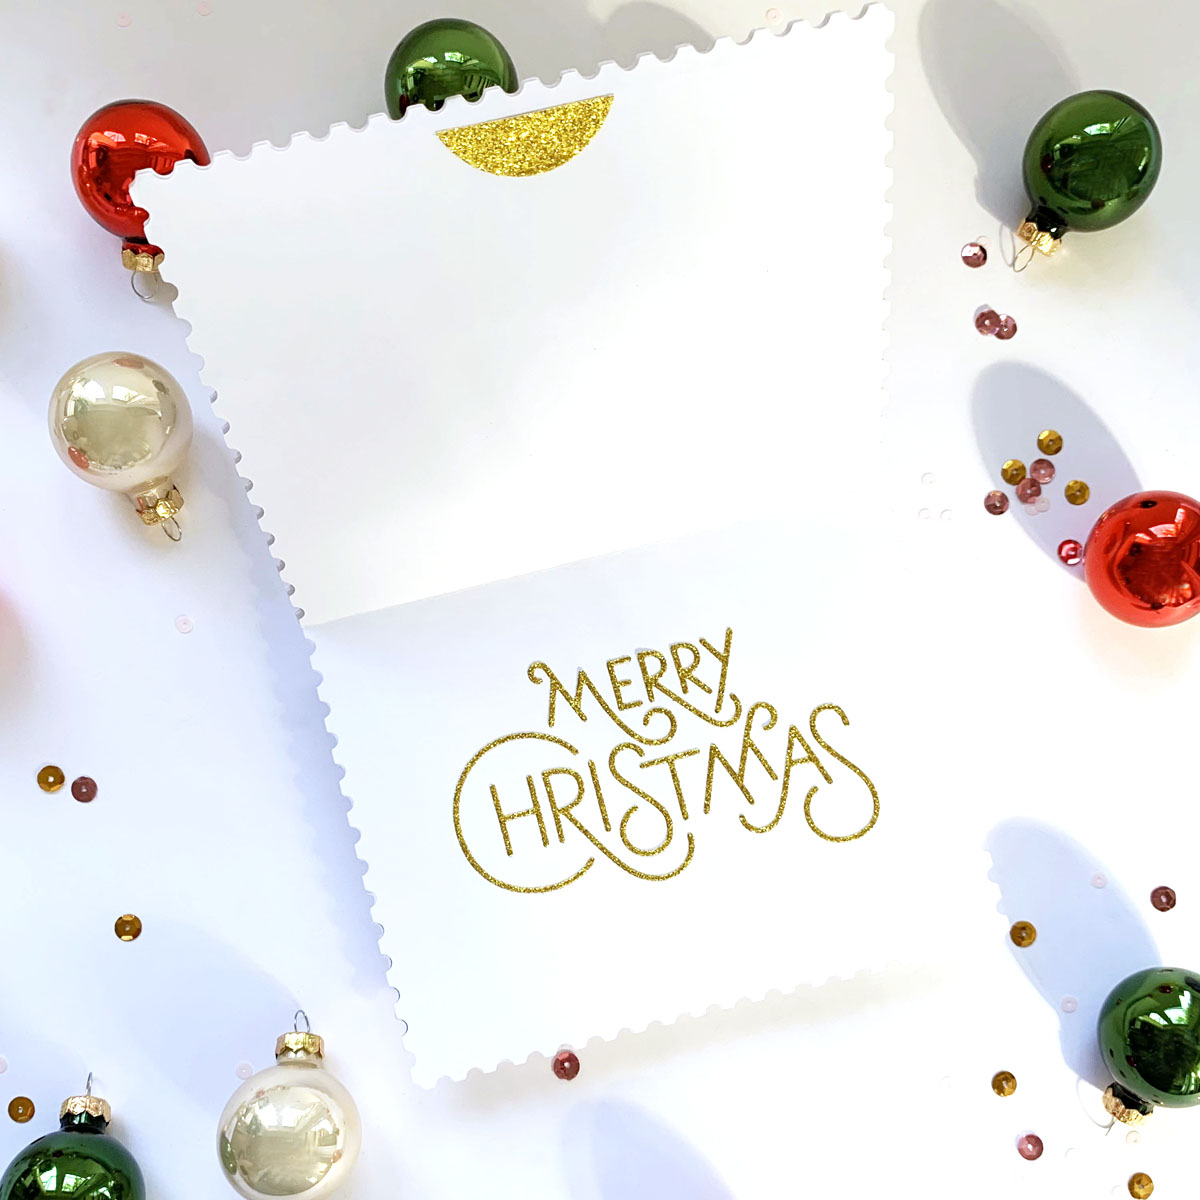
At this point, you can decide where to add the sentiment, somewhere on the front. Personally, I preferred to leave the card as is, and placed the sentiment inside the card.

I cut the phrase Merry Christmas from Stylish Merry Christmas dies in glitter gold card stock and voilà!
Spellbinders Supplies:

Other supplies
White and colored cardstock, foam adhesive, liquid glue, heat-resistant acetate, sequins, gold and silver twine, and two bells.
Thank you so much for stopping by and follow my creative process till the end of the post. I hope you like what I made and feel inspired to play with shapes from Postage Edge collection by Becca Feeken. See you soon!
Love, NG
4 Comments
Michele F
Angela, I adore red with pink, and pink with orange! What a fabulous combination of all three + gold! I am SO happy I have those ovals – wink! Loving all of your gorgeous projects!
=]
Angela Tombari
Thank you so much ♥️
Beverly Jordan
Fabulous and creative cards and new products!!
Angela Tombari
Thank you!