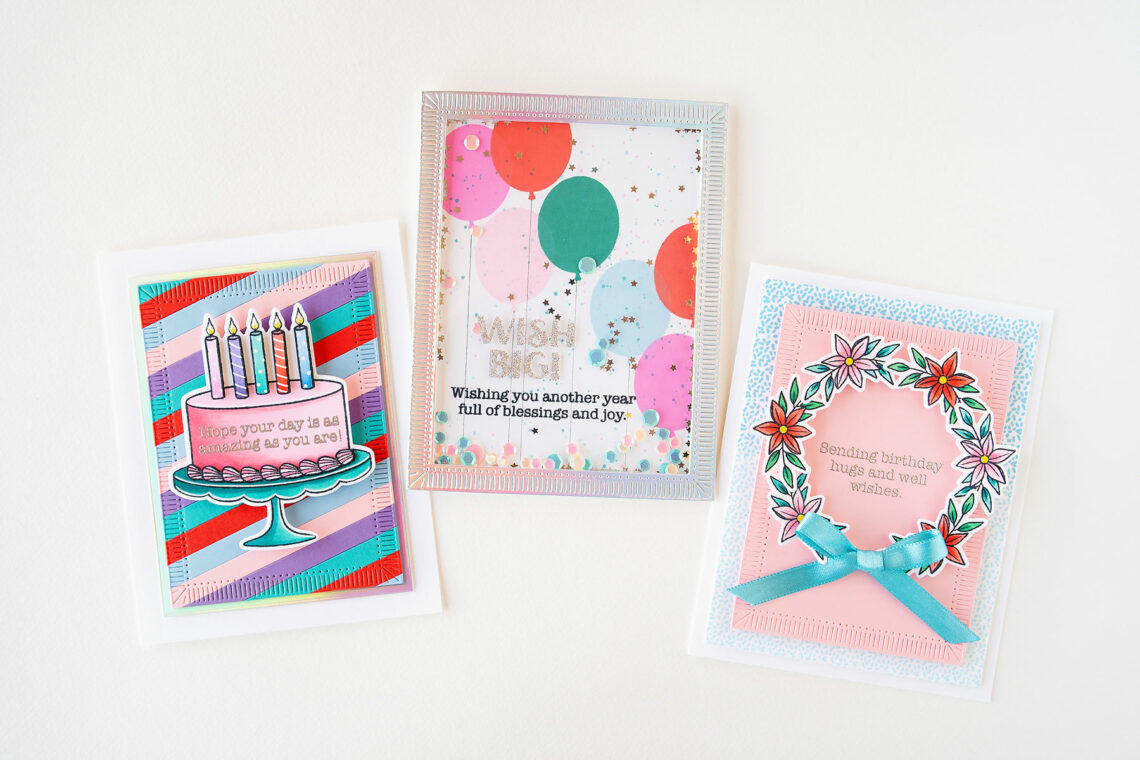
Birthday Basics 3 Ways with Jung AhSang
Hello crafty friends! It’s Jung here, and I am back with another guest post on the Spellbinders blog. For my projects today, I’m working with just one stamp set: the Birthday Basics stamp set from Simon Hurley, along with the coordinating dies.
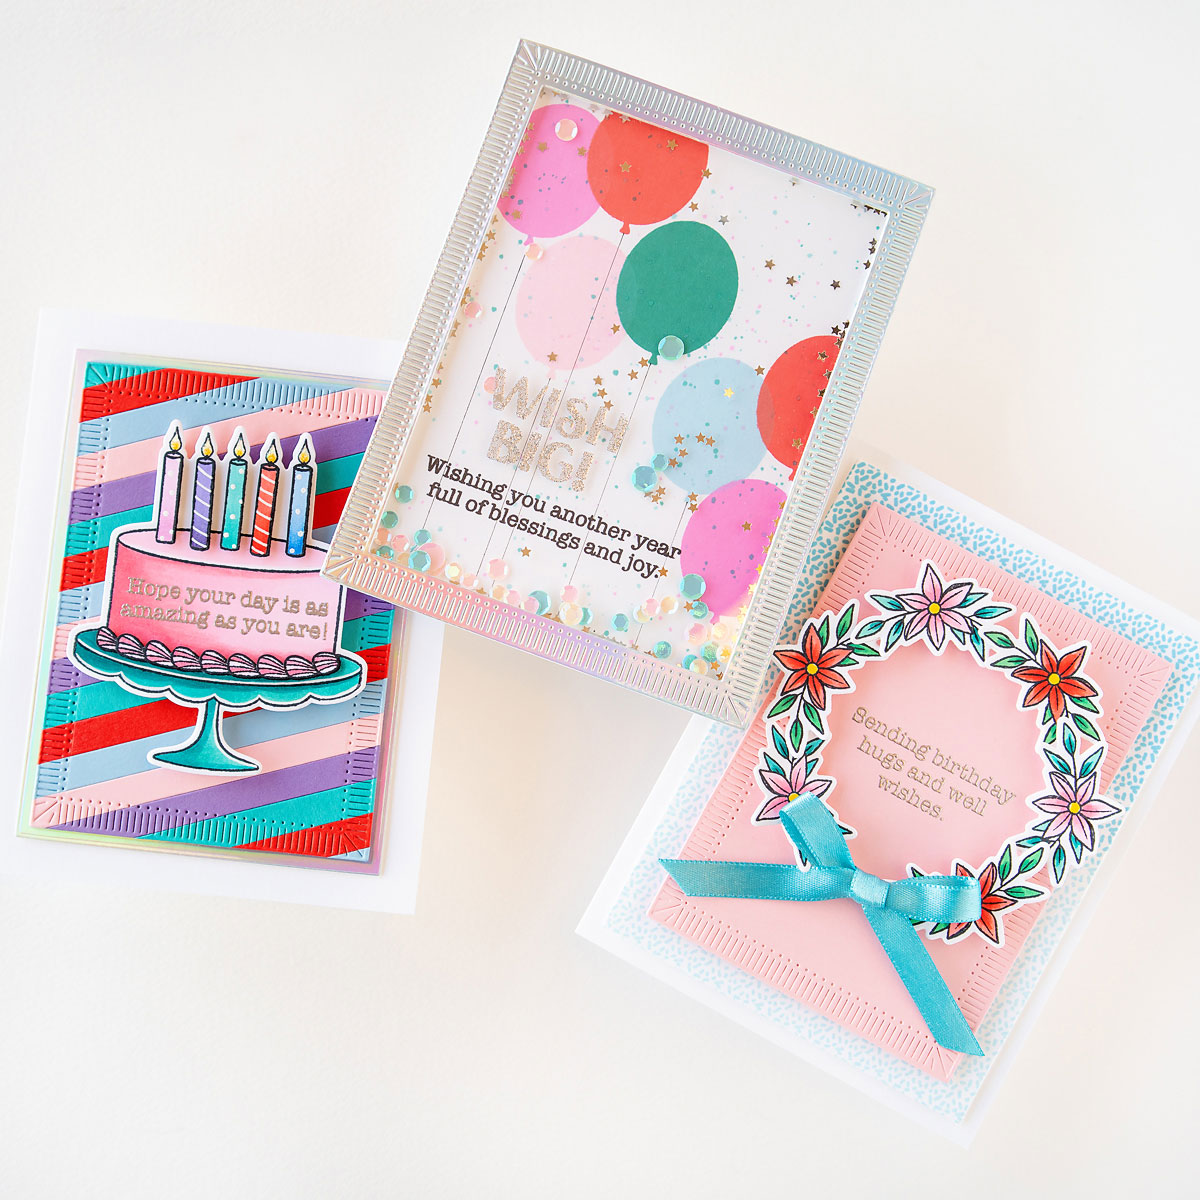
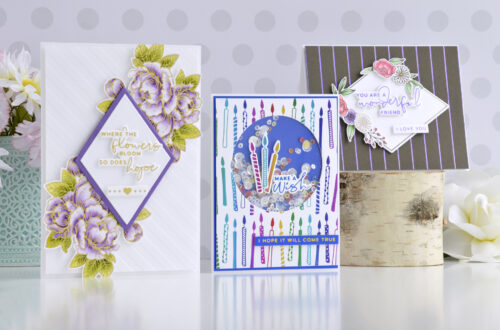
Birthday Cake Card
For my first card, I used the birthday cake from the stamp set.
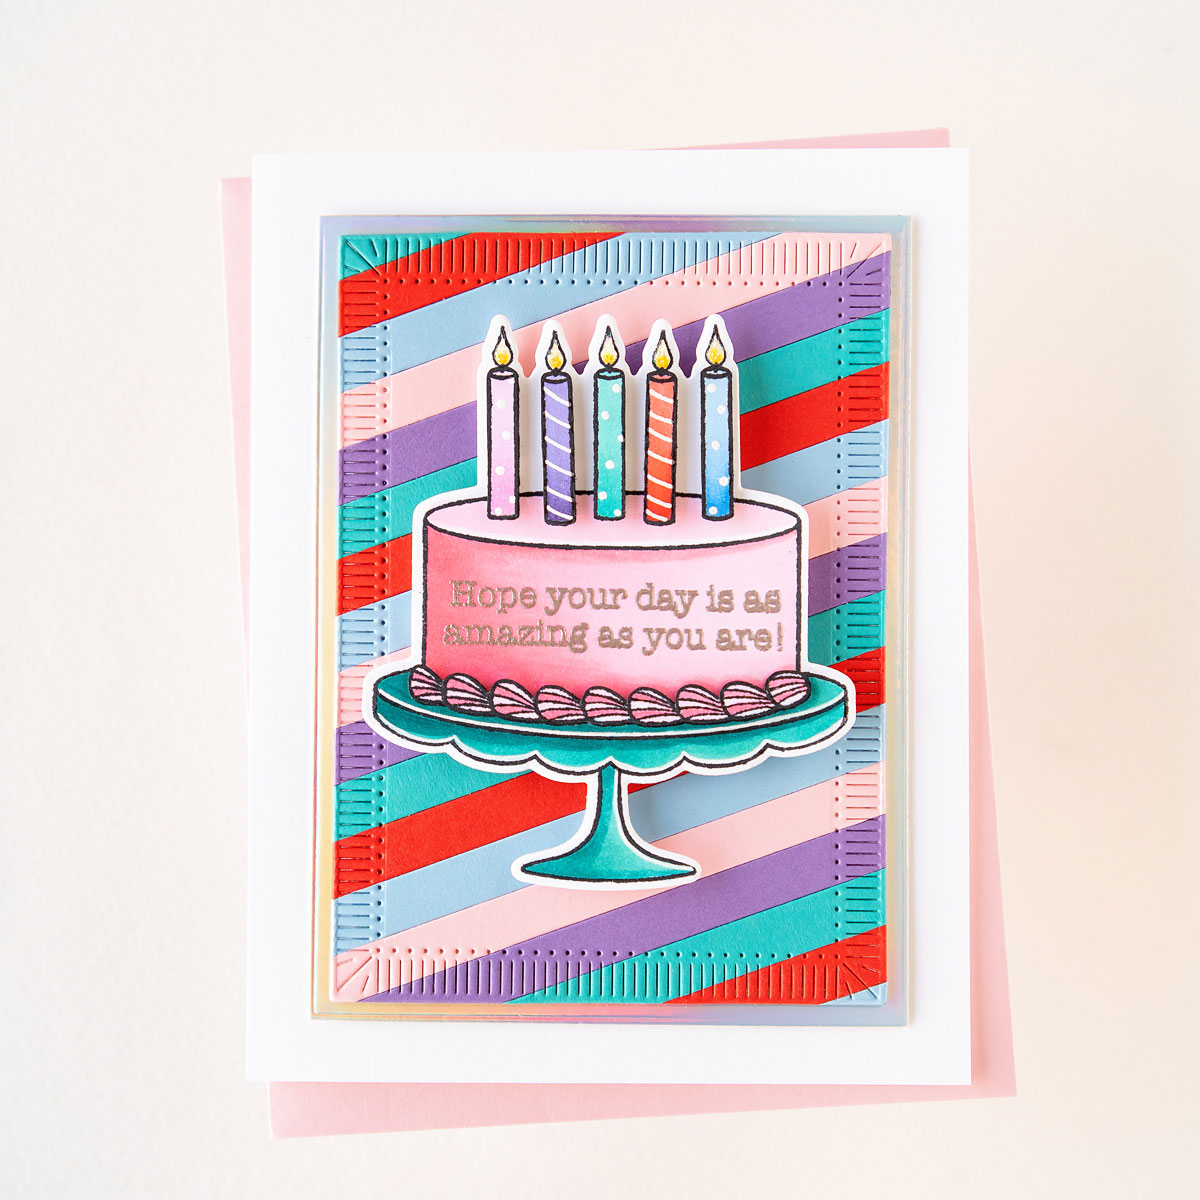
I started out by stamping the image twice with black ink on white cardstock. I colored the first image with Copic markers, then used the coordinating die to cut it out. On the cake, I stamped the “Hope your day is as amazing as you are!” sentiment with Versamark ink, and heat set it with silver embossing powder. On the second cake image, I colored just the candles and the frosting. I added a little bit of detail to the candles with a white gel pen. Then, I fussy cut the candles and frosting and adhered it to the first image with foam tape to create a more dimensional cake.
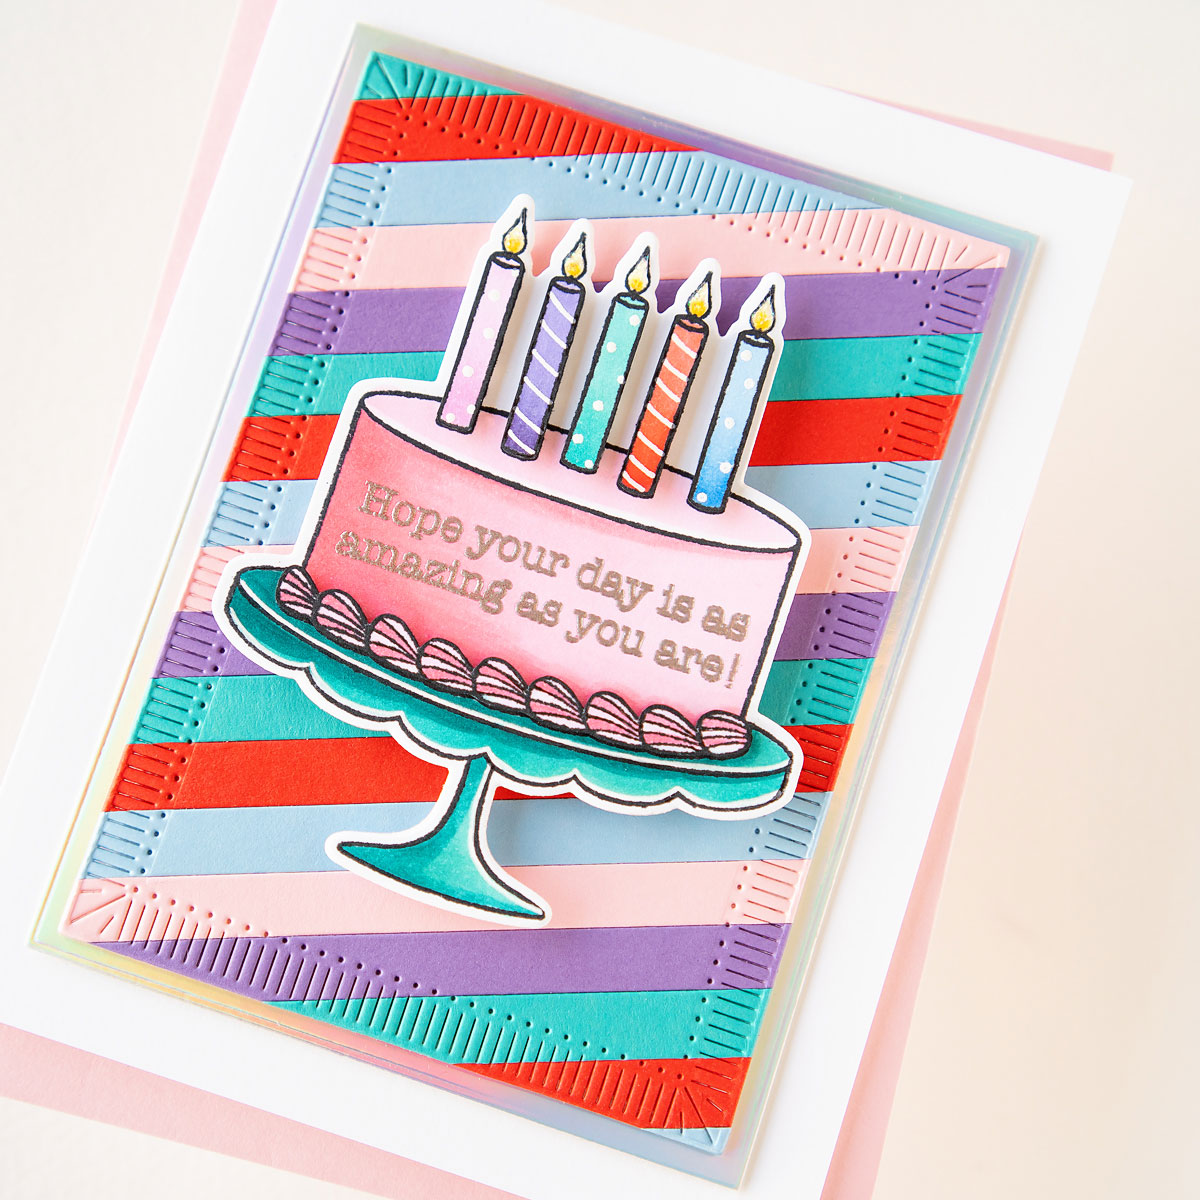
For the background, I made a diagonal striped background, by trimming pieces of colored cardstock, then gluing them to a thin sheet of printer paper. I used 2 of the fluted rectangle dies to die-cut the diagonal background. I used another one of the dies to die cut a panel of holographic cardstock. I used the holographic layer as a mat behind the diagonal background. I glued them together with a few layers of scrap cardstock in between for a little dimension. I adhered the background panels to a white A2 card base. Then, I attached the cake with foam tape. To finish off the card, I added a little bit of Nuvo glitter drops to the candle flames.
Balloon Birthday Card
For my second card, I made a shaker card using the solid balloon image.
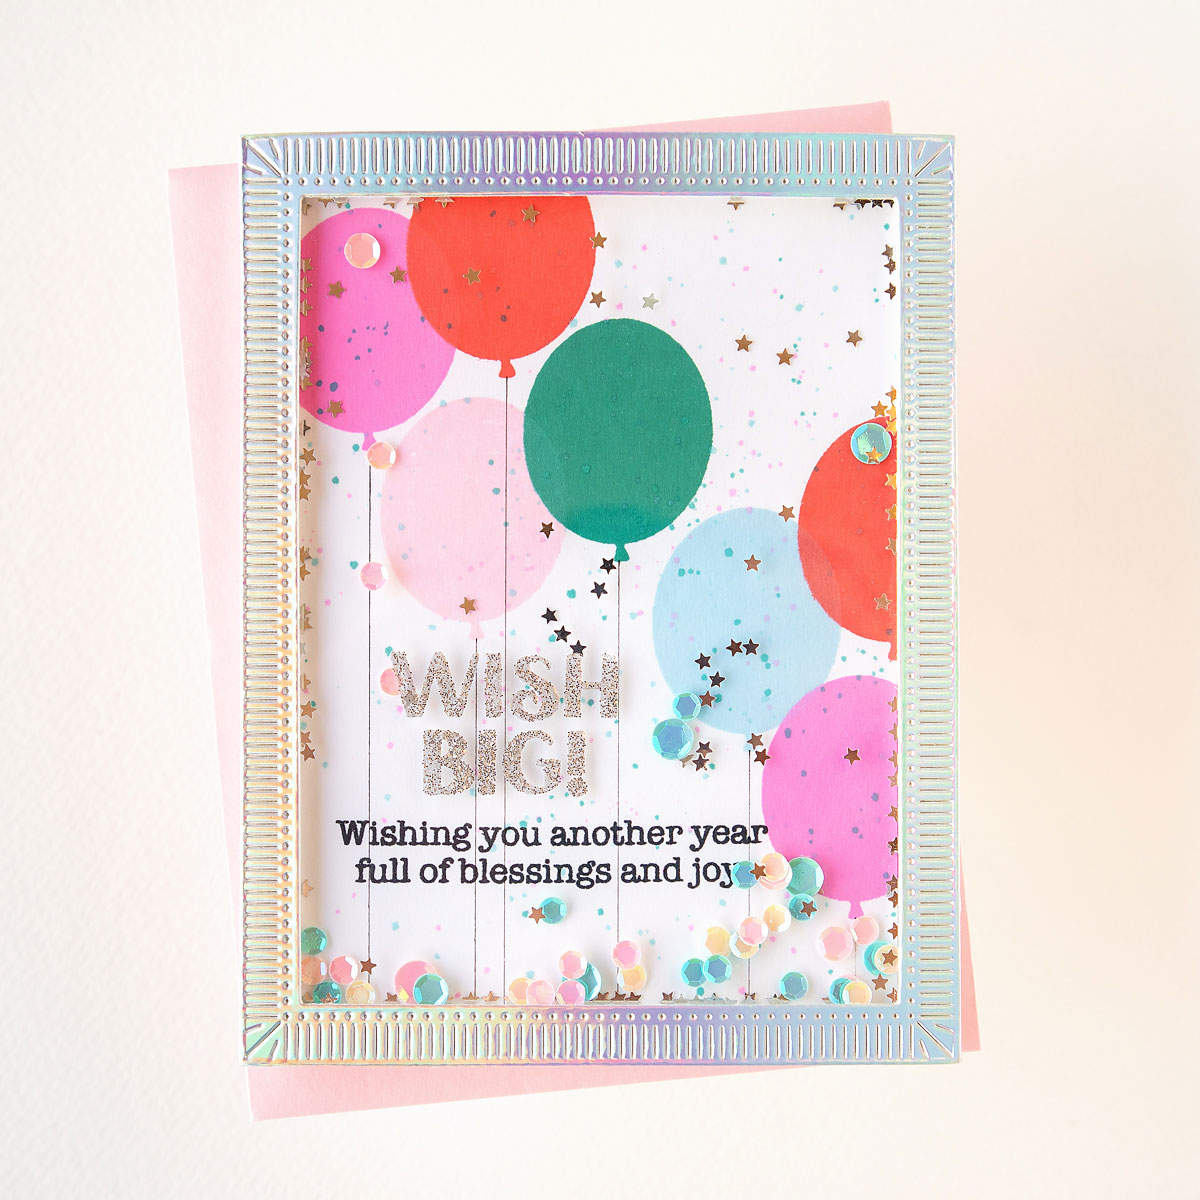
I started by stamping the solid balloon image to a white cardstock panel in a diagonal direction. I used ink colors that coordinated with the first card. I also added a few ink splatters using the same inks watered down. Then, I used a fine-tip pen and a ruler to draw on the balloon strings. There is a curly balloon string stamp in the set, but I wanted the strings to be really subtle. Next, I stamped on the “Wishing you another year full of blessing and joy.” sentiment with black ink to the bottom of the card.
On a piece of acetate, I stamped the “Wish Big!” sentiment with Versamark ink, then heat set it with silver glitter embossing powder. I made sure to line up the acetate with the balloon panel, so I could stamp the bigger sentiment right above the sentiment that I stamped on the balloon panel.
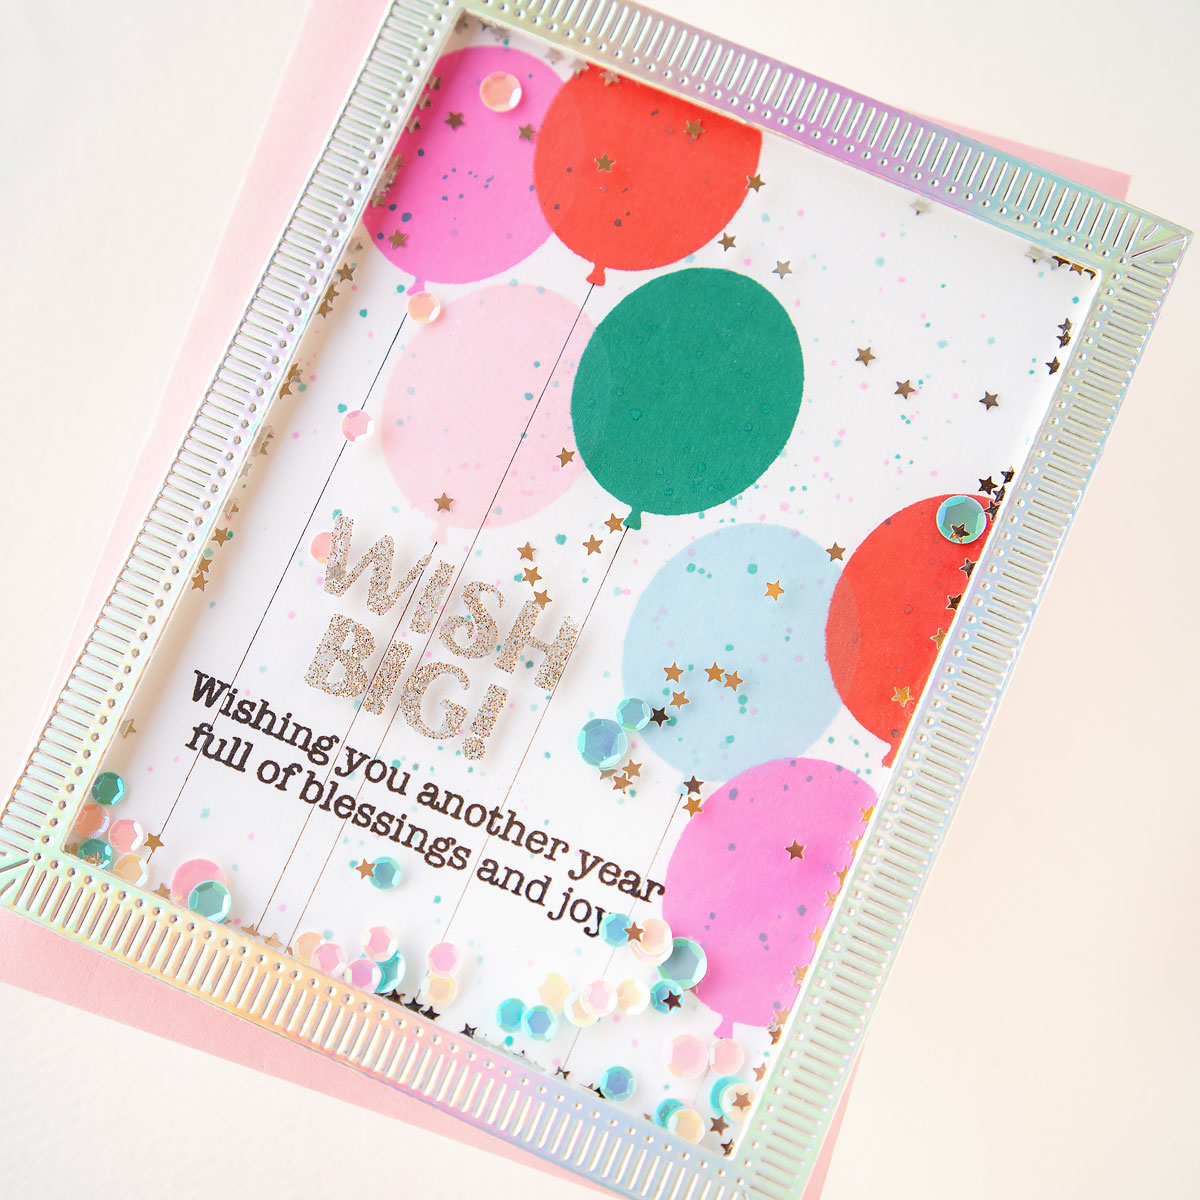
Next, I used 3 of the fluted rectangle dies to die-cut a frame using the holographic cardstock. I glued the acetate panel to the frame. Then, I added foam tape behind the acetate, just inside of the frame edges. I flipped the frame over, added some sequins, then adhered the balloon-stamped panel. I love how this card turned out!
Birthday Wreath Card
For my third card, I made a wreath using the flower image in the stamp set.
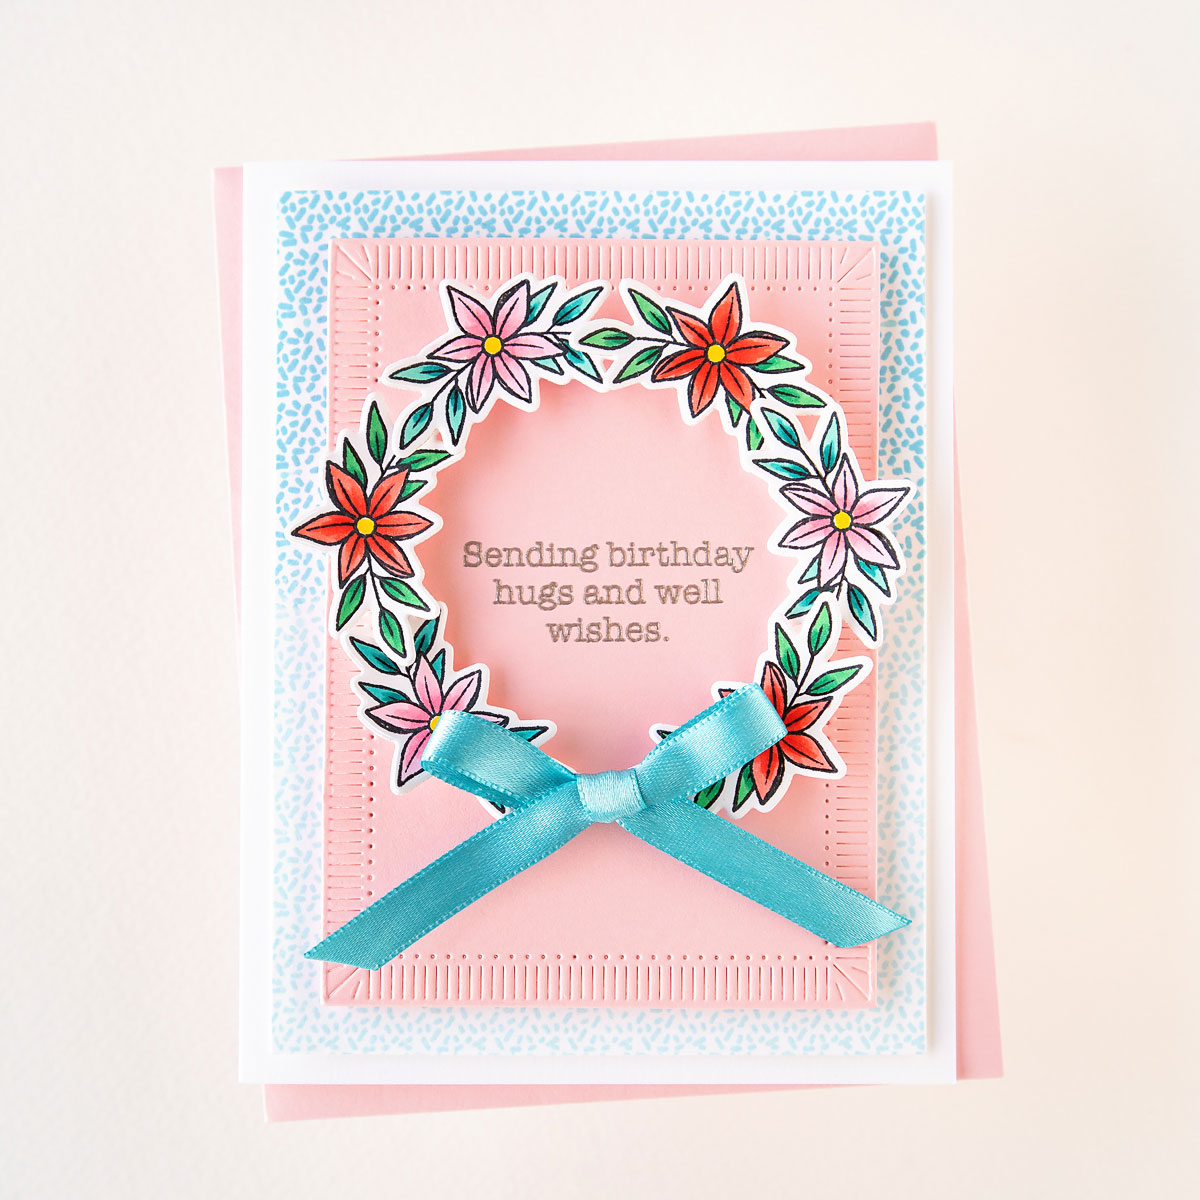
I stamped the flower image many times with black ink, colored them with Copic markers, and then used the coordinating die to die-cut them out. I ended up using 6 flowers on the card.
For the background panel, I stamped the “Sending birthday hugs and well wishes.” sentiment on a piece of pink cardstock. I used 2 of the fluted rectangles to die-cut the panel. Then, I used one of my circle dies as a template to draw a circle on the pink panel around the sentiment. I used foam tape to adhere the flowers to the circle that I drew on. I arranged the flowers, and I had a tiny space left at the bottom, so I decided to add a little ribbon bow.

For added interest to the background, I decided to use the sprinkles stamp to stamp a blue ombre background on a piece of white cardstock. I just repeatedly stamped the sprinkles stamp with 2 different shades of blue ink. I used an A2 layering die to trim the panel. I adhered the sprinkle-stamped background panel to an A2 white card base, with a couple scrap cardstock panels in between for just a little bit of dimension. Then, I adhered the pink panel with the flower wreath on top with foam tape.
It was so fun to come up with 3 different cards using just this stamp set. Who couldn’t use more birthday cards?! I love shaker cards, so I think that one’s my favorite. Which card inspired you? Thanks so much for stopping by, and don’t forget to check out these products in the shop.
Spellbinders Supplies:

Other Supplies
Copic markers, black and colored inks, Versamark ink, silver glitter embossing powder, tiny star sequins, white gel pen, blue ribbon, holographic cardstock.
One Comment
MaryH
Imaginative, cheery cards that make one smile.