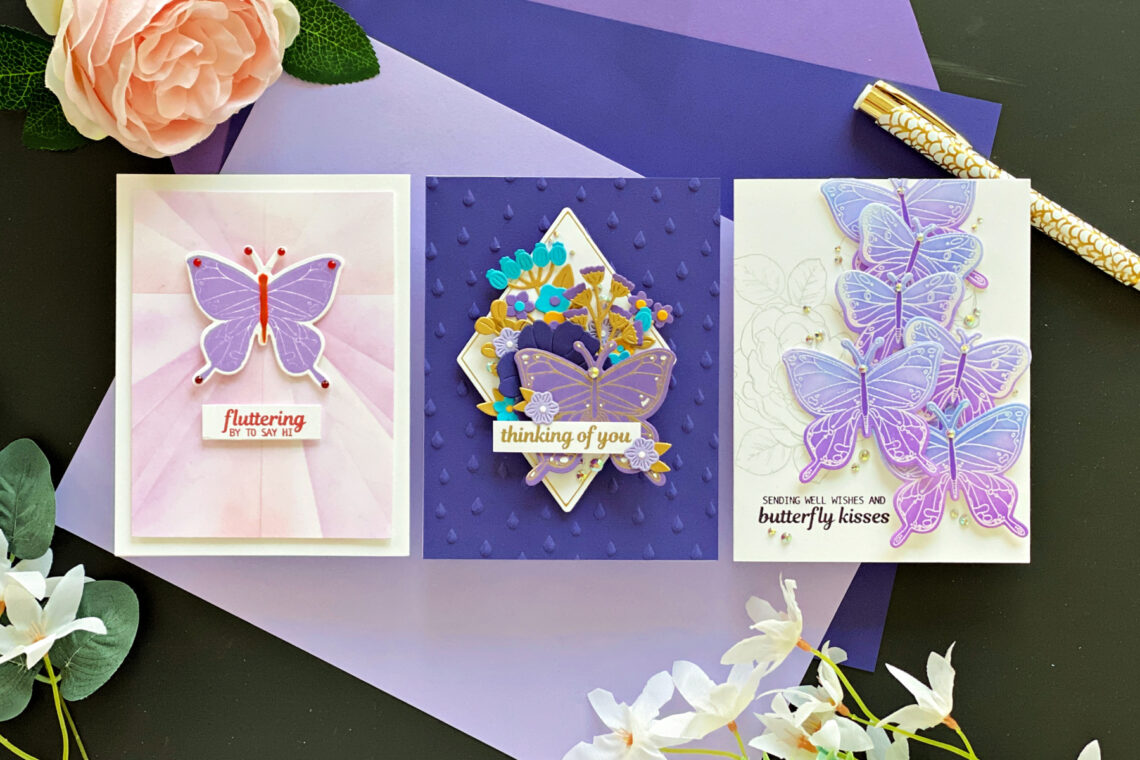
Butterfly Kisses: 3 Ways – Complicated to Simple by Joan Bardee
Hello and welcome! I’m Joan Bardee and today I’m featuring 3 cards using the Butterfly Kisses stamp and die set designed by the amazing Simon Hurley. I’ve got something for everyone here; the first card has lots of layers and colors; the second repeats 2 images; and the third is clean and simple. Used a lot of purple on these cards, which is a color that I rarely use – but butterflies just seem to work with it!
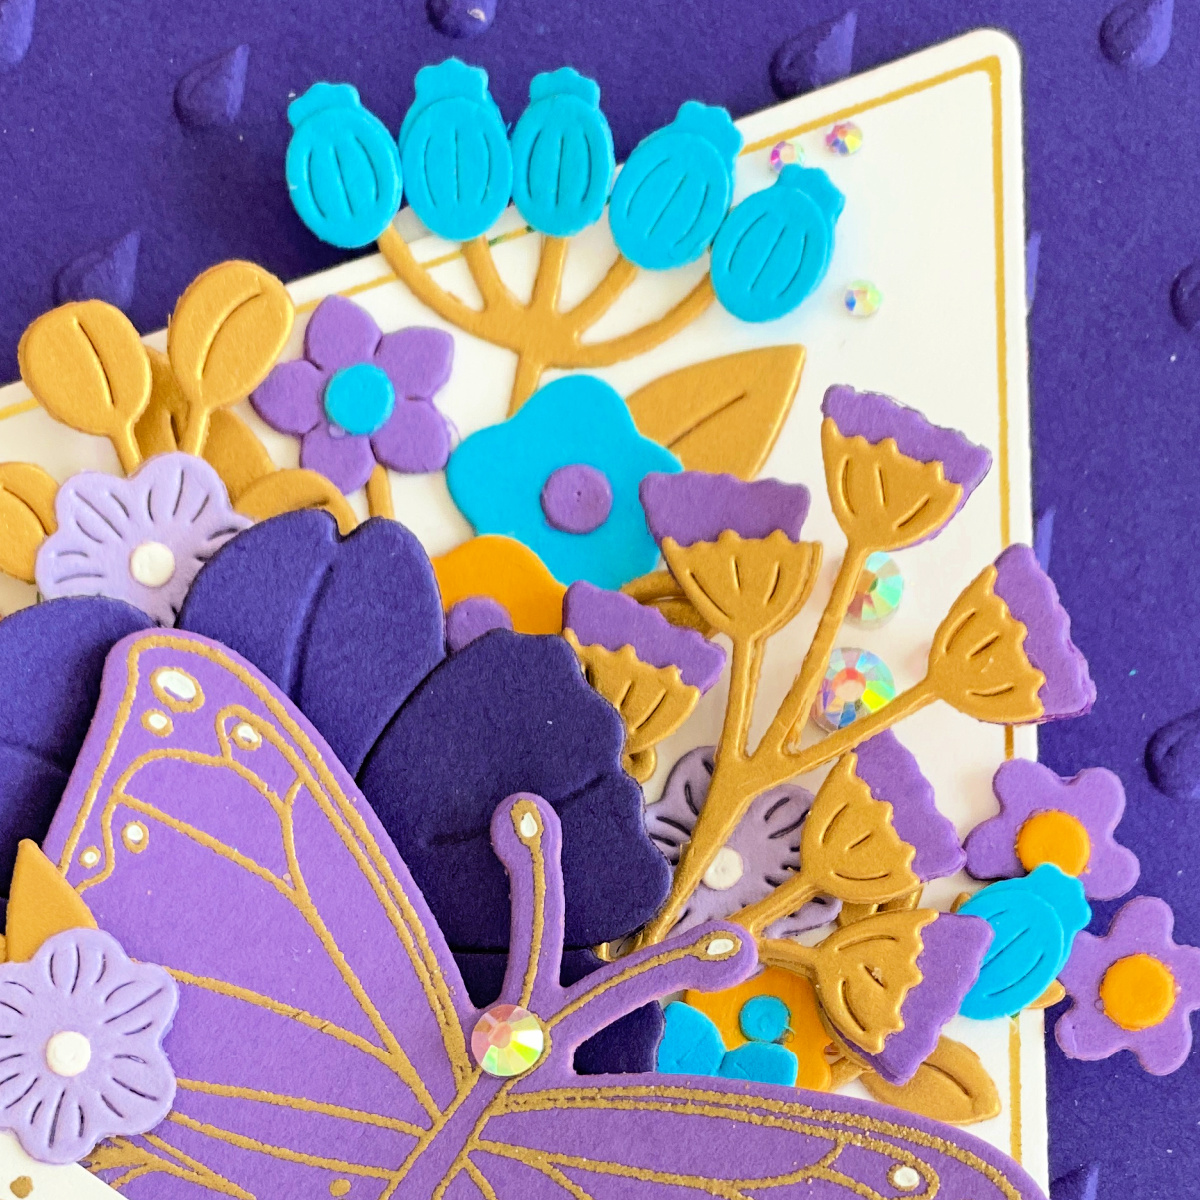
Floral Frame Card

Used Yana Smakula’s “perfect cardmaking formula” to design this card. This was a stretch for me as I usually make much simpler cards. Yana’s formula is to place a die cut and sentiment on a frame or other shape. Add a colorful or interesting (embossed, hot foiled, etc) background. I’m not doing the formula justice with my summary so be sure to check out Yana’s post to get all the details.
- Stamped and die cut the large butterfly and a sentiment from Butterfly Kisses.
- Hot foiled and die cut the Diamond Floral Frame Glimmer Hot Foil and Die Set.
- Die-cut flowers and leaves from a couple of other Spellbinders sets. The large flower is from another set by Simon Hurley called In Bloom.
- Put them all together, focusing on the large butterfly as the focal point. I moved the pieces around and didn’t adhere until I was satisfied.
- Consistent with Yana’s formula, I chose Royal Amethyst cardstock for the background and embossed it with a Raindrops 3D embossing folder.
This was such a departure from my usual cardmaking. I learned a lot and will use this formula again.
Tip: This is a very thick card. Last year I purchased some cardboard mailers online. I mailed quite a few thick cards and they all survived! I take them to the post office and in the US it adds about 20 cents to the postage.
Floating Butterflies
My second card took a lot less time and I love this result as well.
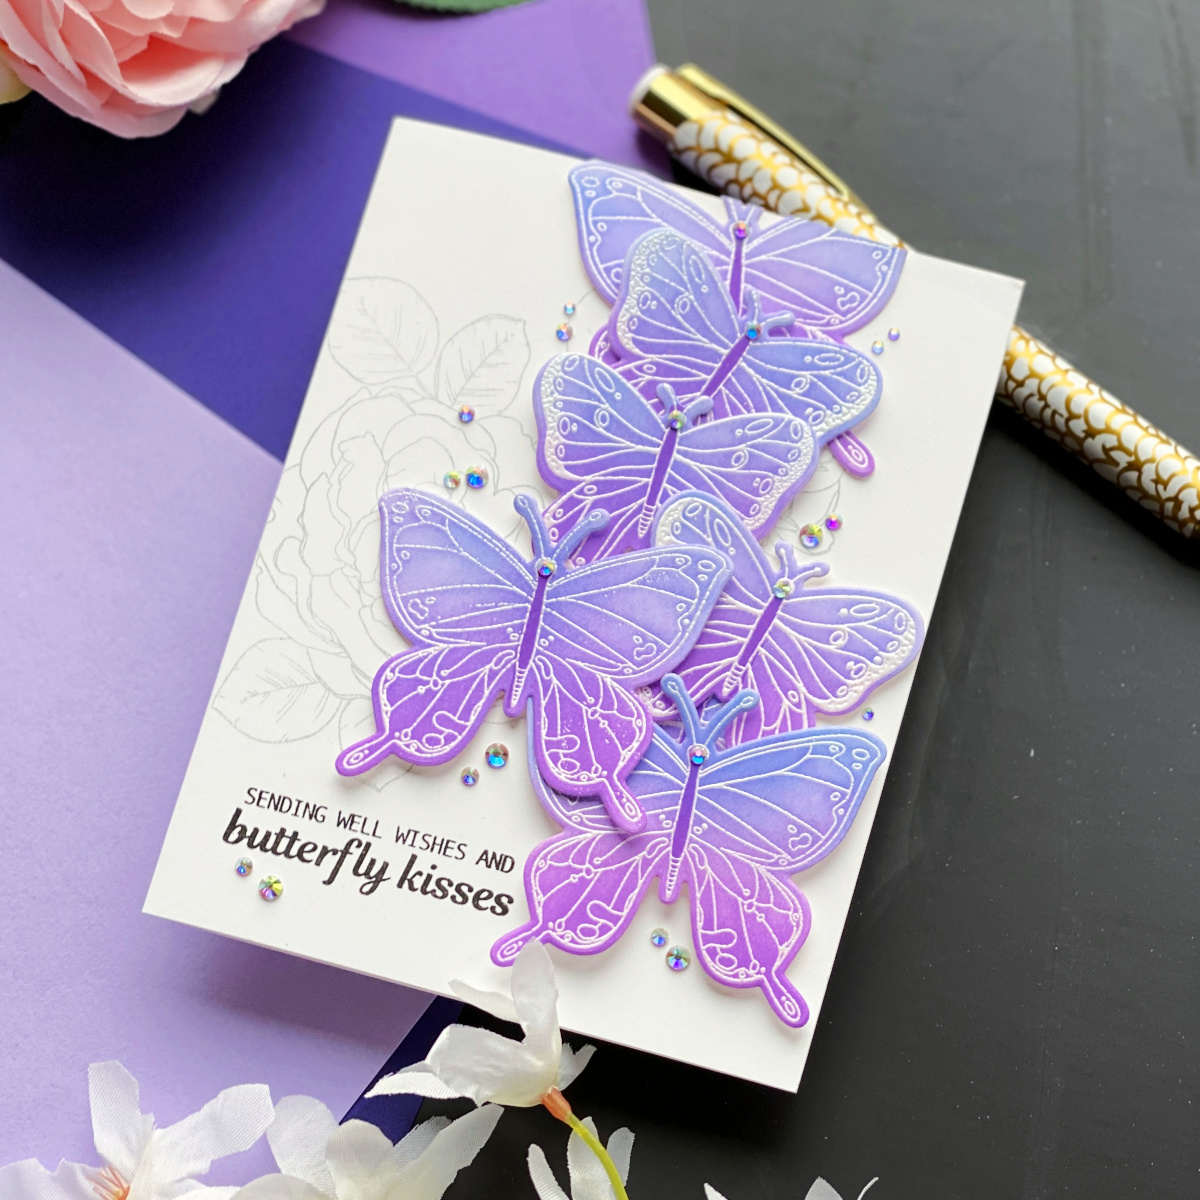
- Stamped a white A2 card with the large floral from Butterfly Kisses using pale gray ink and one of the sentiments using black ink.
- Embossed with clear embossing powder both sizes of the butterflies onto white cardstock, and ink blended all the butterflies with whatever purple and blue inks were left on my blender brushes!
- Die cut all the butterflies.
Tip: Placed one of the large butterflies to the right of the sentiment and then built upwards, using foam tape for dimension.
One Butterfly
My last card took about 10 minutes and uses an unusual color combination of purple and red.
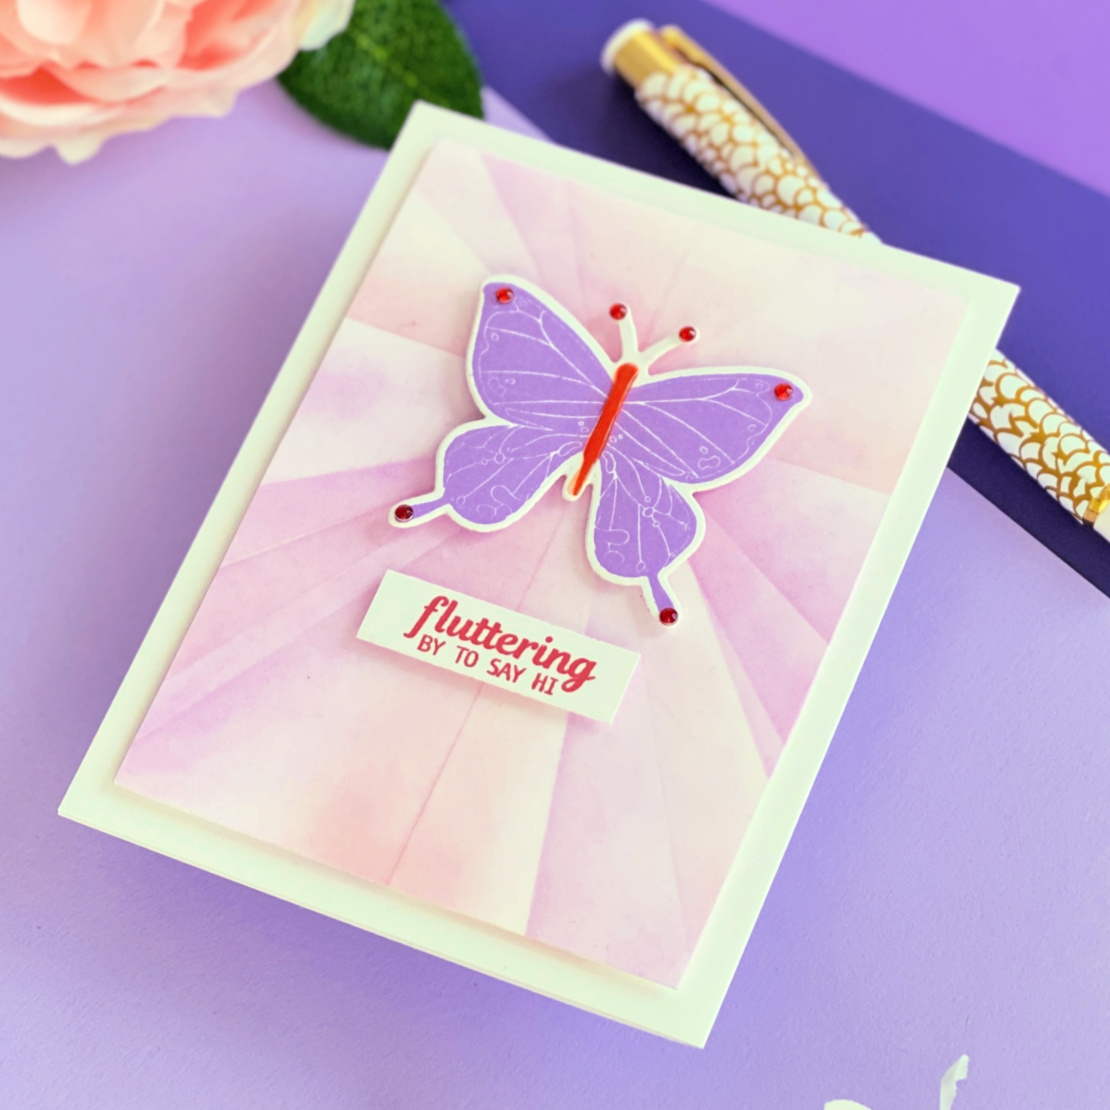
- Stamped only the background layer of the largest butterfly in purple onto white cardstock with a red center and die cut.
- Ink blended background in purple and red using masking tape to form a design. I didn’t measure – I wanted a more casual look.
- Stamped the sentiment in red, mounted the butterfly and added to an A2 card with foam tape.
- Added a few gems.
I love how just one stamp and die set can take us in so many different directions.
Thanks for taking the time to check out my projects. And, thanks to Spellbinders for having me today. if you want to see what else I’m up to, you can find me on Instagram as Dear Paperlicious.
Spellbinders Supplies:

Other supplies:
Heat gun, embossing buddy, gold and white embossing powders, blender brushes, Versamark ink, red, purple and black inks, scissors, paper trimmer, Post-it tape
One Comment
MaryH
Beautiful movement and you are so right about one set providing interesting and varied applications. This set will be useful for many occasions and will stand the test of time. Your projects are cherry and colorful with eye-catching layouts – KUDOS