Painter’s Garden Inspiration with Jennifer Kotas
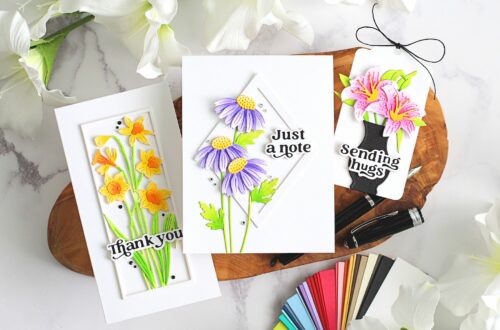
Hello! I’m Jen Kotas from Who Stole My Glitter and I’m happy to be here today to share three cards featuring the Painter’s Garden Collection from Susan Tierney Cockburn. There are five new flower Dies in this collection along with a 3D Embossing Folder.

Susan typically colors her flowers with Copic Markers and uses a special cardstock from Spellbinders. I prefer to cut my flower pieces from heavy-weight colored cardstock from Spellbinders. I added detail to the flowers with ink. It’s a time saver but I also love how the cardstock softens as I shape it but doesn’t tear. For detailed instructions on creating the flowers, please visit the Spellbinders YouTube channel.
I began by die-cutting all the flower pieces from the Pansy, Carolina Allspice, Zinnia, Bird of Paradise and Gerber Daisy and Ladybugs Etched Dies. Most dies are numbered with how many times you need to cut them. I took the opportunity to cut extras for future projects.
Next, I added pigment ink to the leaves and flowers. My intention was to change some colors for detail, not just darken them. Once everything was inked up, I began shaping the leaves. This is generally easier than the flowers as there is no assembly.
I shape the flower pieces and then assemble them before adding them to the card. It gives me the opportunity to play around with my design. There are a few exceptions such as the centerpieces for the Zinnias. They were easier to add once everything was in place.
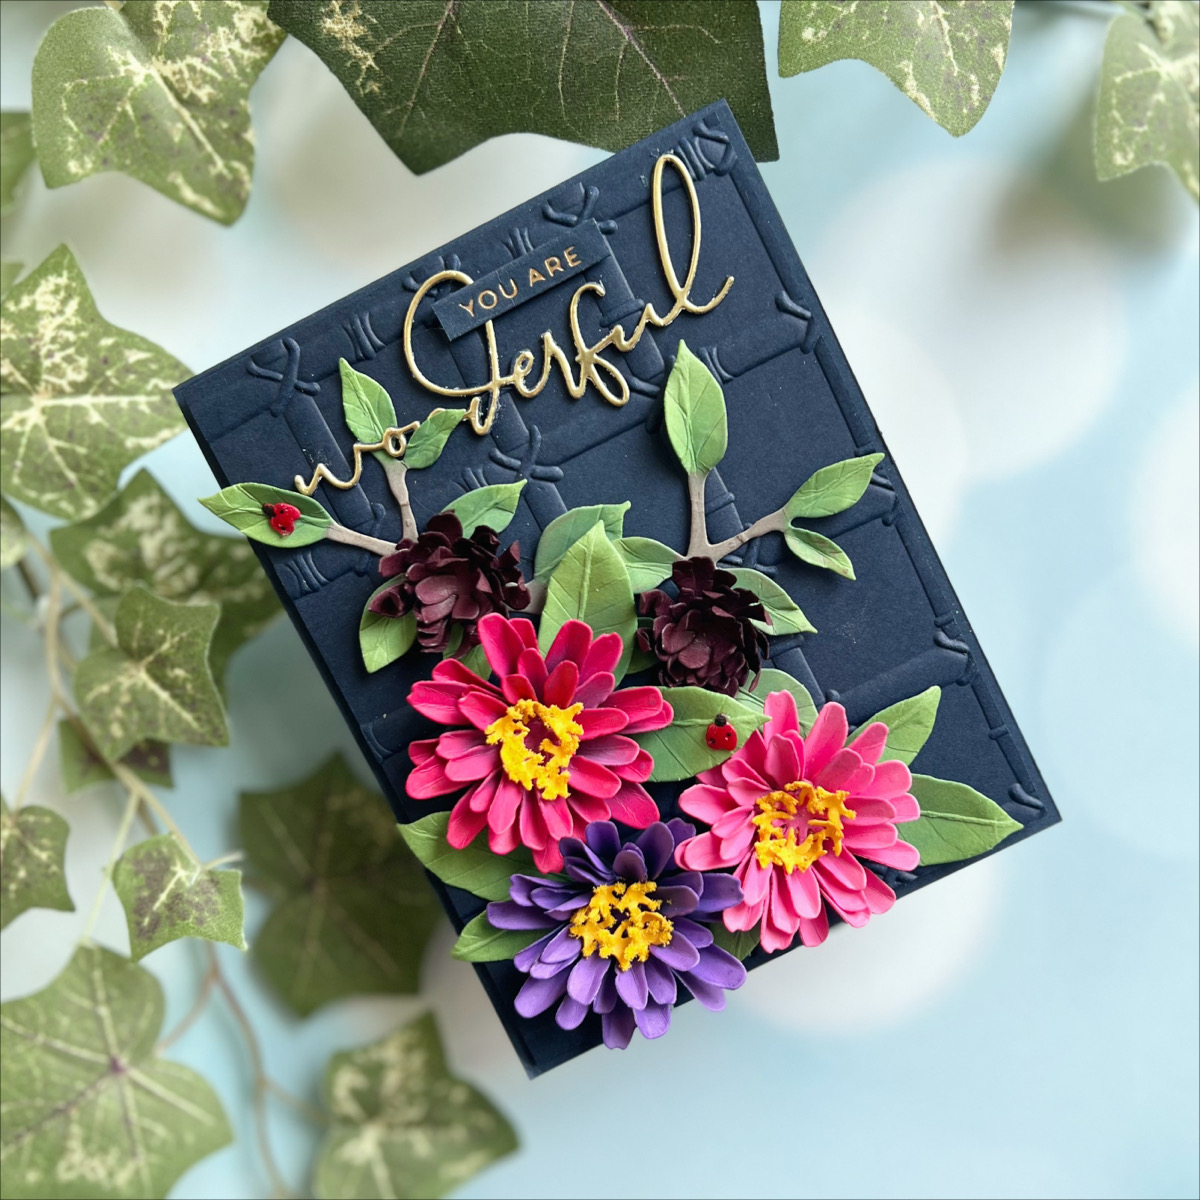
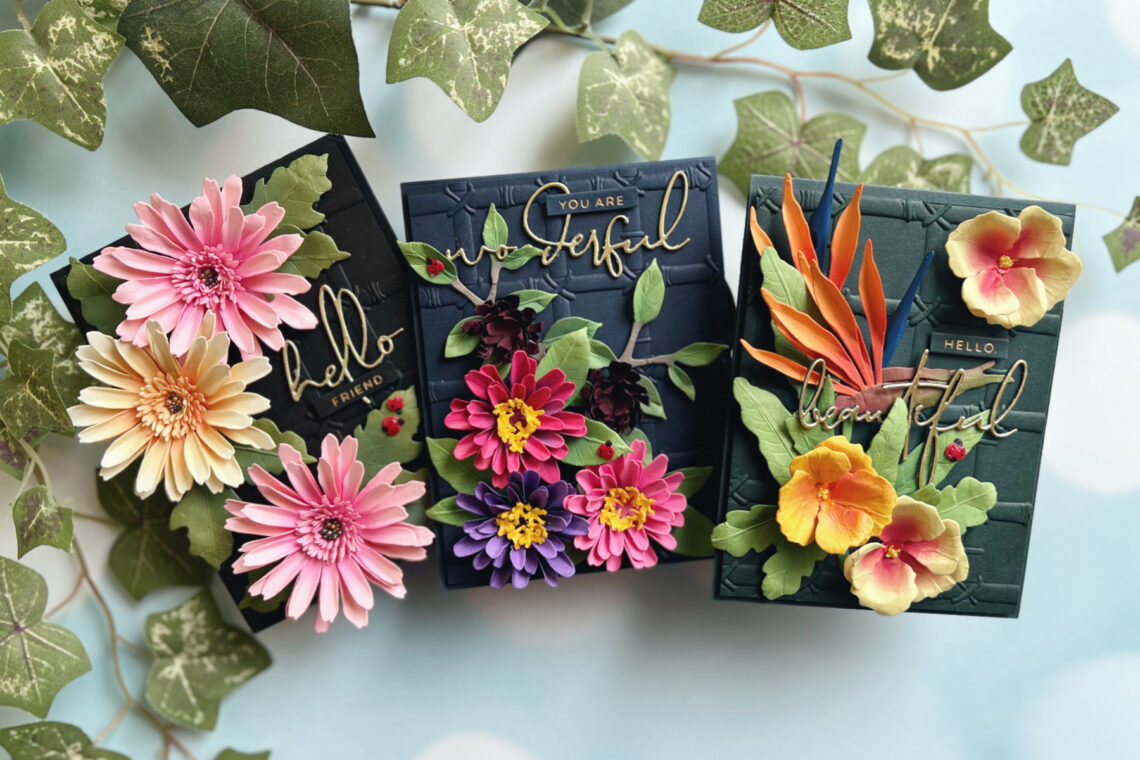
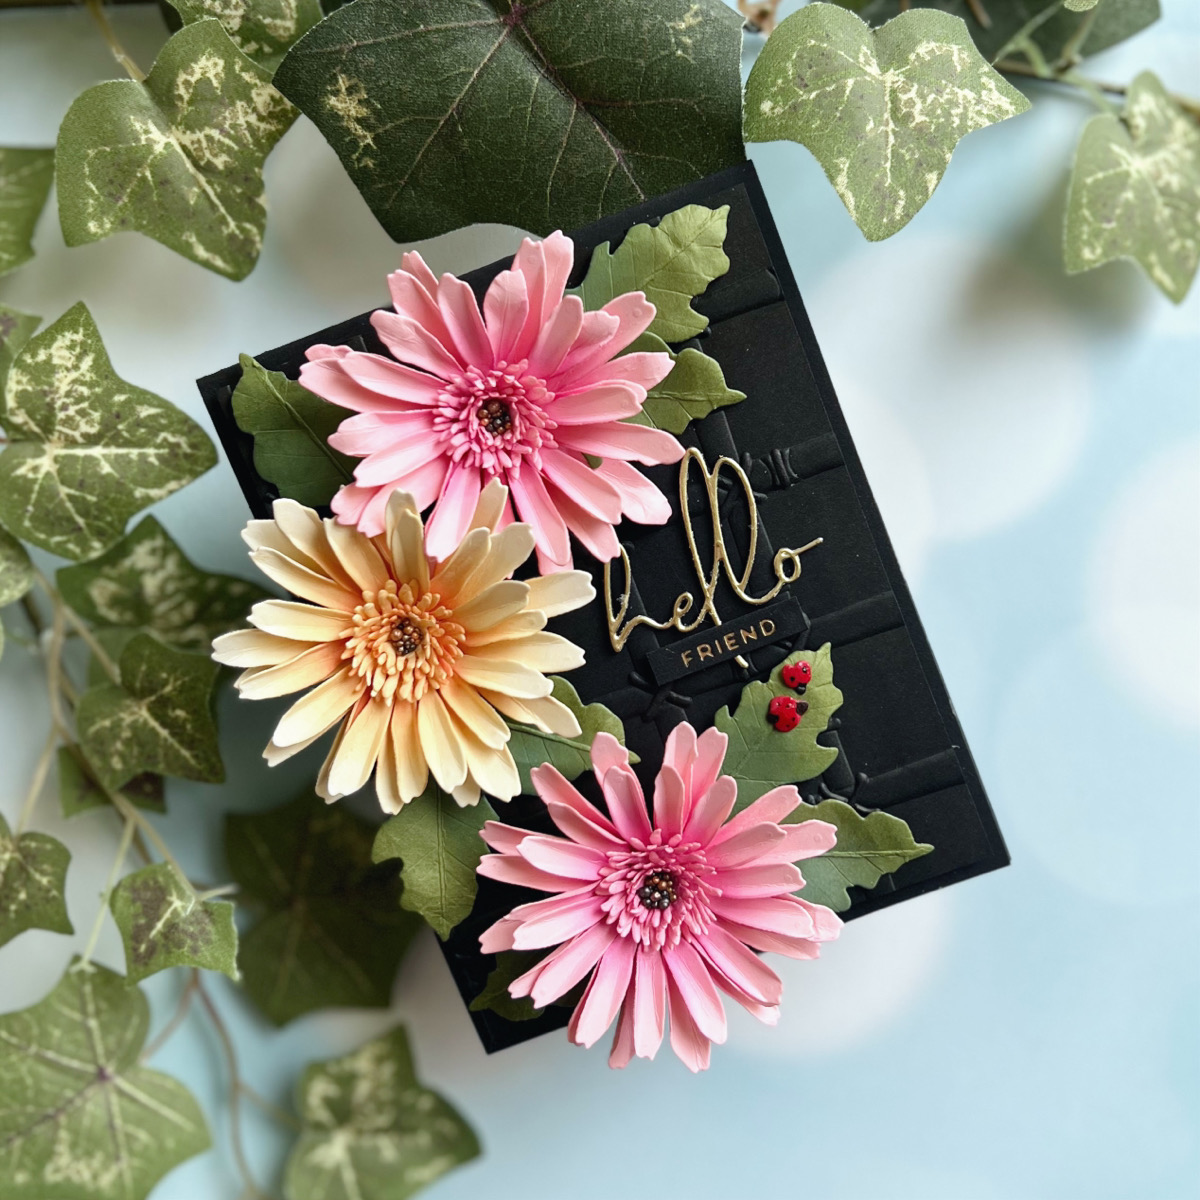
To create the cards I embossed Forest, Indigo and Onyx Color Essentials Cardstock with the Bamboo Trellis 3D Embossing Folder. I then cut the panel down to 4” x 5 1/4”. The sentiments from Wonderful Script Sentiments Etched Dies were cut from Gold Mirror Cardstock once and then one of the three background colors twice. I then adhered them together with liquid glue.
I adhered the flowers to the panels with liquid glue, using the sentiment only for placement at this point. The leaves were added next, along with any finishing details for the flower centers. I did not worry about flowers hanging off the edges since the card won’t fit in an envelope.
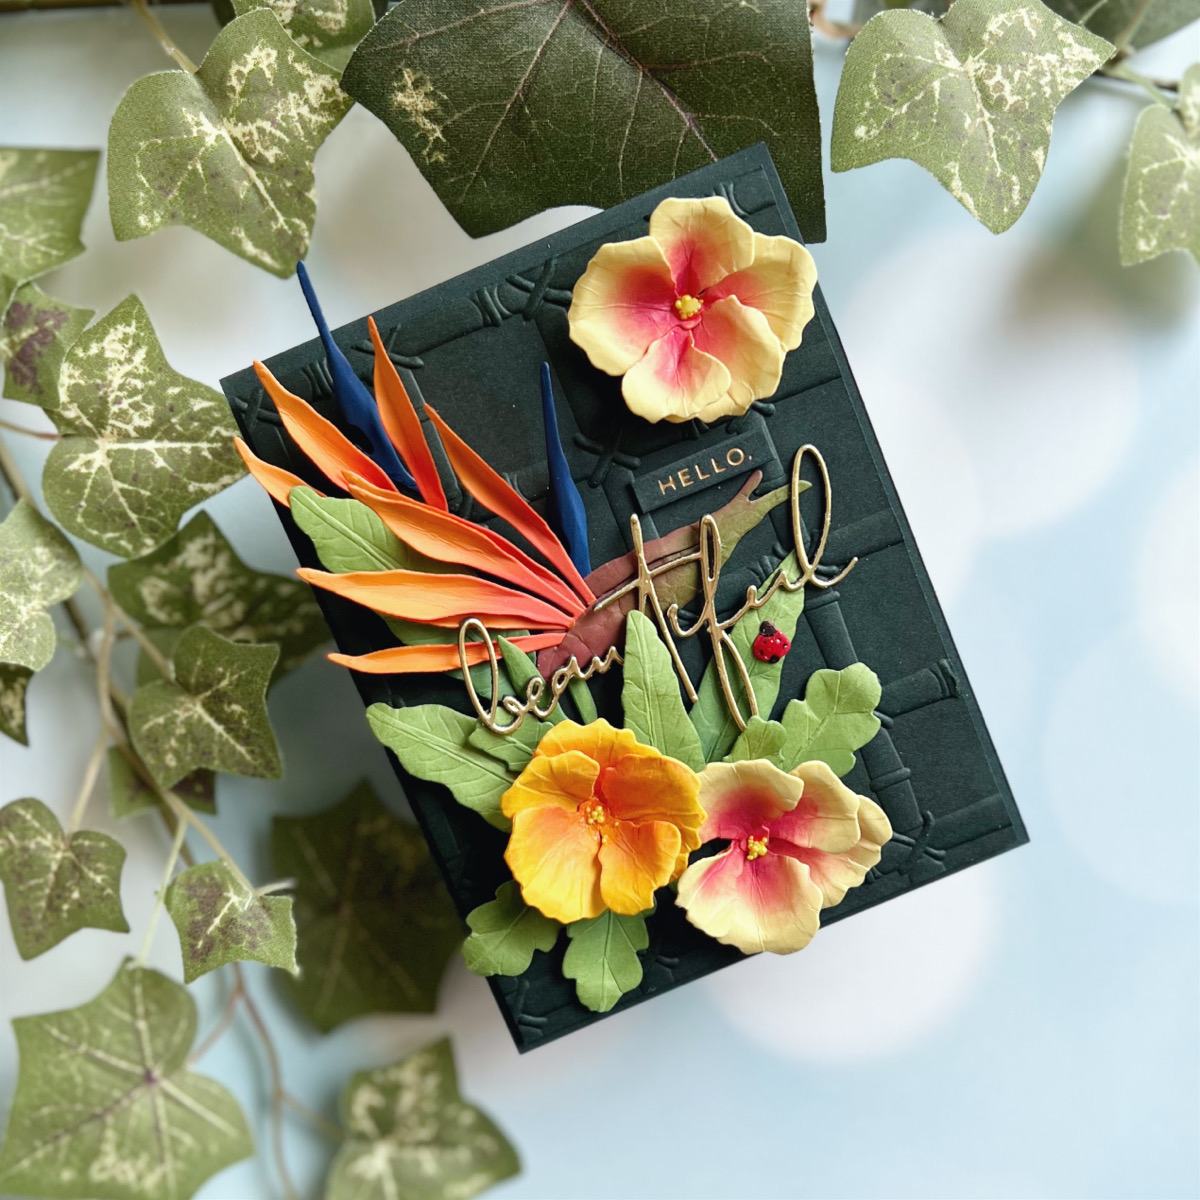
I added the sentiments to the panels and then hot foiled the Hello Friend Sentiments Hot Foil Plates on the same colors as the background with Satin Gold Hot Foil Roll. They were cut down to size and adhered with foam strips. The panels were placed on an A2 card base cut from Forest, Indigo and Onyx Color Essentials Cardstocks with foam tape. To finish the cards, I added a ladybug from the Gerber Daisy and Ladybugs Etched Dies set coated with Glaze and Glue.
I love the way the dark background colors make the flowers shine on these three cards. The ladybugs add a bit of playfulness to these cards. These are cards that should be given to the most special people in your life. You can see more cards made with Susan’s flowers on my blog, Who Stole My Glitter or visit my Instagram page for more inspiration. Thanks for visiting!
Spellbinders Supplies:

Other supplies
Distress Oxide Inks, Bearly Arts Precision Glue, Prills, Yellow Paper Flower Pollen.
4 Comments
Mary A Butler
Beautiful cards! How do you make an envelope for them? Thanks
Melissa Grant
These are little works of Art…truly lovely.
Becky Green
BEAUTIFUL!!!
Susanbcards
I love these!