Wax Seal Cards Ideas with Sealed For Spring and Marie Heiderscheit
Hello, crafty friends! I’m Marie Heiderscheit and I blog and share my creations at Marie Nicole Designs. Today I’m sharing three ways to use the new Sealed For Spring collection in your own cardmaking. I absolutely love wax seals, and these new ones are so pretty!
You can use wax seals to seal your envelopes as well as making fun embellishments to add right to your cards. Let’s take a look!
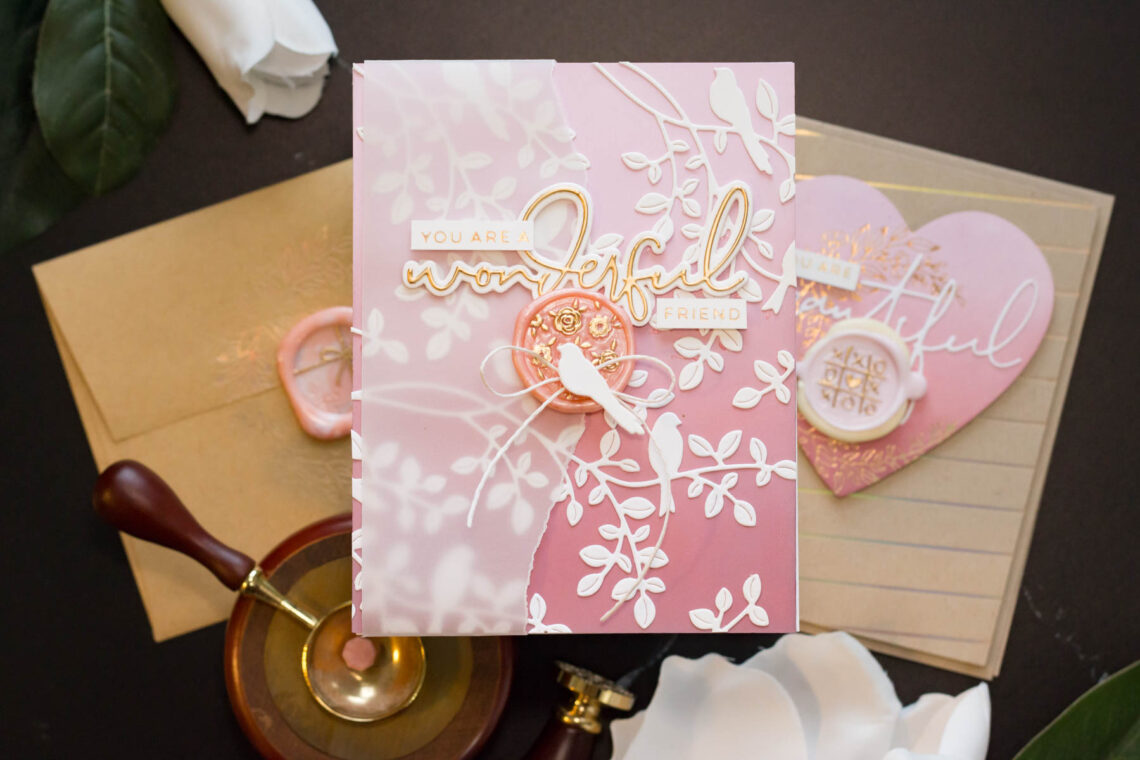
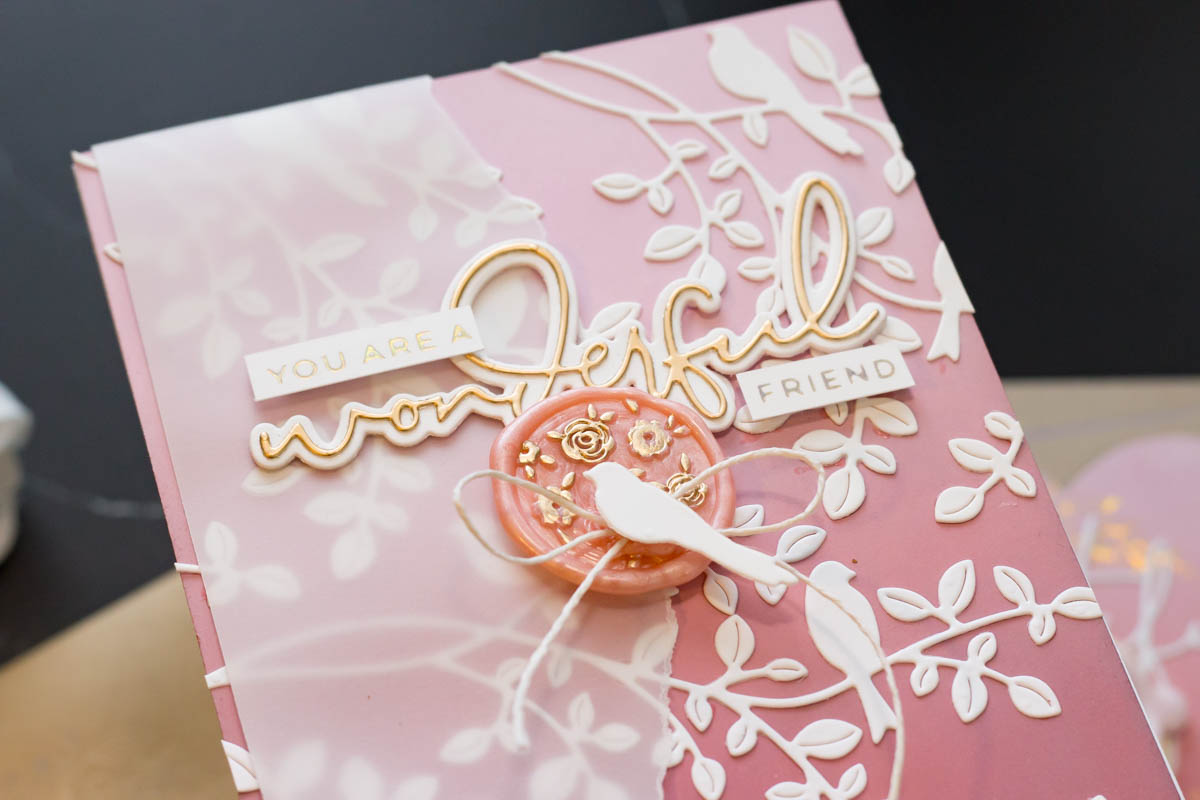
WONDERFUL FLORALS
For my first card, I used some inks to ink blend a pinkish background. Then, I cut the Sealed Birds die from white cardstock and glued it over my ink-blended background, creating a pattern. I wanted my sentiment and wax seal to stand out against the busy background, so I used a piece of torn vellum on one side to tone down the busy background pattern a bit.
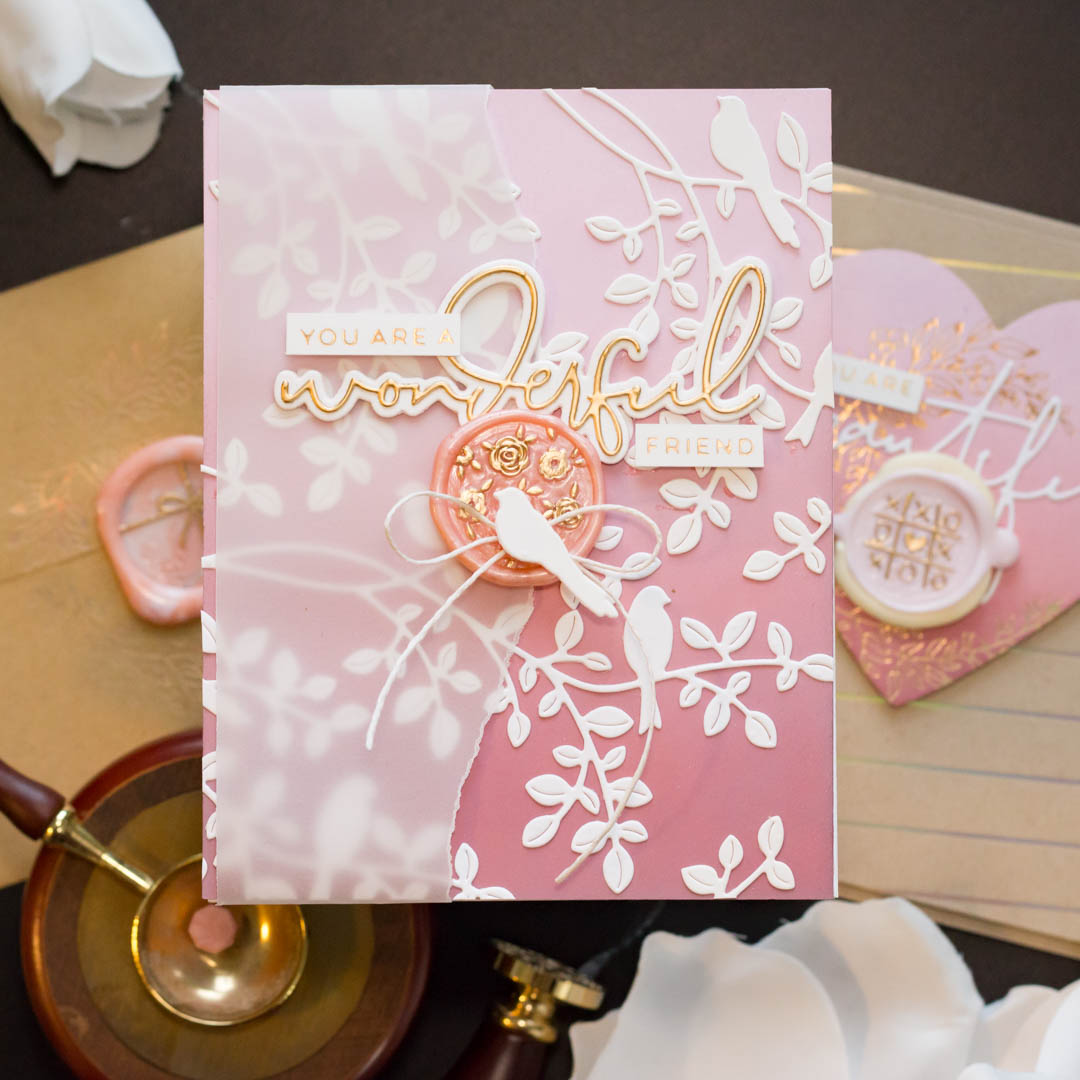
For the sentiment, I used a die and some glimmer plates from the new Anemone Blooms collection. This collection goes so well with the new wax seals! I then used some of the Peachy Pink wax beads to create a seal with the Scattered Florals wax seal stamp. I wanted the flower design to show up more, so I used the gold pain pen to add paint to my seal.
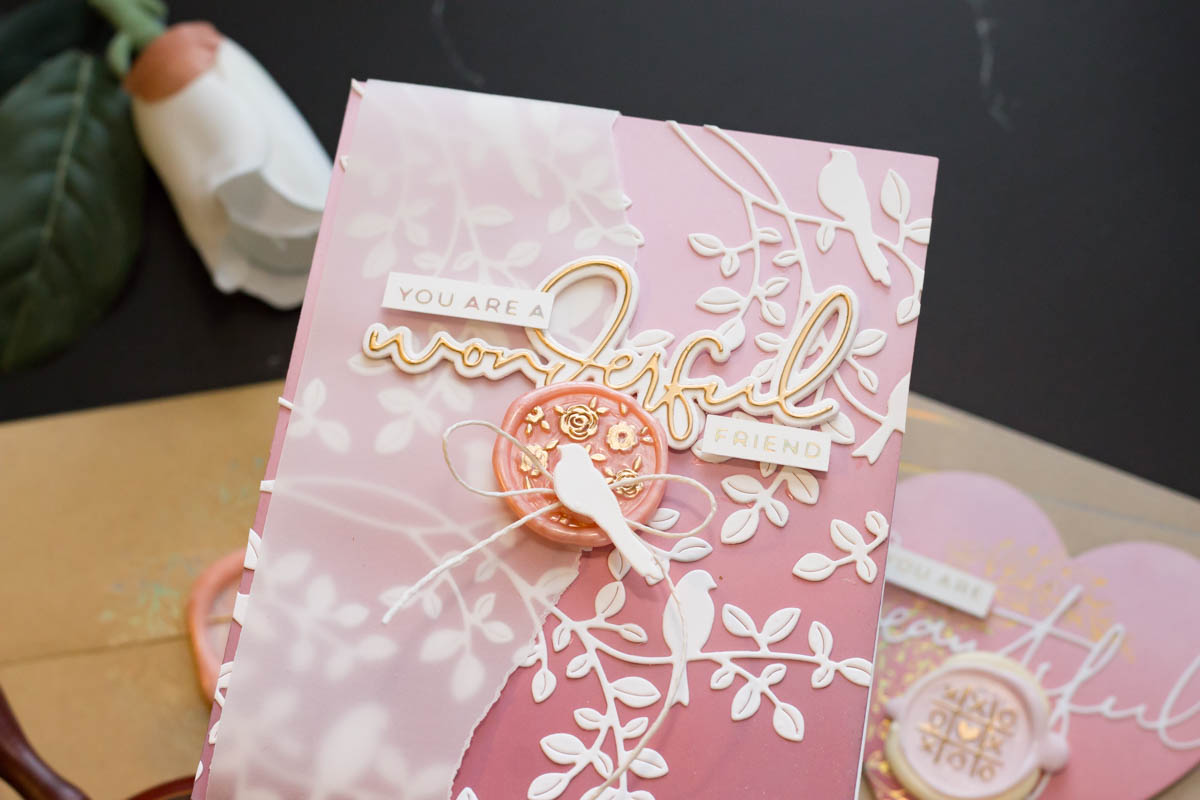
I then added a white cord bow and one of the die cut birds right over the seal and I think it turned out just lovely.
DOUBLE LAYERED
This second card shows how you can use two colors of wax to create a double-layered seal. I glimmered stripes on some kraft cardstock for a background. Then, I did some more glimmering on my heart. I die-cut and ink-blended this heart using the same color of inks I used for my first card.

The glimmer plate I used on top the heart is the Sealed Swag plate and it looks gorgeous on a card as well as on an envelope, which you will see later on in this post!

The sentiment is again from the Anemone Blooms collection. Then, for my wax seal, I first made a white seal using about 5 wax beads and the Solid Circle Was Seal Stamp. This created a plain wax base that I layered the Pastel Pink beads over and then stamped the Heart Tic Tac Toe into it.
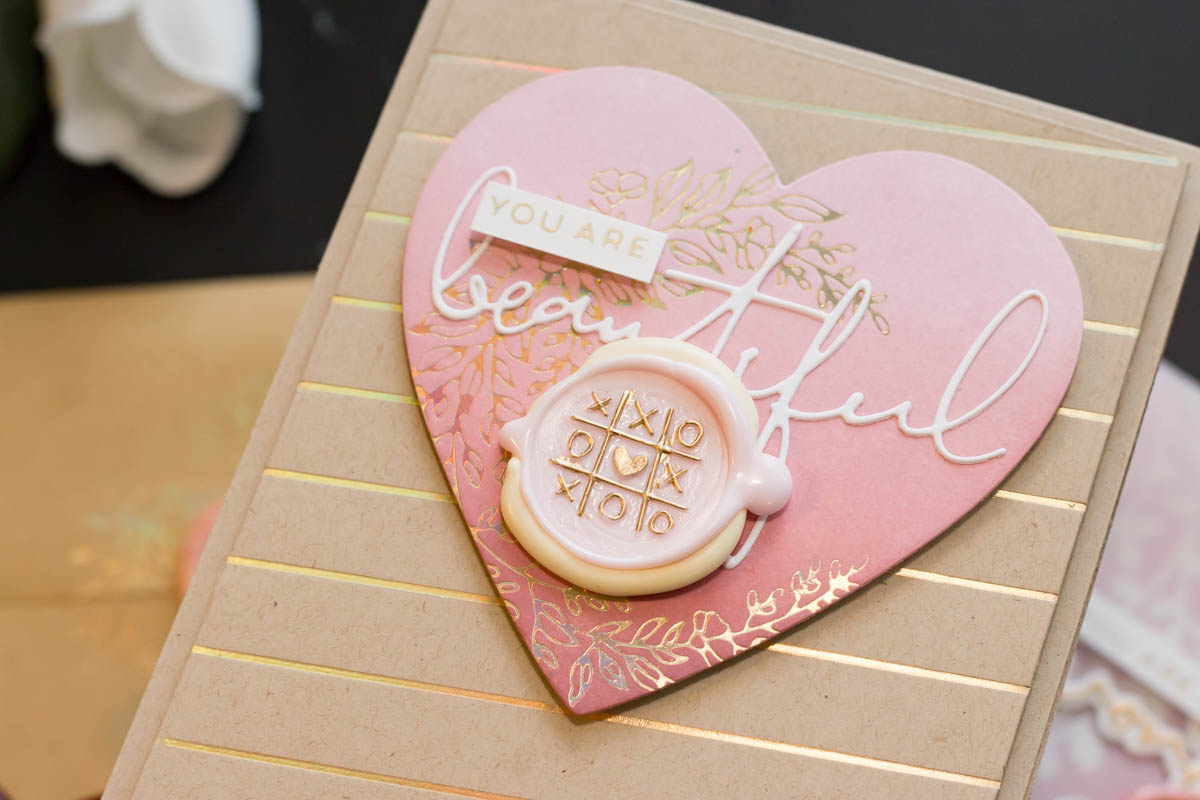
This gives a double-layered seal which is a fun way to layer colors together!
PRETTY ENVELOPES
And of course, you can add these wax seals right onto your envelopes to seal them! I used a kraft envelope so it would coordinate with the colors I used for my cards. I glimmered the Sealed Swag glimmer plate onto the center back of the envelope using the Aura foil.
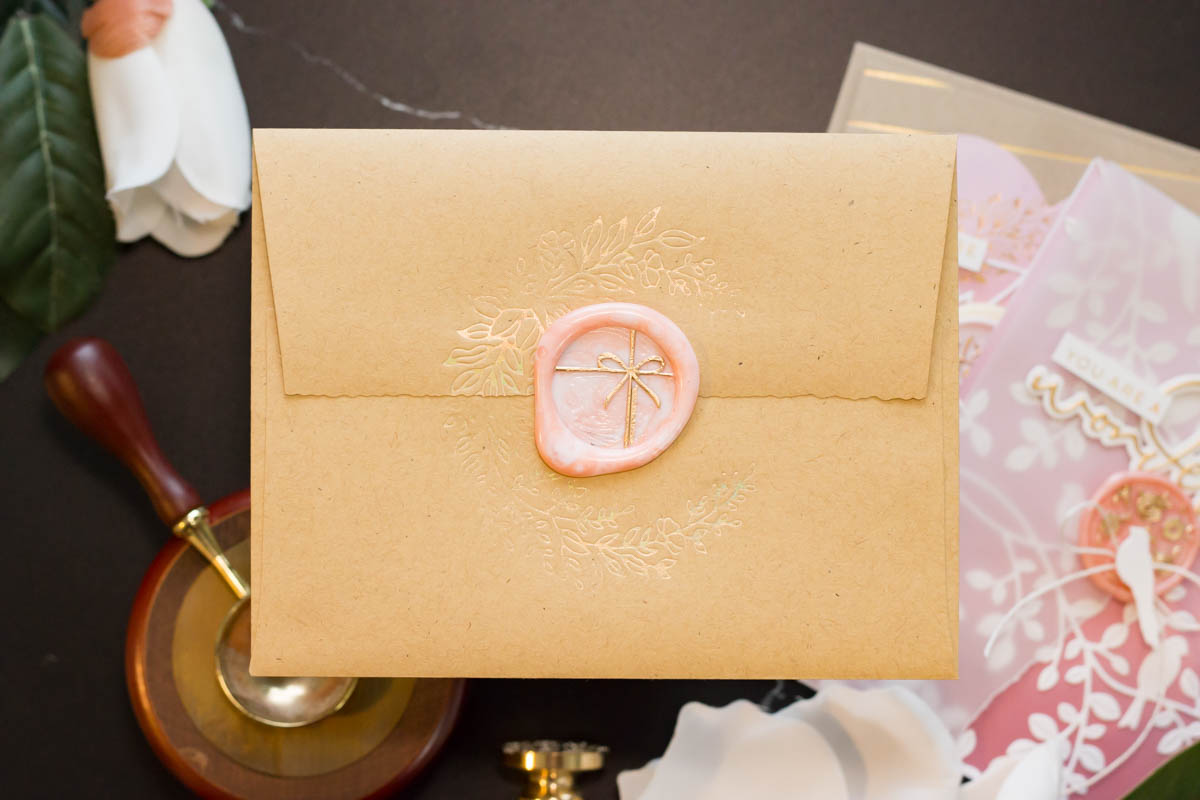
After I had the Sealed Swag glimmered onto my envelope, I added some more Peachy Pink beads and then stamped it with the new Gift Bow Wax Stamp. Again, to make the design stand out I used the gold paint pen. So pretty and so simple to do!

I hope you enjoyed the blog post today! These wax seals are so much fun to create with and there are so many techniques I hope you will experiment with and try.

Until next time,
Marie Nicole
Spellbinders Supplies:

Other supplies
Ink, ink blending tools, liquid glue, foam adhesive, vellum
3 Comments
MaryH
These are gorgeous cards. Love the softness the velum gives the first card. SB has the best seals and your designs certainly are the highlight of each card!
Joan Bardee
absolutely beautiful
Dorothy Ayotte
These seals are lovely- pink is one of my favorite wax colors! Beautiful card samples.