Layered Stenciled Cards with a Folk Art Flair with Joan Bardee
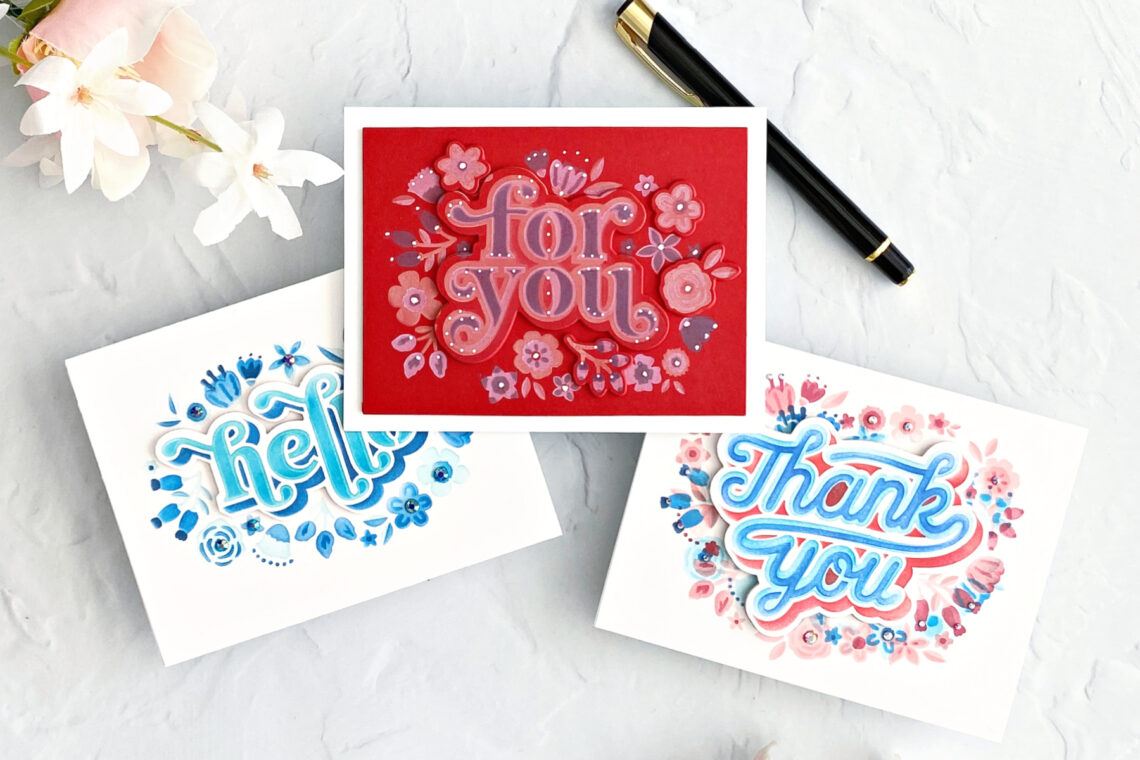
Welcome! Joan Bardee here sharing cards made with the fun new Spellbinders Layered Stencils Collection. There are 4 sets in the collection: Hello, For You, Thank You, and Make a Wish. Each set comes with layering stencils and a mask for the sentiment. There are coordinating dies. These stencils do most of the design work for you – the sentiment knows where to go, and the floral designs form a beautiful bouquet around 3 of the sentiments. Change colors and you will get a totally different look. And, as you’ll see, there is room for even more creativity.
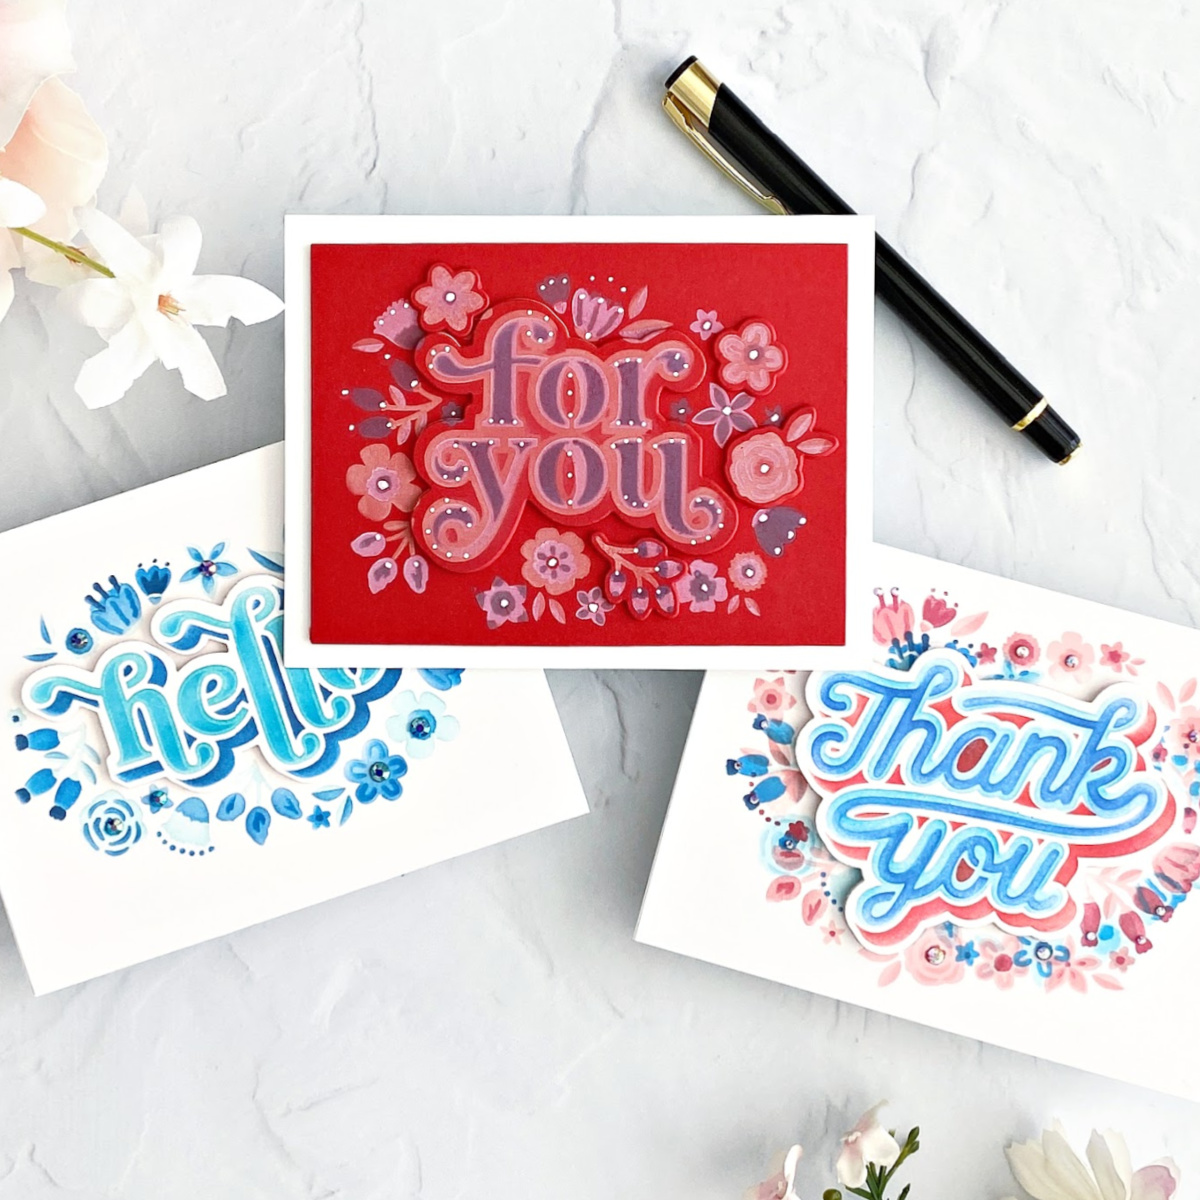
For these cards, I was inspired by Pennsylvania Dutch designs – a form of American Folk Art, with its bright primary colors and distinctive Hex designs.
A few general tips on using this collection:
- If you don’t have 4 shades of one ink color, use the same ink color more than once.
- Start with the lightest shade of ink.
- Use an opaque ink, like Ranger Distress Oxide, when stenciling on darker cardstock. Pouncing the ink gives more coverage than blending.
- It helps to use a temporary adhesive spray, like Pixie, to hold down the sentiment portion of some of the stencils.
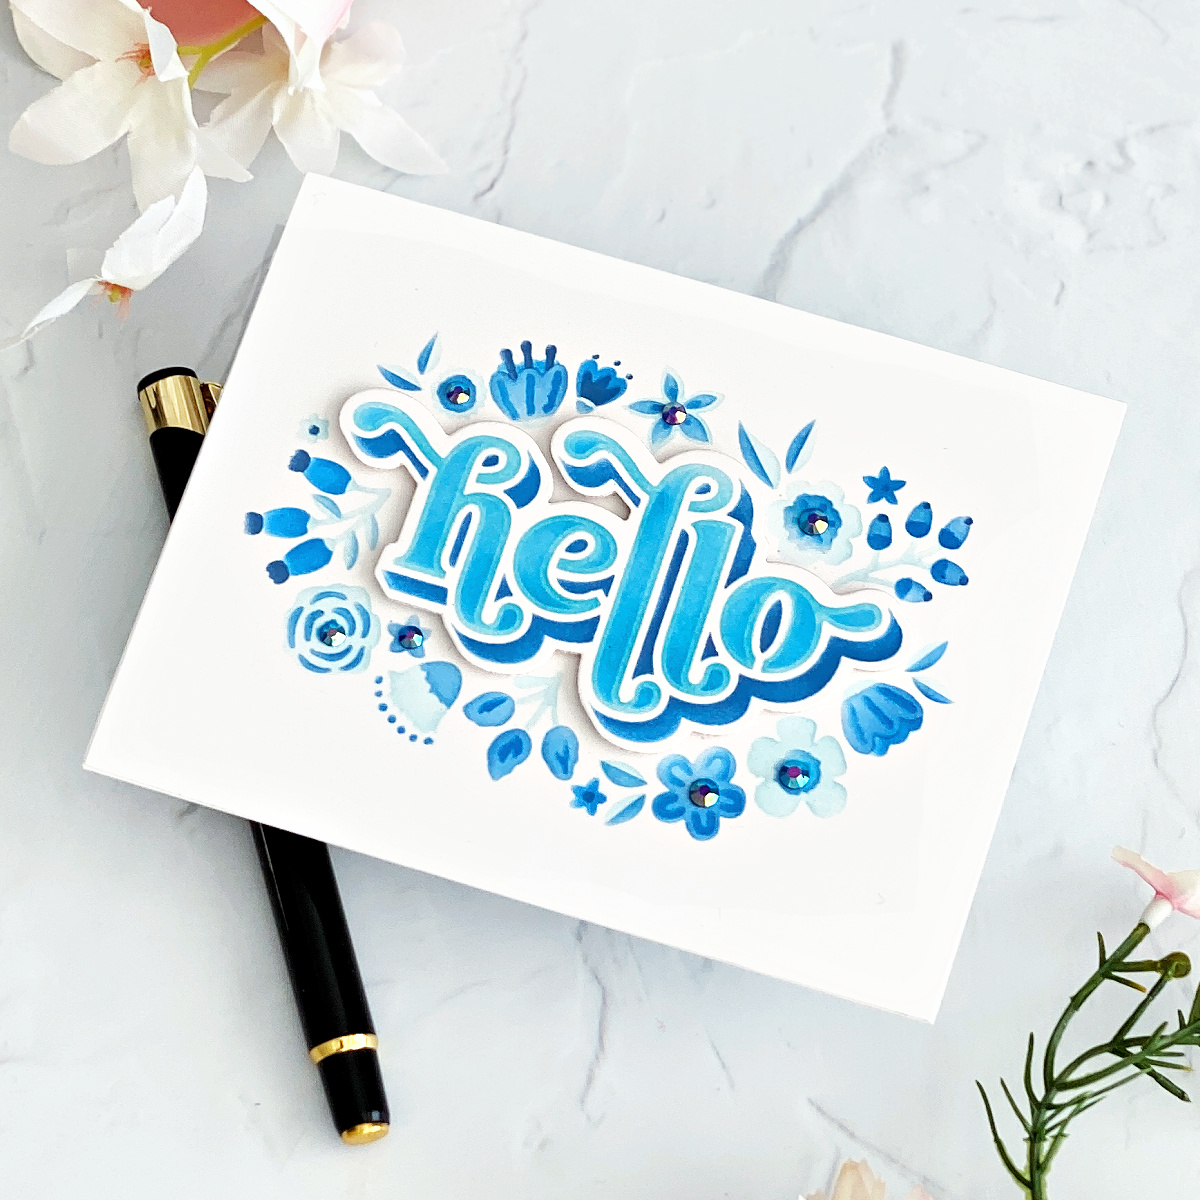
Blue and White Hello
Hello clean and fresh! Used 4 shades of blue ink – one on each stencil of the Layered Floral Hello stencils. With no masking, this card is perfect for mass producing.
Note to Spellbinders: I would love a Christmas version of these Layered Stencils. Thanks!
- Cut 2 pieces of white cardstock to 6” x 4 and 1/2”. (This is the size of the stencils and I like to match the cardstock to the stencil size.)
- Place one sheet of cardstock in the corner of my MISTI.
- Place stencil #1 from Layered Floral Hello Stencils on top of the cardstock, butting up to the corner.
- Stencil the lightest shade of blue ink using stencil #1, and repeat with stencils 2-4, using a progressively darker shade of blue ink for each stencil. Set aside that panel.
- Take the 2nd piece of white cardstock and repeat the steps, stenciling just the sentiment. I didn’t mask off the design around the sentiment because the die cuts around it.
- Die cut the sentiment from the 2nd piece of cardstock with the Floral Hello Coordinating Etched dies. Die cut a few more sentiment shapes from scrap white cardstock and adhere together so that the sentiment is thick.
- Adhere the 1st stenciled piece to an A2 white card and then adhere the sentiment with foam tape.
- Add Opal embellishments.
- Sit back and admire.
For You
This card uses all the parts of the Layered Floral for You stencils and dies.

- Ink blend each stencil from Layered Floral for You stencils on a piece of Poppy Field cardstock (all inks are Ranger Distress Oxide):
- Stencil #1: Squeezed Lemonade
- Stencil #2: Kitsch Flamingo
- Stencil #3: Abandoned Coral
- Stencil #4: Seedless Preserves
- Ink blend the sentiment only on a 2nd piece of Poppy Field cardstock using the same stencils and ink colors as above.
- Die cut the sentiment with the Floral For You Coordinating Etched dies. Die cut 3 additional Poppy Field sentiment layers. Adhere together to form a thick sentiment.
- Stencil only the 4 flowers for which there are dies using the same ink colors. This requires masking off on the stencils around each of those flowers. I stenciled one flower at a time, using smaller pieces of Poppy Field cardstock.
- Die cut the flowers and additional Poppy Field layers. Adhered so that each flower was 3 layers.
- Trim the Poppy Field panel.
- Adhere the die cut flowers and the sentiment to the panel and add white dots with a pen.
- Adhere to a white A2 card.

Tip: Adding white dots and a white border helped the rest of the card come alive.
Tip: Using white pigment ink instead of the Squeezed Lemonade would have been a better choice. Guess whose white pigment ink is missing somewhere in my craft room?
One Card; Two Stencil Sets
Yes, you can use more than one set of Layered Stencils on the same card. I love how it created a bit of a heart shape.

Made this card in the same manner as the Blue and White Hello card, except I used the Layered Floral Hello and the Layered Floral Thank You stencils on one card. Ink blended the Layered Floral Hello stencils in shades of blue and followed with the Layered Floral Thank You stencils in shades of red. I stenciled the sentiment separately, only using stencils 2 – 4 from the Layered Floral Thank You stencils, as I wanted part of the sentiment to stay white.
Tip: Practice on a white scrap or typing paper to make sure that the ink colors work together. If you use complementary colors (such as red and green), you’ll create mud. Using colors next to each other on the color wheel will give the best result.
Thanks so much for checking out this post and thank you to Spellbinders! I would love to see anything you make with this collection, so feel free to tag me on my Instagram account. I’m Dear Paperlicious if you are looking for me.
Spellbinders Supplies:

Other supplies
Squeezed Lemonade, Seedless Preserves, Kitsch Flamingo, Mermaid Lagoon, and Abandoned Coral Distress Oxide inks, paper trimmer, rubbing alcohol (clean the stencils), Post-It Tape, iCraft Pixie Spray Stencil Adhesive, white cardstock, blue dye inks.
One Comment
JJ Bolton
Such beautiful cards and wonderful tips! I always love to see what Joan creates with her Spellbinders goodies!