Stampendous Hello Spring Collection with Jennifer Kotas
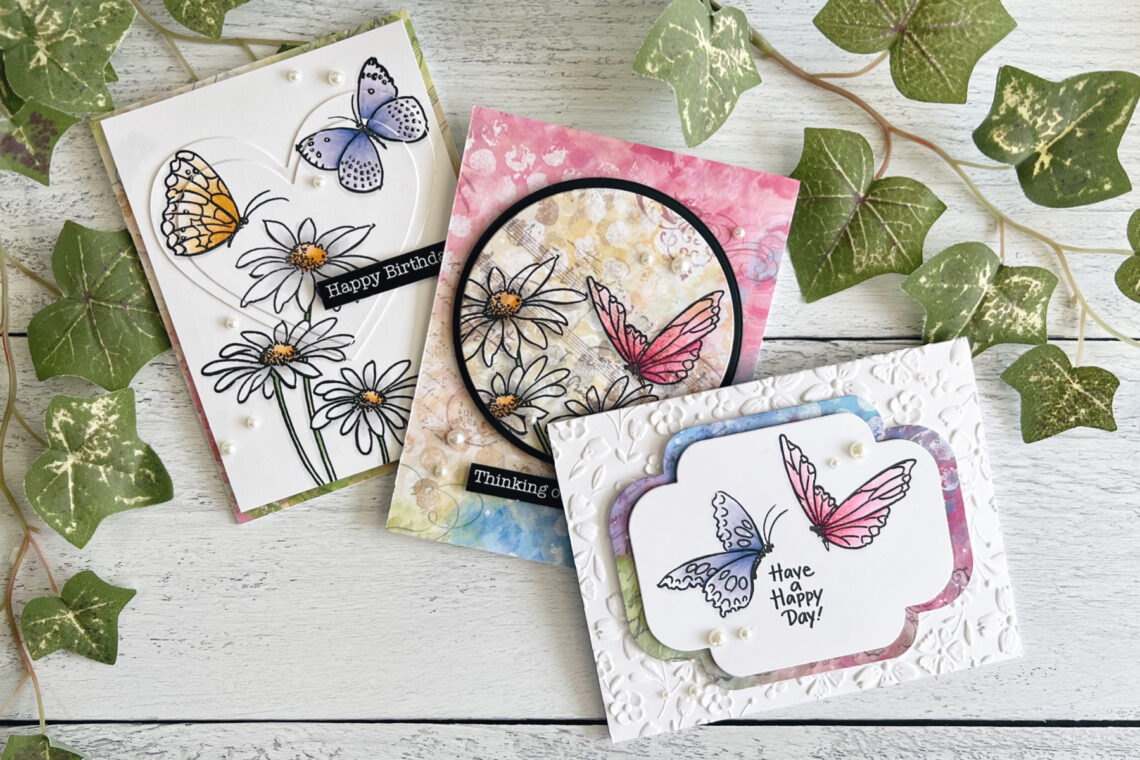
Hello! I’m Jen Kotas from Who Stole My Glitter and I’m happy to be here today to share three cards featuring the Hello Butterfly Stamp Set from the Stampendous Hello Spring Collection. All of the products in this collection are beautiful. I enjoyed pairing the Quick Card Backgrounds up with these stamps as well.
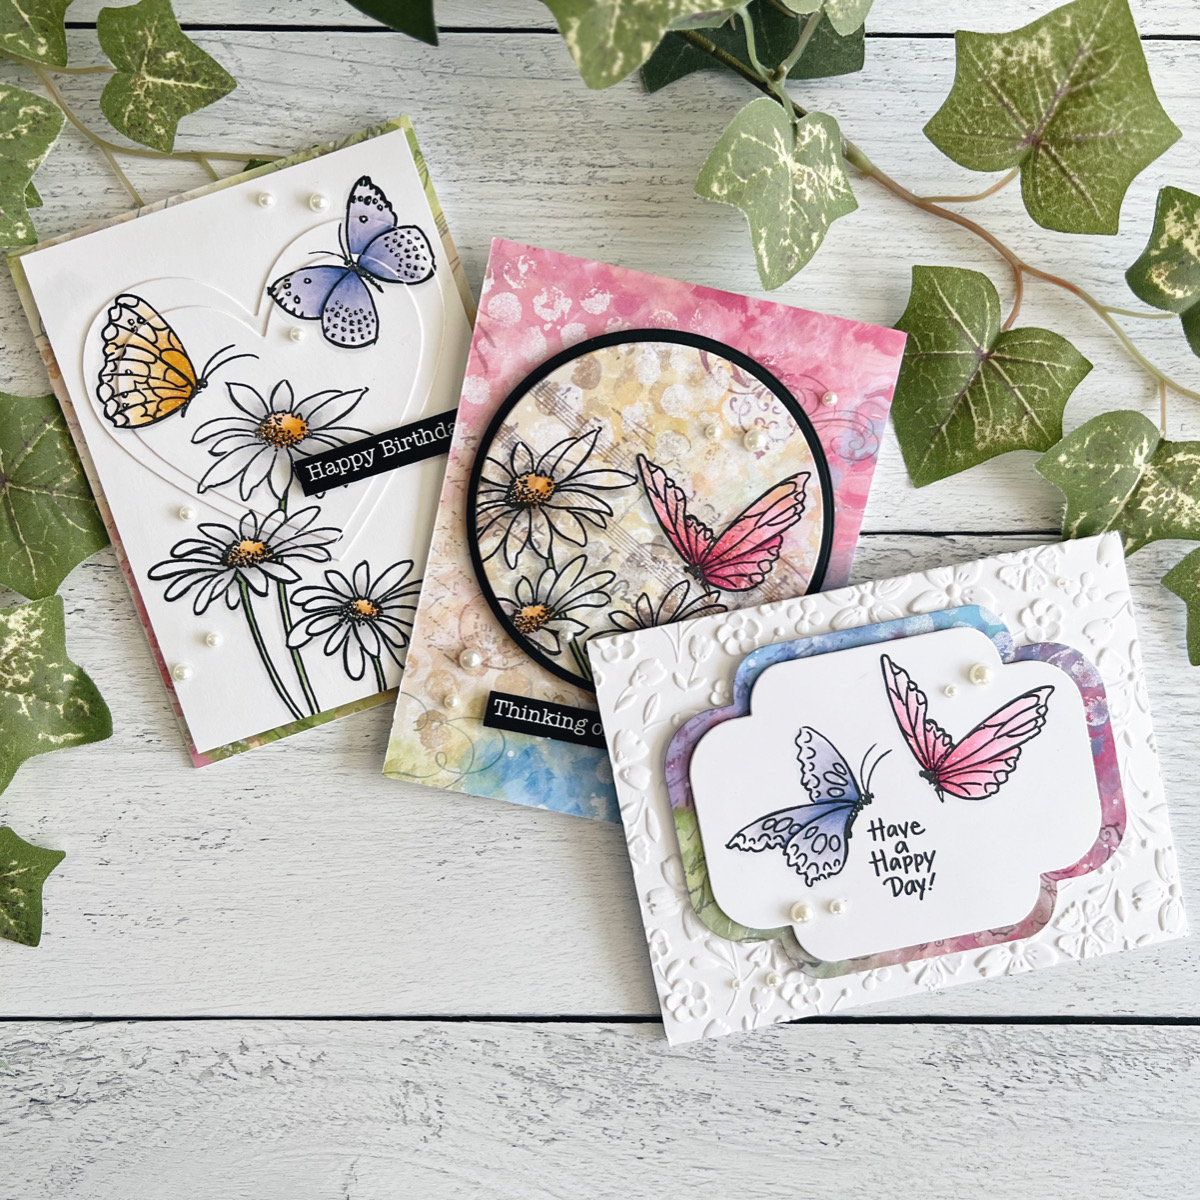
I sometimes struggle when I don’t have dies for my stamps so, for these cards, I tried to find other ways to add interest and dimension without coordinating dies.
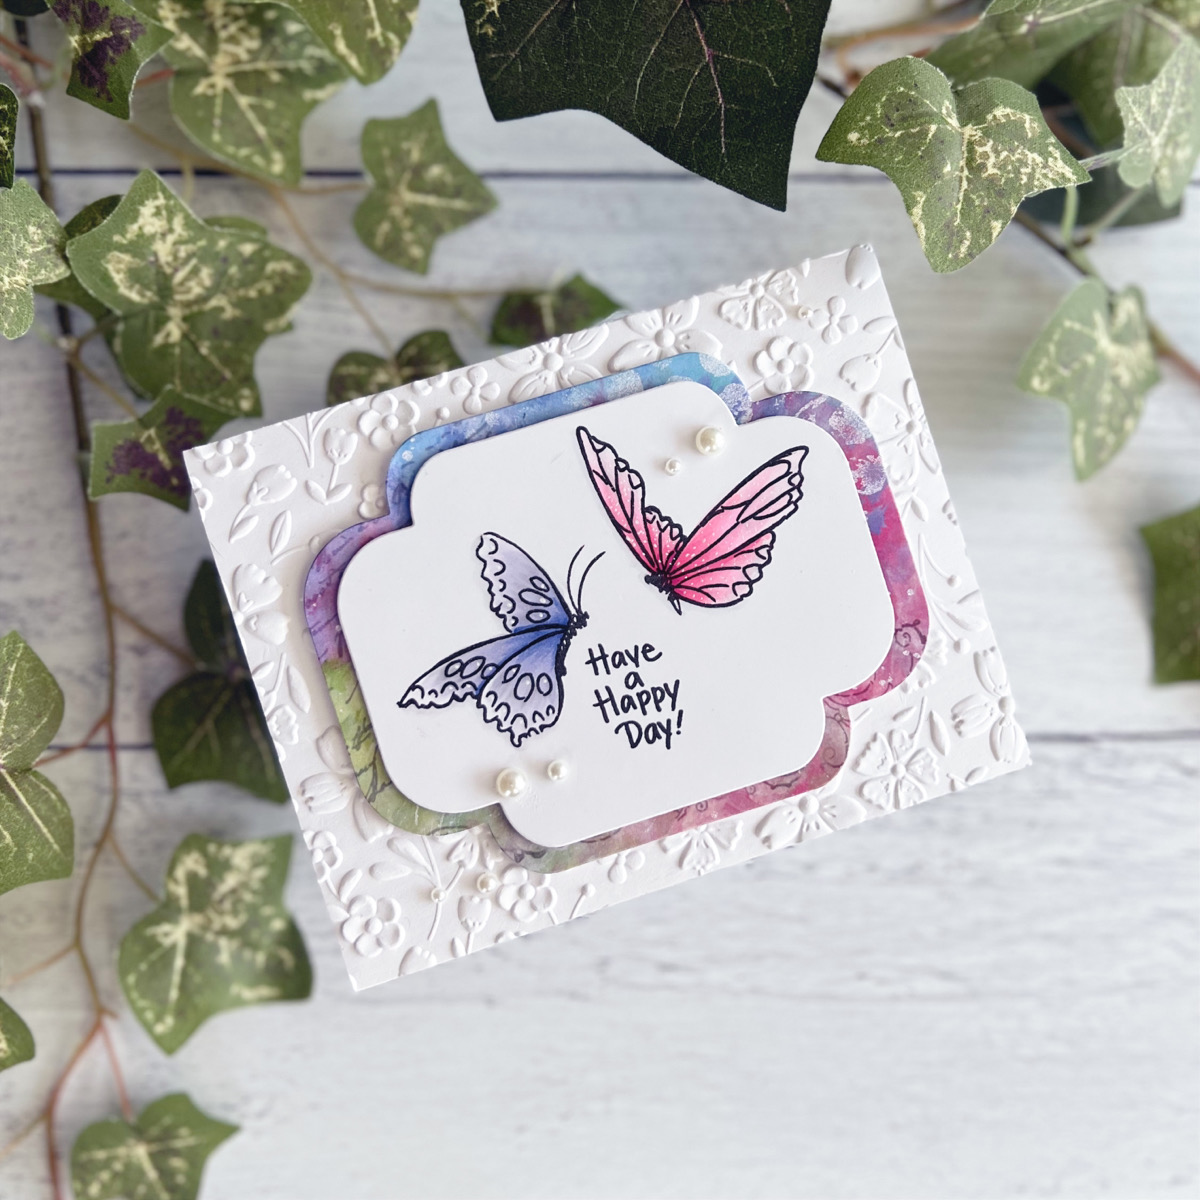
- Die cut the Essential Four Petal Labels dies from white cardstock and slightly larger from Joy of Spring Quick Card Backgrounds.
- Stamp two butterflies and the sentiment from the Hello Butterfly Stamp Set with black ink.
- Color the images in your preferred medium. I used alcohol markers and took my colors from the Joy of Spring Quick Card Backgrounds.
- Emboss a piece of white cardstock with the Flower Frenzy 3D Embossing Folder and adhere to an A2 card base.
- Adhere the two label die cuts to the card with thin foam squares. Finish the card with a few Fashion Oyster Color Essentials Pearl Dots.
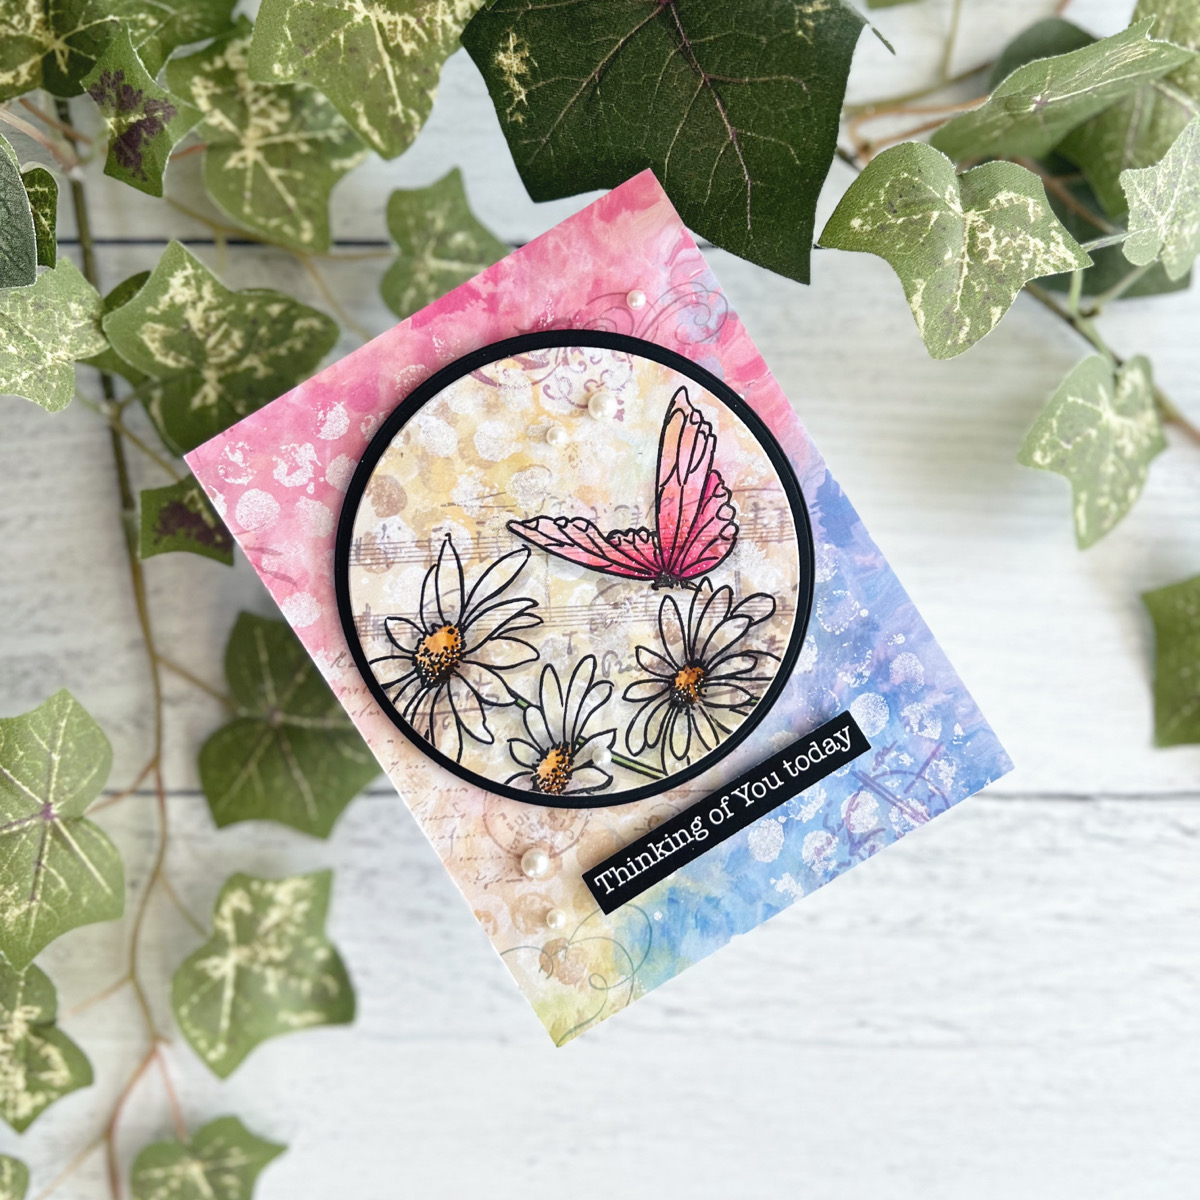
- Cut a section of the Joy of Spring Quick Card Backgrounds to 4 1/4” x 5 1/2”. Add to an A2 card base.
- Die cut a section of the Joy of Spring Quick Card Backgrounds using medium outer rim Fluted Classics Circle Dies. Die cut a piece of Onyx cardstock using the large inner rim die.
- Stamp the flowers and a butterfly on the circle cut from the Joy of Spring Quick Card Backgrounds and color the images. I find it necessary to use darker colors to make them stand out on a patterned background.
- Adhere the circles together and then to the card using thin foam squares. Add a sentiment from the Hope of Spring Quick Card Backgrounds. Finish the card with a few Fashion Oyster Color Essentials Pearl Dots.
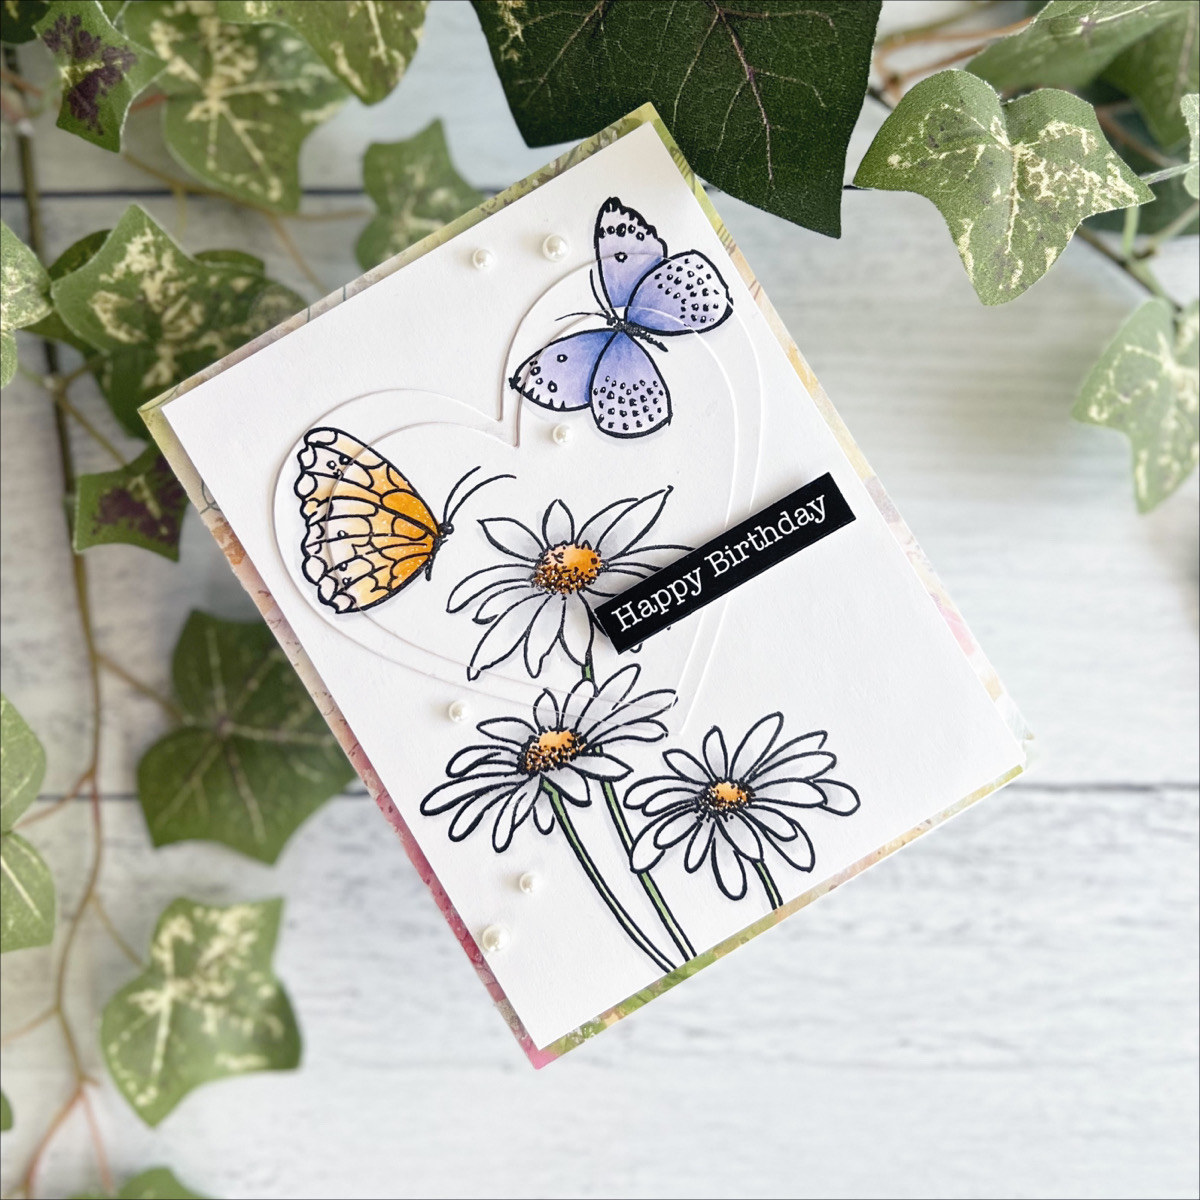
- Cut a piece of white cardstock to 4 x 5 1/4” and die-cut two different-sized Essential Heart Etched Dies from another piece of white cardstock.
- Use temporary adhesive to place the hearts stack on the panel as you wish them to be on the finished card.
- Stamp two butterflies and the flowers onto the card panel, getting a clear stamped image on the smallest heart. Remove this heart only.
- Repeat step two for a clear stamped image on the large heart. Remove the heart.
- Stamp the images one final time to get a clear stamped image on this panel.
- Color all the images being sure to match up the overlapping sections.
- Cut a 4 1/4 x 5 1/2” piece of Joy of Spring Quick Card Backgrounds and add to an A2 card base. Add stamped panel with foam tape then use liquid glue to adhere hearts to card, making sure everything lines up.
- Add a sentiment from the Hope of Spring Quick Card Backgrounds. Finish the card with a few Fashion Oyster Color Essentials Pearl Dots.
Spellbinders Supplies:

Other Supplies
Neenah Solar White Cardstock, Copic Markers, Scotch Foam Tape, Scrapbookcom 4” Adhesive Roll, Hero Arts Intens-ified Black Ink. Scrapbook Adhesives Thin Foam Squares
You can see more card-making tutorials on my blog, Who Stole My Glitter or visit my Instagram page for more inspiration. Thanks for visiting!
One Comment
candyraet
I absolutely love the simplicity of these cards. They are so pretty though.