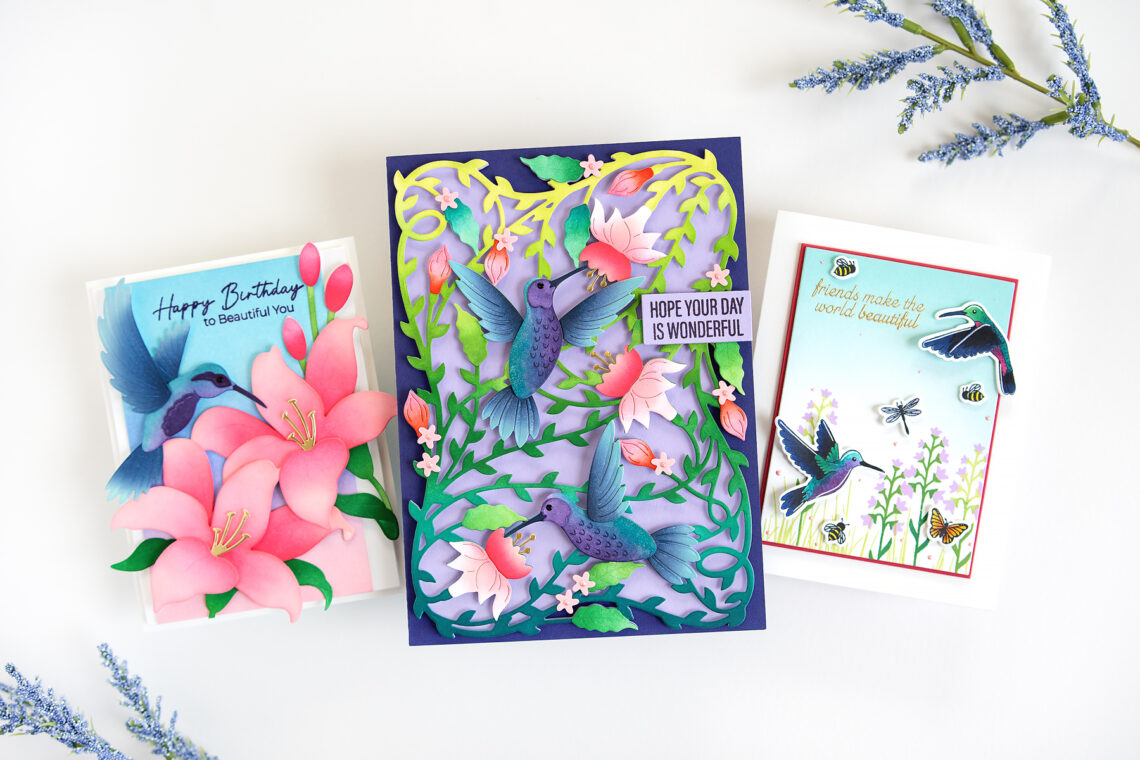
Hummingbird Cards 3 Ways with Jung AhSang
Hello crafty friends! It’s Jung here, and I am back with another guest post on the Spellbinders blog. Today, I made 3 cards using the new Hummingbird collection from Bibi Cameron.
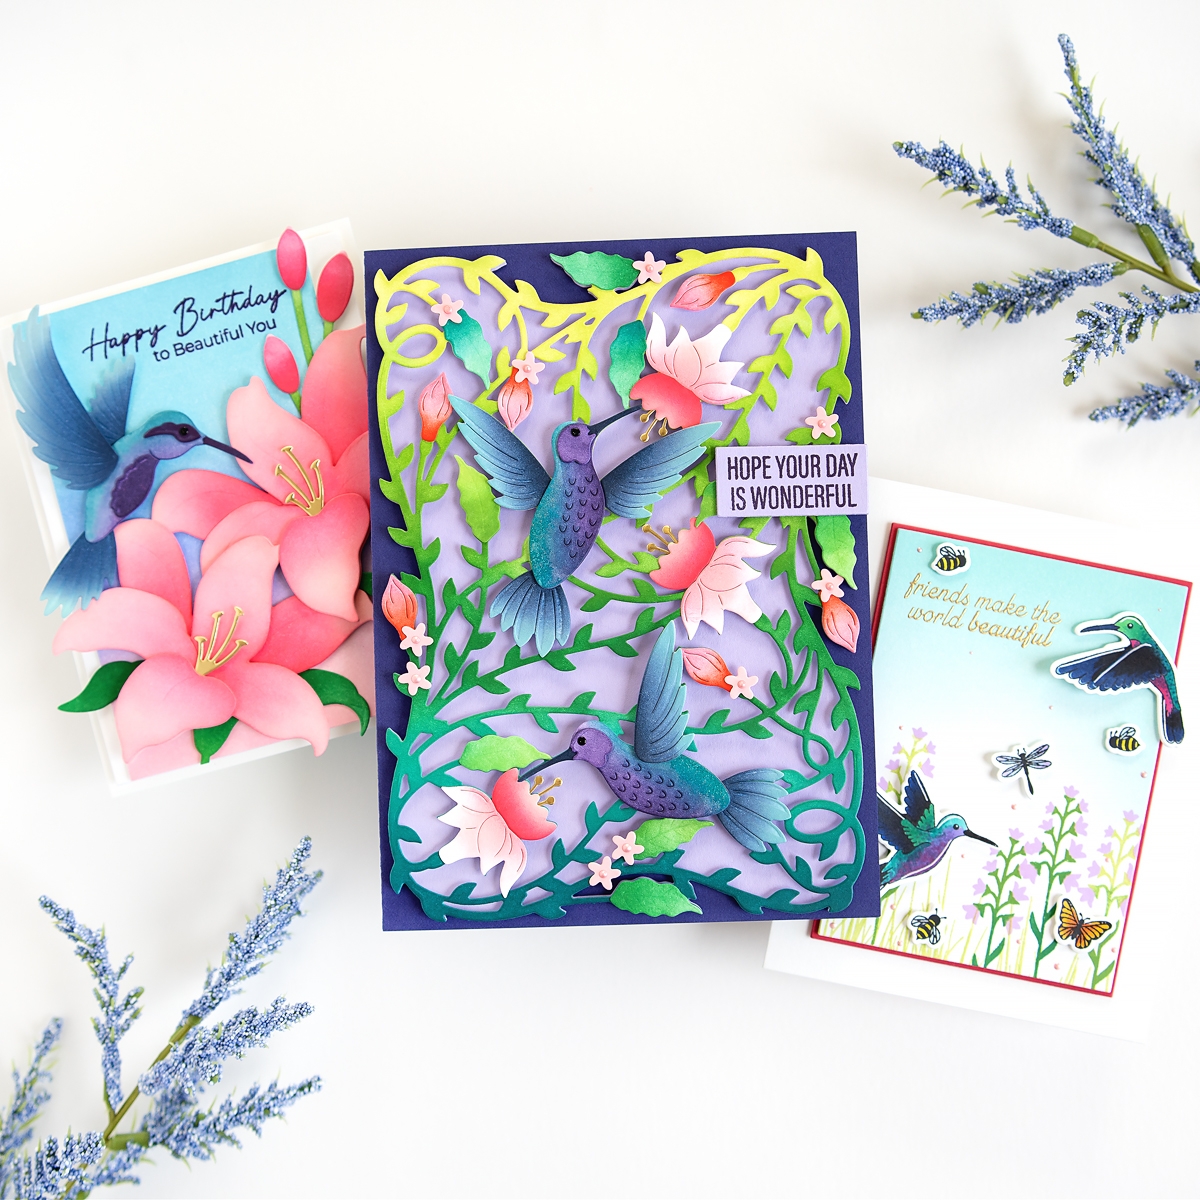
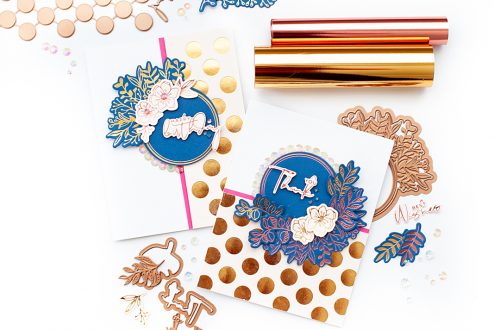
For my first card, I used the larger Delicate Floral Hummingbirds die set to make a 5×7 card.

I started out by die-cutting all the pieces from white cardstock. I cut the 3 flower stamens from mirror gold cardstock. I used different combinations of green ink to ink blend the larger greenery outline, as well as the leaves. Then I used pink inks for the flowers, and a combination of blue, purple, and teal inks for the birds.
I glued on all the leaves and flowers to the outline, and then the birds.
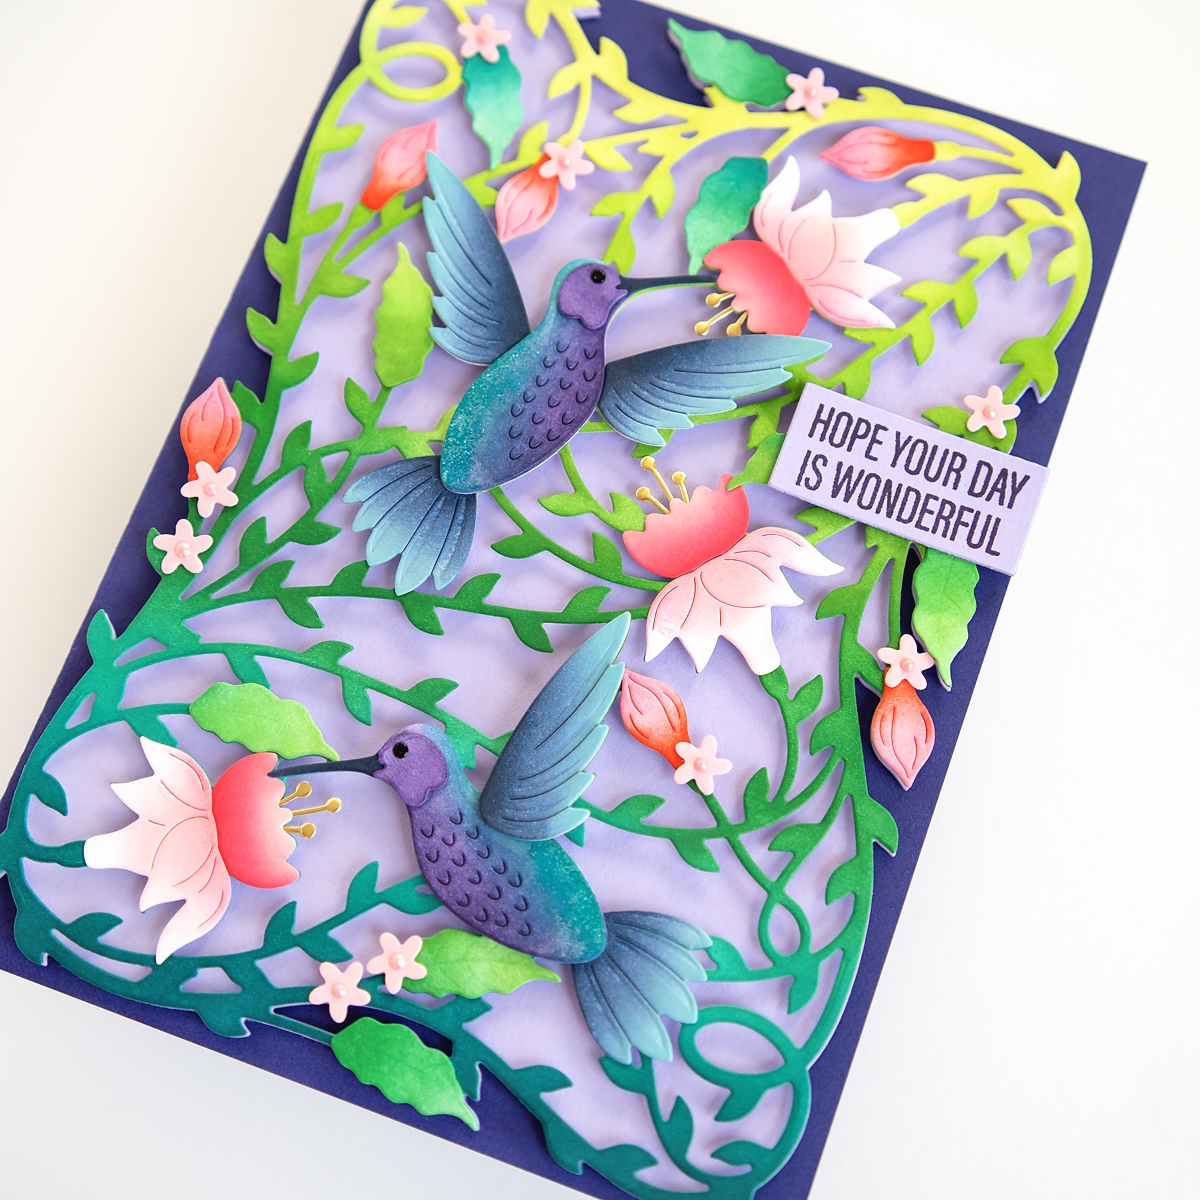
I also die-cut a solid outline piece (without the intricate greenery piece) from light purple cardstock. I added foam squares to the backs of the flower leaves, and birds on the ink-blended greenery panel then adhered it to the solid light purple background. Then, I made a 5×7 card base from dark purple cardstock and glued the delicate floral hummingbird’s piece on top.
For the sentiment, I stamped the “hope your day is wonderful” sentiment on light purple cardstock with purple ink, then die-cut it using one of the A2 layering dies. I adhered the sentiment to the upper right of the card. To finish off my card, I added pink Nuvo drops to the center of the small pink flowers, and black Nuvo drops to the birds’ eyes to make them pop.
For my second card, I used the Hummingbird and Lily die set.
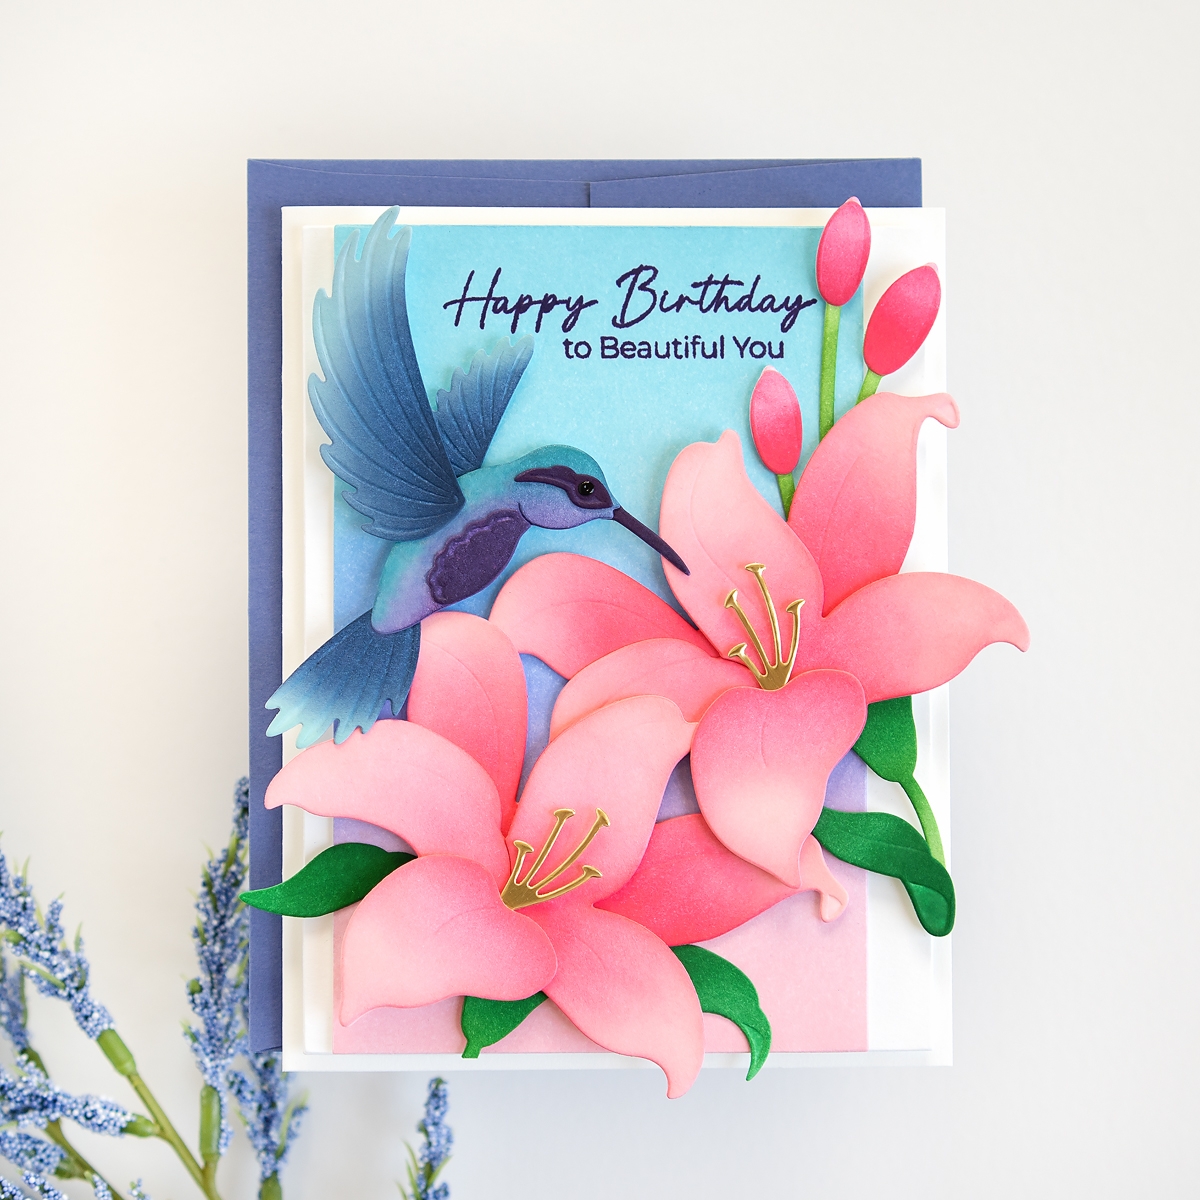
Again, I started out by diecutting all of my pieces. I die-cut the pieces from white cardstock, except the stamens which I diecut from mirror gold cardstock. I used different inks to ink blend, using the same color combo as the first card. I assembled the pieces together, and set them aside.
I also ink-blended a white cardstock panel for the background. I used Distress inks to create a soft pastel-colored sky. I used one of the A2 layering dies to trim the panel. I did run it through twice, shifting the cardstock slightly, to create more of a slim shape. I die-cut another white cardstock panel using the same A2 layering die.
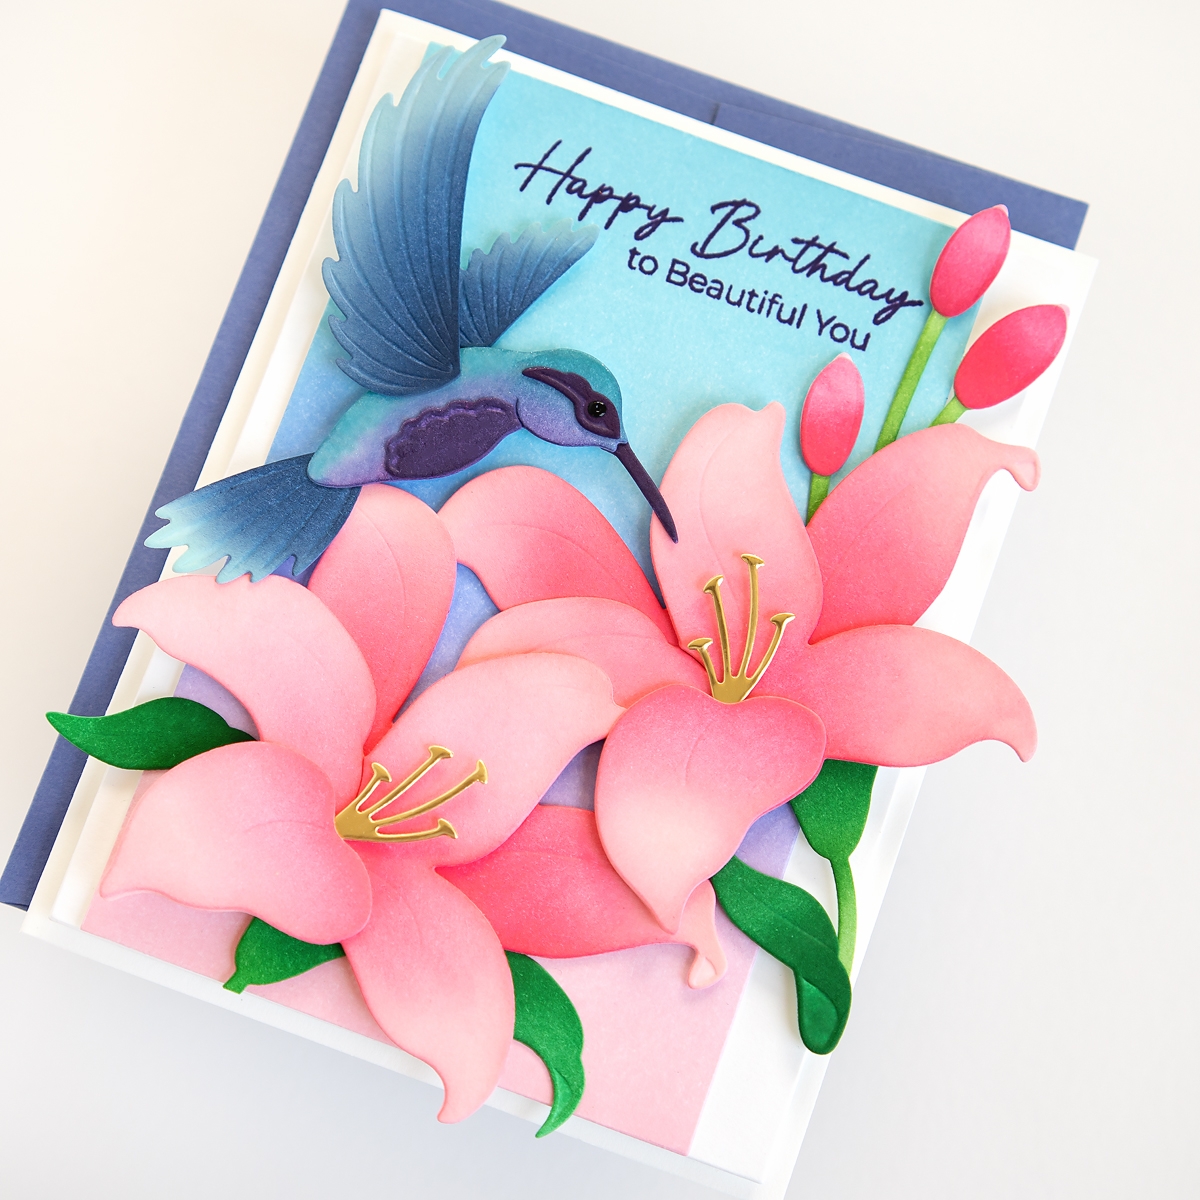
On the ink-blended background panel, I stamped the “Happy Birthday to beautiful you” sentiment to the top with purple ink. I adhered this panel to the white cardstock panel with foam tape. Then I adhered both panels to a white A2 cardbase.
I adhered the lilies on, and then the hummingbird. To finish off my card, I added a little black Nuvo drop to the bird’s eye.
For my third card, I used the Hummingbird build a scene clear stamp and die set.
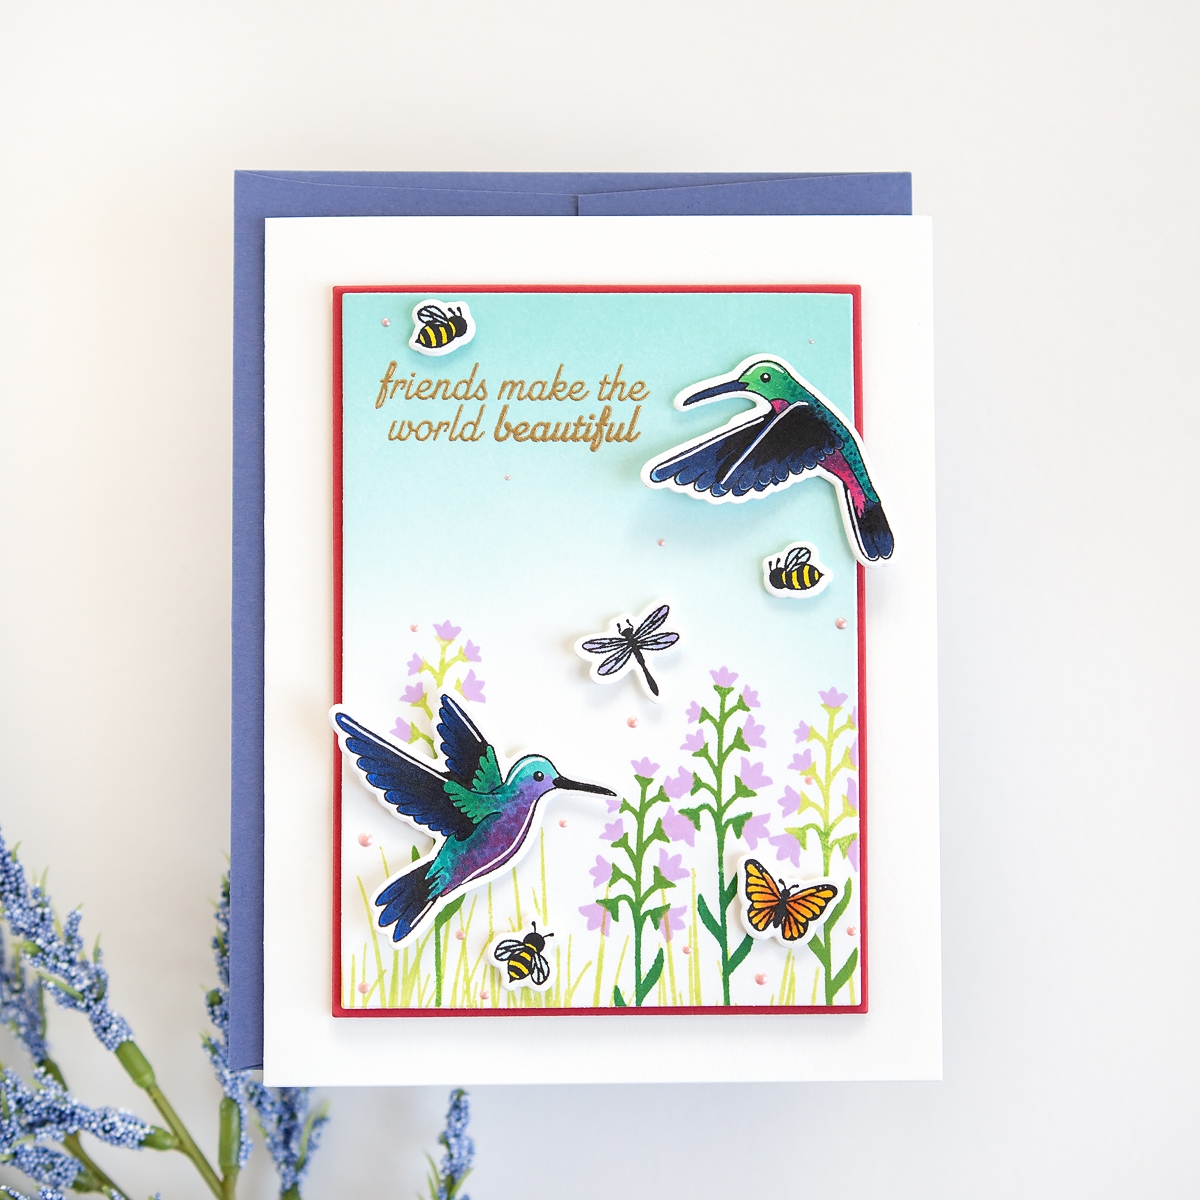
First, I stamped all the images to color on a piece of white cardstock with black ink. I used Copic markers to color in the birds, bees, dragonfly, and butterfly. I also used a white gel pen to add a little bit of highlight to the hummingbirds. Then, I used the coordinating dies to die-cut the images.
For the background, I wanted to create a subtle sky, so I ink blended some blue ink just to the top of a piece of white cardstock. I let it fade to white. Then, on the bottom of that piece of cardstock, I used the grass stamp, and the solid layereing floral stamps to create a field of blooming flowers. I used one of the A2 layering dies to trim the background panel. Next, I stamped the “friends make the world beautiful” sentiment to the upper left with versamark ink, then heat set with gold embossing powder.
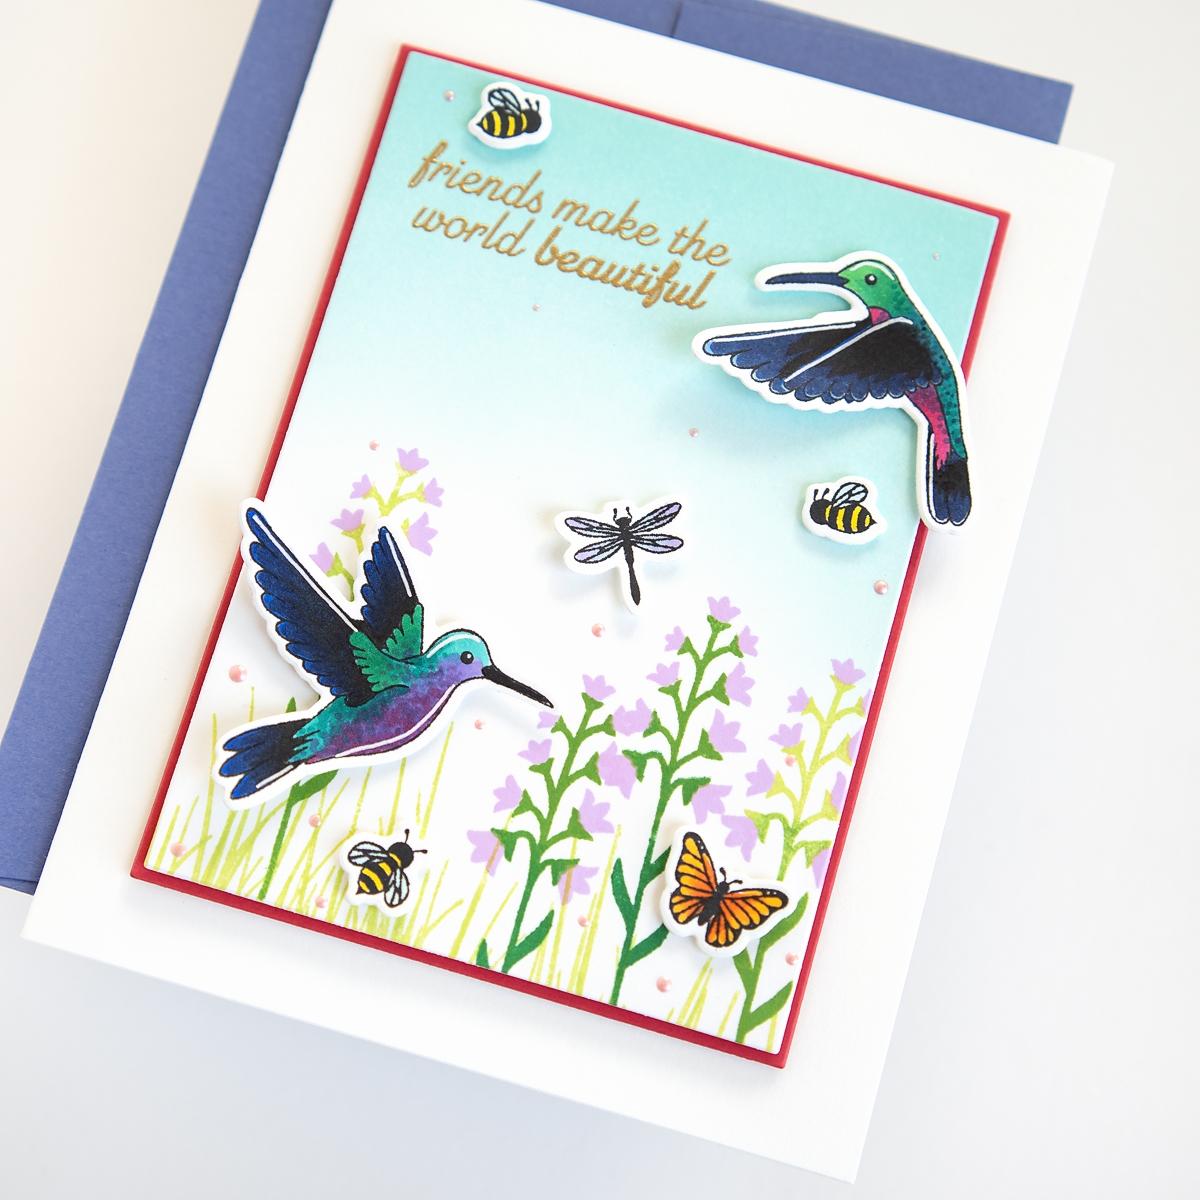
To assemble the card, I adhered the diecut birds and insects to the background panel with foam squares. I decided I wanted to mat the background panel, so I diecut a piece of wild berry cardstock with another A2 layering die. I adhered the stamped panel on top of the pink cardstock, with a few scrap pieces of cardstock in between for dimension. Then, I adhered that to an A2 white cardbase. To finish off the card, and add a bit of soft embellishing, I used Nuvo drops to add a few pink dots around the card.
These cards came together so beautifully. Spellbinders dies are so detailed, it makes it easy to put together a card. I especially love the bigger dies that fill up an entire panel. I hope you got some inspiration from my cards and blog post today. Make sure to head over to the Spellbinders site to check out these beautiful products. Thanks so much for stopping by.
Spellbinders Supplies:

Other Supplies
Colored inks, Copic markers, white gel pen, Nuvo drops (shimmering rose and ebony black), versamark ink, gold embossing powder.
One Comment
Sandra Knecht
Your cards are beautiful!