Creating “Oceans” Without Watercoloring Using the Seahorse Kisses Collection with Joan Bardee
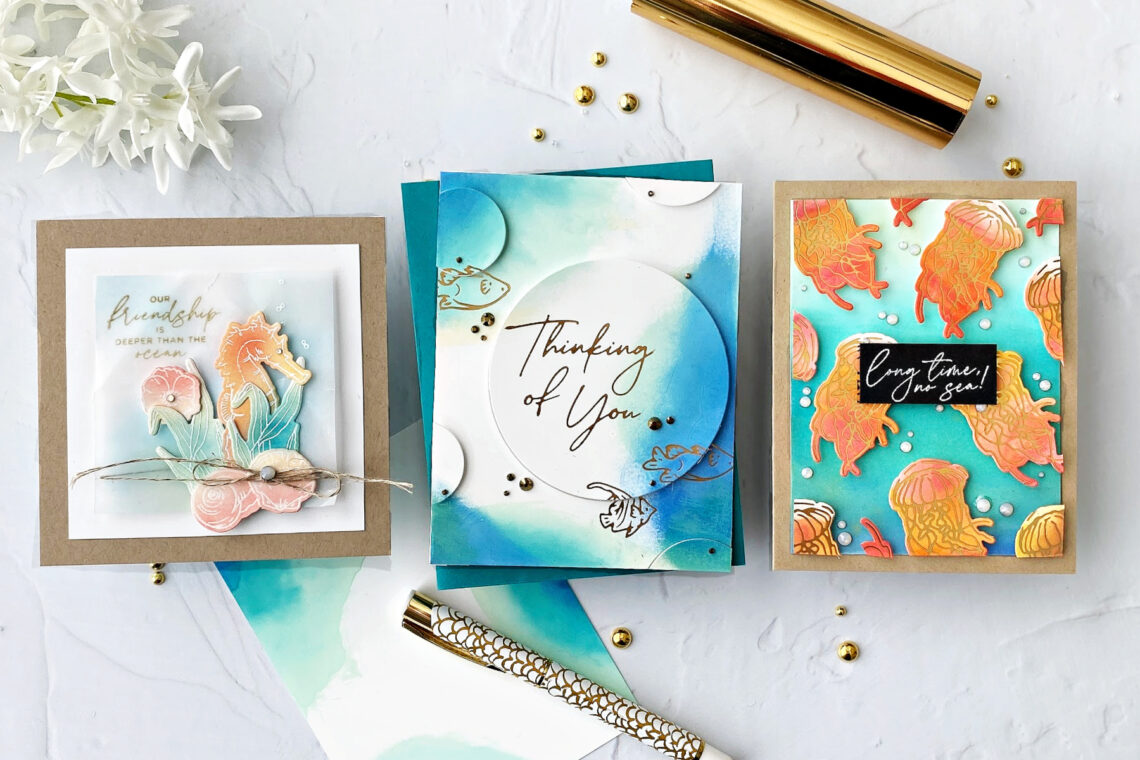
Hello crafters! I’m Joan Bardee and today I am sharing 3 ocean-themed cards using the beautiful Seahorse Kisses Collection designed by Dawn Woleslagle. As I’m sure many of you know, Dawn Woleslagle is an amazing watercolorist. The Seahorse Kisses Collection would be beautiful watercolored. However, since I’m not on speaking terms with watercolors, I decided to create ocean backgrounds with ink blending on specialty papers. I hope you like the results.
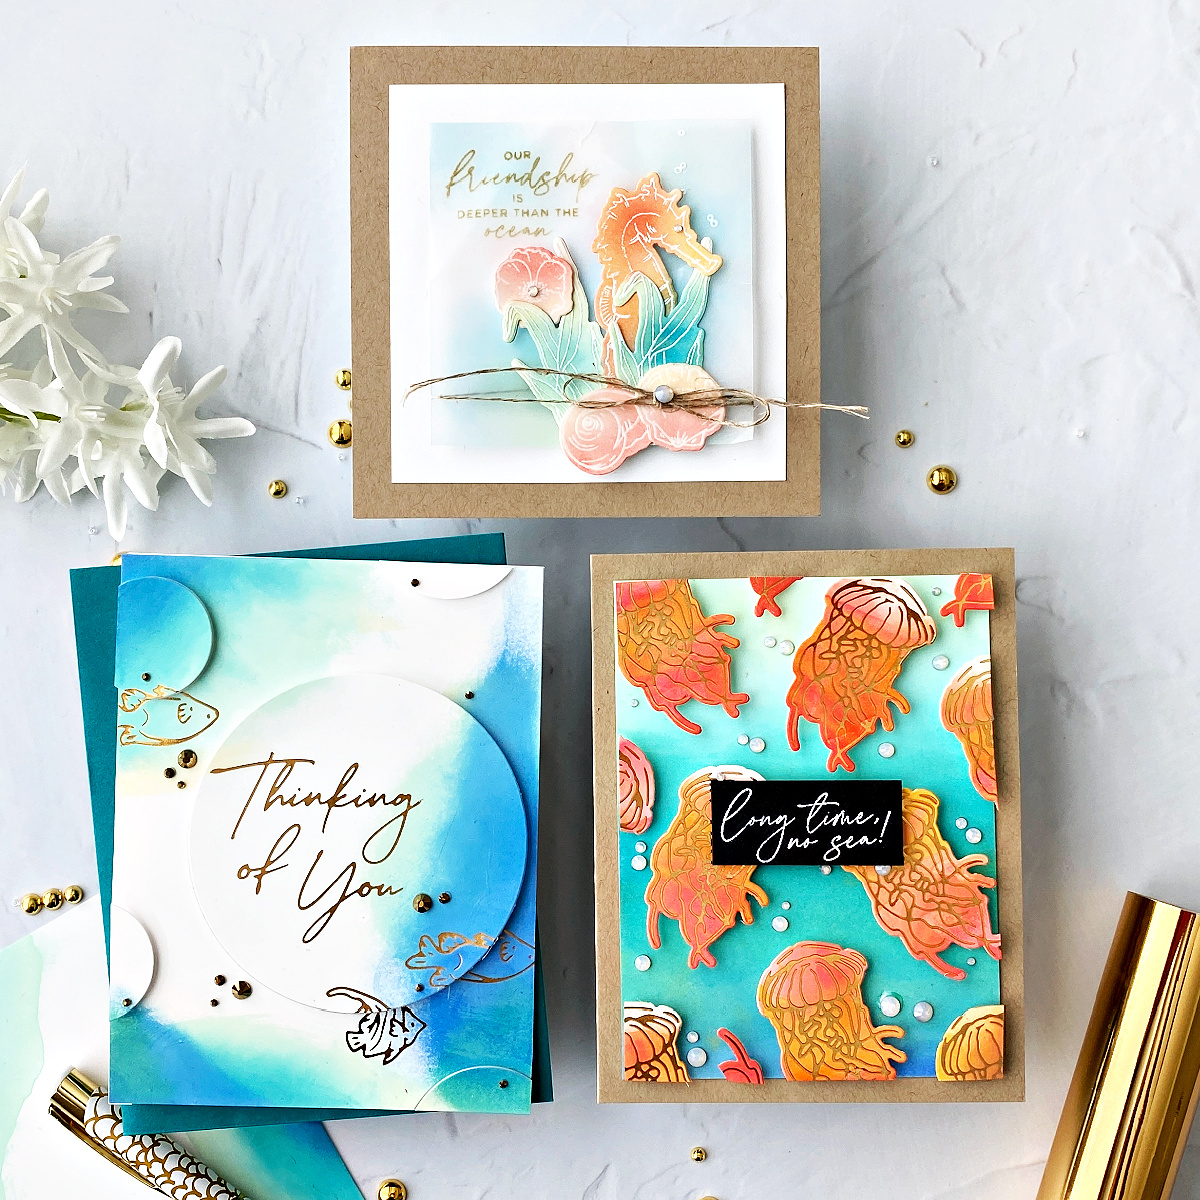
A Modern Inky Tide
This abstract modern take on ocean tides was inspired by these amazing cards that Yana Smakula made with Spellbinders Glimmer Specialty Cardstock.
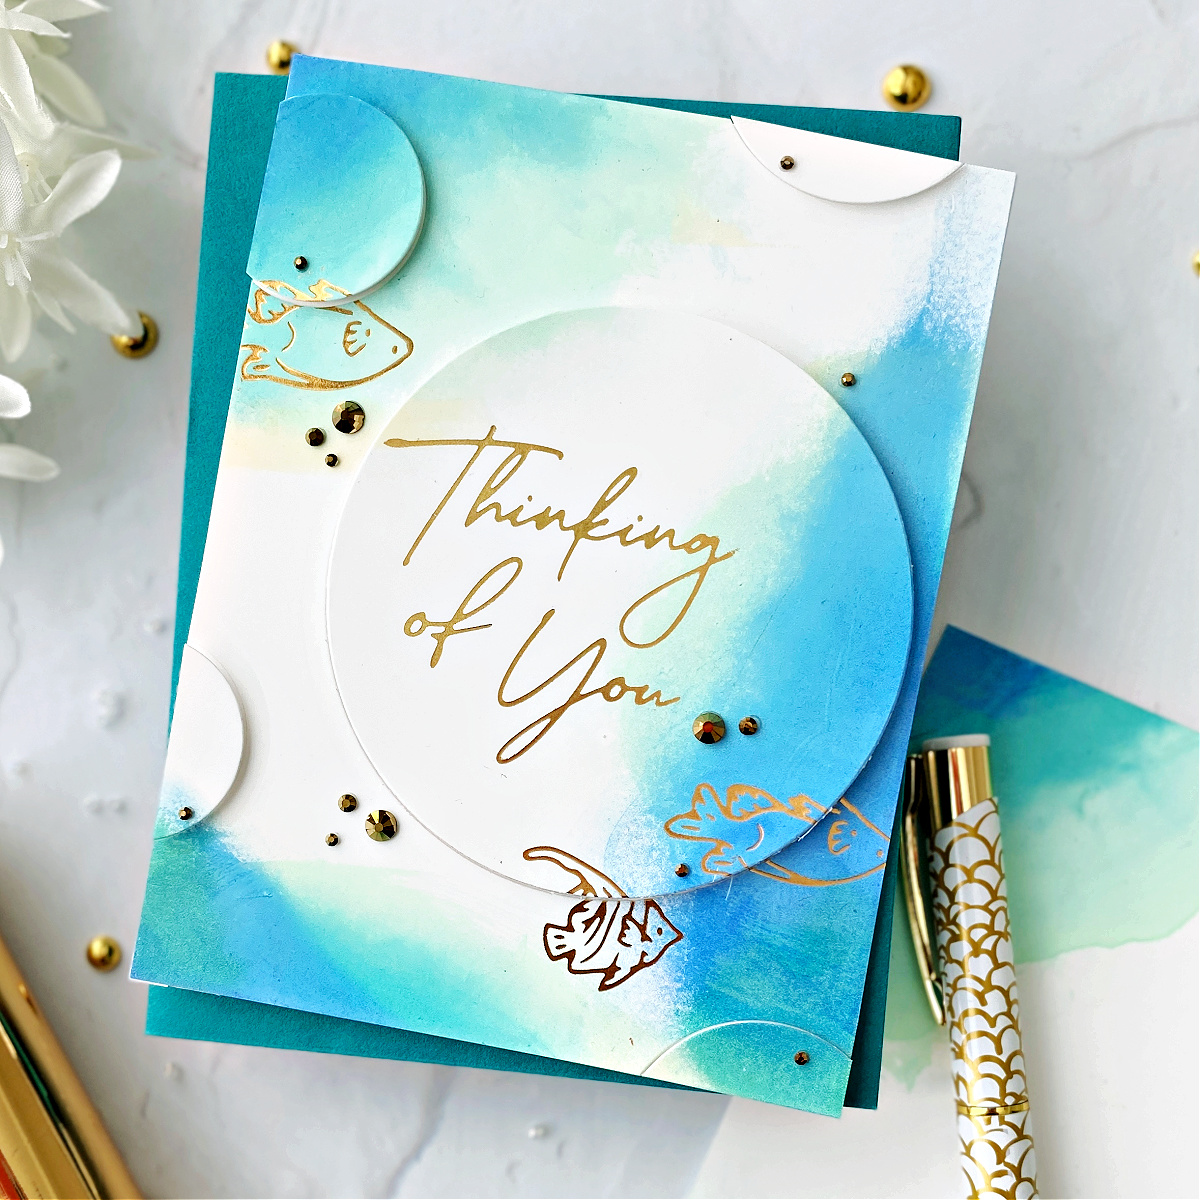
This paper, designed to be the perfect paper for hot foiling, has a synthetic coating that resists ink. This gives you quite a bit of time to move the ink around – with a cloth, your finger, or a blending brush.
Tip: the ink will stay wet for a while. Give it time to dry – a good 30 minutes.
- Rubbed various colors of dye ink directly on an A2 size piece of Glimmer Specialty Cardstock. Moved the inks around with my finger (I wore a vinyl glove) and blending brushes. I found that felt dye ink cubes worked the best, but any dye ink should work fine. Set aside to dry.
- Hot foiled a sentiment from Seahorse Kisses Sentiments Glimmer Hot Foil Plate and Die Set in gold in the center of the inked panel.
- Hot foiled 3 fishes from Under the Sea Hot Foil Plates & Die Set using the same gold foil. Note: I wanted all the fishes to be headed in the same direction so the 2 longer fishes may or may not be upside down! Ok, they are upside down.
- Using the Everlasting Circles Etched Dies, die-cut the sentiment so that the circle is off-center – I think that’s a little more interesting. Why circles? They are the “bubbles” in the ocean.
- Die cut more circles and popped them up using foam tape.
- Adhered the glimmer paper to a piece of white cardstock and then to a white A2 card.
- Added a few gems.
- Gosh, that was fun! So fun, that when I finished making the card, I ordered 2 more packs of the Glimmer Specialty cardstock. Can’t run out!
A Soft Vellum “Ocean”
Used a piece of ink-blended vellum to make a dreamy “ocean” for this little scene.
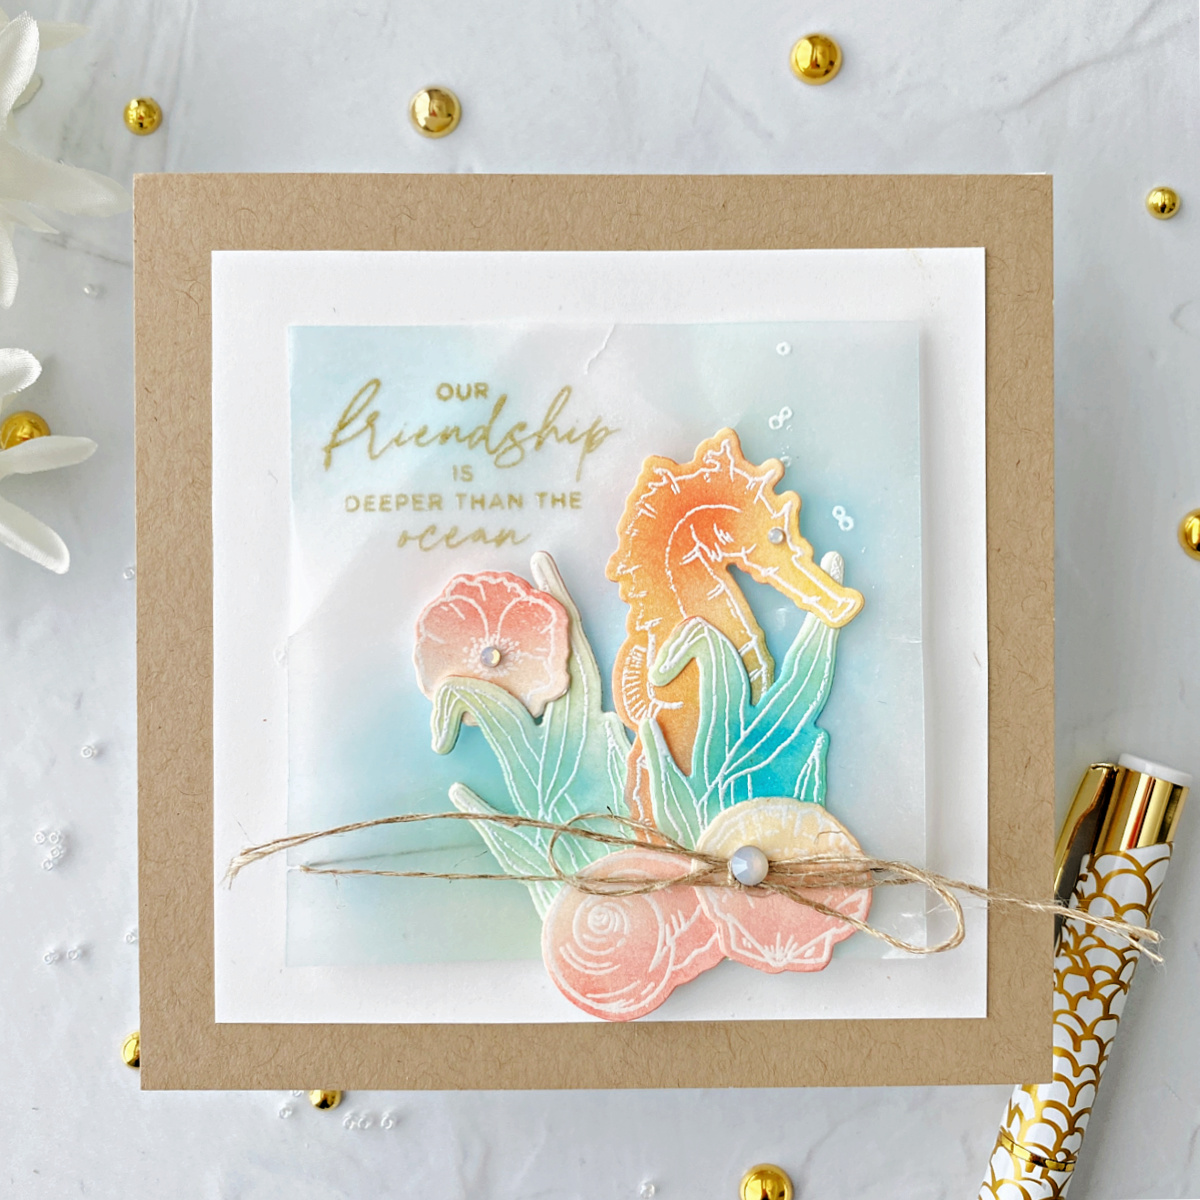
- After stamping and embossing the images in the Seahorse Garden Stamp Set & and Die set, I ink blended each of them and then wiped off the ink so that the white embossing would show through. Die-cut each image.
- Lightly ink-blended some teal and blue inks onto a piece of vellum, making sure to leave some of the vellum uninked. Trimmed to form a square.
- Stamped the sentiment in a light brown dye ink and quickly embossed in clear. Added a few bubbles from the stamp set and embossed those in white.
- Scrunched up the vellum to give it some texture and movement.
- Using Bearly Arts Glue and some foam tape, formed a scene on the vellum square.
- Wrapped with twine and added a few gems.
- Adhered everything to a square white panel and then to a kraft card, making sure to add glue to the back of the vellum in just a few places, so that the vellum ocean is only partly adhered.
Tip: I use a color wheel every time I create a card. Blue and orange are on opposite sides of the color wheel and therefore, as complementary colors, add energy to a card. I chose softer versions of each color because this is the ocean. I matted the card on a kraft card base and chose brown for the sentiment to evoke the sand.
Hot Foiled Jellyfish
Switched back to an ink blending on Specialty Glimmer Cardstock and created another “ocean” without watercoloring.
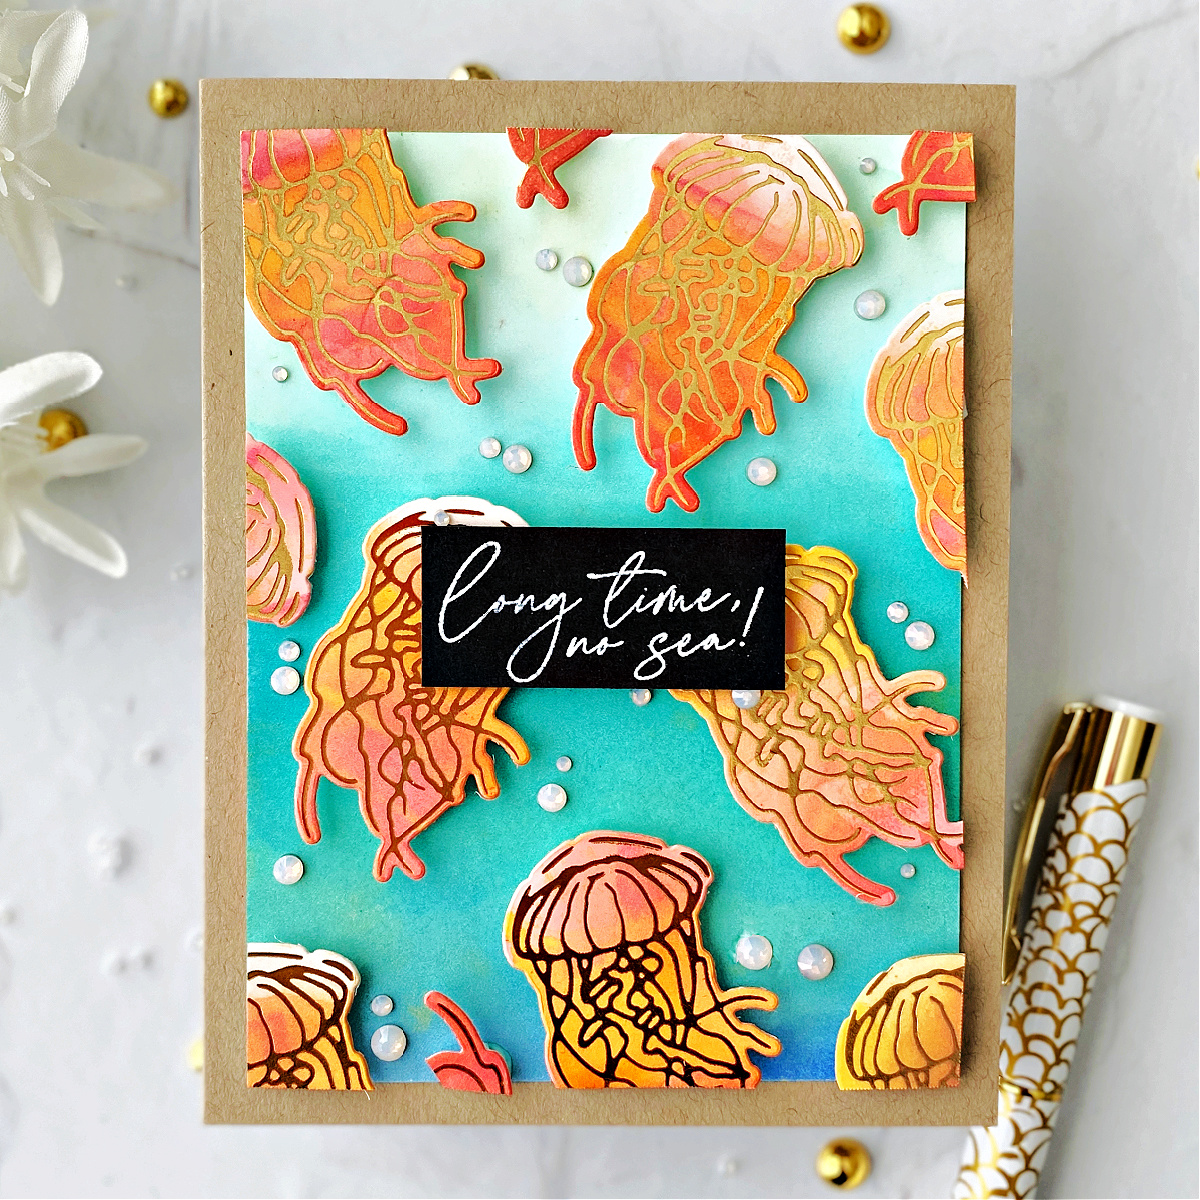
- Repeatedly hot foiled in gold and the jellyfish hot foil stamp from the Under the Sea Hot Foil Plate & Die Set onto white cardstock.
- Ink blended warm colors over the jellyfish. Die cut.
- Using the direct-to-paper technique, I rubbed a few blue and green dye ink cubes directly onto a piece of Glimmer Specialty Cardstock starting with dark on the bottom and ink blended with brushes.
- Adhered the jellyfish to the ocean background and popped each up with foam tape and trimmed.
- Adhered a few opal gems.
- Stamped and embossed in white a sentiment from Seahorse Garden Stamp & Die set.
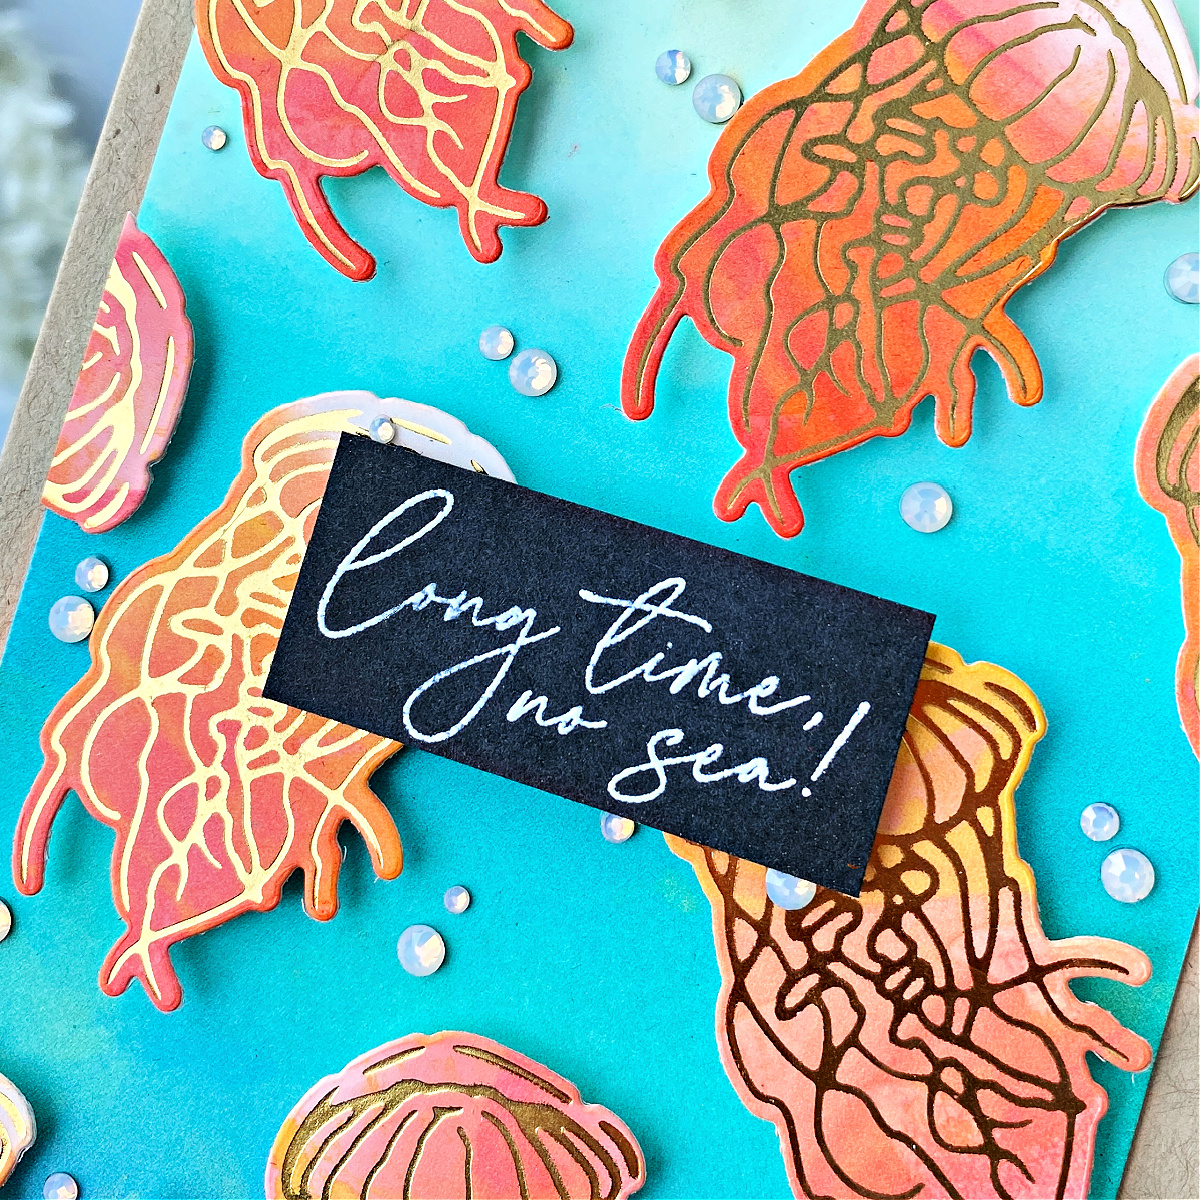
Look how smooth that background is? Using the Specialty Glimmer Paper is the trick.
Tip: The Specialty Glimmer Paper is not sturdy enough for a card base. It’s a thin, lightweight paper and it should be adhered to a card base or other layer.
Tip: Lightly misting some water on this inky blend would have added to the ocean look. I’ll do that next time!
Thanks so much for checking out this post and thank you to Spellbinders. I would love to see anything you make with this collection, so feel free to tag me on my Instagram account. I’m Dear Paperlicious if you are looking for me.
Spellbinders Supplies:

Other supplies
Twine, glue dot, kraft cardstock, heat gun, embossing buddy, paper trimmer, scissors, dye inks.
May 2019 Amazing Paper Grace Die of the Month is Here – Nostalgic Serenade Card Frame
Card Club Kit Extras! January 2019 Edition. Loads of inspiration!