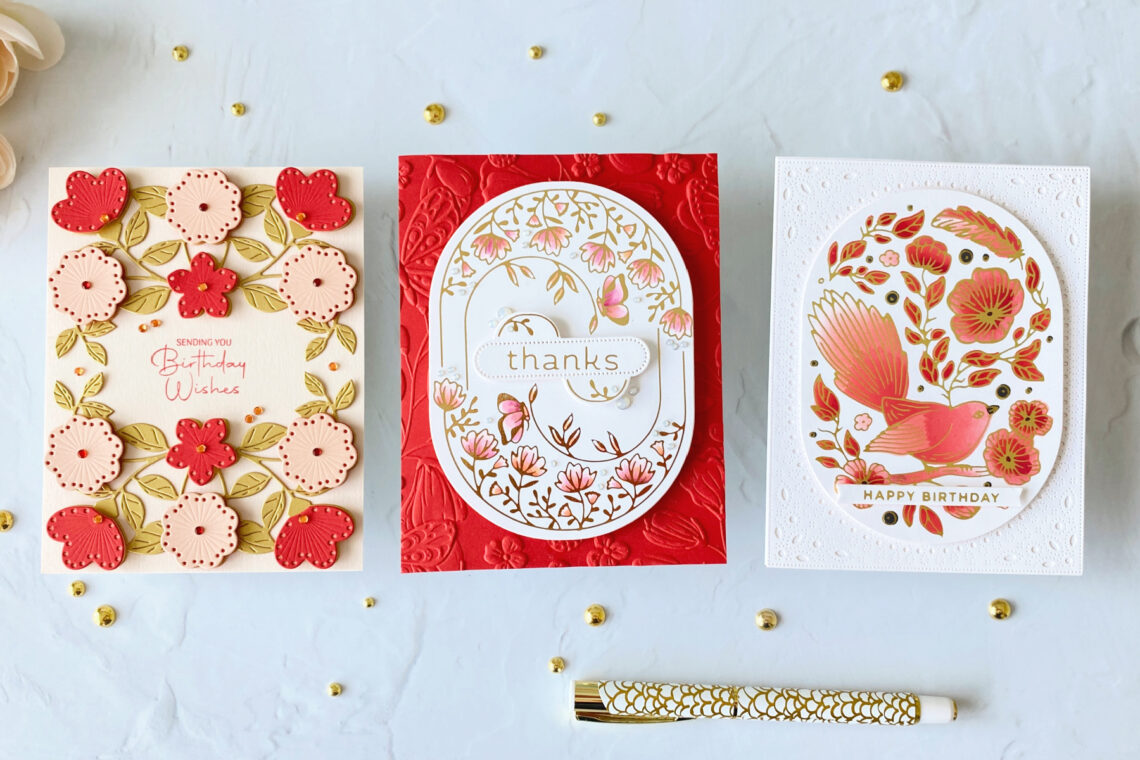
Design Decisions: Keeping the Process Simple Using the Stylish Ovals Collection with Joan Bardee
Hello crafters! Do you have a hard time settling on a card design? I’m Joan Bardee and I confess to remaking my cards multiple times. Today I’m sharing how I simplified my design decisions using the beautiful Stylish Ovals Collection.
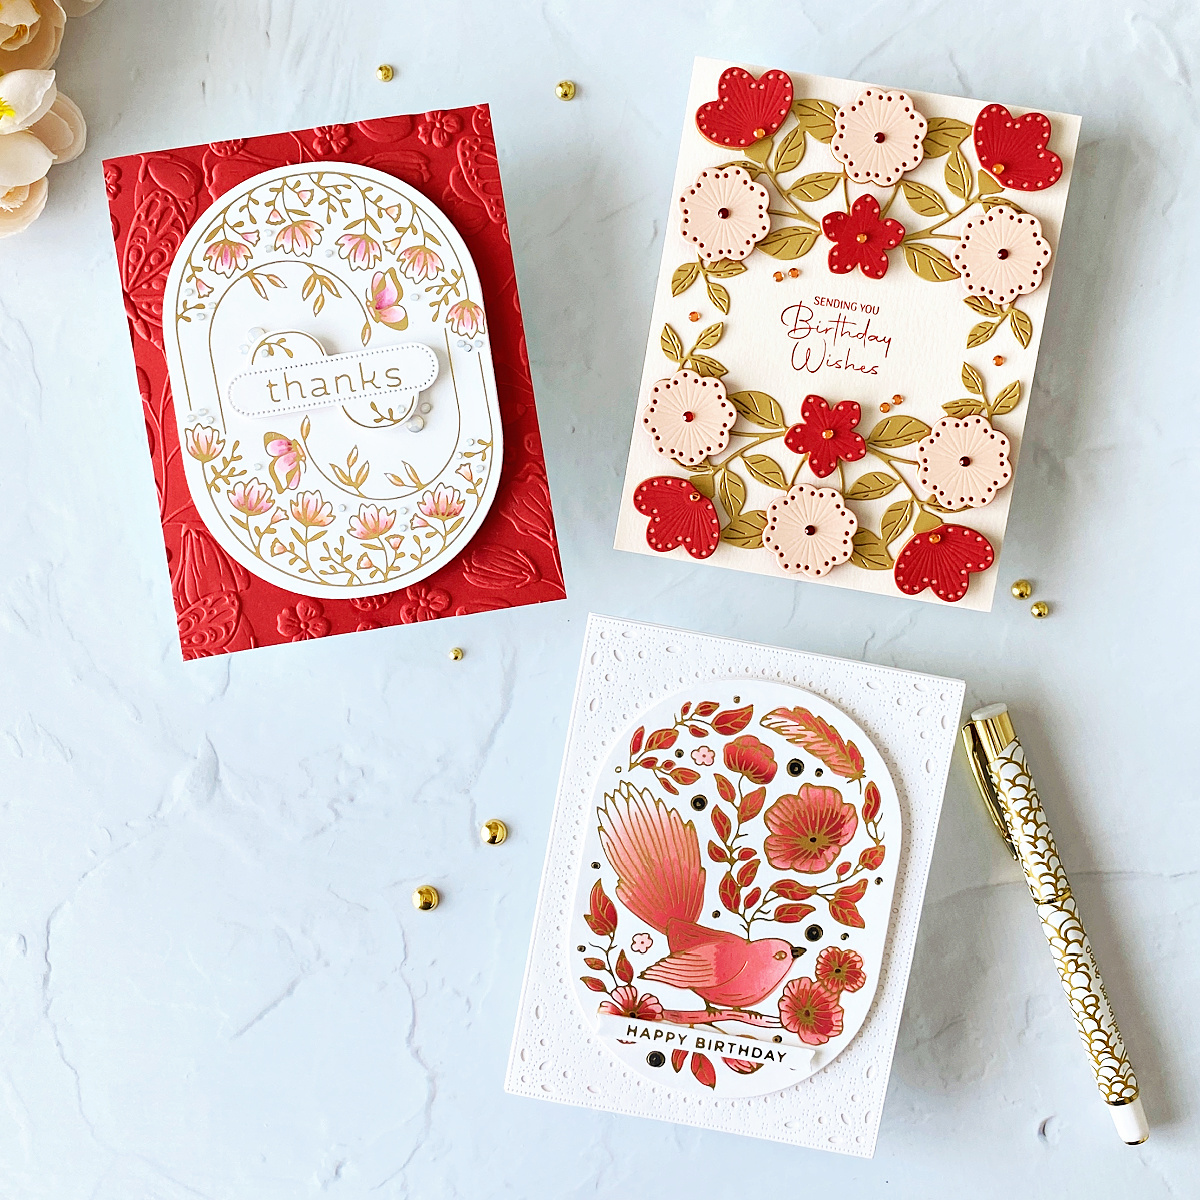
I took a long look at the collection and noted that several of the products have a symmetrical or near-symmetrical design. Symmetry, where one half of the design mirrors the other half, is balanced and evokes calm.
So, for each card, I opted to use: 1. the same limited color palette (red/peach, white, and/or gold), and 2. a symmetrical or near symmetrical layout. I found that by making these decisions before I cut a single piece of cardstock, I was able to make 3 cards without second-guessing my choices.
Easy and Beautiful Stitched Floral Frame Etched Dies
The Stitched Floral Frame dies form a symmetrical layout. The set comes with stitchable flower dies as well as the optional solid flower dies in the same size and shape. I used both, but with no stitching on the top layer, as I wanted the color of the bottom layer to peek through.
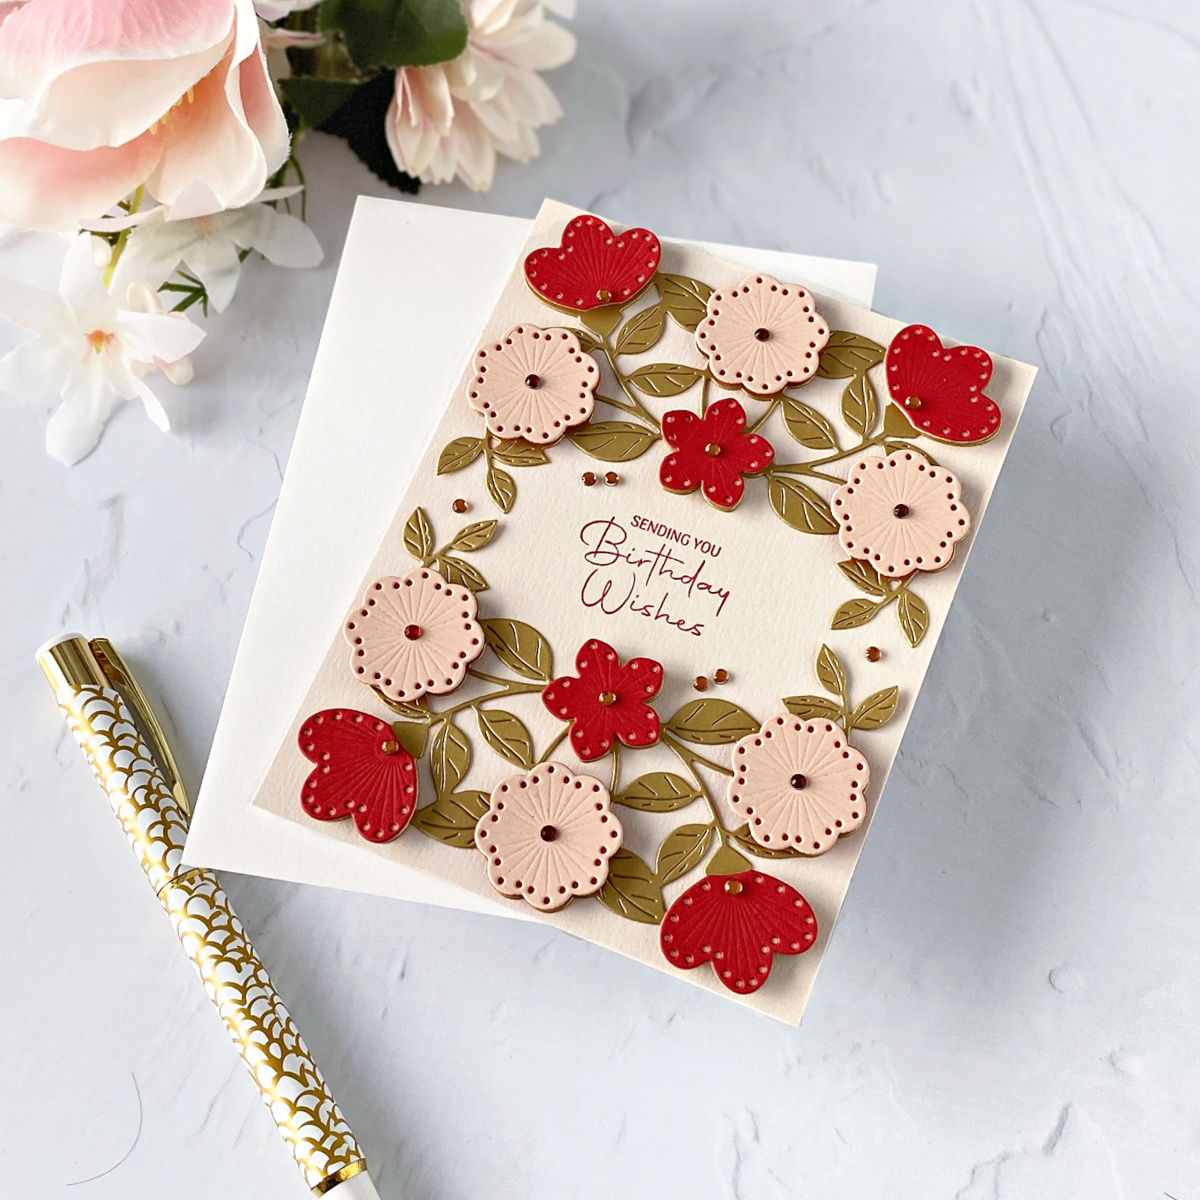
- Chose Brushed Gold cardstock for the leaves. The die cuts out the leaves and a spot to place each flower in one piece. Run it through your die cuting machine twice and you are done.
- Die cut all the flower dies in Spellbinders Poppy Field and Peach Sorbet cardstocks and adhered.
- Trimmed a panel of Spellbinders Barely Peach cardstock and stamped a sentiment from Stylish Ovals Birthday Wishes Clear Stamp & Die set in Candy Apple Distress Oxide ink.

- Glued down the leaves and flowers and adhered to an A2 card base. Finally, I added a few red and coral gems in a symmetrical pattern.
- Apparently, I can make a beautiful card without re-doing it multiple times!
Tip: This card has no black or white. It has gold leaves and a red sentiment. Using unexpected colors can add interest to a symmetrical design.
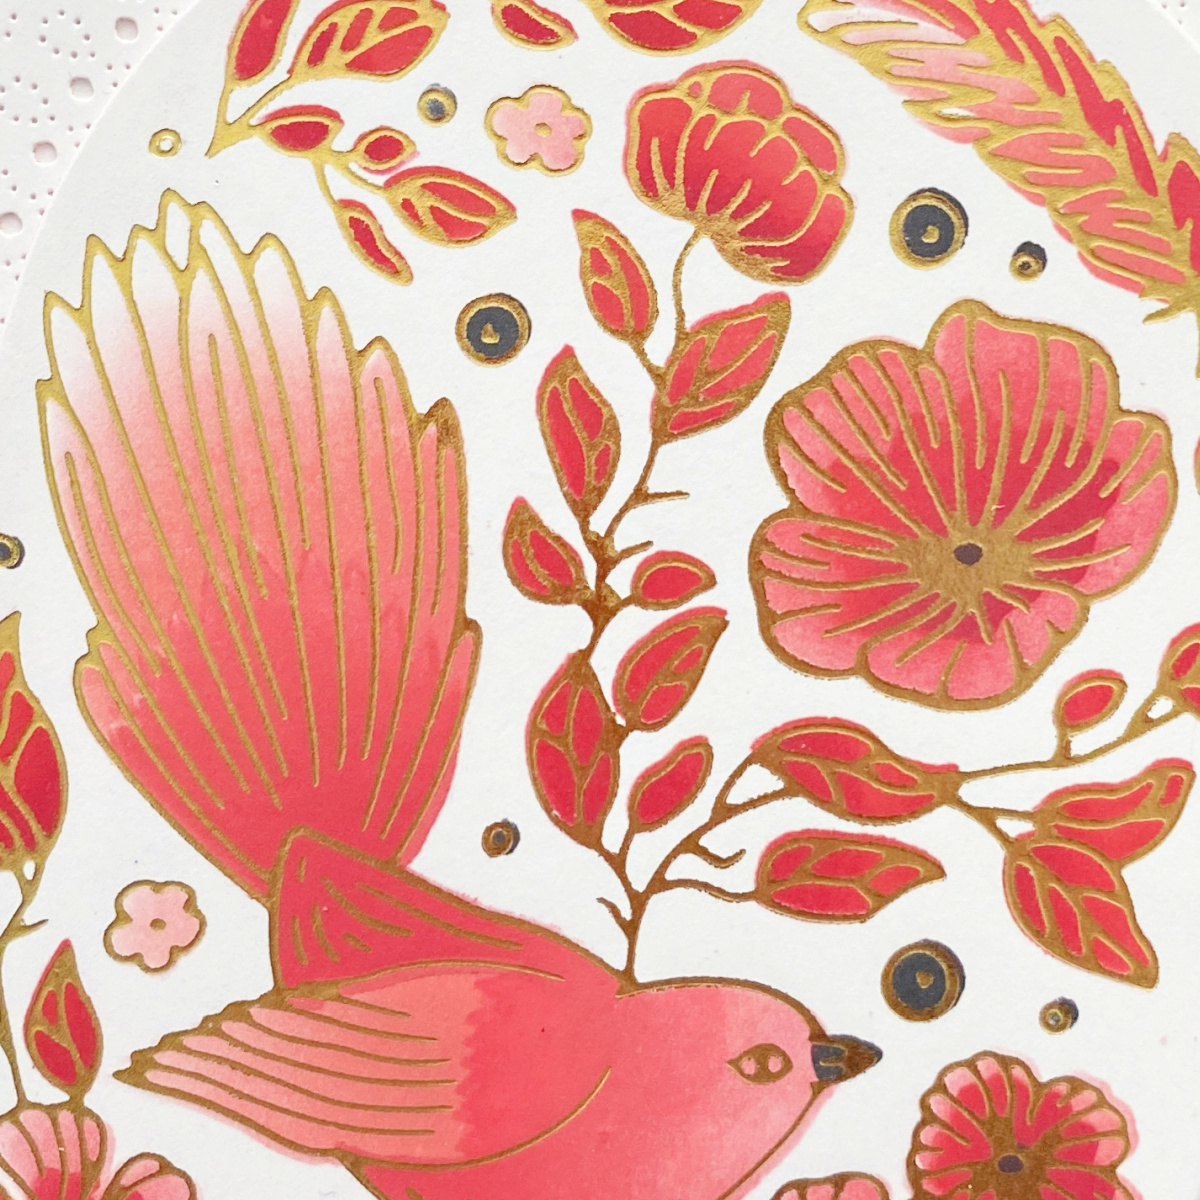
Stenciled Stylish Oval Floral Bird Hot Foil Plate
While the gorgeous pattern in the Stylish Oval Floral Bird Hot Foil Plate isn’t perfectly symmetrical, the Stylish Oval shape is, so there was no question as to my layout – smack in the center. I think of this card as near symmetrical.
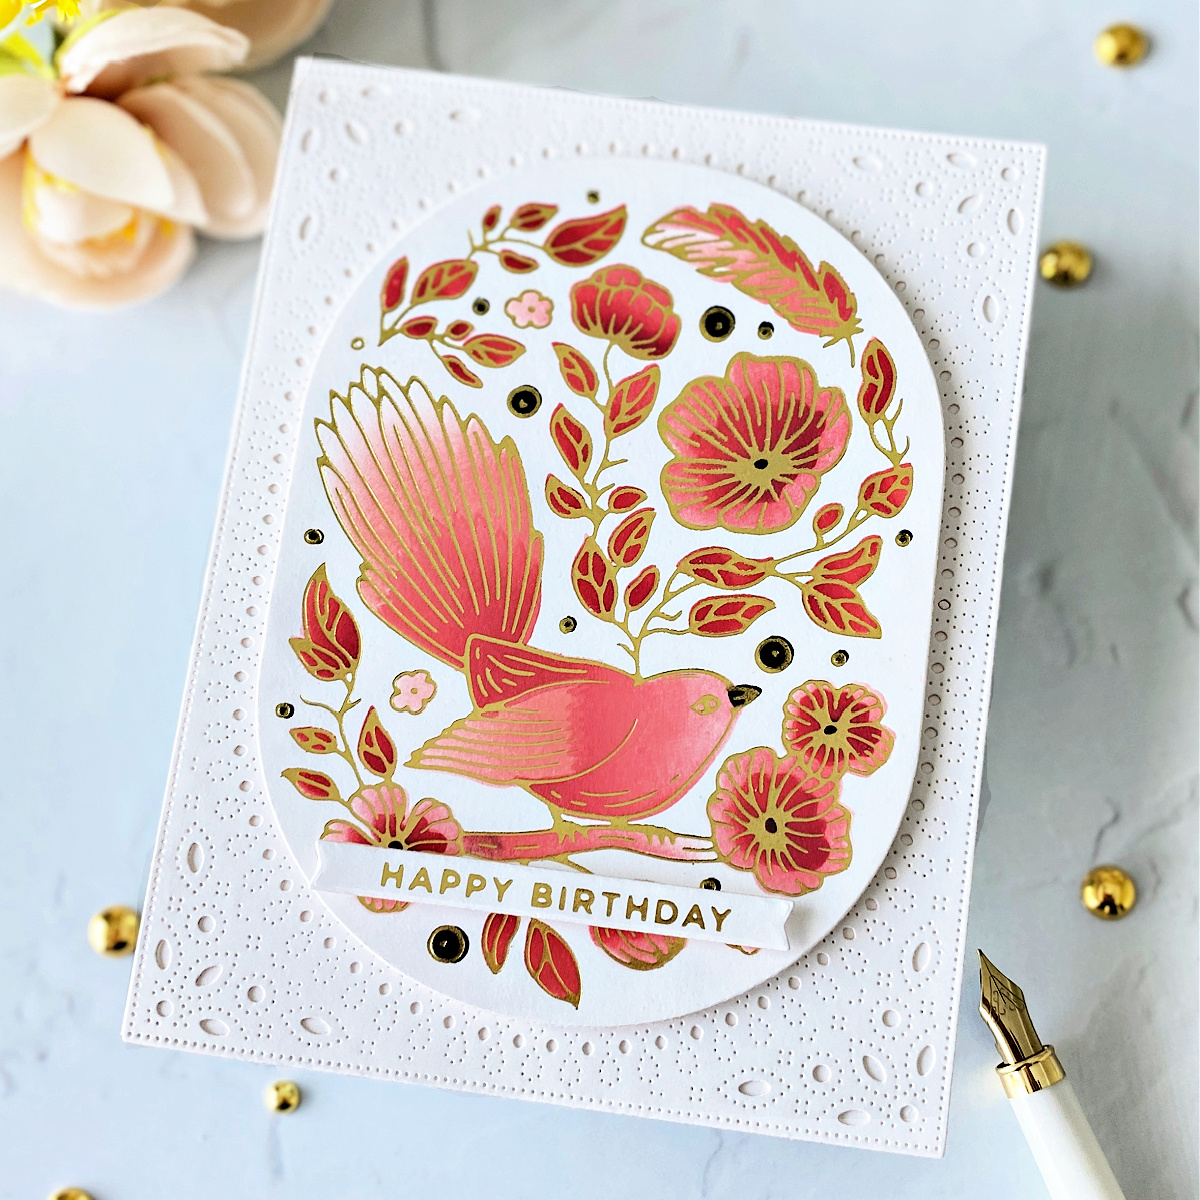
- Hot foiled the plate onto white cardstock with gold foil.
- Used the coordinating Stylish Ovals Floral Bird Layering Stencils to add color, adding a bit of black to my previously selected color palette.
- Die cut the floral bird panel, using one of the Essential Stylish Ovals Etched dies.
- Hot foiled a sentiment from my very favorite Mini Everyday Sentiments Glimmer Hot Foil Plate & Die and added it to the bottom of the card.
- Die cut a piece of white cardstock with the Infinity Punch & Pierce Plate and adhered that to an A2 white card.
- Popped up the Floral Bird layer onto the card and I was done and happy.
Tip: The Infinity Punch & Pierce Plate is a particularly beautiful and versatile product. It creates one symmetrical layer, but if you press just a bit, the layers come apart and form 3 symmetrical layers – a border and 2 smaller ovals. I think I will be using this one a lot.
Tip: I’ve wasted a lot of time over the years trying to color in images. Now, I jump on designs that also come with a stencil.
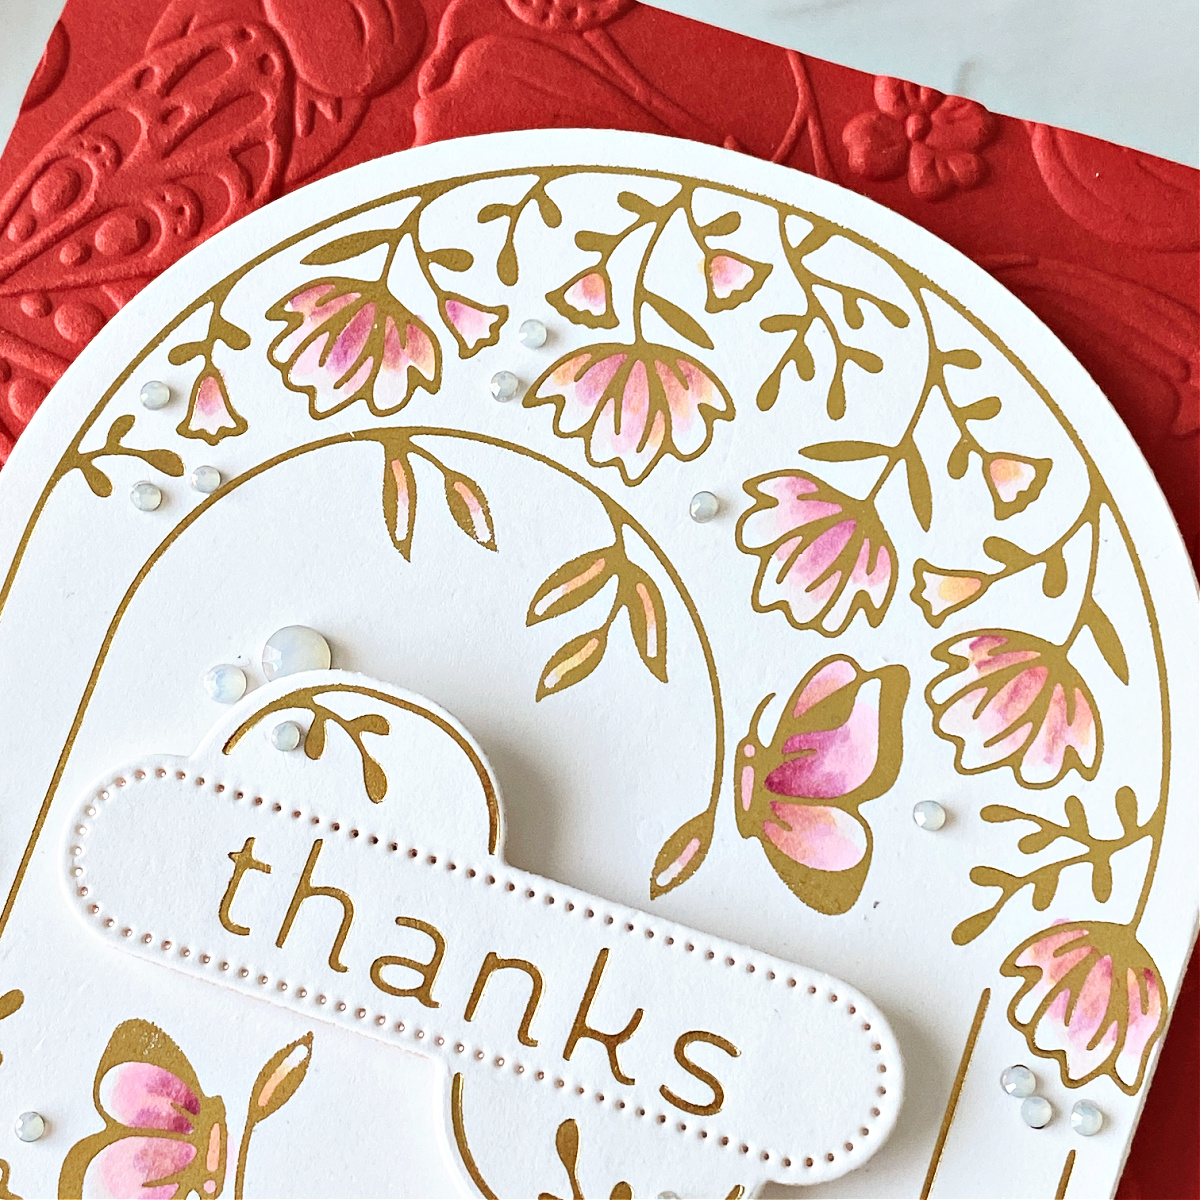
Perfect Symmetry with the Stylish Oval Thanks Glimmer Hot Foil Plate & Die Set
The Stylish Oval Thanks Glimmer Hot Foil Plate creates a perfectly symmetrical design – you can divide the design into quarters and each quarter will be the same. This card was the simplest to make of the 3.
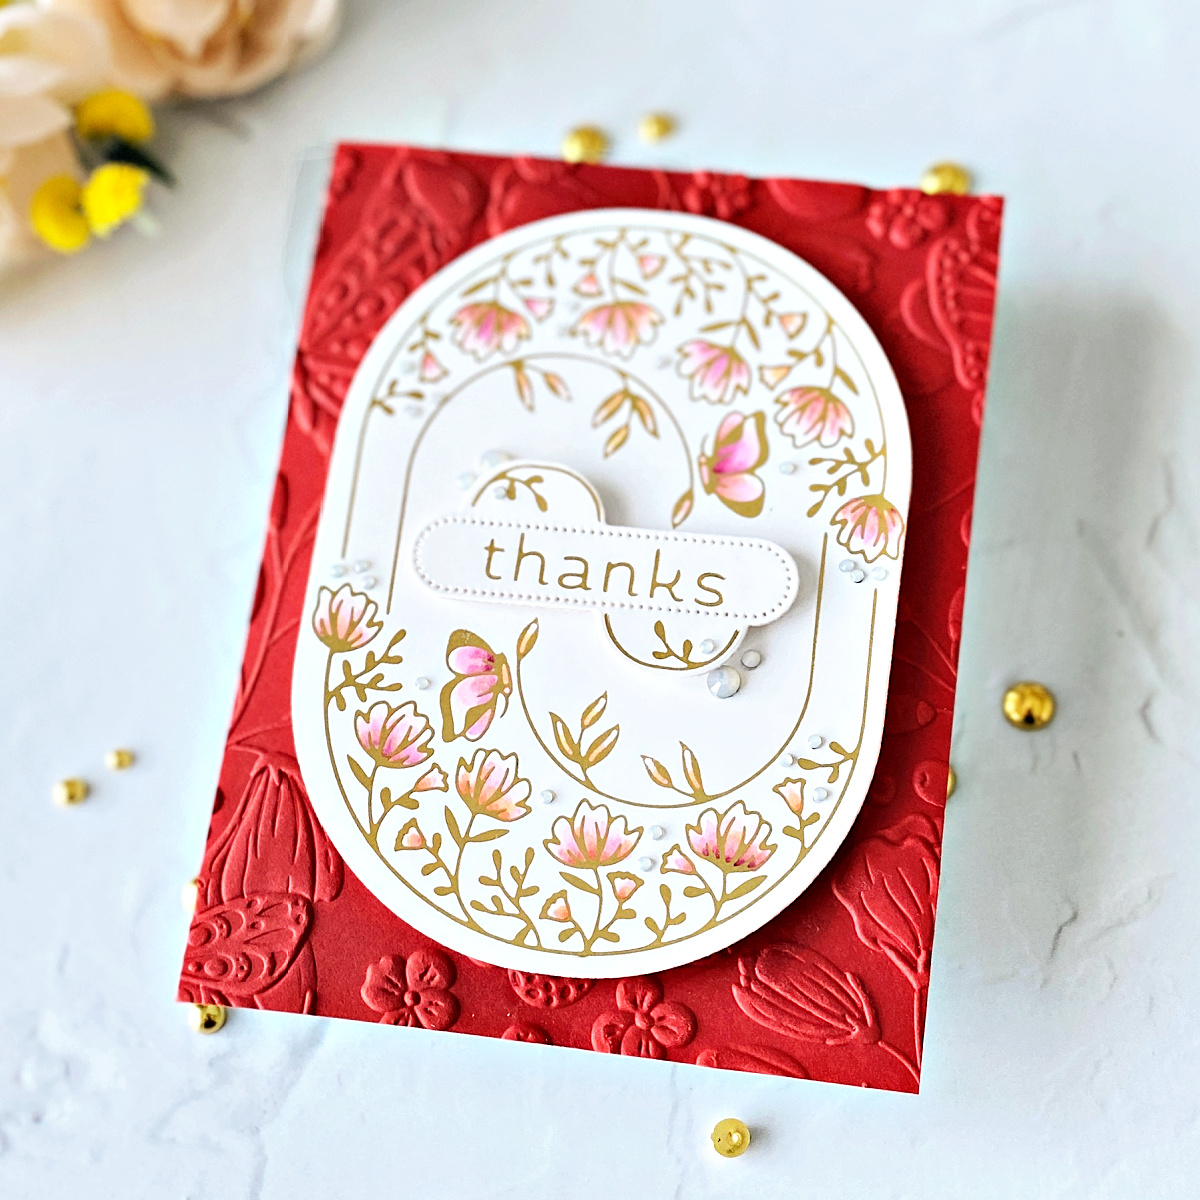
- Hot foiled the Stylish Oval Thanks Glimmer plate in gold. Color with alcohol markers.
- Die cut with an Essential Stylish Ovals die.
- Hot foiled and die cut the sentiment that comes with the set. I love how different it is. Add to panel.
- Used the Beautiful Butterflies 3D Embossing Folder to emboss a piece of Poppy Field cardstock.
- Added the embossed panel to an A2 card.
- Added a few gems.
- Gosh, this is pretty.
Tip: Except for ink blending and stencils, I avoid coloring. However, these tiny flowers were easy to color even for me. I keep a few alcohol markers on hand for this reason. This plate would also look beautiful hot foiled on colored cardstock with no coloring.
Thanks so much for checking out this post and thank you to Spellbinders! I would love to see anything you make with this collection, so feel free to tag me on my Instagram account. I’m Dear Paperlicious if you are looking for me.
Spellbinders Supplies:

Other supplies
Alcohol markers, paper trimmer, embellishments.
Cardmaking with BetterPress – Autumn Card Inspiration
Elegant Twist Collection Cardmaking Inspiration with Linda Parker
