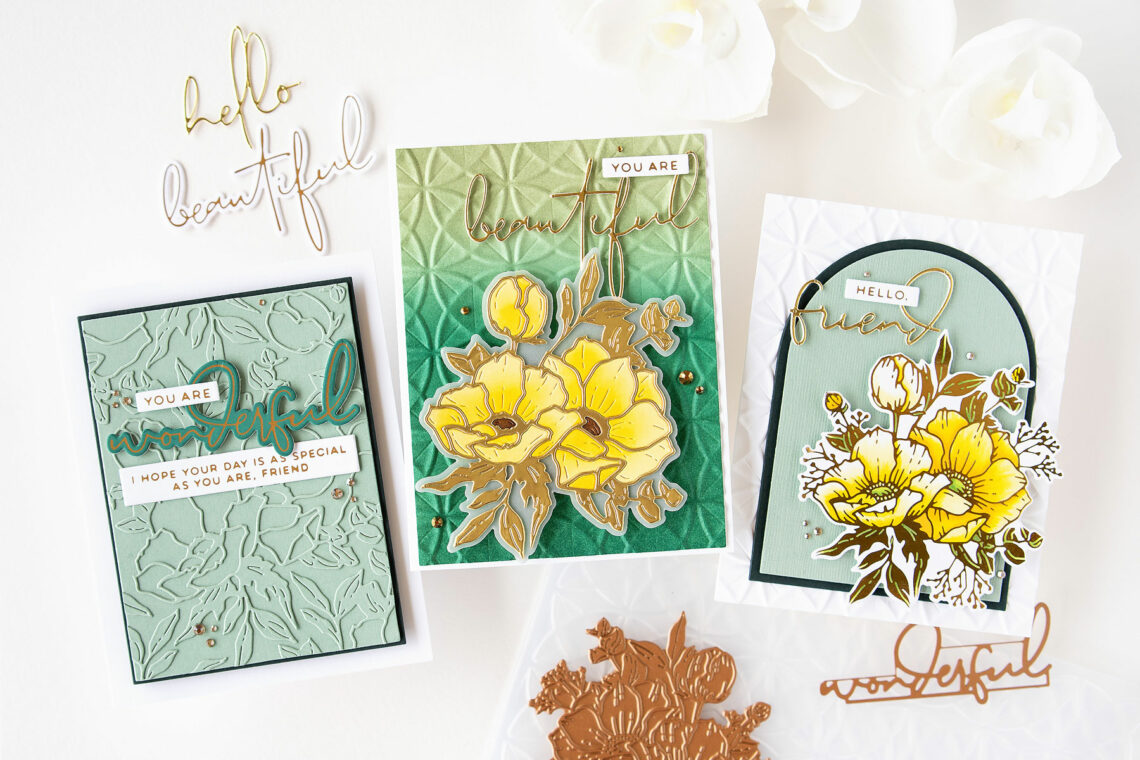
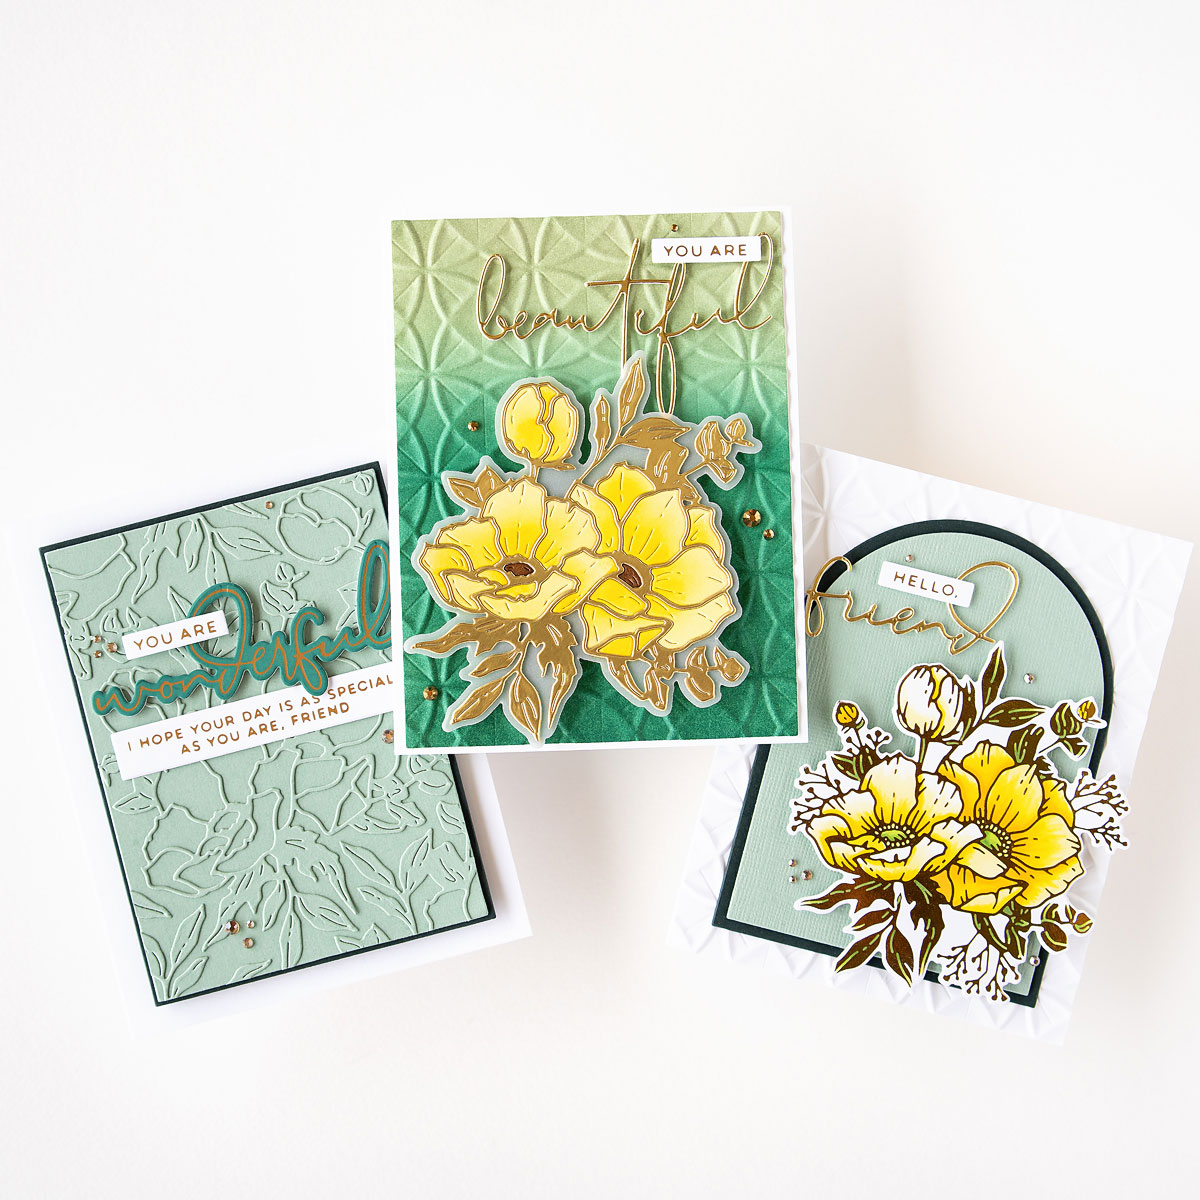
Anemone Blooms, a Trio of Cards
Hello crafty friends! It’s Jung here, and today, I’m sharing 3 cards that I made using the new Anemone Blooms collection by Yana Smakula.
Yellow Foiled Anemones
For my first card, I used the Anemone Glimmer Blooms as the focal point.
First, I foiled the Anemone Glimmer Blooms hot foil plate on smooth white cardstock with polished brass foil. While my Glimmer machine was hot, I foiled all the sentiments from the Hello, Friend Sentiments as well as the Inside Card Glimmer Sentiments on smooth white cardstock with satin gold foil. Next, I used the coordinating die to die-cut the Anemone Blooms image, and then colored the image with Copic markers.
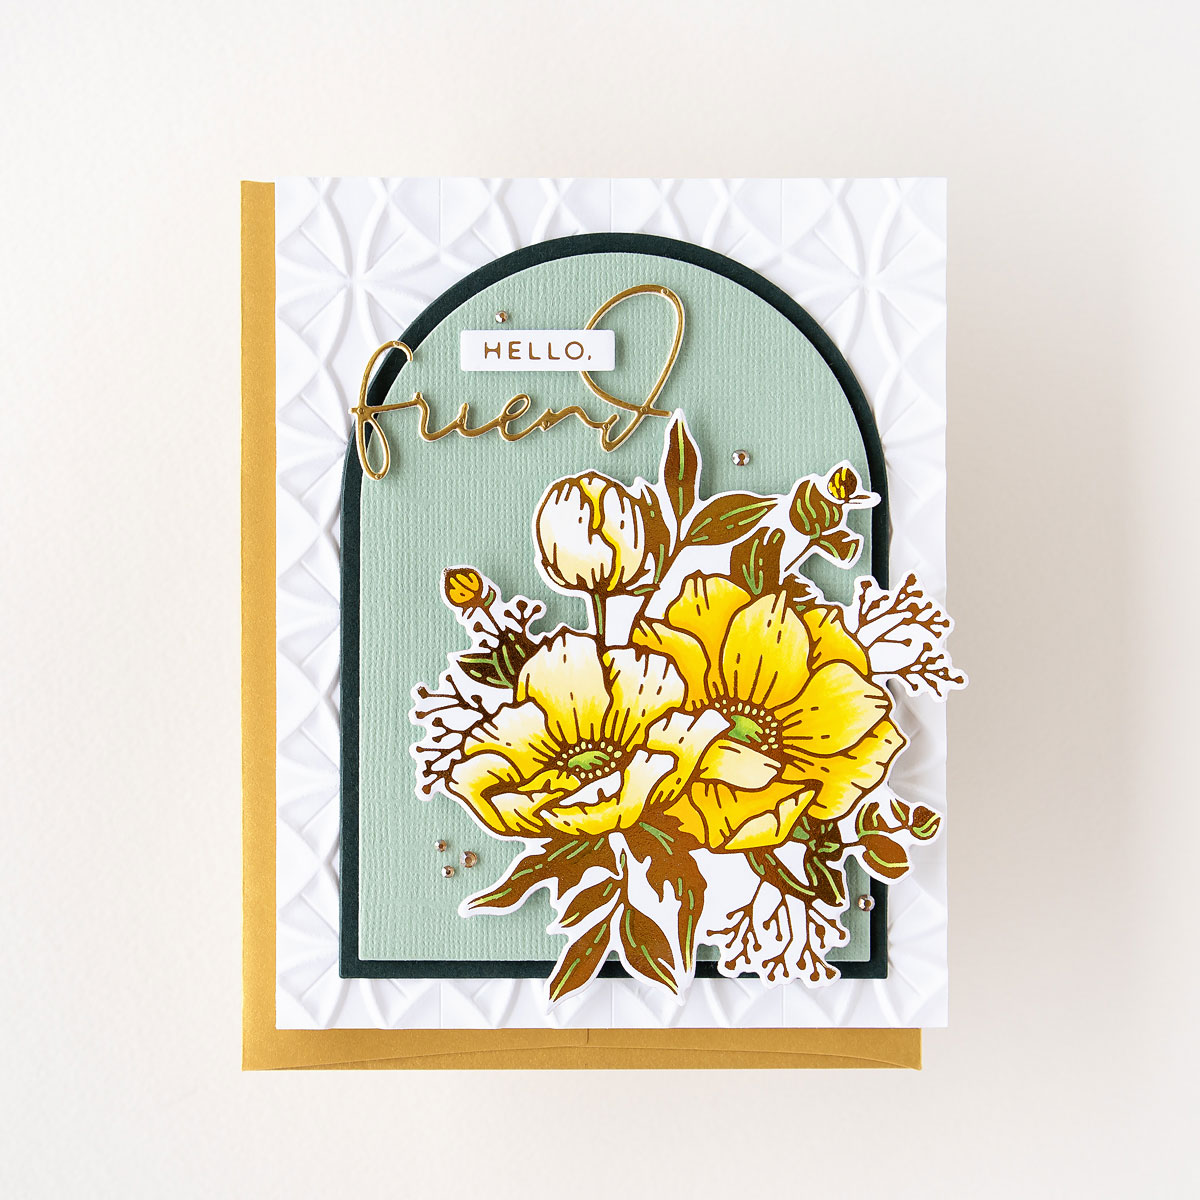
For the other elements of my card, I die-cut 2 essential arches from light green and forest green cardstock. I also trimmed a panel of white cardstock, then used the Origami Folds 3D embossing folder to add texture. I glued the embossed panel to a white A2-sized card. I glued the 2 green arches together, with a couple scrap pieces of cardstock in between for dimension, and then adhered them to the embossed panel.
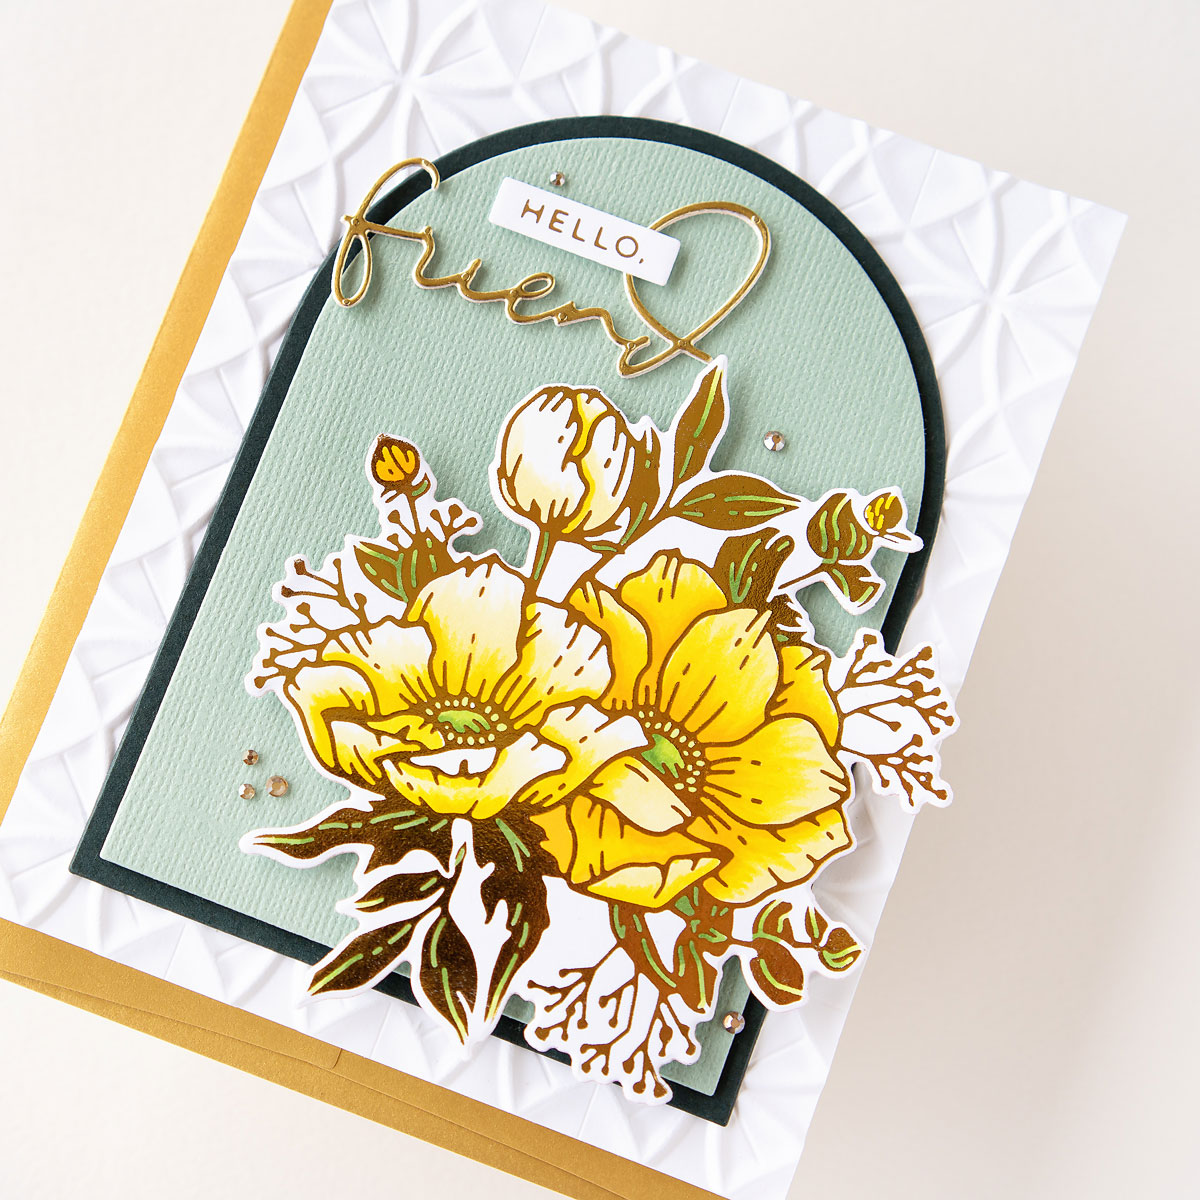
I adhered the foiled Anemone Blooms to the bottom right of the arches with thin foam tape. For my sentiment, I die-cut the “friend” die from the Wonderful Script Sentiments with Mirror Gold cardstock and a couple times from white cardstock. I glued them stacked for dimension. Then, I glued the friend diecut to the upper left of the arches. I used the “Hello” sentiment that I foiled earlier, die-cut it using a sentiment strip die, and adhered it above the friend die with foam tape. To finish off the card, I added a few gold gems.
Yellow Die Cut Anemones
For my second card, I used the Anemones dies as the focus. I began by die cutting all of the pieces that I needed for my card. I die-cut the floral pieces twice: once from Mirror Gold Cardstock, and once from Chamomile cardstock. I also die-cut the shadow/outline of the anemones from vellum. I die-cut the “beautiful” sentiment script from Mirror Gold cardstock, and twice more from white cardstock.

I carefully kept all the yellow anemone pieces together. I added a little bit of Copic shading to the petals of the yellow flower, and I colored the center brown. I glued the entire yellow piece to the vellum shadow piece. Then, I glued just the outline portion of the mirror gold anemone on top of the yellow anemone to create a subtle dimensional look.
Next, I started working on the background. I used some green Distress inks to ink blend a piece of white cardstock. I trimmed the ink blended panel with an A2 layering die, then ran it through my diecutting machine with the same Origami Folds embossing folder as I used in the first card.

I glued the background panel to a white A2 card base. Then, I adhered the anemone diecut with foam tape, careful not to put any foam tape where it would be visible through the vellum. Next, I glued the “beautiful” script diecuts stacked together and adhered them to the upper right of the card. I trimmed out the “you are” glimmer sentiment that I foiled earlier with a sentiment strip die, and adhered it above the “beautiful” sentiment. To finish off the card, I added some gems.
Tone on Tone Anemones Pattern
For my third card, I used the different glimmer sentiments as my focus. For this card, I picked the sentiments that I wanted to use from the ones I foiled earlier. I decided to use the “wonderful” foiled sentiment, as well as the “you are” and “I hope your day is as special as you are, friend.” I used the die from the Wonderful Script Sentiments die set to die cut the “wonderful.” I love how the glimmer foil sentiments and the sentiment dies coordinate together. I used one of the distress inks to make the sentiment script green. I also used sentiment strip dies to die cut the other sentiments.
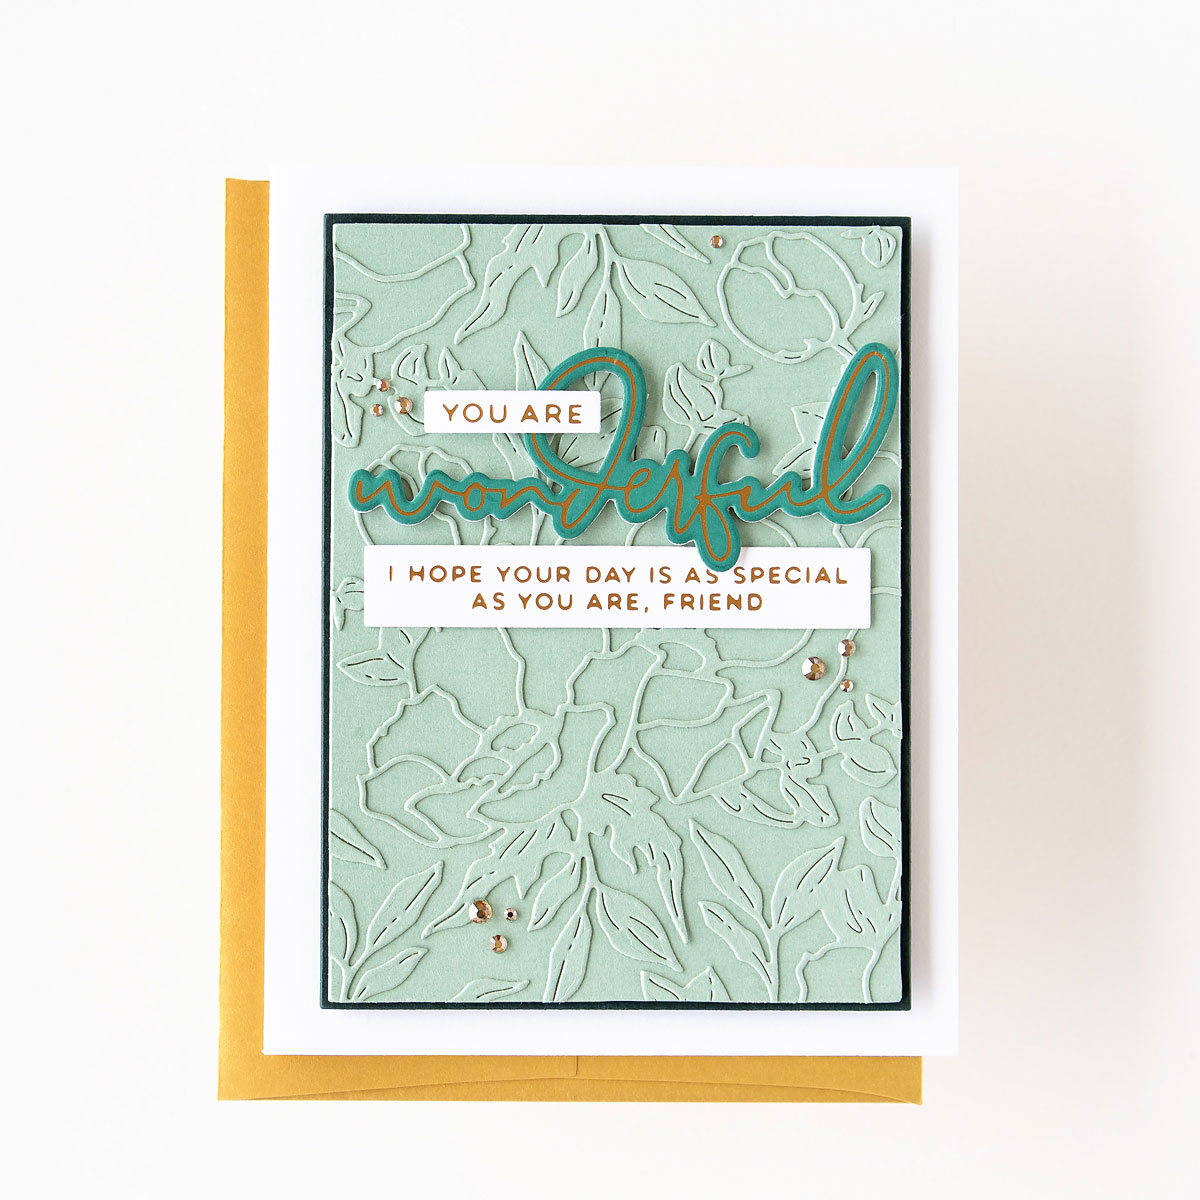
Next, I die cut the Anemone die 3 times from light green cardstock and only used the outline portions. I trimmed another piece of light green cardstock using the A2 layering dies, then glued the outline anemones, and trimmed off the pieces hanging off the edges. I love creating my own subtle patterned background, creating an almost 3D embossed look.
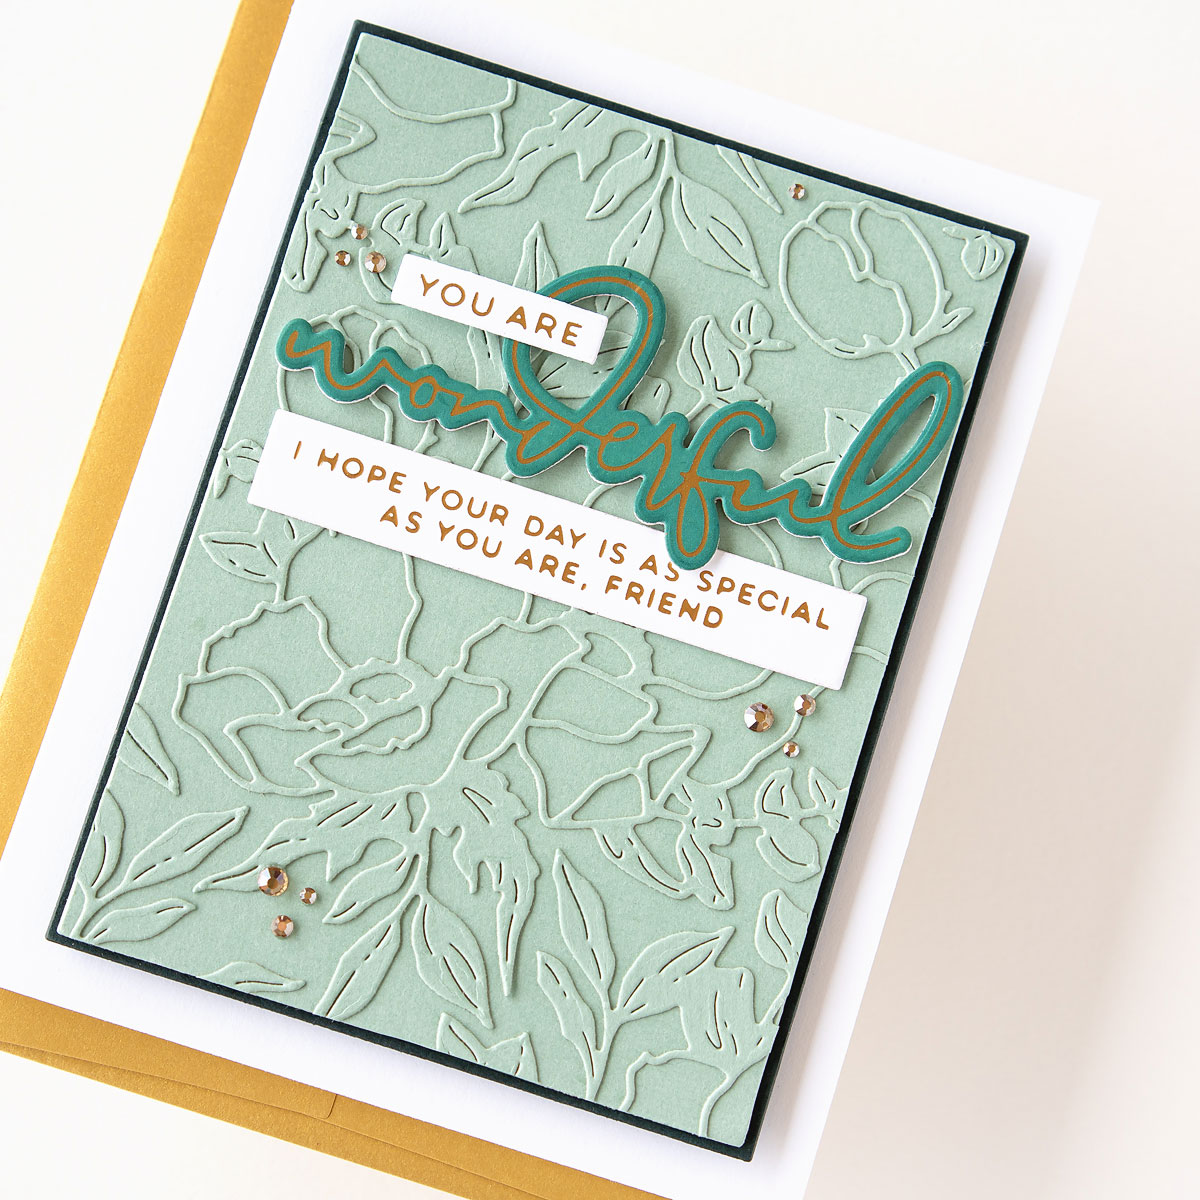
I diecut another rectangle using the A2 layering dies from forest green, then adhered the 2 green rectangle panels together, with a few pieces of spare cardstock between them for dimension. I glued the longer (inside the card) sentiment to the rectangle panel, then the script wonderful on top. Then, I attached the “you are” above the wonderful script with foam tape. Next, I adhered the entire panel to a white A2 card base with foam tape. To finish off the card, I added some gold gems.
These cards turned out so pretty! I love the scripty sentiments in Yana’s collections, and the florals are so beautiful. I hope you got some inspiration from my cards. Thank you so much for stopping by, and we will see you next time!
Spellbinders Supplies:

Other Supplies
Distress Ink, Copic Markers.

One Comment
Cindy
I especially like the third card! Very unique & classy!