-
Glimmer Hot Foil on Three Surfaces | Spellbinders Live + Glimmer Roundup
Join Kim Kesti in the Creative Classroom as she creates shiny and shimmering projects with the Glimmer Hot Foil System. If you’ve been waiting for the Hot Foil System to come back in stock, now is the time to grab yours. Sit back and take a few tips and tricks in this glimmer hot foil tutorial. Are you new to the Glimmer Hot Foil System? The Glimmer is easy to use. Just heat the platform & chosen plate, create your foiling sandwich, and then run the platform through your die cutting machine. Foiled elements can be added to various materials, such as cardstock, fabric, ribbon, leather, and more. In today’s glimmer hot…
-
Cardmaking, Glimmer Hot Foil, Glimmer Kit of the Month Club, Step by Step Tutorials, Video Tutorials
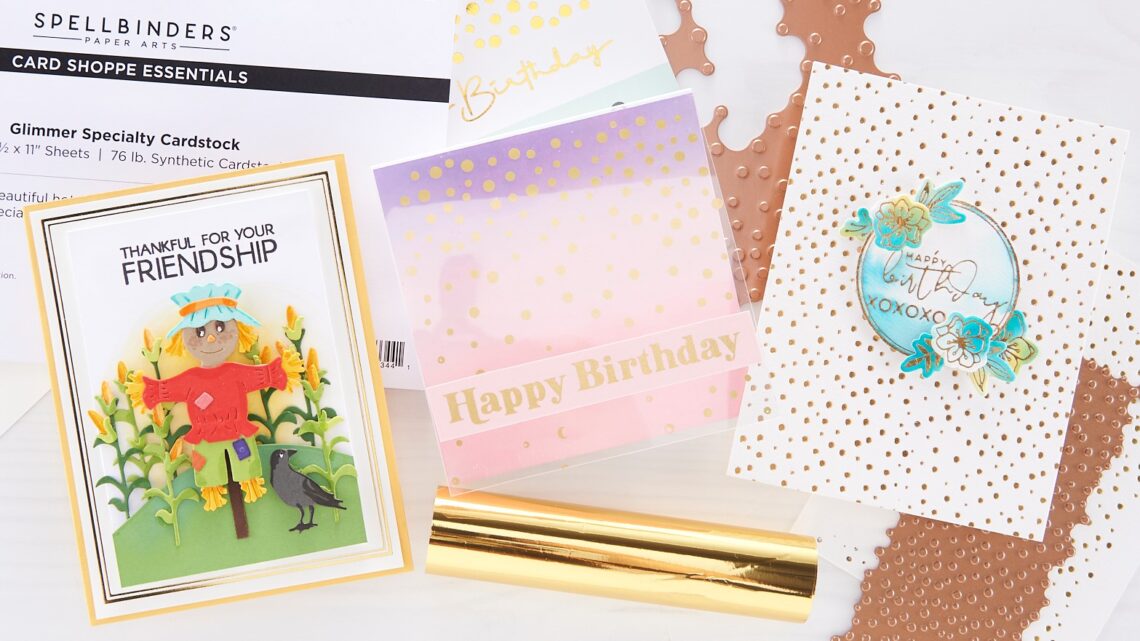
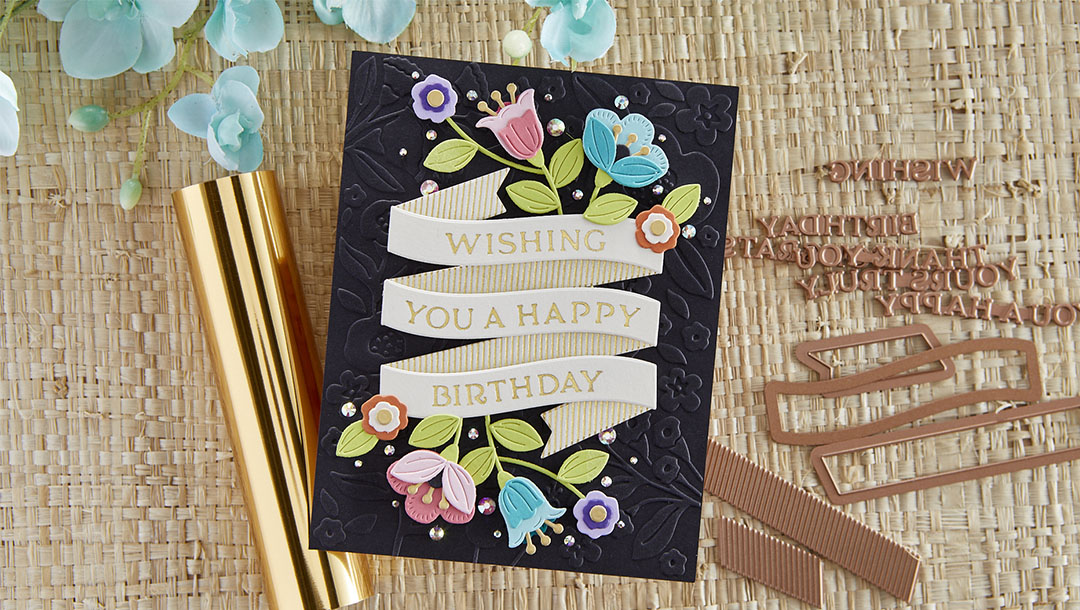
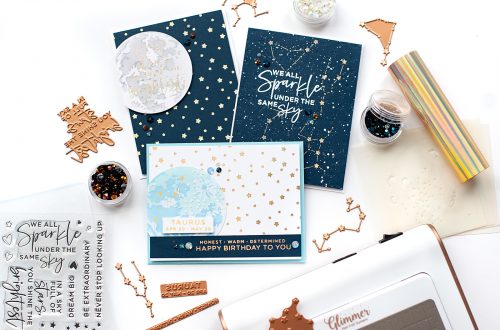
September 2021 Glimmer Hot Foil Kit of the Month is Here – Glimmering Build a Banner
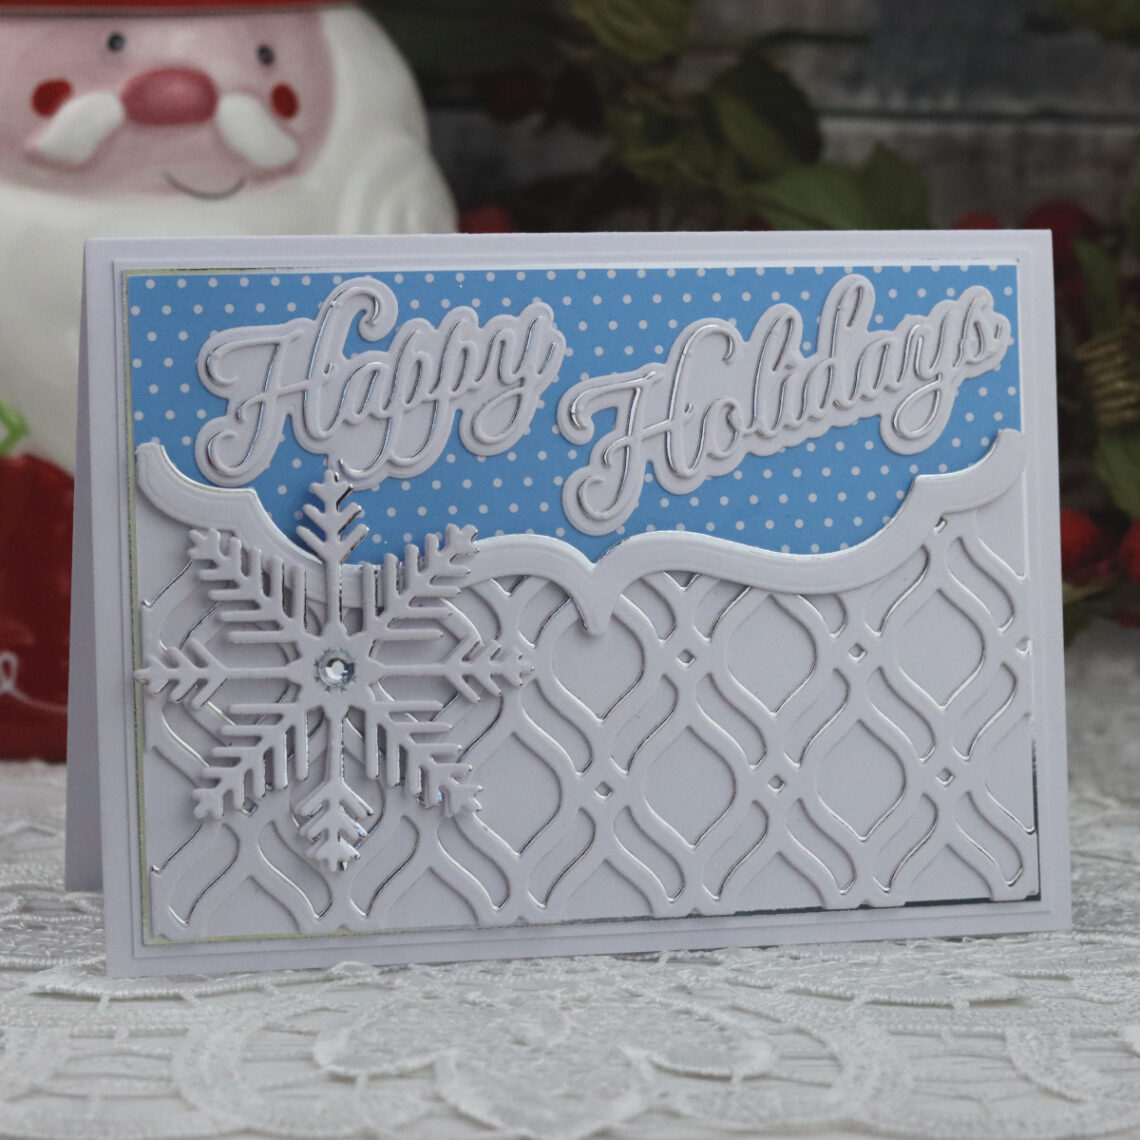
Our September 2021 Glimmer Hot Foil Kit of the Month Club is here! The Glimmer Hot Foil membership subscription includes an exclusive Glimmer Hot Foil Plate Set + One Roll of Foil (colors may vary). This kit is available on September 1st, 2021, make sure to get yours! Join the Club Glimmer Hot Foil System and a compatible die cutting machine is required for use. Sold Separately. See Product Compatibility. Wishing You a Happy Birthday Card: Catch step-by-step instructions for this project below. Click photos to enlarge: Foil sentiment & shadow lines Die cut Assemble banner Emboss card front Add banner to card base Arrange die cut & assembled flowers…
-
Fall Traditions Collection – Inspiration with Lisa Mensing
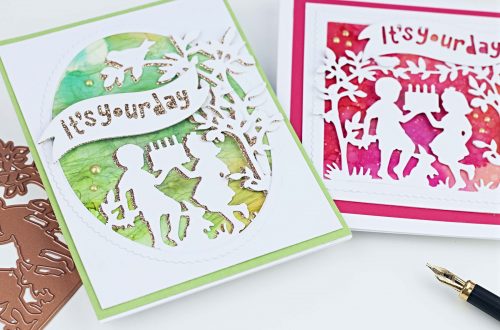
Hello, everyone. Lisa here, from LisaMensing.com, with you today. I’m so excited to be back sharing inspiration here on the Spellbinders Blog with you and even more excited by the fact that it’s all about the Fall Traditions Collection. Fall is my favorite time of the year. It ushers in so many beautiful memories from my childhood, Halloween and Thanksgiving to name a few. I’m so blessed to be here today, sharing a few of these projects with you. Thank you for having me. The Happy Turkey Day is easy to assemble and so cute. I like that I could change the look of this card by simply changing the…
-
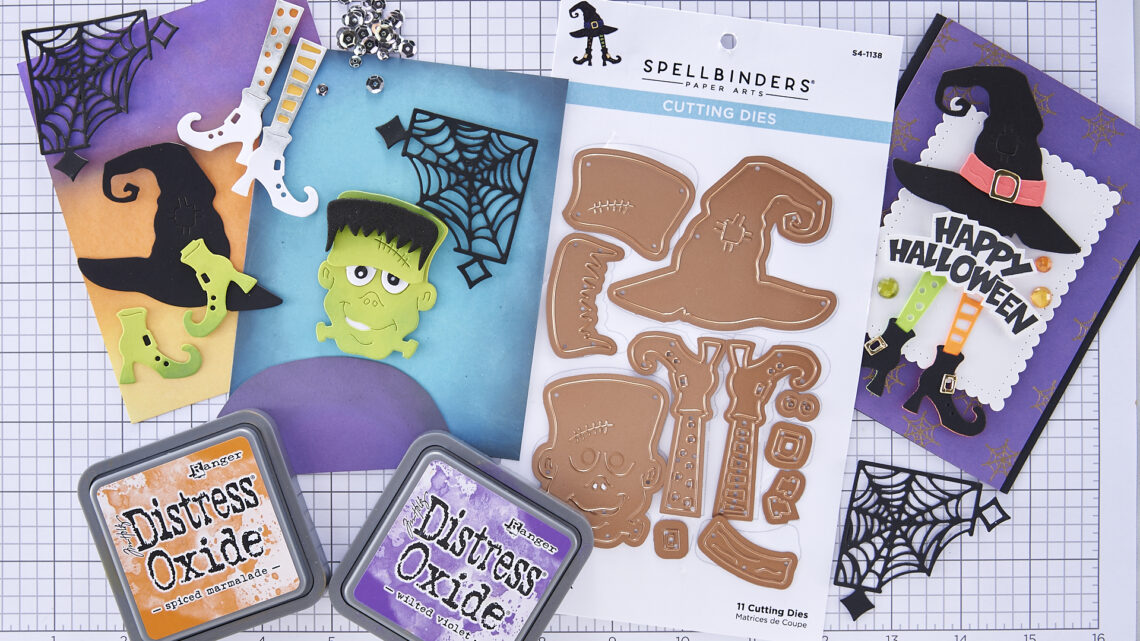
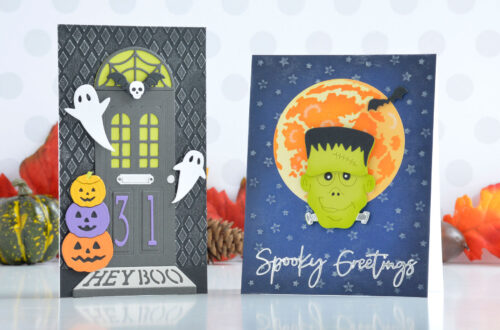
Let’s Be Frank Two Cards One Die Set | Spellbinders Live
Join Kim Kesti in the Creative Classroom as she creates sweet and spooky projects with the Let’s Be Frank Halloween dies. Kim starts out her first card by inking the edges of Frank’s face. The separate forehead die isn’t necessary, but adds a fun bit of personality to Frank, so Kim added some inky edges to that layer too. In today’s video Kim shares a tip for creating the white of Frank’s eyes. She die cut a second face from white cardstock, and cuts the eyes out. Watch to see how the eyes are already partially cut, which makes it super simple to add this layer. Next, Kim creates Frank’s hair.…
-
The New Holiday Medley Collection by Becca Feeken with Linda
Hello. I’m Linda, a papercrafter from the UK and I was delighted to be invited by Spellbinders to be Guest Designer on their blog. I am showcasing some products from the fabulous new Holiday Medley Collection by Becca Feeken. I have three Christmas projects to share with you today and I do hope you like them. Christmas is the ideal occasion for throwing dinner parties with stunning table displays, and I thought it would be fun to create a personalized guest place setting card. I thought that the gorgeous Pinstripe Bracket Card Builder Hot Foil Plate was just perfect for this. It also occurred to me that this idea would…
-
Holiday Medley Collection – Christmas Card Inspiration with Annie Williams
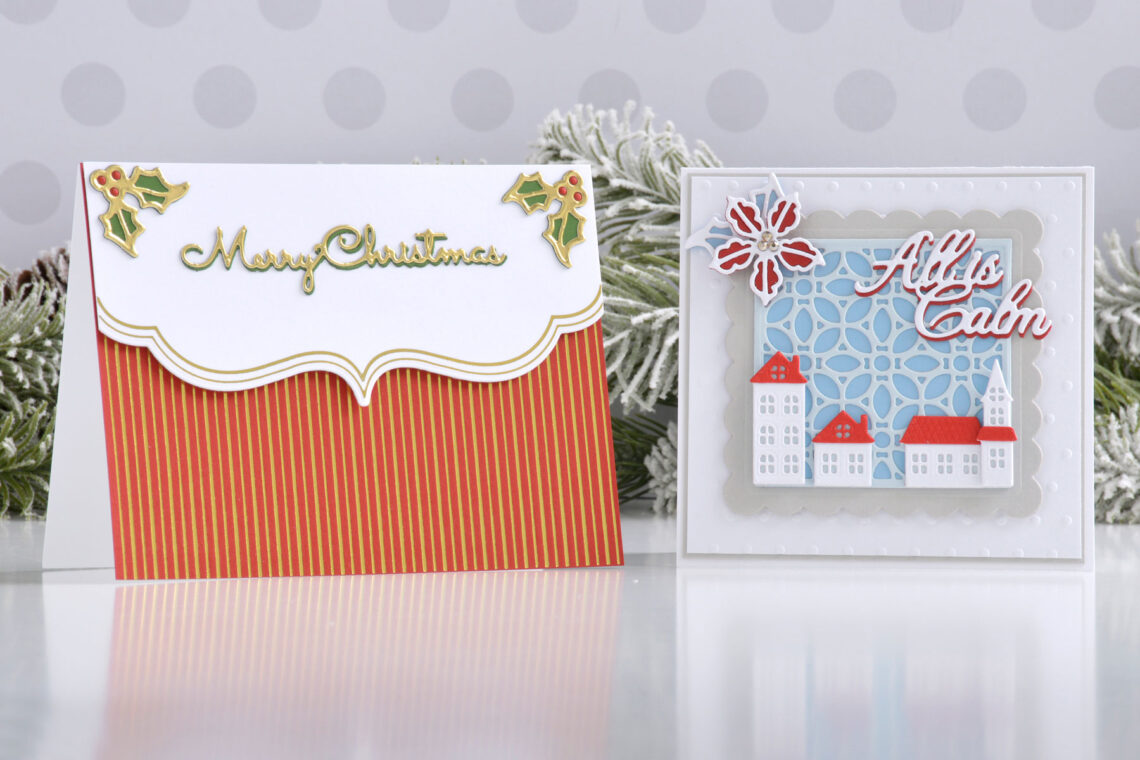
Hi there, this is Annie Williams and I’m excited to be back on the blog today to share a couple of projects using the new Holiday Medley Collection by Becca Feeken. The beautiful Glimmer plates, ornate background dies, and gorgeous sentiments in this collection inspired me to create three pretty Christmas cards in different sizes that are perfect for sending a holiday hello. I love making mini square cards at Christmas to add to a gift bag or stack of gifts as an extra special tag. Using the buildings from the Silent Night Make A Scene Die set on top of a patterned background from the All Is Calm Word…
-
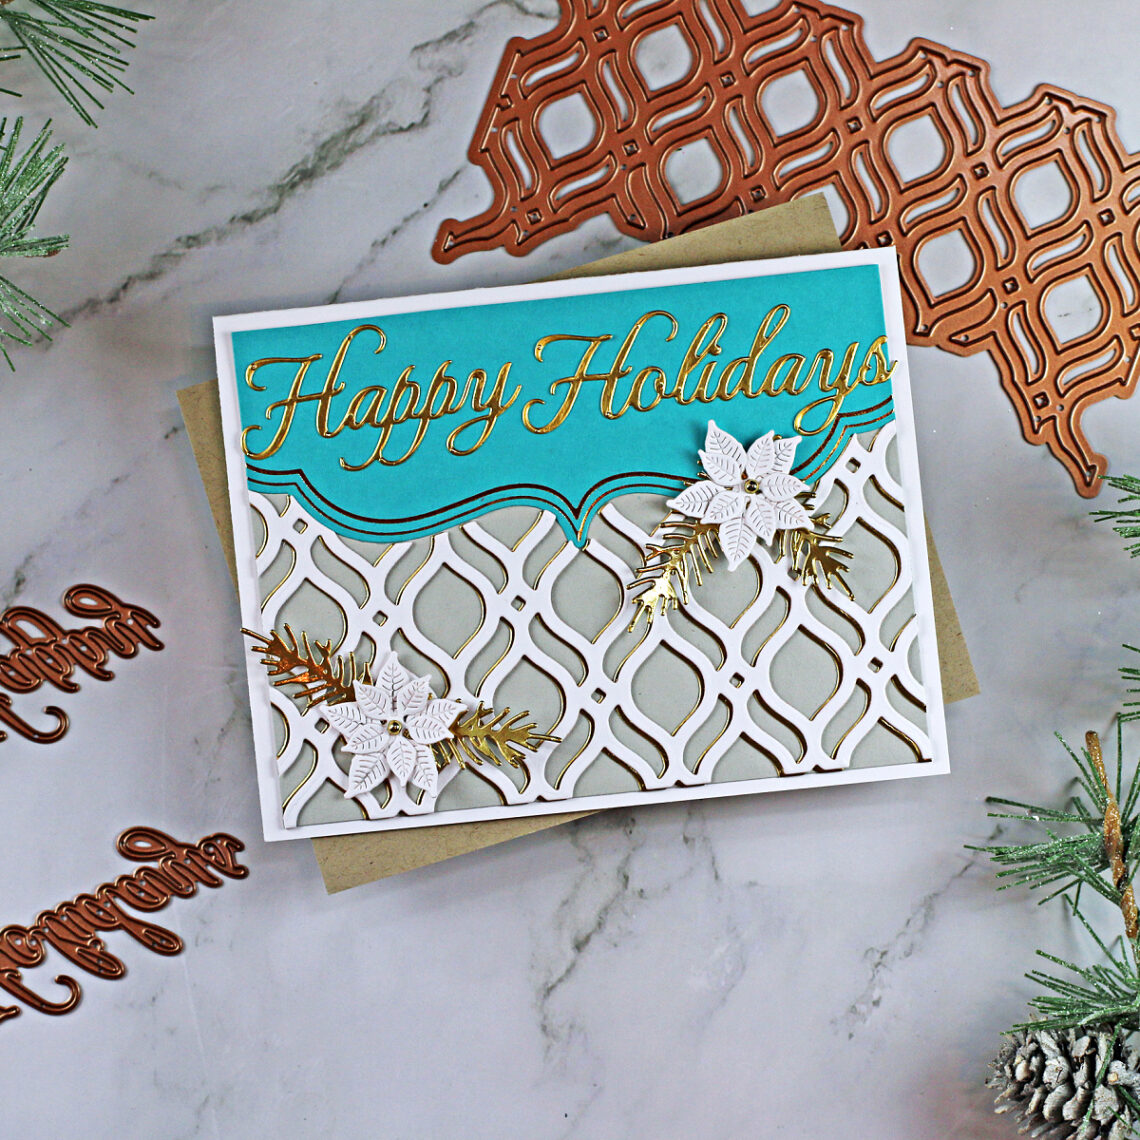
Holiday Medley Collection Inspiration with Sandi MacIver
Hi cardmaking friends and welcome back. It’s Sandi MacIver here and today I’m very excited to be sharing projects created with the New Spellbinders Holiday Medley Collection. The Holiday Medley Collection by Becca Feeken is a fabulous selection of die cutting sets perfect for your holiday card making. The intricate dies that Becca is known for, cut beautifully making designing and completing cards a breeze. So let’s jump into today’s cards, shall we? I have done them all in blue, white and gold as those are my Christmas colors for our tree and I’m just really partial to them, but these cards look great in any color you may choose.…
-
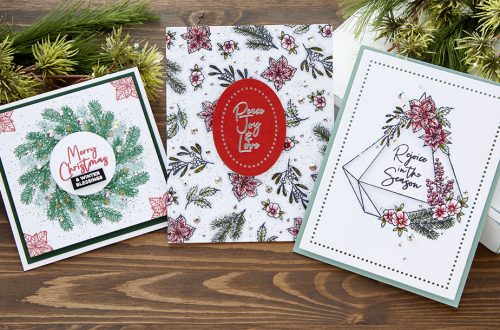
Christmas Slimline Inspiration with Marie Heiderscheit
Hello, crafty friends! Are you ready for some Christmas inspiration? I’m sharing three slimline cards today showcasing the Holiday Slimline collection by Spellbinders! There are so many fun die and glimmer sets in this collection that you can mix and match to get a head start on your Christmas cards! Die Cut Greenery My first card features these gorgeous pinecone, poinsettia, and greenery dies that you can layer and add to your cards. I cut a large amount of these pieces, ink blended them a bit, and then layered them over my card front. Before adding my die cut pieces, I dry embossed the background with one of Spellbinder’s slimline…
-
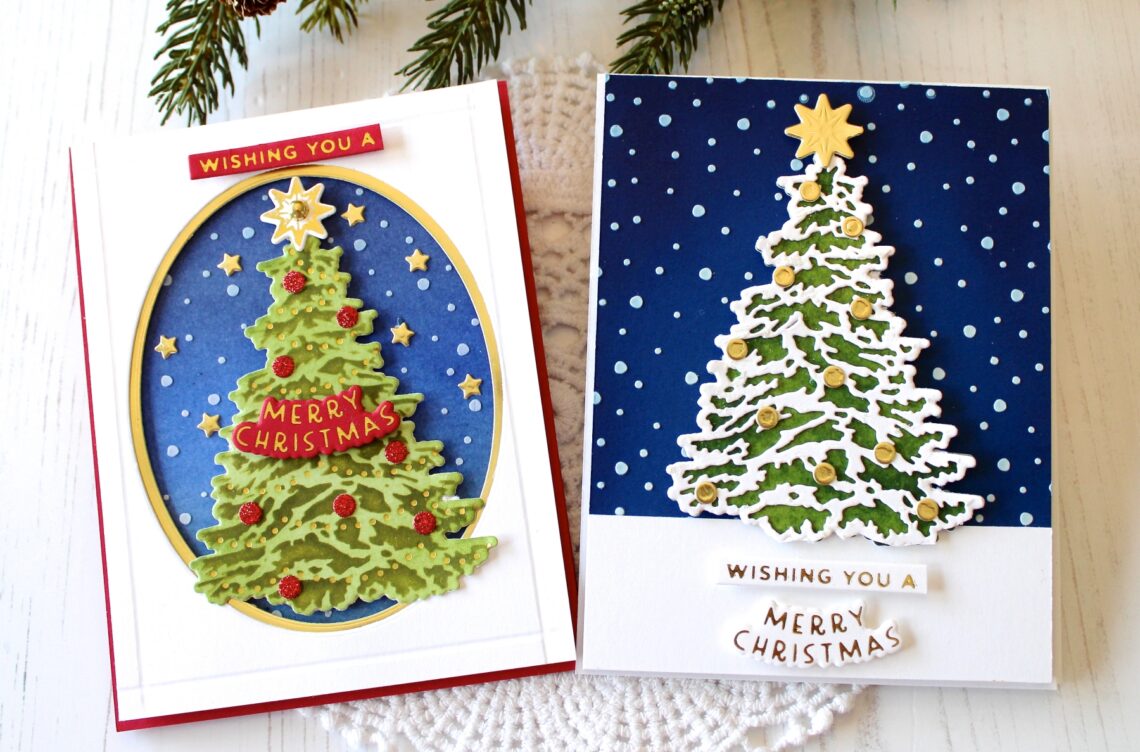
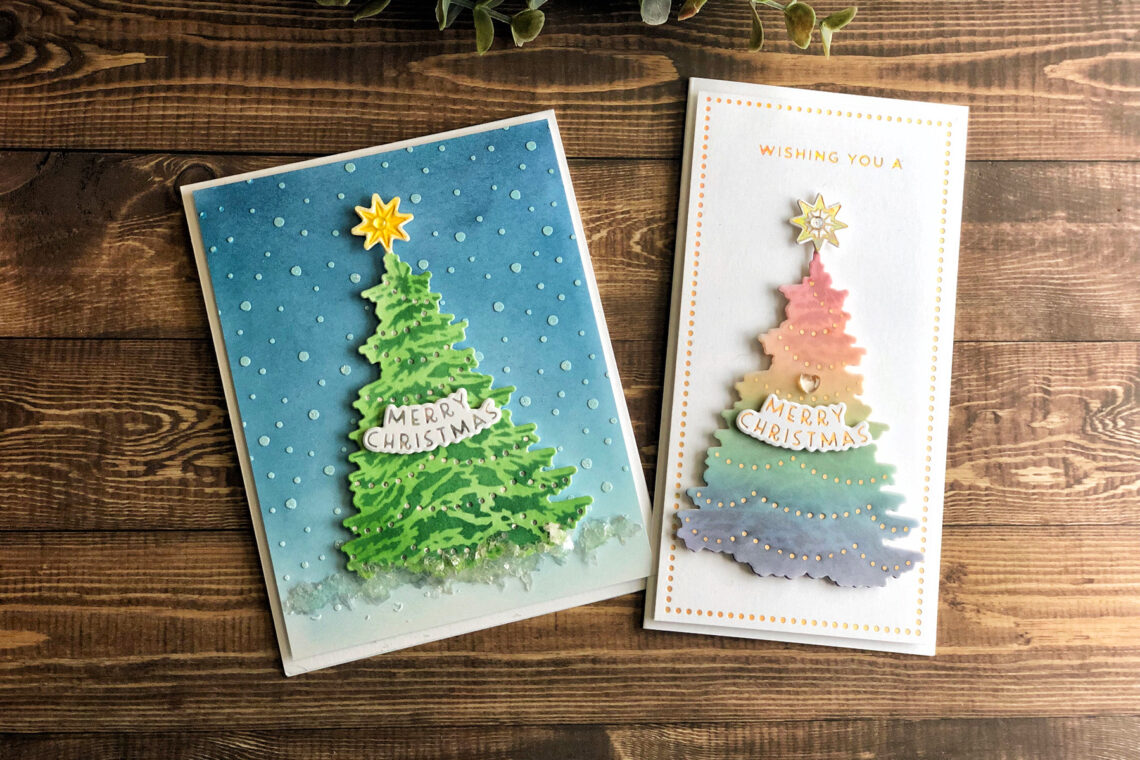
Trim A Tree Collection Inspiration with Melody
Hello! It’s Melody here on the blog today. This is my first time as a Guest Designer on the Spellbinders Blog and I am excited to be here. I have two projects to share with you that I created with the new Trim A Tree Collection. The collection included a Layered Christmas Tree Stencil, O Christmas Tree Etched Dies, and the Shining Christmas Tree Glimmer Hot Foil Plate & Die Set. To create the background I cut a piece of dark blue cardstock to fit the card front and blended Chipped Sapphire Distress Ink on the outside edges. Then I used the Layered Christmas Tree Stencil with Journey Modeling Paste to add the snow to the background. Next I…
-
Trim a Tree Collection Inspiration with Jennifer Kotas
Hello! I am Jennifer Kotas from Who Stole My Glitter. I am so happy to be on The Spellbinders Blog today. I have got two cards to share with you using the Trim a Tree Collection. The stencil in this collection was where my projects began, and they grew from there. It was quite an enjoyable process and led me to create one traditional card and one more modern card. Before I started designing either card, I stenciled a bunch of trees. I tried different color combinations including ombre and rainbow trees. There are so many ways to make these trees. You could die cut the layers from coordinating colors…